


Showing posts with label veggies. Show all posts

Monday, March 05, 2007

Cajun Salmon & Herb Marinated Calamari


*Just Braise has moved. Please visit me at www.justbraise.com!*

It is often that when I buy seafood I tend to go a little crazy. The briny smell, the lobsters swimming around, the gracious smiles and even the slight attitude I get when I ask something possibly(?) silly like, “what does that taste like?” Response: “White fish.” Or: “How do I cook this?” Response: “However you like.” Or my recent favorite, “I’m cooking this with capers, do you have capers?” Response: “I don’t even know what that is lady.” It all makes for that authenticity that screams burly fisherman and has me coming back for more than I really need.

Okay, so my local fishmonger spends little to no time on a boat actually fishing. More of it is spent “fishing” up in the Bronx at the newly relocated Fulton Fish Market. Still, entering the place is like hanging out with the boys on the docks—on a recent visit I overheard a few stories about the original Woodstock and how the “experience” was “a total trip.” I can guess a few enhancers that would lead to “trippy experiences” that my friendly fisherman might have partaken in. Instead, I kindly smiled and asked for a pound of calamari, cleaned, yes, thank you. And a pound of salmon too please.

While the two in combination are not totally exotic, they started to sound really good when I put words like “cajun blackening” and “Thai herb marinated” in front of them, albeit spicey. It also helps to have a winning cookbook (that’s right, The Cook’s Book, where every recipe is clearly laid out with fabulous photography and claims both these recipes as a cinch to make (which is true).

With a helper tuned to the task at hand, this meal can be whipped up in about 30 minutes, less if you are really on cue. The procession:

Person 1: Prep/ marinate salmon, prep/ marinate calamari.
Person 2: Prepare salad
Together: Prepare fish. The calamari takes a mere 3 minutes to cook and the salmon 6. If you start the salmon, get the calamari going, flip the salmon, remove calamari, the salmon is just about done, all remains hot to serve and you’re good to go.

Throw in a new favorite quick salad (our own invention) this meal is golden-- or better yet, a deliciously trippy experience.

The salmon and calamari recipe are as they appear in The Cook’s Book. When I made this I bought 1 pound of calamari and almost 1 pound of salmon and cut the salmon into 4 fillets. This meal was a satisfying dinner and an even better lunch the next day. It will definitely be made again. The salmon looks daunting, but many of the spices are staples (or should be) or could possibly be left out.

SALMON WITH CAJUN BLACKENING SPICES
Serving Size= 4. Active time= about 20 minutes. Cook time= about 8 minutes.
* 1 tablespoon ground cumin
* 1 tablespoon coriander seeds, crushed
* 1 tablespoon dried ground garlic
* 2 tablespoons paprika or pimento (smoked Spanish paprika)
* 1 tablespoon coarsely ground white or black pepper
* 1 tablespoon dried thyme
* 1 teaspoon dried oregano
* 2 tablespoons fine salt
* 4 salmon fillets, about 6 oz each (skinned)
* vegetable oil

1) Mix together all spices, herbs and salt. Using half the mixture [per side], rub into both sides of the pieces of salmon and lay them on a tray. Cover and leave at room temperature for up to 30 minutes.
2) Heat a heavy-based frying pan over high heat until very hot. Brush the pan with oil, then place the fillets in the pan. Let cook for 2 minutes without moving them. Turn the fish over, cover the pan, and cook for 2 more minutes. The spices will have blackened and the fish will be barely cooked inside. Transfer the salmon to warm plates and serve. [We cooked ours 3 minutes each side and they came out perfect, cooked almost all the way through.]


THAI BASIL & CILANTRO MARINATED SQUID
Serving Size= 4. Active time= about 8 minutes. Cook time= about 2 minutes.
* 1-½ heaped teaspoons white peppercorns [use about half if you only have black or mixed]
* ½ teaspoon salt
* 1 garlic clove
* handful of Thai basil [regular tastes good too]
* handful of cilantro, including roots, steams and leaves
* 14 oz squid, cleaned, then body finely sliced into rings and tentacles separated
* 2 teaspoons peanut oil
* 1 teaspoon nam pla (fish sauce)
* 2 teaspoons finely chopped or grated pale palm sugar [I omitted this ingredient]

1) Lightly pound the peppercorns, salt and garlic in a mortar with a pestle until combined. Add the basil and cilantro, and work into a chunky paste [alternately a food processor can be used]. Put the quid into a bowl and coat with the paste. Leave at room temperature for 15 minutes.
2) Heat a wok until smoking. Add half the oil and swirl it around. Add half the squid and cook over high heat for 30 seconds, tossing it a little. Tip the squid into a bowl. Wipe the wok clean, then cook the remaining squid in the same way.
3) Return the first batch of squid to the wok and add the fish sauce and palm sugar. Toss together and cook for 20 seconds longer.


OUR NEW FAVORITE WINTER SALAD
Serving Size= 4. Active time= about 8 minutes.
* ½ small red cabbage, thinly sliced (alternatively, a fennel bulb is delicious)
* 1 orange, peeled and cut into 1 inch pieces
* 1 grapefruit, peeled and cut into 1 inch pieces
* juice of ½ a lemon
* 2 tablespoons cider vinegar (or champagne vinegar)
* ¼ cup parmesan cheese, grated
* 1 teaspoon anise seeds (if using fennel bulb omit this)
* salt/ pepper to taste

1) Slice the vegetable and fruit. Put everything into a bowl, toss and serve.

Saturday, February 17, 2007

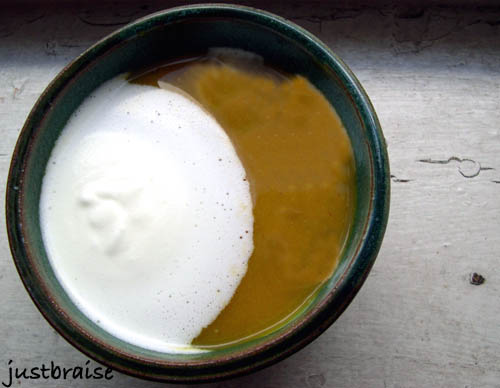
Split Pea Soup


*Just Braise has moved. Please visit me at www.justbraise.com!*

For the Chinese New Year of the Pig I’ll be finishing out my pork dishes.

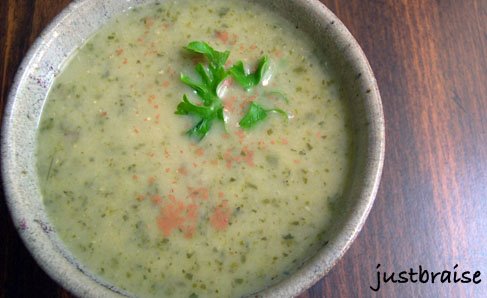
This luxurious soup was made from that citrus-sweet pork shoulder way back when. (This blog is not exactly in Real Time-- although I suppose it is possible I froze the bone).

The weather this past week has been frigid. Growing up in the Chicagoland area, I can handle the cold (my school was once canceled because it was too cold to go outside, i.e. frostbite in under 1 second). When I first moved to New York City almost 10 years ago I used to (for brief stints outside) wear t-shirts in 30 degree weather. People thought I was crazy, I proclaimed it was the Chicagoan in me keeping me warm. But when winds blast exposed skin so it feels as though it is peeling right off your face… Well, that makes we want to crawl into a small room with a blazing fire and never leave.

When it is this cold outside and you can feel the cold shoot from the pavement through your shoes and freeze your bones, hot meals are all the more soothing. There is little better than the natural heating power of a steaming bowl of soup to keep you toasty (okay, maybe a steaming mug of hot cocoa or tea). This a the perfect soup for the blah weather. It is silky rich and deliciously filling with a little croute on top or crispy bread on the side.

My freezer is full of frozen individual portion sizes of soups. Once frozen and mixed up, they often turn into a game of surprise lunches that D and I will regale in after work: “Ooooh, I had that swiss chard soup from this summer-- even better warm!” or “I thought it was the ginger carrot, but once hot I realized it was the winter squash.” The supply sometimes seems endless and the addition of this split pea is a welcomed one. How else do you think D and I have had nary a sneeze these past two winters (forgetting the recent bout of food poisoning that just reinforces the benefits of home eating).

I remember my mother used to make split pea for us in the winter. Just before serving she would float hot dog slices into the soup (how very Chicago of her). As kids, we loved it and I distinctly remember plucking each hot dog piece out with my fingers and shoving my whole fist happily into my mouth, licking it clean in the process.

These days, I don’t need that extra salty kick of a hot dog to eat this soup (I prefer the kick of a little bacon). Once the split peas soften into the broth, this soup is deceivingly thick. If I didn’t make it myself I would swear there was gallons of cream laced into this creation. In fact, the only cream is the (optional) tablespoon I floated on top before serving.

This is the kind of soup that can melt you out of the warm house, allowing you to brave the nasty elements outside. It is filling on its own, paired with a light salad or a good sandwich.

SPLIT PEA SOUP
Serving Size= 8-10. Active time= about 20 minutes. Inactive time= about 2 hours.
* 2 tablespoons butter
* 1 tablespoon olive oil
* ½ pound bacon, cut into ½ inch pieces (optional and used instead of butter and olive oil)
* 1 large sweet onion, chopped
* 2 stalks celery plus leaves, chopped about 3 inches long
* 2 carrots, chopped about 3 inches long
* pork bone, the shoulder works well
* 10-12 cups water
* 2- 12 ounce bags green split peas, washed and brown ones discarded
* ½ cup loosely chopped parsley, plus extra for garnish
* 2-½ teaspoons cumin
* salt/ pepper to taste

1) Warm a large stock pot over medium-high heat. Add bacon and cook until browned, about 8 minutes. Remove bacon set aside. Keep about 2 tablespoons of fat in the stock pot, discard the remaining, soaking it up with a paper towel. (If not using bacon, warm the butter and olive oil and continue).
2) Add onion and sauté until translucent; about 5 minutes.
5) Add celery, carrots and pork bone, sauté about 5 minutes. Add water, cover and bring to a boil. Reduce heat to medium and uncover slightly.
6) Let simmer until pork bone begins to break down and smell infiltrates the air, about 1-½ hours. Add split peas, parsley, cumin and pepper. Follow directions for cooking length on back of package, usually the peas need about 30 minutes to cook.
7) Peas will have absorbed most liquid. Add salt to taste. Remove bone and cut any remaining pork into bite-sized pieces, add to soup. Additionally, if any pork remains uneaten from shoulder, about 2 cups of bite-sized pieces can be added to the pot. Add bacon, stir until evenly combined.
9) Serve plain or with croutes and a little heavy cream and/or parsley flakes drizzled over top.

Wednesday, February 07, 2007

Pork Tacos w/ Mango Black Bean Salsa


*Just Braise has moved. Please visit me at www.justbraise.com!*


I notice there are far too many sweets on display on this site. It appears we eat nothing but that sweet angel dust. In the next few days I'll be adding all the delicious porky creations made from the one 6 pound shoulder discussed below.

A few that went without photos:

The first post-roast creation was a delicious sandwich that had no chance at a photograph. Served on hearty Jewish rye bread (any offended excuse the sac-religious combination), Korean pears ( mentioned here ) and a generous smothering of honey mustard. A few minutes in the toaster oven set this to a perfect sweet-crisp combination.

Another hog-a-licious idea was to be pulled pork sandwiches smothered in a hickory BBQ sauce. Instead, we mixed the pork with avocado, lime juice and tomatoes and wrapped them in the tortillas that remained after the pork tacos pictured above. Similar to the tacos, yet a totally new flavor combination and equally delicious.

The pork tacos appearing above are served with a healthy scoop of a black bean mango salsa and a dusting of cilantro. They compete with the chorizo taco from my favorite taco truck down the street.

It goes to show you can eat well on a budget and create a symphony of tastes with the result. There are plenty of dishes that were not created that would be just as delicious: pork fried rice, rice and beans, breakfast hash, hammy macaroni, a number of soups (a rich split pea to come), empanadas, pork dumplings or piradzini (Latvian pork puffs, also to come).

A $20 pork shoulder can take two people far.

This black bean mango salsa is a great summertime side. It is great with the addition of corn and can be used for a number of taco combinations, my favorite being a grilled shrimp.

BLACK BEAN MANGO SALSA
Prep time= about 10 minutes.
* 1 ripe fresh mango, cut into ¼-inch cubes
* juice of 1 lime
* ¼ red onion, cut into ¼-inch cubes
* 1 can low-sodium black beans, washed and drained
* 1 ear of fresh corn, sliced from stalk (optional)
* 8 grape tomatoes, deseeded and cut in quarters (optional)
* ½ cup fresh cilantro, chopped loosely (optional)

1) Slice the mango and put it into a medium-sized bowl. The meat surrounding the pit can be squeezed into the bowl. Add lime juice, chopped onion, black beans, corn, tomatoes and cilantro. Stir and serve.

Wednesday, January 31, 2007

Lemongrass-Sugarcane Roasted Pork w/ Purple Sweet Potatoes


A few weeks back D and I found ourselves in Flushing, Queens. Flushing is the China-Korea-Thai Town of Queens. Larger and more crowded than New York City's, it seems to extend into Elmhurst and almost reach Jackson Heights where the Indian and Pakistani shops begin to mix with Columbian and Irish. We were in Flushing for Shabu Shabu, or hotpot.

In Japan they call it Shabu Shabu because of the sound the cooking food makes when it hits the water. In Korea it's called Shin Sul Ro, and is often a spicier creation, based in kimchi. In China it simply translates as "hotpot." All forms date back thousands of years from Emperors' banquets to Ghengis Khan's soldiers sharing a meager meal.

It's essentially one and the same: a steaming bowl of water or mildly flavored broth (today kept warm with a hot plate, not fire) brought to diners with added accoutrements: crab, tripe, chicken, fish balls, duck, vegetables, for example-- or a taste of all of the above. Various seasonings/ sauces from salty to sweet to spicey are added to your delight.

Originally, the hotpot was a shared dish and in China you can still find hotpot establishments "in the old way" with one pot for all diners (I have only seen it in China). Today it is more common that everyone is provided their own pot, as it was the day we were in Flushing.

Hotpot is the perfect cold weather meal. It warms the soul, fogs the glasses and leaves you full and as satisfied as Buddha.

The last time I took D for hotpot he was mildly terrified. We had just started dating and I took him into the depths of New York City’s Chinatown, under the Manhattan Bridge. His glasses fogged immediately as we entered the steamy dining room and being unable to see, and unable to understand the language around him, he meekly walked to the table pointing unconvincingly as he ordered pork from the waitress. I happily showed him the sauce counter, explained how to mix items, how long to cook them for and suggestions for mixing sauces.

Needless to say, when I suggested it again, he wasn’t too thrilled. I convinced him by offering to buy him some frozen handmade dumplings at the grocery and we were good to go with an explorative gourmand friend, R, in tow.

This time it was D explaining to R what he was in for: Jumping in by ordering extra fish balls, hitting the sauce station first and explaining how to best put creations together. We left, D received his 10 lb bag of dumpling reward, and I became mesmerized by items in the grocery aisles (which is none too difficult for me).

D and I scoured the soy sauces until we found a boutique variety without caramel coloring. We watched eels swim in their containers and crabs being tossed back and forth. In the fruits and vegetables I fought over plump kumquats and Korean pears on sale 4 for $1 (everyone else was doing it so why not join the fray?). I ogled the massive selection of seaweeds, keeping them in mind for a future visit and grabbed up some lemongrass.

I told D to keep a lookout for purple sweet potatoes. We had them at a restaurant once (where they called them Okinawa sweet potatoes. I was so fascinated by their rich color I could not believe there was no dye in them. He found them hiding behind a beige skin and we grabbed two large specimens. As we headed out my eyes landed on sugarcane sticks. My mind wandered to mojitos served with cane “straws” and I grabbed a package. Finally, D cut me off.

The next day we picked up a pork shoulder and remembering all my new treats in the fridge, I suggested we make a tropical glaze for the pig. I used the lemongrass, sugarcane, a lime and a bottle of cheap Brazilian beer to extract the flavors. I think allowing the meat to marinate in the resulting liquid would have been more successful, still, the pork turned out sugary sweet around the edges and perfectly juicy inside. While roasting, we wrapped a purple sweet potato in tin foil and threw it on the pan for baking.

The purple sweet potato is truly unique. It is sweeter than traditional sweet potatoes we are used to here in the U.S. with more of a honey overtone. It makes a beautiful presentation and would be perfect for a special Valentine’s Day meal. A few days later we sliced the second potato thin and fried it in some reserve bacon fat. The result was deliciously light and reminiscent of the Terra vegetable chips one can find in the markets.

LEMONGRASS-SUGARCANE PORK ROAST
Cook time= about 3 hours
* 1 pork shoulder, about 5 lbs
* 3 sticks lemongrass
* 2 sticks sugarcane, about 5 inches long, 1 inch thick
* ½ a lime
* 1 inch cube fresh ginger
* 2 Tablespoons honey
* 1 bottle lager beer

1) Using a sturdy blender, like a Cuisinart, puree lemongrass, sugarcane, lime (rind, juice and pulp), ginger. The result will be a mealy, fibrous consistency.
2) Warm a skillet on medium heat. Add puree and cook about 4 minutes, stirring often, until aroma begins to fill the room. Add beer and bring to a simmer. Cover and turn heat off, allow to sit 10 minutes. Warm again until just a simmer then remove from heat.
3) Line a large bowl with cheesecloth and place lemongrass-sugarcane puree into cheesecloth. Strain liquid, pressing the cheesecloth tight.
4) Warm an oven to 350F.
5) Wash and pat dry pork. Slash 2 inch diamonds along fat. Cover with ample salt and pepper.
6) Pour about half the lemongrass-sugarcane liquid over the pork, making sure some remains on top and inside the fat slices. If you have a syringe, inject some of the liquid into the pork. Reserve ¼-½ the liquid for later basting.
7) Bake on middle rack, basting 1-2 times, until pork’s internal temperature is 165F.


Oh, and Happy Birthday to me!!!
D and I are low-keying it today with a brunch out and lobster dinner at home. Okay, maybe that's not totally low-key.

Saturday, January 13, 2007

Sunchoke (Jerusalem Artichoke) Salad


Last year, I read so much about the little Sunchoke that I grew overwhelmed with joy when they finally appeared at the market. I bought a bunch and made some hearty soup that whisked away cold days. The sunchoke is hearty, sweet and not only tastes great raw, but is a great substitute for the potato.

Over the holidays I was around San Francisco visiting family. My uncle is taking a Master Gardening class and over the years built a substantial garden on his property. It is one that I am extremely jealous of and if he happened to have an avocado tree I would seriously consider moving in. Still, it does include blueberry and raspberry bushes, plum trees and strawberries all for my grandmother to make jams from (nothing but fruit and sugar, not even water she'll proudly tell you multiple times), tons of nasturtium flowers (that my uncle says proliferate like weeds), herbs of all kinds, artichokes, sunflowers, grape vines, tomatoes, a massive worm farm for compost, roses, a myer lemon tree and sunchokes.

He showed me around his garden saying most of what he has is just for play: he plants things and watches how they grow, rarely harvesting anything. One morning, I nabbed one of the last non-flowered artichokes for myself and boiled it up. I don't think there is anything more tasty and satisfying than eating something straight from a garden. He showed me the sunchoke bin, telling me they grew so robustly that the bin almost burst. He dug some up to show me there was literally wall-to-wall sunchokes growing underneath the dirt.

The next day while sauerkraut and ham was being served, I ran out to the garden and grabbed a handful of sunchokes and clipped some lavender leaves. I sliced the sunchokes thin and sauteed them until crisp with lots of butter, garlic and the lavender. My grandmother and mother were both pleasantly surprised at this previous unknown vegetable and refused to share them with anyone. I was pleasantly surprised at the mild taste of the lavender with the sunchokes.

My uncle gave me a bag of sunchokes to take home and plant in my own (pathetic in comparison) bucket garden. They are perfect because from the outset they appear to be weeds-- perfect in a city where old ladies steel my tomatoes and chicken wire. They are safely hibernating and will hopefully produce well come harvest next fall.

In the meantime, it's difficult to let a bag of fresh organic sunchokes go untouched. I made this salad for dinner the other day and D surprisingly applauded it (when I initially told him the ingredients he said the salad sounded like "weird girly veggie mush"). I'm not totally sure I know what that classifies as (I think zucchini is on the "veggie mush" list though), but once he ate this he assured me he would eat it again-- especially the sunchokes!

This is a visually stunning winter salad. It is hearty and really shows off that winter food can be just as beautiful as summer food. It also has fabulous texture layers and an interesting array of flavors. If you are dexterous you can cut down on cook time by sauteing the mushroom at the same time as frying the sunchok (since the sunchokes only take about 2 minutes in the oil).

Sunchoke Salad
Serves 2. Active time= about 30 minutes.
* 1 cup green beans, cut into 1 inch spears
*1 head endive, sliced thin
* 1 yellow pepper, left whole
* 1 portabello mushroom, sliced into 1/2 inch shoots
* 1 cup vegetable oil (more or less depending on pan)
* 1 sunchoke, well scrubbed and sliced into 1/8 inch rounds
* 1 tablespoon goat cheese
* 4-6 grape tomatoes

1) On the serving plate/ bowl, arrange green beans and endive.
2) Prep: Set a paper bag in a bowl aside. Set paper towels on a plate aside.
3) Roast the yellow pepper: Using long metal tongs, set pepper over burner set on medium-high flame. Rotate the pepper until all sides are blackened, about 6 minutes total (this only works with gas stoves as an open flame is needed. Another option is to dry roast the pepper on a non-stick pan until blackened). Place the pepper into the paper bag and seal. Set aside. This completes the pepper's cooking.
4) In a small pan on medium heat, saute the portabello mushroom. While the mushroom is cooking, put the vegetable oil in a medium sauce pan on high heat. While oil is warming, finish the mushrooms, cooking until reduced and darkened, about 8 minutes. Arrange the mushrooms on the serving plate.
5) When the oil is hot, fry the sunchokes quickly, removing when they turn brown around the edges. About 2-3 minutes total should turn them crisp. Remove from oil, place on the napkin covered plate and sprinkle lightly with salt.
6) Remove the yellow (now blackened) pepper from the paper bag. The skin will begin to flake off. For fast removal, place whole pepper under lukewarm water, gently rubbing ashes from the pepper. Dry off and slice into 1/2 inch spears, add to serving plate.
7) Sprinkle grape tomatoes over salad arrangement. Add goat cheese in a single lump. Spear sunchokes into the goat cheese to allow the sunchoke chips to stand verticle. Top salad with olive oil, a light sprinkle of salt and a spritz of lemon (optional). Any more dressing would ruin the flavors in this salad.

Saturday, October 28, 2006

Winter Squash Soup


For some, the crisp fall weather is fearsome. It means cold weather, leafless trees, heavy jackets, and buckets of snow are on the way. Too worried about the future, they fail to appreciate the present and all the greatness this time of year has to offer. To them I say, be away with you-- move south!

Whatever happened to your love of sledding, apple picking, snowball fights, pumpkin carving, and snow angels? Jumping through billows of fresh fallen leaves or mounds of fresh pure snow? Waking up on a cold morning to icicles covering the windows and pole licking dares (à la A Christmas Story)?

Personally, fall is my favorite time of year. I love the brisk weather, the changing of the trees, and bundling up in sweaters and mittens. I especially love the food of the season: hot cocoa, soups, stews, the spices that emerge (nutmeg, cinnamon, peppermint) and the general hearty warming these things have on the state of mind.

I go into ration mode. I have the summer fruits I bought overripe and cheap, frozen away to be used in the dead of winter for a Caribbean-like fruit smoothie when its bitterly unbearable outside and reminders of warm weather are necessary. I also have my stockpile of soups that begin to accumulate in single serving sized containers, ready to accompany me to the office for a little internal snuggle or a fast dinner when the need arises.

This soup is an exception. Naturally sweet, creamy and delicious, it is hard to put any aside for a later date. A perfect seasonal soup, this dish would look fabulous for a Halloween treat, Thanksgiving feast, or anything in between and beyond. Make this soup, and you may never make another again.

WINTER SQUASH SOUP
Serving Size= 8-10. Active time= about 40 minutes. Inactive time= about 1 hours.
* 1 White Acorn Squash (or regular Acorn Squash)
* 1 small Butternut Squash
* 1 small Golden Nugget Squash*
* 1 large sweet onion, chopped
* 1 stalk celery, chopped
* 2 carrots, chopped
* 8 cups chicken stock (or vegetable)
* 2 long sticks of fresh Rosemary
* 2 whole cinnamon sticks, about 3 inches long
* 1 teaspoon nutmeg

1) Preheat oven to 350F. Using a heavy sharp knife, slice the three squash down the middle vertically. Gut the seeds (set aside if you want to bake them for eating later, otherwise; discard).
2) Place the squash skin side down on a large cookie sheet and place in middle rack of oven. Bake for 40 minutes, or until soft when poked with a fork.
3) While squash are baking, prepare the other ingredients and begin the soup.
4) In a large stock pot on medium-high heat, warm 2 Tablespoons olive oil or butter (or combination of both). Add onion and sauté until translucent; about 8 minutes.
5) Add celery, carrots, chicken broth, rosemary and cinnamon sticks. Cover and bring to a boil. Reduce heat to medium and uncover slightly. The squash should be about done at this time.
6) Remove squash from oven when soft when touched with fork. Using a towel around your hand, or a fork and knife, either peel the skin off the squash, or slice it away, keeping as much meat as possible. Cut squash into 2-3 inch chunks and add to stock pot.
7) Cover and bring to a boil then reduce heat and remove cover.
8) Remove cinnamon sticks and rosemary twigs (leaves will have fallen off). Add nutmeg. Using a handheld blender, or carefully in batches with a regular blender, purée the soup until smooth.
9) Serve plain or with a little heavy cream.
*Note: If you are unable to find these squash in your local market, almost any combination of squash will work. Just Acorn and Butternut would work well, or Acorn, Butternut and pumpkin, etc.


Tags: , , , , , , , , .

Tuesday, September 19, 2006

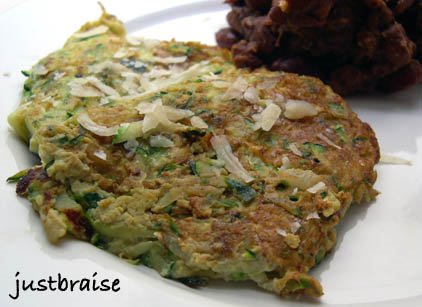
Zucchini Pancakes


I can remember the moist zucchini-walnut bread my mother used to make when I was growing up. That, coupled with her infamous carrot bread, were worthy treats in the house and always much appreciated. In my years away from home I craved the breads (mind you, not cakes) and often called, requesting a loaf to be air-mailed to me without haste. Lucky for me, my mother usually obliged.

These days she has misplaced the treasured zucchini bread recipe. Sure it came from the depths of Joy of Cooking, we have failed to find the true source of the recipe; unable to replicate its sweet and wholesome moistness.
I bought these zucchinis craving that loved bread. Knowing D has a (vocal) aversion to squash—though once confronted with it will often happily eat it—I was sure I would be dining on these fruits alone. (And yes, zucchinis are in fact, a fruit.)

Knowing the bread eluded me, I began preparing these zucchinis much the same way my mother would have: by grating them into a tall pile. I continued on the fly: Throwing in a few more ingredients and sticking these on a hot buttered skillet. These might just be the next best thing—even better, D played a vanishing act finishing his in no time flat-- allowing me to dine with company.

Though I still crave that bread, I can happily buy zucchinis for the remainder of its soon-to-be-over season. We enjoyed these cakes so much, I’m thinking of attempting them in the bucket garden next year (even better, we would then have fresh squash flowers for frying!)

Oh, and that menacing darkness that hovers closely behind the zucchini cakes in this picture? Some leftover Louisiana-style beans made with a leftover ham shoulder—the combination was delicious! These pancakes are great for breakfast with a poached egg or as a dinner with beans (as pictured here). They can be added to a sandwich (a sort of veggie burger), had with a sour cream based dipping sauce, or simply snacked on the go. They are also quick and easy to make.

ZUCCHINI PANCAKES
Makes about 12 4-inch pancakes. Active time= about 30 minutes.
* 2 large zucchinis
* 2 eggs
* 2 teaspoons cumin
* 2 dashes Worcestershire sauce
* ¼ cup Parmesan cheese, grated
* 1 teaspoon chili pepper
* 2 dashes Tabasco sauce
* 1 teaspoon salt
* fresh ground pepper to taste
* 1 tablespoon butter or olive oil

1) Grate zucchinis. Grab up a small handful of grated zucchini and wring out the excess water over the sink. Set drained zucchini in a medium bowl, set aside. Continue until all zucchini is drained then dab with a paper towel to get remaining moisture out.
2) Add eggs, cumin, Worcestershire sauce, Parmesan, chili pepper, Tabasco sauce, salt and pepper to the bowl.
3) Use hands to incorporate all ingredients evenly.
4) Place butter on a medium sauté pan over medium-high heat. Once pan and butter are hot (butter will subside its bubbling and smell nutty), place small even handfuls of the zucchini mixture around the pan, use a spatula to gently press the pancakes flat. Allow to cook about 5 minutes each side, until golden brown. Serve warm, topped with fresh grated Parmesan.


Hop on over to Sweetnick's for ARF Tuesday!

Tags: , , , .

Tuesday, September 12, 2006

Roasted Red Pepper & Mushroom Soup


The recent spell of cool, wet weather along the east coast was nothing but pleasant for me. Fall foods are some of my favorite, full of hearty warmth. The passing storms sought to bring out the culinary colors of the season and my own penchant for soups.

In gloomy weather, reds are a bright choice for foods. Red makes us think of warmth, be it the heat of a hot pepper or an August sunset. The color brings us memories of the summer; think warm vine ripe tomatoes, raspberries or strawberries. When the dreary grey days of fall and winter have us down, there is nothing like a bright bowl of soup to cheer us up.

In the past, I have made brilliantly hued and high flavored roasted red pepper and tomato soup, as well as roasted tomato soup. Both delicious: the sweetness of pepper and tomato are enhanced in the roasting process; adding a pleasant finish to any soup.

In addition to the glorious red bell pepper, I adore mushrooms. Their earthy aroma and buttery flavor can compete with most anything delectable. So how to combine the sweetness of a pepper and the robustness of the mushroom? A soup of course-- Full of sweetness and heavy undertones. Perfect for these the days when fall looms ahead, yet light and colorful enough to remind us that summer still holds.

I topped this soup off with some heavy cream and homemade croutes (as Julia Child would say)—- or croutons. (These croutes were made weeks ago from stale bread, cut into 1-inch cubes and frozen. Once the soup was ready, the croutes were drizzled with 1 Tbl olive oil, fresh ground pepper, salt, a pinch of garlic powder and placed in a toaster oven until browned.)

ROASTED RED PEPPER & MUSHROOM SOUP
Serving Size= 6-8 persons. Active time= about 30 minutes. Inactive time= about 30 minutes.
* 2 red bell peppers, whole
* 1 large onion, chopped loose
* 4 cloves garlic, chopped
* 2 stalks celery, chopped loose
* 1 quart button mushrooms (or two large handfuls), chopped loose
* 2 Tbl non-salted butter (or olive oil)
* 6 cups chicken (or vegetable) broth (boxed or homemade)
* 1 small bunch parsley, washed well
* salt/ pepper to taste

1) The easiest way to roast a red pepper is in the broiler by following step one of this previous soup post. Alternatively, I prefer to use the “baba ganoush method:” rotate over an open flame (using tongs) until the pepper turns black, throw it into a paper bag for 15-20 minutes, peel off black char, discard innards, add to soup just before broth.
2) Place onion, garlic, celery and mushrooms into a large stock pot with 2 Tbl butter or olive oil. Sauté for about 10 minutes; until onions turn translucent and limp and mushrooms begin to brown and release juices.
3) Add roasted red peppers.
4) Add chicken broth and parsley. Cover, bring to a boil, then reduce heat and allow to simmer for 10 minutes.
5) Using a handheld blender or carefully in batches with a regular blender, puree the contents until smooth and even. If thicker than desired, cut soup with a little water. Taste for flavor, add salt/ pepper to taste.
6) Garnish with cream and parsley and serve with grilled cheese, peanut butter and jelly, cucumber onion (or any other preferred sandwich), a hunk of crusty bread, croutes, good cheese, a salad, or on its own.


Tags: , , , .

Sunday, August 20, 2006

Rainbow Salad


*Just Braise has moved. Please visit me at www.justbraise.com!*

As the nights begin to cool and we turn the first corner into the fall season, it is best to take advantage of the freshness still available. Late season produce are some of my favorites; full of the warm juices of summer. They include certain berries, corn, peaches, beets and nectarines (amongst others). Keep to the seasons and you are guaranteed some of the best tasting produce.

When I started going hog wild for the peaches at my local fruit stand, D and I were overwhelmed (but they smell so good!)—there are only so many that can be sliced and frozen for mid-winter smoothie binges! Pretty soon, every time I made a dish, I just tossed a few peaches onto the mix. D thought me crazed at first, tainting his otherwise prized pork and sandwiches, but pretty soon, the boy caught on.

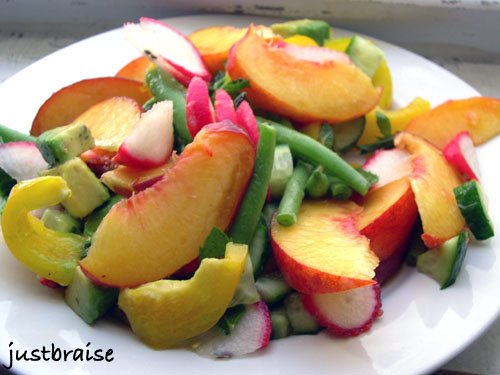
One morning as we were rushing out the door I pulled out anything and everything fresh from the fridge. It ended with a very colorful salad that appeared to taste as good as it looked. A few hours later I received emails from D that his officemates wouldn’t allow him to get a bite in—they were all admiring the colors! While we ate separately, we came together later commenting on the perfect harmony that the salad offered. No longer questioning my peach plundering, D and I made this salad again and again—a fast and fresh summer pick-me-up that can be altered in many ways, remaining a delicious feast for belly and eyes.

The colors on this salad are stunning--- an ideal side for a summer picnic or BBQ. So go ahead and stock up on peaches. Put a few aside for the winter, and indulge in this salad while peaches are at their best.

RAINBOW SALAD w/ BASIL VINAIGRETTE
Serving Size= 2 persons. Active time= 10 minutes.
* 2 ripe peaches, each sliced into 8 wedges
* 4 radish, sliced
* 1 avocado, cubed
* 1 yellow bell pepper, sliced thin
* 1 small cucumber, cubed
* 1 small handful green beans, blanched and halved
* 1 cup lightly packed fresh basil
* ¼ cup Tarragon vinegar
* juice of 1 lime
* salt/ pepper to taste

1) In a medium bowl, gently toss cut fruit and vegetables: peach, radish, avocado, bell pepper and beans.
2) In a food processor or blender, combine basil, vinegar and lime juice. Blend until basil is finely chopped and well incorporated. Season to taste with salt and pepper and pour over salad.
NOTE: Other tasty additions to this salad include celery, mango (in lieu of peach), corn, new potatoes, or anything else you enjoy.

Saturday, August 05, 2006

Garden Pasta


My first personal (known) encounter with Swiss chard was the other year. While I am sure I have dined on it in restaurants, I had never sought to purchase the funky colored vegetable before. While at the grocery, the vegetable caught my eye and I scooped it into my basket. As D often does when he notices I am plucking items for their unique beauty rather than possible utility he queried what we could make with it. “I don’t know, but we’ll think of something.”

We turned “something” into Braised Swiss Chard wrapped in Sole. Swiss chard’s bitter sweetness won us over and D rarely questioned my random fruit and vegetable acquisitions again.

Over the months the rainbow vegetable remained on my mind and I eventually bought seeds for planting them when the bucket garden was a mere dream. They would soon sprout into their glory and remain a site as the stalks matured.

One day, impatient for my own chard to mature, I hit up the vegetable market for a bunch. They became a perfect accent to a delicious cold summer soup.

Finally the glory of my rainbow swiss chard in the buckets was breathtaking. Glowing yellows, radiant reds and electric pinks made the calling to me. I plucked them from their buckets and presented them to D. What to make when the temperature is too hot to handle the kitchen? Some quick and easy pasta, requiring minimal cooking.

As residents of Queens suffered through blackouts in the high temperatures D and I considered ourselves fortunate with our minimized power—at least we still had the refrigerator (and if that failed a few buckets of bounty outside). We ran to the grocery to pick up fresh pasta. Requiring a mere 2 minute boiling time, it would serve as an ideal backdrop to a cold dish.

Whipping up a large batch of pasta, D and I had a fresh meal to last us through the week; no stovetops required.

GARDEN PASTAspan>
Serving Size= 6-8 persons. Active time= 10 minutes.
* 2 pounds fresh spinach pasta
* 1 bunch rainbow swiss chard, loosely chopped
* 1- 15 ounce can garbanzo beans (chick peas), washed and drained
* 1 red bell pepper, sliced into ¼-inch strips
* 1 medium Spanish onion, chopped
* 3 large garlic cloves, crushed
* ½ cup fresh firm ricotta cheese, crumbled
* ½ cup kalamata olives
* 2 Tbl olive oil

1) In a sauce pot on medium-high heat, bring salted water to a boil. Add pasta, cover and cook for 2 minutes. Remove from heat, wash and drain. Set aside in a large bowl.
2) In a large skillet on medium heat, warm 2 Tbl olive oil. Add pepper, onion, garlic and cook until aroma is loosened (about 3 minutes). Add swiss chard, cover and cook until leaves wilt (4-6 minutes).
3) Add swiss chard, peppers, onions, garlic, garbanzo beans, ricotta and olives to pasta. Serve warm or cold.


Below is Kitty and her beloved squirrel toy. We train her to search and destroy these little critters that attack my garden—if only she were allowed outside to put her training work. The glazed look in her eye? We get her good and high so she can forget her killer instinct (the squirrel is full of catnip). Check out this weekend’s cat antic WCB over at Eat Stuff.

Sunday, July 30, 2006

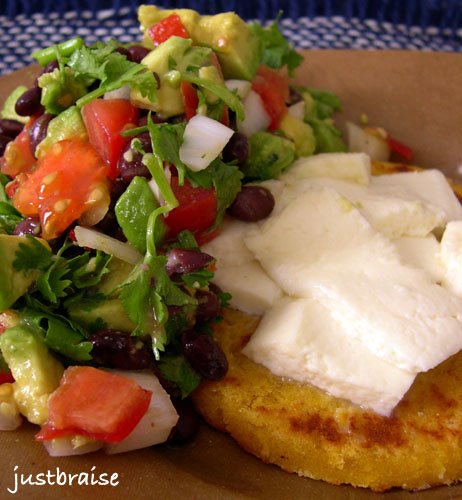
Arepa con Salsa


Continuing with the southern theme mentioned here and here, I will dip further south with this entry. As previously mentioned, I do not make much Mexican (or South American) food. I love its spice and freshness, but hold a few restaurants close to my heart that have mastered it better than I ever could (although I have a promised empanada recipe eventually making its way towards me from a family friend). About 1 year ago, one of those restaurants closed.

Pollos y Mas was an amazing family-run Columbian hole-in-the-wall. Serving up steak or whole chickens with ginormous sides of beans, rice, plantains and whole sliced avocado (my favorite) for astonishingly low prices (around $8). My roommates at the time ordered from the restaurant weekly and as I entered the apartment the sweet savory smell of rotisserie chicken would get me salivating in no time.

D and I found the scent overpowering as we walked by one night and were pulled in for dinner. We started the meal with an arepa con queso. Ordered without knowing what we would get-- I knew that D liked his corn and I liked my cheese. A thick, bright yellow corn pancake was brought to us covered with a snow white cheese. Upon tasting, the cheese’s light-saltiness complemented the sweet corn arepa perfectly. No sooner were D and I hooked than Pollos y Mas closed down, our arepa lost forever-- Or so we thought.

A few months back as D and I meandered slowly over the refrigerated section of our local grocery, we noticed what seemed to be a cousin of the arepa once had. By no means freshly made like the Pollos y Mas one, it would do for our purpose. Settled in nearby were various packets of queso fresco. Grabbing up a pack of each, we attempted to replicate our first tasting of the arepa at home. We started simple, as it was at Pollos y Mas, a thick corn patty covered in cheese, toasted warm until the cheese produced hints of melting. How could something so simple taste so decadent?

In the months to come, D and I expanded our arepa tastings. Sometimes with fresh tomato or avocado sliced on top, other times with salsa, and when we were really hungry, a poached egg, would cap it—always with the queso fresco. The recent heat wave has kept us out of the kitchen and yearning for quick food solutions. The arepa with queso fresco and other accoutrements has been our go-to to the delight of us and others.

Today was no different as D attempted to hold back his excitement when he suggested the arepa for lunch. Because I knew we had a few other fresh ingredients to accompany the meal, I agreed. I must say, this was the best salsa accompaniment yet and why it was deserving of a picture.

Note: Arepa and queso fresco are available at many groceries where usual South American products are available. Look in the refrigerated section.

AREPA CON SALSA
Serving Size= 2 persons. Active time= 10 minutes.
* 2 corn Arepa
* ¼ cup queso fresco, sliced long to cover arepa
* 1 large vine-ripe tomato, diced
* 1 small Spanish onion, diced
* 1 ripe avocado, diced
* 1- 15oz can of black beans, rinsed and drained
* ¼ cup fresh cilantro, chopped
* 1 fresh red Serrano pepper, chopped
* juice of 1 lime

1) Arrange queso fresco over arepa and place in toaster oven on medium heat. (D likes to do 2 rounds of toasting on medium because the queso fresco just begins to lose form.)
2) While arepa toast, prepare the salsa. In a medium bowl place the tomato, onion, avocado, black beans, cilantro, pepper and lime juice. Mix and serve over arepa.
NOTE: A tasty addition to this is a poached egg.


Head on over to Sweetnick's for Tuesday's ARF roundup!

Saturday, July 29, 2006

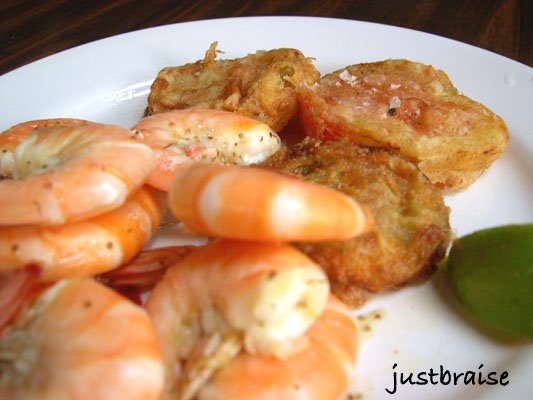
Cayenne Shrimp & Fried Green Tomatoes


The sticky heat making its way through the east coast brings me memories of the south. Even though the most south I have been is the northern reaches (Kentucky, Tennessee, North Carolina, Virginia and Florida), I hold images of sweeping porches, ice cold lemonade, rocking chairs and the tales of my Georgia-living friend. Complementing these images is the lemon meringue pie recently whipped up and rounding off the stereotype, I’ll add today’s fried green tomatoes and cayenne shrimp.

This simple meal kept us out of the kitchen, with the longest moment being the wait for the oil to heat up. It has already been repeated this summer, and will be made many more times for sure—it’s too easy and delicious not to indulge. The heat of the shrimp is cooled by the sweet tomatoes and when served with a cold white wine, this meal is perfection. The combination would stun eaters into awed delight on a sandwich (with the addition of arugula, avocado or perhaps some spicy mayonnaise or mustard).

So while I anxiously await my own tomatoes to ripen on the vine (I spied them yellowing at the edges today), I’ll enjoy these greenmarket finds.

FRIED GREEN TOMATOES
Serving Size= 2 persons. Active time= 15 minutes. Inactive time= 8 minutes.
* 2 large green tomatoes
* 1 cup 2% or whole milk
* 1-½ cups flour
* ½ Tbl paprika
* 2 tsp salt
* 1 tsp pepper
* vegetable oil

1) With a sauce pot, or deep skillet, on high heat, fill oil 1-inch up the sides of the pan. Slice the tomatoes into ¼-inch thick discs.
2) Place milk in one shallow bowl and flour, paprika, salt and pepper in another.
3) Dredge the tomato slices in the milk. [At this time you can start the Cayenne Shrimp; below]
4) Once oil is hot, transfer tomatoes to the dry ingredients and coat both sides. Transfer to oil and cook until lightly browned, about 3 minutes each side.
5) Remove the tomatoes from the oil once done and transfer to a paper towel covered plate. Sprinkle with a little more salt/ pepper and serve.


CAYENNE SHRIMP
Serving Size= 2 persons. Active time= 8 minutes.
* 1 pound large fresh shrimp, cleaned and de-veined
* 1 Tbl butter
* ½ Tbl cayenne pepper
* 1 tsp celery seed
* juice of 1 lime
* hot sauce to taste
* salt/ pepper to taste

1) In a large skillet on medium-high heat, melt butter.
2) When nutty smell of butter comes out, add shrimp and toss in pan to coat
3) Add remaining ingredients and toss again to coat.
4) Cook shrimp about 3 minutes each side, until pink and curled.

Wednesday, July 26, 2006

(Re-Posted) Lebanon's Baba Ganoush

Below is a post I stuck up back in November 2005. It was one of my first posts. Two years ago, about this time, I went with a friend to Lebanon. Not to turn this into a political blog space or anything, but the events of the past two weeks have been on my mind (about 8 years ago I was in Israel and have a similar fondness for the country and people, Lebanon is just a little closer to memory now).

I guess because this has all been on my mind I made some baba ganoush tonight. It is a recipe a half-Lebanonese friend gave to me. This, along with her hummus, Lebanonese potatoes and Fol I make often. Maybe more will be made in the coming days...

Although I would like to make a few changes/ additions here and there, I think it's best to keep it unaltered. This is the Lebanon I remember two years ago. It will not be the same. Here is the original post:
--------------------------------------------------
November 2005

As the weather turns toward the worst, and gray days become a common thread, I cannot help but linger on the past, warm and fresh.

In the 1940's, France withdrew from Lebanon. To this day, it is in a summersault between old and new world-- reinventing and revamping its character. Walking down the streets, signs still read in French and Arabic (or Arabic and English). Fruit stands on every corner press fresh juice to order, and pistachio pastries laced with honey waft towards the nose. Out of the city, vineyards can be found on hillsides that neighbor crosses mounted high on a village church. It is a country that still understands hospitality, where no meeting between friends is able to last under two hours, and where you will always be offered a bottomless cup of fresh Arabic coffee, laden with cardamom.

Between 1975-1991, civil war tore through Beirut and its surrounds. From above, the city's white stone buildings are iridescent in the sun and the mountains roll away reflecting the cerulean Mediterranean. Salt is ripe in the air and mingles with trees as lizards dash through legs of a traveler to the safety of a forgotten bullet hole in a nearby structure. Roam the streets and notice wires crisscross overhead in a forgotten and haphazard desperation of gaining electricity during the war-- still in-use. Or suddenly come upon a blocked-off road, where the ground is yet to be re-stabilized. Inside bombed-out-building-carcasses, families create wall-less homes on top floors that overlook city lights. The new hottest club is constructed beneath sacred ground, and luxury high-rise buildings blossom around Roman and Phoenician ruins; barely visible and utter surprises to stumble upon amongst the ever –present cleansing and rebuilding. This is the crazy struggle between tradition and modernity.

The Muslim call for prayer rings out. It is a subtle undulation that flows off the salt air notifying the beach bums to rotate their tanning. Women walk the streets fully veiled or deeply bronzed in mini-skirts flaunting the latest fashions. Saudi oil heirs on vacation take to the corniche with their wives to find groups of men smoking nargeela, (Lebanese sheesha or flavored tobacco) lounging in home-brought plastic chairs while others fish in the sea where boys swim. Along this walk, the smell of cardamom is thick with Arabic coffee vendors hocking their product amidst others that grill and sell corn.

Food is fresh and fabulous. From cheeses, olives and fresh flat breads at breakfast, to the sweet fruits that complete every meal: fresh figs, dates, melons and mangoes. You dine on what is in season—not what is an able import. Flavors are intensified by this freshness of seasonality. The weather is perfect-- not too dry, and the peach-hued sunsets over the sea make up for any humidity that may linger.

Travel beyond the beach bum days and clubbing nights of Beirut. Hire a private driver and take the road to Balbaak and Ksara in the east, near Syria (easily done in one day). Some of the oldest ruins are found at Balbaak with an ancient population that continued to build upon what was already there, allowing centuries upon centuries of ruins almost indecipherable from the previous. In Ksara, cooling caves under a mountain vineyard, are host to wine tastings.

South near Saida, a soap factory is hidden in the old souq, where soap is still made “the ancient way”-- with boiled olive oil and ash. The juices and kebabs in the souq are the freshest I have tasted (fresh grapes taste like rose water, we are told “it’s the sea you taste”)—some of the best shwarma can be found here too. Continuing south, there are generations-old glass blowing studios on the way to the beaches and ruins of Tyre (a port town a stone’s throw from the Israeli border). This city, once a major trade route between Israel and Egypt, as well as the rest of the Mediterranean, has since been left in disrepair from civil war days, retaining its beauty.

North in Byblos we find where the written word began and paper spread throughout the world. Mountain peaks overtake the eyes where (surprise) temperatures dip low enough for skiing in the winter. It is difficult to leave such a paradise that is a true Eden.

If you cannot make it to this beautiful Garden, I beg of you to taste it in the home. These below recommendations are quick, easy, and require minimal cooking:

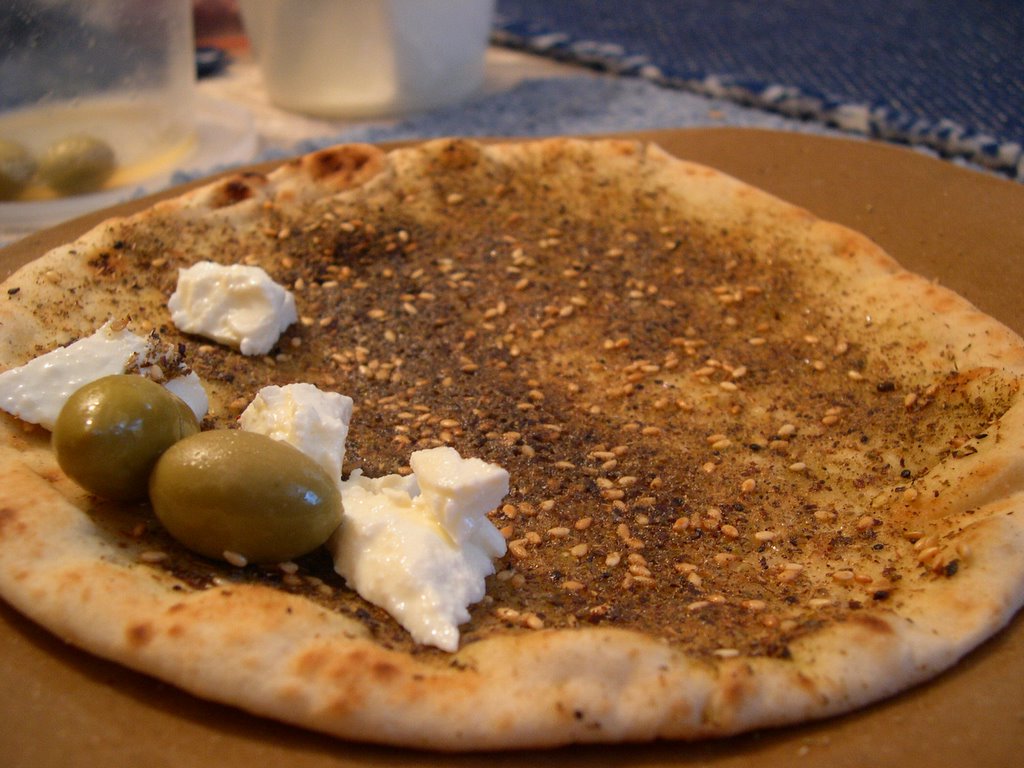
Gather some fresh Lebanese olives, feta, tahini (sesame seed paste) and flat bread (or pita) from a middle-eastern market (most groceries will carry these products as well). Ask for zataar (a thyme-based herb mixture with oregano and sesame) and lebne (a yogurt-like cheese). You will also need 1 large eggplant, extra-virgin olive oil, a lemon, garlic, plain yogurt (optional) and a selection of your favorite seasonal fruits. (When I eat these meals, I like to use the feta pictured at right. It reminds me of what I bought in Lebanon)

Place the olives in a dish to eat as-is. Do the same for the feta. Put the lebne on a separate plate, sprinkle with zataar and pour about 1 Tbl ev olive oil over the lebne. Serve with baba ganoush (recipe below), flat bread, and your favorite salad. Use the flat bread as a spoon to scoop up the baba and cheeses. (A popular great-tasting snack is to brush olive oil on a piece of flat bread and dust with zataar; pictured. Toast until lighly browned in a toaster oven. It tastes great with the lebne and feta seasoned this way).

Below, a family recipe for Baba Ganoush (thank you A for your Lebanese wisdom):

BABA GANOUSH. (10 min cook,15 min setting time, 5 min prep). This recipe has a great smoky flavor. Recipe is the same for hummus (with only about 10 min prep-- minus the eggplant and flames, everything else is the same. Just buy a can of garbanzo beans (chickpeas), drain the liquid, and use a blender instead of a potato masher).
-----------------------
1 large eggplant
2 Tbl tahini
juice of 1 lemon
4 Tbl olive oil.
1-2 cloves garlic, crushed (or to taste)
1/2 cup plain yogurt (Optional, this gives the Baba a creamier consistency. Without it, you
may need a few more Tbl olive oil to cut the Baba’s thickness)
fresh pepper (to taste)
sea salt (to taste)
brown paper bag
potato masher
large bowl
----------------------
1. Brush the eggplant with olive oil. On a stove’s open flame, cook eggplant. Rotate periodically (easy with long tongs) until all sides are crisp from flame and eggplant wilts thoroughly. The eggplant will also become saturated and heavy with juices (some of which may leak onto stovetop). For a large eggplant, this process should take about 10 min. (This method gives the Baba its smoky flavor. Another option is to wrap in foil and bake the eggplant for about 30 min. I have never done it this way, and cannot guarantee the smoky flavor, but I assume it would cut back on juices flowing onto the stovetop).

2. Place eggplant in brown paper bag and sit the bag in the large bowl (eggplant will continue to leak juice). This continues the cooking process of the inside of the eggplant and begins to cool it. Leave in bag 15 min.

3. Open bag, peel and discard as much of the eggplant's purple skin as possible. Cut off and discard vine head. Place remaining meat (with seeds) into large bowl.

4. Mash with potato masher (you are left with a better consistency than using a blender which can destroy the seeds and turn the Baba pasty).

4. Add remainder of ingredients, mix.

5. Top off with another Tablespoon of olive oil and maybe some paprika or parsley for color.

NOTE: A Palestinian friend of mine dices and de-seeds a ripe vine-tomato and stirs it into the Baba. An Egyptian friend swears tomato is wrong and one can never have too much garlic in Baba adding at least 5 cloves to her recipe. Both these are optional, tasty additions.

Saturday, July 22, 2006

Vichyssoise


There is no doubt the French can cook. Grant it, one can say this about most any people, but I take a special leaning towards French cuisine.

I began learning French in elementary school, in part, because I loved French food-- A food snob before I knew it, one of my favorite restaurants was La Boheme, an upscale bistro. To encourage my love of all things French, whenever my family traveled, my father stalked out the local French establishments (hotels, restaurants) even with his abhorrence to it all. I would walk in and grandly correct his forgotten Spanish-esque pronunciation of a French word so that all could hear me, the French-spewing-girl-wonder.

Finally my family went to Paris. I attempted to disassociate myself from my rambunctious brothers as they hollered and tumbled through parks, museums and grand avenues. I believed myself to be of more noble blood, I spoke French afterall. Appalling to the masses (mostly me), in broken Spanish my father would ask for directions: “Whatever, it’s close enough, just change an ‘e’ to an ‘a’!”. Of course, this did not help his love of the country, nor the Frenchman’s love of Americans and they promptly tuff-tuffed their way out of the situation.

“Um, moment!” I ran after countless groups. In what I believed to be perfect (though limited) French, I asked for and repeated directions that were offered with accolades for my fabulous accent.

In restaurants when my younger brother wanted butter I taught him the word and made him ask for it. I checked us into hotels. I owned France—I was a sixth-grade Francophile.

In junior high school I met a girl who’s father was French—and a chef. Worlds collided and I latched onto her. Our friendship survived but my desire to learn the language was extinguished when three horrible high school language teachers dissuaded me from fluency. I thought the girl could cook and might teach me some skills, but was soon disappointed when I found her greatest feats included boxed cakes and microwaves (still pretty good). Regardless, we remained friends.

In the end, I still love the French and the food and can mangle my once-perfect accent into a phrase or three. I tell myself I will take a language course, a French cooking course, move to Paris… In the meantime, having D’s fluency in the language helps my lack of it, knowing how to read a recipe fills the cooking course gap, and the desire to step on a plane and move to France at the moment can be filled by my local (and reasonable!) French restaurant.

This recipe is a play on the classic Vichyssoise (I have added Swiss Chard). It is traditionally served cold and is surprisingly easy to make- the perfect summer soup.

VICHYSSOISE
Active time= 20 minutes. Cook time= 40 minutes. Inactive time= 2 hours.
* 4 leeks, whites only
* 1 large bunch of Swiss chard
* ½ bunch of parsley (optional)
* 6 russet potatoes
* 6 cups chicken stock/ broth (or vegetable)
* 2 cups cream (or milk)
* 2 Tbl unsalted butter
* salt/ pepper to taste

1) Coarsely chop the leeks (whites only), Swiss chard and parsley. Chop the potatoes into 1-2 inch chunks.
2) In a stock pot on medium-high heat, melt the butter. Once warm, add leeks, Swiss chard and parsley. Cook until wilted, stirring occasionally; 8-10 minutes.
3) Add potatoes and chicken stock; cover. Bring to a boil then reduce heat to medium. Cook for 30 minutes; or until potatoes are soft.
4) Using a handheld blender (or carefully in a blender in batches) purée the soup. Add cream, salt and pepper. Refrigerate for 2 hours, or until cold. Serve garnished with parsley.
NOTE: The pink over the soup pictured is sea salt.


Don't forget to check out Kalyn's Kitchen for a little WHB action.

In non-food related news Eat Stuff is back with WCB! Below we have Whisky pictured with a stuffed dog. This could be wrong on many levels, none of which I want to investigate.

Saturday, July 15, 2006

Light Poached Brunch


Behold the egg. There’s nothing like it. So versatile and perfect it can be added to a slew of dishes to create perfection (my favorite of the moment is frozen custard which I’m miffed there is only one NYC location it can be purchased at). Alone (or separated), it can be whipped into beautiful white mountain peaks, poached, hard-boiled, fried, scrambled, sunny-ied, soft-boiled or done over-easy.

My favorite is the poach. A fluffy exterior gives way to a rich and gooey interior that beckons to be soaked up and savored. Perfect over fresh bread, toast, coaxed into warm soup or at the peak of a salad (another favorite of the moment).

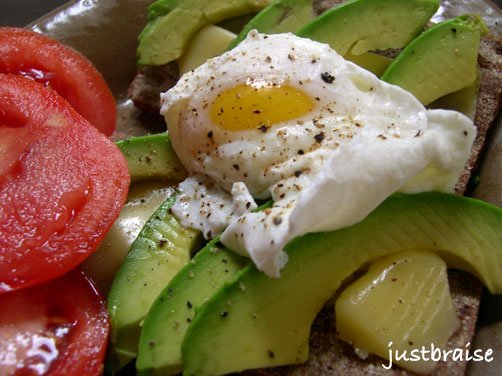
But low and behold, no bread was to be found in the home this morning. Instead, my reliable thick and hearty rye crackers would have to do, held together by some freshly melted Jarlsberg. A delicious way to enjoy season vegetables, this poach would crown a velvety avocado and sit beside a sugary-ripe tomato.

And while you enjoy this simple dish, don’t forget your morning paper. Whisky (below) likes to read his over breakfast. (For more cat antics head over to Eat Stuff).


Instead of a full recipe, because this one is fairly simple (melted cheese on crackers, sliced avocado and tomatoes, topped with a poached egg) I will give directions on how to poach, the most difficult part of the process and the part that befuddles most people.

TO POACH AN EGG
Active time= 4 minutes. Inactive time= 8 minutes
* 2 eggs
* 1 Tbl vinegar (I like to use Tarragon Vinegar, but any will do)**
* 2 tsp salt

1) In a deep sauce pan or small pot, fill water up sides about 2 inches. Add salt and vinegar. On high heat, bring to a rapid boil.
2) Crack eggs and gently, one at a time (careful so as not to burn yourself) usher the egg out of the shell and into the water. Do this close to the water; do not drop the egg in the water. (Alternatively, you can crack the egg into a small bowl and lightly guide the egg into the boiling water.)
3) Turn heat to medium, allow 2-3 minutes to boil and remove with slotted spoon.
** Vinegar binds the egg protein together

Tuesday, July 11, 2006

Cold Corn Soup


My mother loves buttermilk. When I was growing up, she would buy vats of it and sit happily curled up with a clear glass of thick creamy buttermilk. She tipped the glass and the milk receded, leaving its history in filthy chunky streaks. If the glass was rotated with each drink, the clear would turn white and there was no telling how much of the vile matter was left.

My dislike towards buttermilk probably began when my mother first brought it home: “Ew! Buttermilk?! Why would you drink butter?!” I obediently tasted it, confirming my suspicion of its disgusting nature, spat it back into the cup and thoroughly washed my mouth clean with water and crackers. My brothers held similar sentiments to the fraud milk.

Regardless of her children’s opinions, every few weeks my mother would buy a quart of it. Her prized purchase, she coddled the slim carton like a newborn, setting it gently between the two mammothly awkward gallons of milk and silhouettes of my father’s beer in the refrigerator. We sat down to dinner, places set, milk all around: 2% milk poured for the kids, buttermilk for my mother. I watched my mother’s clear glass turn progressively scum-covered, grimacing with the thought of its improperly heavy consistency.

Sometimes we ran out of 2% milk. My mother, thinking she was so clever, would pour our glasses full of buttermilk. My brothers and I saw the scam before we ever sat down: “I’m not drinking that.”
“What are you talking about? It’s just milk.”
“That’s not milk. That’s that… buttermilk.”
“No it’s not.”
“Yes it is. I can tell because it’s not white.”
White, pristine, pure, the color of half a cow. The color of milk. Real milk. The only milk my brothers and I consumed. We went to the refrigerator to confirm our suspicion: there was no gallon of 2%: “See, I told you. It’s buttermilk.”
“No, it’s the last of the 2%. I threw the container away.”
…Walking to the trash compactor.
“Oh, I already took the trash out…”
A lie. The trash was full. I fetched a glass of juice and sat slumped with crossed arms as my mother’s glass grew opaque throughout dinner. I pushed my buttermilk glass her way, she happily took seconds.

More often than not, a fresh gallon of milk would grace the shelves of the refrigerator after an episode like this. Sometimes, time passed too quickly and the buttermilk remained an intruder on the dinner table. The episode repeated itself with little variation:
“I’m not drinking that.”
“What are you talking about?”
“That’s not milk. That’s the buttermilk.”
“No it’s not. I bought regular milk, look:” My mother would lift a glass and slosh the milk around a bit, coating the sides and comparing it to her own glass, “see, mine’s thicker,” she would proudly proclaim.
I knew her trick: “That’s just because you watered ours down. I’m not drinking that.”

Life continued and sooner than later my mother stopped attempting to pass buttermilk off as regular milk. If it was spied in the refrigerator, I pushed it off to the back recesses, allowing real beverages to hold court.

Strangely enough, I love buttermilk. I now happily reach for it every few weeks in the grocery and pull it from my refrigerator. I love it in pancakes and as the base to decadently rich frostings. It is delicious-- Just not alone.

It must have been with a severe lapse in my childhood trauma memory bank that I read a M.F.K. Fisher recipe and thought Cold Buttermilk Soup actually sounded good. Surprisingly refreshing so I copied the recipe down. Adapting it a
bit to suit my own flavors (scallops instead of shrimp, the addition of corn and broth and no sugar).

This soup has become a summertime favorite, especially when corn hits peak season.

COLD CORN SOUP
Serving size= 6 people. Active time= 15 minutes. Inactive time= 1-2 hours
* 1 quart buttermilk
* 2 cups vegetable or chicken broth or stock
* 4 ears of corn
* 1 pound of scallops (or shrimp)
* 1 cucumber, diced
* 2 Tbl spicy mustard
* ¼ cup chopped dill
* 1 Tbl butter
* salt/ pepper to taste

1) Using a sharp knife, carefully slice the kernels off the ears of corn. If using large scallops, cut into quarters.
2) Over medium heat in a large skillet, melt the butter. When pan is hot, add the corn and scallops. Cook about 8 minutes, stirring occasionally, until both change darker shades of their respective original coloring.
3) While the corn and scallops are cooking, dice the cucumber and chop the dill.
4) In a large bowl, place the buttermilk, broth, cucumber, mustard and dill.
5) Once corn and scallops are done, add to buttermilk mixture. Add salt/ pepper to taste. Stir and refrigerate until cooled.

Monday, June 26, 2006

Radish & Peach Sandwich


As previously mentioned the garden has produced crisp, slightly bitter and tremendously juicy White Hailstone radishes, smelling faintly of blossoms and soil. Pulled from the ground (rather, bucket) and washed clean, Kitty even had a taste of the thick green stalks (see picture from June 24).

Desiring more than a salad and noting the meager contents of my pantry I went to the inspiration of cookbooks. Cracking each one, I went straight to the index only to find many a radish laden salad. D grew hungry and impatient, Kitty kept at the stalks and I finally found what I vaguely remembered I had: the Best of Gourmet Paris. The cover image, burned in my memory, showcased two mouth-watering baguettes: one brimming over with a thick schmear of goat cheese covered with raspberries, the other a candy cane assortment of radishes over a blue speckled blanket of cheese.

Using the recipe as inspiration, I headed to the grocery for the best Roquefort I know: Société (with a nod to a certain Frenchman currently displaced in Nottingham, England whose mother used to work at the dairy). Then to the bakery for a (Greek) baguette. In no time, this amazingly simple summer sandwich was produced.

Though D thoroughly rejected my notion that peach would be a sweet and colorful addition to the sandwich, I won in the end and crowned my prized radishes. One bite and I am hooked on the summery nature of this sandwich. The bread, an airy bed for the slightly pungent and salty creaminess of the Roquefort. The garden radishes crisp, with each bite sprinkling dew upon my nose. The peach, pure icing on the cake—the perfect representation of summer that left warm juice dribbling down my chin.

Each ingredient complimented each other to perfection. With a few slices of radish leftover, I placed them on the side, gave them a sprinkling of Lots Wyfe Hawaiian sea salt, creating radish “chips” and popped them in my mouth as a palate cleanser. Hunger problems solved and more refreshing radish sandwiches in the future warming months.

RADISH & PEACH SANDWICH
Serving size= 2 persons. Active time= 8 minutes.
*4 medium-sized White Hailstone Radish (preferred)
* 1 ripe peach
* 4 Tbl Roquefort cheese (Société preferred)
* 1 loaf crispy bread (baguette)

1) Cut the baguette in 2 and slice open (this is an open-faced sandwich)
2) Smear Roquefort over the insides of the 4 bread pieces.
3) Chop radish into 1/4-inch thick discs and layer over Roquefort
4) Slice peach into half. Remove pit and slice each half into 8 wedges. Place over radish.


Check out some Chewy Chocolate Chip Cookies over at WellFed's Paper Palate.

Head on over to Sweetnick's for more ARF friendly items!

Sunday, May 07, 2006

Soda-Braised Beef


D and I are gearing up for what we are dubbing The Epic Voyage. We leave next week and my mother is a doll to fly in from Chicago (okay, she was already coming for a short visit), but will be extending her stay to care for the cats, my plants and my little City Garden (I don’t think she actually knows the extent of her duties!). As D and I begin to get our trip in order, tie up loose ends, put in extra hours at work, finish open projects—don’t even mention packing—we are trying to clear out some perishables my mother will probably not use, e.g. the dregs of a cola bottle.

While D and I do some last minute scrimping, we figured a good cheap braise was in order. It would clear out our refrigerator and last us through the beginning of next week. So when I told D to just grab “whatever” in the fridge, he pulled out the soda: “Coke?” I thought for a few seconds before, “of course, soda can go in BBQ, marinades, and you can put juices in a braise, so why not soda? Dump it.” D splashed the remains into the pot and took the last swig for himself.

When I was younger, all sodas-- or colas, depending on where you are from, I referred to as, “coke”. My family would go to a restaurant and I would ask: “What kind of cokes do you have?” I received one of two stares: “idiot,” or “smartass.” In the Chicagoland area, “coke” came in diet and regular. I was supposed to ask for soda.

It was not until later that I found out that “coke” as a term for all carbonated beverages really is common. It is mostly used in the south, especially Georgia, where the Coca-Cola Company has their main headquarters. Still later, I found out that in my home state’s almost-neighbor, Ohio, cola was the proper term when discussing carbonated drinks, but they also say crick, begel and ruff (instead of creek, bagel and roof), so I don’t know if it is optimal to use their “cola” term.

Phraseology varies all over this country—don’t even start on the world. It is interesting, whether through travel, or everyday encounters, to find these idiosyncrasies. So as we creep ever closer to Memorial Day and the official start of summer travels, keep an ear out for these cultural flare-ups.

Oh, and the braise was pretty darn good. The sauce was not too sweet with an overall robustness that was quite delicious when paired with the meat. The carrots and celery especially took on the soda very well, turning into sticks of caramelized goodness. The new potatoes were perfect—a last minute decision to purchase these instead of using up some russets we had. Because the new potatoes were left in-tact, they held together nicely, took on the broth and were even better when dipped in a dab of sour cream.

SODA-BRAISED BEEF
Makes 6 servings. Active Time= 20 minutes. Cook Time= 3 hours.
* 6 pounds of beef, left whole (or in 2-3 pieces to fit in pot)
* 3-4 cloves of garlic, crushed
* 2 stalks of celery, cut 1-2 inches in length
* 2 carrots, cut 1-2 inches in length
* 10 white button mushrooms, cut in half
* 10 pearl onions, left whole (or 1 medium onion, sliced into 1 inch cubes)
* 15 new potatoes, washed well and left whole
* 2 cups beef broth (or water and bouillon)
* 2 cups Coca-Cola (Pepsi, Tab, Dr. Pepper or other dark soda)
* salt/ pepper to taste
* 2 bay leaves
* fresh herbs (rosemary, thyme, tarragon, parsley work well)
* 3 Tbl butter or oil

1) In a dutch oven, or other pot with tight fitting lid, warm the butter on medium-high heat. Rinse the beef and pat dry. Sprinkle with salt and pepper. Add to pot and brown on all sides. Add garlic.
2) Once meat is thoroughly browned, remove from pot and set aside. Add celery, carrots, mushroom, onions and potatoes. Sauté about 8 minutes, until onions are translucent.
3) Return beef to pot, add beef broth, soda, bay leaves and fresh herbs. Cover and bring to a boil. Remember: this is not a stew, it is a braise. Liquids should come just under the top of the beef.
4) Turn heat down to medium-low, leave covered and cook for 2½ - 3 hours, until meat falls apart.
Note: Served with fresh crisp bread or a good salty cheese this makes a great dish.


For all the herb lovers out there Kalyn’s Kitchen hosts WHB. My herbs this week: rosemary, parsley and thyme in this braise.

In non-food related activities we have WCB over at Eat Stuff. I really attempt to capture Kitty BoJangles in action. It is not that it is so rare, but it is true, she is often asleep. Her fun time is what I call her "night crazies." Just after dinner when she bolts the length of the apartment a few dozen times. There is no use getting a shot of her then, because frankly, if you get in her way it is damaging. Instead, I took a picture of her on a box post-night crazies. Shortly after this picture was taken, the box was thrown away. She had grown quite attached because she stared at me viciously as I removed her cooling pad.

And then there is the usual tormentor, Whiskey. He looks very innocent here, be warned, it is all a cute cover.

Saturday, April 29, 2006

Chipotle-Mustard Glazed Chilean Sea Bass w/ Green Beans


*Just Braise has moved. Please visit me at www.justbraise.com!*


I first encountered the chipotle pepper a few years back. It was my birthday and a friend brought me an orange can of La Morena Chipotle Peppers in Adobo Sauce. He had passed a Mexican bodega on the way to the party, stopped in, and bought the cheapest bizarre food item he could find—the 50 cent-7 ounce can was perfect. It was not the only strange food-related gift I would receive that year: a small jar of mint chutney, a bag of stale cotton candy, a can of tuna fish and gunpowder tea were some others. All, much to my own surprise, were put to use—except the chipotle peppers—I just did not know what to do with them.

I cannot say I was afraid of the little shriveled smoked pepper. I just did not make much Mexican food at home (a friend of mine worked at a fabulous Mexican restaurant that offered me a good deal on my meals). I did not know what to do with it. As I said, this was a few years ago. My adventures in mixing world cuisines were not so daring, that can of peppers sat in my cupboard for at least 1 year.

After years of eating chicken mole at said establishment, I finally craved that bittersweet chocolate sauce one night at home. I called my friend for the recipe, attempted my own measurements (since they make it in large vats) and low and behold, I had all the ingredients-- chipotle chili peppers being one of them. I whipped up a batch and I might say, mine was just as delicious as the one I had been eating for years.

I no longer shy away from buying that little orange can of peppers. Their deep smoky flavor is unique and their subtle spice is superb. So when I was sent a bottle of Chipotle-Mustard, I knew it would be delicious. That mustard started popping up in my tuna fish sandwiches, replacing regular deli mustard. I used it on kielbasas, in dips, for dressings on salads.

Inspiration hit the other day as D and I purchased some Chilean Sea Bass from the fishmonger. The problem I often have with D: I want to experiment and he will say something in the realm of: “We purchased the most expensive fish in there, nothing should be added, it’s like drenching a filet mignon in sauce! Fish should be simple: butter, lemon juice, done.” I assured him that even though I had no idea what I was doing, I knew what I was doing. The more you cook, the more you understand flavors and how they might coexist. I was finally able to convince D that replacing plain mustard with chipotle mustard would taste good.

The result? The fish just melted in the mouth. It was a superb combination of smoky chili to sweet mustard to buttery fish. Served alongside green beans this meal will have to be made again—possibly with more chipotle oomph.

CHIPOTLE-MUSTARD GLAZED CHILEAN SEA BASS w/ GREEN BEANS
Makes 2 servings. Active Time= 8 minutes. Cook Time= 20 minutes.
* 1 pound Chilean Sea Bass
* 1 Tbl Silver Springs Chipotle-Mustard
* 2 tsp granulated sugar
* 1 Tbl butter
* about 20 green beans, washed and ends plucked clean

1) Preheat oven to 250F. Melt butter over stovetop on medium-high in an oven-safe pan. While the pan is warming, mix the chipotle-mustard and sugar in a small bowl. Wash and pat dry the Sea Bass.
2) When pan is hot, sear the Sea Bass, skin side up for 2-3 minutes. Flip and sear skin side down for 2-3 minutes. (The thickest part of the fish should still be raw).
3) Brush the chipotle mix over the Sea Bass, place the green beans around the fish and put in center shelf of oven, uncovered, for 20 minutes.


For non-food related activities we have WCB over at Eat Stuff. Below we have one very inactive post-op Whiskey drugged up and sleepy.

As well as one comatose self-drugged (cat nip) Kitty BoJangles (note the fluffy toy that is stuffed full of nip).

Monday, April 24, 2006

Mediterranean Pasta (or Red Pepper-Broccoli Rabe-White Bean & Procuitto Pasta)


There are some people that live and die by pasta. It is their favorite food, it is served at every meal-- it is utterly perfect. For myself, I (still) cannot really understand the effect pasta has on people. I have the same non-chalance with white rice. Sure, I can add butter and salt and it has a great flavor, but… it’s just... there. Does that make any sense? I mean, sure, it tastes good, but in a head-to-head with another starch: warm crisp bread or a baked potato; I’ll take the bread or potato.

Now, I know pasta is not just pasta, and it can be dolled up to create something beautiful on its own. Just like adding olive to bread, tomato paste, spinach or octopus ink added to pasta, all of a sudden creates an attractive taste sensation on the tongue. It is no longer mere pasta. This I accept.

But because of my initial blasé attitude towards pasta in general, I tend to walk past the pasta shelves with hardly a glance; even when they may have “enhanced” pastas. So when D complained that I “don’t let him eat pasta” I was slightly appalled (and quite content) that my own stance had taken hold: D finds his way to the grocery store just as much as I do and I have never not allowed him to buy anything he may want.

So when I was making a run for some flour my eyes were averted by my grocery’s newly expanding organic section. I noticed organic wheat pasta and figured I would give it a try. When I returned with pasta in tow and shared the news with D he could barely fathom his good fortune: “really, pasta?!” You would think we had been living on rations for months and had finally found the black market.

I must admit, there is so much flavor in this dish, the pasta is hardly noticed. If pasta was served like this all the time, I might eat it more often. Because there is no sauce beyond a drizzle of olive oil and sprinkle of Parmesan and fresh herbs, this dish is a pure breeze in terms of cleanup—it also tastes great warm or cold. The broccoli rabe offers a sweet bitterness that can hold its own against the salty procuitto. The white beans are little bundles of surprise as they dance in and out of the pasta “cups”. Most importantly of all, this dish was a rainbow of colors on the plate and palate.

MEDITERRANEAN PASTA
Makes: 4 servings. Active Time= 15 minutes. Cook Time= about 10 minutes. (Depends on pasta variety.)
* 2 cups pasta
* 6-8 stalks Broccoli Rabe, washed (left whole or chopped into large 2-3 inch pieces)
* ½ Red Bell Pepper, chopped into bite-size pieces
* 1 16-oz can White Beans, washed and drained
* 8 slices Procuitto
* 3-4 Tbl olive oil
* Parmesan to taste, freshly grated
* 2 tsp fresh thyme
* salt/ pepper to taste

1) Prepare pasta according to package instructions. While pasta cooks, prepare the vegetables. (If using fresh pasta, prepare after vegetables are combined, just before serving.)
2) In a large-sized skillet on medium-high heat, warm 1 Tbl olive oil. When hot, Add broccoli rabe and red peppers. Cover and allow to cook until broccoli rabe darkens and begins to wilt; about 4 minutes.
3) Add white beans to the vegetables. Stir, cover and cook another 3-4 minutes; until beans are warmed through. Turn heat low and keep covered until pasta is ready.
4) Drain pasta once ready and wash with cold water (this stops the pasta from cooking without cooling it down too much). Throw warm vegetables over, add a about 2 Tbl Parmesan (allow people to add most of their own quantity), olive oil, salt/ pepper and thyme. Toss to mix.
5) Serve up, adding Procuitto at last moment over the pasta (since Procuitto is already smoked, you want it to retain this flavor. Add it at the last moment to avoid cooking it.)


Head on over to Sweetnick's for today's ARF roundup!


View Stats
Rankingblogs.com: Defining your blogs worth..