Showing posts with label cheese. Show all posts

Sunday, March 11, 2007

Brunch Braised Eggs


*Just Braise has moved. Please visit me at www.justbraise.com!*

Happy Daylight Savings Day if you live in the US in one of those cities that enjoy torturing inhabitants’ internal clocks with bi-yearly time changes. I am embracing bags under the eyes today to push through the pain. Remember to go to your computer maker's homepage and download the necessary plug in to update your operating system.

Thank you to everyone who participated in the last giveaway. As more suppliers come to me offering samples I will attempt to make them available to you so keep posted! Another offer coming up shortly…

Some of you may have noticed that JustBraise.com appears different than the current Blogspot site you are reading. I am working with a brilliant designer now to modernize, slim down and in general make clear what I can offer you. I am not fully aware of the final vision, but please be patient in the future if either site experiences loading problems or content is missing. I promise it will not last too long.

All that being said… brunch!

Here in NYC, yesterday blessed us with a hint of Spring. I took a short walk outside to enjoy the mild weather and even went so far as to open a window to let a refreshing breeze pass through (read: to cool the kitchen). Spring weather in NYC reminds me of brunch. Seemingly every New Yorkers' favorite weekend pastime when the weather finally reaches mild temperatures, outdoor seating emerges to take the place. Sidewalks are no longer crowded with bushy jackets but chairs overflowing with revelers of their leisurely 2pm brunching hour.

In the suburbs and many other cities, I seem to recall brunch falling around 10 or 11 am. For whatever reason, in New York City, the later you are able to make it to brunch the more it says “I don’t care, I am spending today drinking bloody marys.” For whatever reason, if your time is being spent brunching, your waste of a day is perfectly justified (it also says, “that’s right, I was at the secret after hours location until 6am, pssshhhh.”). One will often find brunch menus extend well past 4pm, overlapping with those early bird dinner specials.

In honor of brunch, my slightly early awakening this morning and the change of the season, I present this decadent dish. Soon it will be too warm to enjoy such a luxury— When a hot breakfast is about as appealing as that industrial air conditioner’s exhaust hitting your face on a 90 degree day in what seems to be 100% humidity and the soles of your shoes are melting and the buildings around you create a fabulously effective canyon for retaining heat and you become increasingly bitter at those who were smart enough (or simply have the means and schedule) to flee the City for the duration of the summer and bask in the cool waves of the ocean. No bitterness, I have my bucket garden to tend to.

On the other hand, this recipe may allow you to forget the beach and the heat of the summer and bask in the rich joys of winter.

BRUNCH BRAISED EGGS
Serving Size= 2. Active time= about 8 minutes. Cook time= about 10 minutes.
* 1-2 tablespoons butter
* 1 bunch spinach, washed well and drained
* ½ cup heavy cream or milk
* 2 tablespoons ricotta cheese
* 1 tablespoon parmesan
* 2 tablespoons cognac or brandy
* salt/ pepper
* 2 eggs

1) Preheat oven to 400F. In a large sauce pan on medium high heat, melt the butter. Once bubbling, add the spinach, cover and allow to wilt, about 3 minutes. Stir to bring wilted leaves to the top and complete wilting.
2) Add cream, ricotta, parmesan, salt and pepper. Bring just to a simmer, stirring often, about 2 minutes. Add cognac and return to simmer. Taste the broth and add more salt/ pepper if needed.
3) Divide the spinach and cream mixture between two oven safe bowls, reserving about 2 tablespoons of the cream-cognac mixture. Crack an egg over the top and add the remaining cream-cognac sauce.
4) Place the bowls on a cookie sheet for easy removal. Bake for 10 minutes, or until whites just set for runny yolks, longer for firmer yolks.
5) Serve warm with buttery toasted bread.

Saturday, January 13, 2007

Sunchoke (Jerusalem Artichoke) Salad


Last year, I read so much about the little Sunchoke that I grew overwhelmed with joy when they finally appeared at the market. I bought a bunch and made some hearty soup that whisked away cold days. The sunchoke is hearty, sweet and not only tastes great raw, but is a great substitute for the potato.

Over the holidays I was around San Francisco visiting family. My uncle is taking a Master Gardening class and over the years built a substantial garden on his property. It is one that I am extremely jealous of and if he happened to have an avocado tree I would seriously consider moving in. Still, it does include blueberry and raspberry bushes, plum trees and strawberries all for my grandmother to make jams from (nothing but fruit and sugar, not even water she'll proudly tell you multiple times), tons of nasturtium flowers (that my uncle says proliferate like weeds), herbs of all kinds, artichokes, sunflowers, grape vines, tomatoes, a massive worm farm for compost, roses, a myer lemon tree and sunchokes.

He showed me around his garden saying most of what he has is just for play: he plants things and watches how they grow, rarely harvesting anything. One morning, I nabbed one of the last non-flowered artichokes for myself and boiled it up. I don't think there is anything more tasty and satisfying than eating something straight from a garden. He showed me the sunchoke bin, telling me they grew so robustly that the bin almost burst. He dug some up to show me there was literally wall-to-wall sunchokes growing underneath the dirt.

The next day while sauerkraut and ham was being served, I ran out to the garden and grabbed a handful of sunchokes and clipped some lavender leaves. I sliced the sunchokes thin and sauteed them until crisp with lots of butter, garlic and the lavender. My grandmother and mother were both pleasantly surprised at this previous unknown vegetable and refused to share them with anyone. I was pleasantly surprised at the mild taste of the lavender with the sunchokes.

My uncle gave me a bag of sunchokes to take home and plant in my own (pathetic in comparison) bucket garden. They are perfect because from the outset they appear to be weeds-- perfect in a city where old ladies steel my tomatoes and chicken wire. They are safely hibernating and will hopefully produce well come harvest next fall.

In the meantime, it's difficult to let a bag of fresh organic sunchokes go untouched. I made this salad for dinner the other day and D surprisingly applauded it (when I initially told him the ingredients he said the salad sounded like "weird girly veggie mush"). I'm not totally sure I know what that classifies as (I think zucchini is on the "veggie mush" list though), but once he ate this he assured me he would eat it again-- especially the sunchokes!

This is a visually stunning winter salad. It is hearty and really shows off that winter food can be just as beautiful as summer food. It also has fabulous texture layers and an interesting array of flavors. If you are dexterous you can cut down on cook time by sauteing the mushroom at the same time as frying the sunchok (since the sunchokes only take about 2 minutes in the oil).

Sunchoke Salad
Serves 2. Active time= about 30 minutes.
* 1 cup green beans, cut into 1 inch spears
*1 head endive, sliced thin
* 1 yellow pepper, left whole
* 1 portabello mushroom, sliced into 1/2 inch shoots
* 1 cup vegetable oil (more or less depending on pan)
* 1 sunchoke, well scrubbed and sliced into 1/8 inch rounds
* 1 tablespoon goat cheese
* 4-6 grape tomatoes

1) On the serving plate/ bowl, arrange green beans and endive.
2) Prep: Set a paper bag in a bowl aside. Set paper towels on a plate aside.
3) Roast the yellow pepper: Using long metal tongs, set pepper over burner set on medium-high flame. Rotate the pepper until all sides are blackened, about 6 minutes total (this only works with gas stoves as an open flame is needed. Another option is to dry roast the pepper on a non-stick pan until blackened). Place the pepper into the paper bag and seal. Set aside. This completes the pepper's cooking.
4) In a small pan on medium heat, saute the portabello mushroom. While the mushroom is cooking, put the vegetable oil in a medium sauce pan on high heat. While oil is warming, finish the mushrooms, cooking until reduced and darkened, about 8 minutes. Arrange the mushrooms on the serving plate.
5) When the oil is hot, fry the sunchokes quickly, removing when they turn brown around the edges. About 2-3 minutes total should turn them crisp. Remove from oil, place on the napkin covered plate and sprinkle lightly with salt.
6) Remove the yellow (now blackened) pepper from the paper bag. The skin will begin to flake off. For fast removal, place whole pepper under lukewarm water, gently rubbing ashes from the pepper. Dry off and slice into 1/2 inch spears, add to serving plate.
7) Sprinkle grape tomatoes over salad arrangement. Add goat cheese in a single lump. Spear sunchokes into the goat cheese to allow the sunchoke chips to stand verticle. Top salad with olive oil, a light sprinkle of salt and a spritz of lemon (optional). Any more dressing would ruin the flavors in this salad.

Sunday, October 08, 2006

This Ain't Johnny's Grilled Cheese


*Just Braise has moved. Please visit me at www.justbraise.com!*

Sweet, gooey, warm and crisp, there are few things that totally satisfy our child desires of yesteryear like a perfect butter-laced grilled cheese.

I think the French understand this desire best—the croque monsieur and croque madame are practically the national foodstuffs. [And believe you me, any time I find myself in this tasty country (which is definitely not enough) I am always sure to pick up this café treat.] When I first came across the croque pair in my elementary French textbook I thought it was surely a mistake—that or the authors were pandering to the young masses that were learning the placement of all those accent egus. Why were we learning how to order a grilled cheese sandwich, a seemingly typical American food?!

How wrong we were, not just in the fact that we all thought the grilled cheese as typical American, but our base preparation methods (on a dare might you use Swiss cheese over a cheddar or [gasp] American cheese!).

So while it is hard to believe our fresh picked apple supply is barely beginning to dwindle (I won’t even go into how many batches of apple chips, have been produced), a gooey cheese sandwich seemed like a perfect pairing with some crisp juicy apples on a fall morning, mais non? And for the dear reader, yet another recipe to put those fall apples to good use.

GRUYERE APPLE GRILLED CHEESE
Serving Size= 2 sandwiches. Active time= about 15 minutes (less if bacon and mushrooms are already prepared).
* 2-4 slices thick cut bacon (have your butcher custom cut thickness to any size you like)
* small handful mushrooms like baby bella or button, sliced into quarters
* 1 tablespoon sliced onions
* gruyere (or like) cheese, sliced; enough to cover 1 slice of bread
* 1 small Rome, Empire or Granny Smith apple, sliced into 16 wedges
* roasted garlic paste (optional; if available)*
* 4 slices good white bread
* 1 tablespoons unsalted butter

1) In a hot frying pan, cook the bacon until desired crispness is reached. While bacon is frying, keep an eye on it and slice the mushrooms, onions and apples.
2) Once bacon is complete, transfer to paper towels, drain fat from pan, return the pan to the stovetop and on medium-high heat, sauté mushrooms and onions. While mushrooms and onions cook, prepare the bread.
3) On 2 slices of bread, spread an ample amount of roasted garlic paste (optional). Cover bread with a layer of gruyere, a layer of sliced apples and 1-2 slices of bacon. Set aside.
4) Once mushrooms are browned and onions are translucent (about 8 minutes) transfer to a bowl and carefully wipe pan dry.
5) Turn heat to medium, melt ½ tablespoon of butter in the pan. Transfer prepared bread halves (with cheese, apples and bacon) onto the pan, top with mushroom-onion mixture, place second slice of bread over top and allow bread to brown and cheese to melt; about 4 minutes. Flip carefully, add ½ tablespoon butter to pan and move sandwiches around to pick up butter (allowing the butter to brown, not the bread to burn). Let sit about 3 minutes, remove from pan and eat hot and delicious.


* roasted garlic paste is a cinch make (and cost effective if you’ll be roasting something else in the oven). Simply take a whole head of garlic and slice the top off clean (to barely give you access to the cloves). Wrap in tin foil and place in the oven (around 350F) for 30-45 minutes. Remove and let cool. Once cool, pop the garlic cloves from their shells and transfer to a small dish. Add about 3 tablespoons olive oil and stir to breakdown garlic and incorporate olive oil into a uniform paste. Great on sandwiches, over meat, in potatoes or mixed into a salad dressing.

Check out other Fall Feast-ival items over at WellFed's FitFare!

Tags: , , , , , .

Monday, June 26, 2006

Radish & Peach Sandwich


As previously mentioned the garden has produced crisp, slightly bitter and tremendously juicy White Hailstone radishes, smelling faintly of blossoms and soil. Pulled from the ground (rather, bucket) and washed clean, Kitty even had a taste of the thick green stalks (see picture from June 24).

Desiring more than a salad and noting the meager contents of my pantry I went to the inspiration of cookbooks. Cracking each one, I went straight to the index only to find many a radish laden salad. D grew hungry and impatient, Kitty kept at the stalks and I finally found what I vaguely remembered I had: the Best of Gourmet Paris. The cover image, burned in my memory, showcased two mouth-watering baguettes: one brimming over with a thick schmear of goat cheese covered with raspberries, the other a candy cane assortment of radishes over a blue speckled blanket of cheese.

Using the recipe as inspiration, I headed to the grocery for the best Roquefort I know: Société (with a nod to a certain Frenchman currently displaced in Nottingham, England whose mother used to work at the dairy). Then to the bakery for a (Greek) baguette. In no time, this amazingly simple summer sandwich was produced.

Though D thoroughly rejected my notion that peach would be a sweet and colorful addition to the sandwich, I won in the end and crowned my prized radishes. One bite and I am hooked on the summery nature of this sandwich. The bread, an airy bed for the slightly pungent and salty creaminess of the Roquefort. The garden radishes crisp, with each bite sprinkling dew upon my nose. The peach, pure icing on the cake—the perfect representation of summer that left warm juice dribbling down my chin.

Each ingredient complimented each other to perfection. With a few slices of radish leftover, I placed them on the side, gave them a sprinkling of Lots Wyfe Hawaiian sea salt, creating radish “chips” and popped them in my mouth as a palate cleanser. Hunger problems solved and more refreshing radish sandwiches in the future warming months.

RADISH & PEACH SANDWICH
Serving size= 2 persons. Active time= 8 minutes.
*4 medium-sized White Hailstone Radish (preferred)
* 1 ripe peach
* 4 Tbl Roquefort cheese (Société preferred)
* 1 loaf crispy bread (baguette)

1) Cut the baguette in 2 and slice open (this is an open-faced sandwich)
2) Smear Roquefort over the insides of the 4 bread pieces.
3) Chop radish into 1/4-inch thick discs and layer over Roquefort
4) Slice peach into half. Remove pit and slice each half into 8 wedges. Place over radish.


Check out some Chewy Chocolate Chip Cookies over at WellFed's Paper Palate.

Head on over to Sweetnick's for more ARF friendly items!

Thursday, May 04, 2006

Chocolate-Espresso Tart


Chocolate is too seductive to dismiss. I have forgone meals to satisfy my craving, and I have drenched ice cream in fudgy syrup, making the original flavor unidentifiable. As a child, I would pull a bottle of chocolate sauce from the fridge and squirt the sugary treat direct on my tongue—chocolate milk was a daily addiction. Needless to say, I have trouble trusting those who claim, “I am not really into chocolate.”

Just out of college, I had a roommate any chocoholic would love: she worked at a haut chocolate shop. I quickly turned monthly visits to the store into daily happenings. With each drop in I claimed to be taste testing the wasabi-tinged truffles, ancho chili spiked hot chocolate and bars of white chocolate infused with lavender. In truth, I was in heaven.

When I spy chocolate on a menu I make sure to leave room for dessert—even better is when chocolate is part of the main course! D is often worse than me when it comes to the dark temptation: pushing to order the richest dessert when I might crave a lighter fare—and I thought girls were real chocolate junkies.

When I saw this dessert while flipping the pages of Marth Stewart Living it was too difficult to resist. Once tasted, I knew this tart would satisfy even D’s chocolate cravings: The cocoa crust lingers with the faint flavor of marscarpone in the filling, and the smooth rich ganache permeates with bitter espresso. It is a perfect dessert. Below is the recipe as it appears online.

CHOCOLATE-ESPRESSO TART
Makes 8 servings.
Better than a box of chocolates, this dessert is triply indulgent. The cocoa shell forms a crisp rectangular foundation for two decadent fillings: creamy, tangy mascarpone cheese and generous rosettes of silky-smooth espresso-flavored chocolate ganache.
For the Ganache:
* 8 ounces bittersweet chocolate (preferably 61 percent cacao), chopped
* 1-¼ cups heavy cream
* 2 tablespoons good-quality ground espresso beans

For the Tart Shell:
* 1 cup all-purpose flour, plus more for parchment paper
* ¾ teaspoon salt
* 1/3 cup unsweetened Dutch-process cocoa powder
* ½ cup (1 stick) unsalted butter, softened
* ¼ cup sugar
* 1 large egg
* ¾ teaspoon pure vanilla extract
* 3 tablespoons heavy cream

For the Filling:
* 1-½ cups mascarpone cheese

1) Make the ganache: Put chocolate into a medium heatproof bowl, and set aside. Bring cream and espresso to a boil in a small pan. Pour through a fine sieve over the chocolate; discard solids. Let stand 2 minutes, then whisk until smooth. Let cool to room temperature, 1 to 2 hours.
2) Make the tart shell: Sift flour, salt, and cocoa powder into a medium bowl; set aside. Put butter and sugar into the bowl of an electric mixer fitted with the paddle attachment; mix on medium speed until pale and fluffy, about 4 minutes. Add egg and vanilla, and mix until combined, scraping down sides of bowl as needed. Reduce speed to low. Gradually add the flour mixture in 3 batches, alternating with the cream. Shape dough into a thick rectangle; wrap in plastic. Refrigerate until cold, about 30 minutes.
3) Preheat oven to 350°. Roll out dough between 2 pieces of lightly floured parchment paper to a 16-by-6-inch rectangle, about 1/4 inch thick. Press dough into a 14-by-4 1/2-inch rectangular flan frame set on a baking sheet lined with parchment. Trim dough flush with top edge. Prick all over bottom of shell with a fork. Bake until firm, 18 to 20 minutes. Transfer to a wire rack; let cool completely. Unmold.
4) Put ganache into the bowl of an electric mixer fitted with the whisk attachment; beat on medium-high speed until soft peaks form, about 4 minutes. Transfer to a pastry bag fitted with a large star tip (such as Ateco #828).
5) Smooth mascarpone cheese over bottom of tart shell with an offset spatula.
6) Pipe ganache rosettes, one next to the other, on top of mascarpone to cover. Store in the refrigerator up to 1 day.
Note: Great Ganache: To turn out smooth ganache every time, make sure the mixture is at room temperature before whipping. Any warmer or colder, and its cream is likely to seize or become grainy.

Wednesday, April 19, 2006

Scallop Salad


More beets and another salad… Can a girl get tired of such sweet treats?

While the sun decides to let me linger on the streets a little longer, it becomes more difficult after a day at work to take refuge to the kitchen. However, I have beets (the last of them) that need some quick vanishing (as well as a light purse to care for).

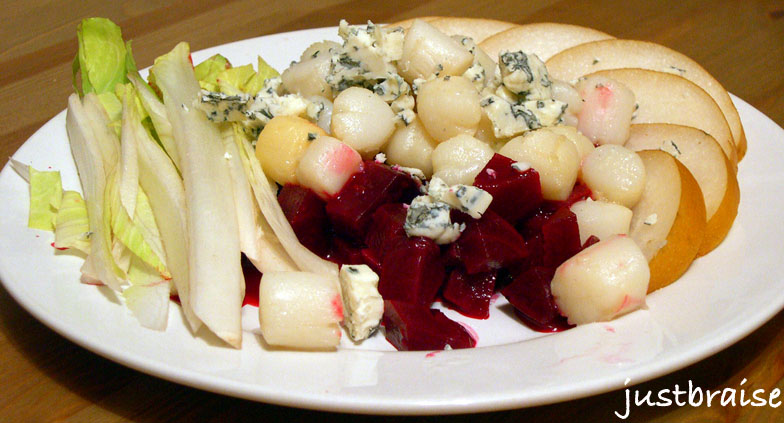
Light, sweet and buttery, I decided scallops were an unusual yet natural pairing with the beets. Accompanied with some classic, subtle salad ingredients, this meal is a winner for a quick and painless feast on a warm day.

Asian Pear is given space on this plate. A cross between a crisp, juicy apple and an almost ripe pear, this fruit provides a splash of exotica to the salad. There is a woman I work with who can go on at length about the perfect fruit. She is from the Philippines and wins the fruit battles that ensue when we talk, mentioning it always taste better at home, in the Philippines. I believe this is true for anyone, wherever they may be from: an American will swear their apples are the best only back home, an Egyptian proclaims their dates to be the sweetest only when seated by the Red Sea, and a Haitian will only eat mangoes when on their own shores.

So when I brought an Asian Pear into the office I was sure she would brush me off with another one of her, “oh, back home ours are much tastier. You have not lived…” Sure enough, she saw my pear: “Oh those pears, they grow all over in my country…” Finishing with “it is the only fruit I do not like.” I paused, unable to comprehend how someone could not love a combination of the two greatest fruits: “I prefer your American pears much better. So much sweeter.” And with that, she shrugged her shoulders and walked away. For those who agree, or do not have Asian Pear handy, a regular pear or crisp apple may be substituted in this meal.

I have discussed previously how to pick scallops, here offering an alternate cooking method. They may be chilled before being placed on the salad, or served warm scattered over top. Nuts may also be added to this salad for another crunch.

SCALLOP SALAD
Makes: 2 servings. Active Time= 10 minutes. Cook Time= 45 minutes (if beets are not already prepared).
* 1 medium beet
* ½ pound Bay Scallops
* 1 Asian Pear (apple or pear is suitable too), sliced thin
* 1 endive head, sliced this
* 2 Tbl blue cheese
* 1 Tbl butter
* 1 Tbl spicy mustard
* 1 Tbl vinegar (tarragon or wine)
* 1 Tbl fresh lemon juice

1) Braise or boil beets according to directions from previous two posts. Slice and place on plate.
2) Warm a pan over medium heat with the butter. Wash the scallops under water. Once pan is warm and butter melted, sauté the scallops about 8 minutes until lightly golden. While cooking, prepare the remaining salad.
3) Arrange sliced Asian Pear and endive on plate. Toss scallops on top, add crumbled blue cheese over whole.
4) In a small bowl mix mustard, vinegar and lemon juice. Pour over salad just before serving.

Tuesday, April 18, 2006

Beet & Bean Salad


It seems there are those who are not as gastronomically in-tune with beets as myself. How did this blushing beauty get such a bad rap? Full of color, sweet, delicious and combining well with almost anything-- where did the sweet beet go wrong in history? Is it that slightly off-putting exterior? I know many other vegetables that look much worse off (dinosaur kale, parsnips, dare I say celery root and sunchokes?!). Is it too economical? Eating both leaves and root of a single vegetable is too smart for the purse strings? Is it my Eastern European heritage that has me craving the rubies of the Earth?

Here’s to beets, the sweetest of all vegetables (while remaining low in calories) and all their nutritional goodness.

Notes on this salad: I used beets leftover from myBraised Beets, hence the minimal cook time noted below. If making fresh beets, you can braise them or boil them for 45 minutes; until soft. Because these beets were braised in orange juice, they had an extra citrus sweet tang that allowed this salad to pair nicely with an orange juice-lemon vinaigrette. I think this salad would have been delicious (and beautiful) with some sliced oranges added on top.

BEET & BEAN SALAD
Makes: 2 servings. Active Time= 10 minutes. Cook Time= 45 minutes.
* 2 medium-sized beets
* 10-15 green beans
* Parmesan cheese to taste
* 1 Tbl orange juice
* 1 Tbl lemon juice
* 1 Tbl vinegar (tarragon or wine)

1) Bring a pot with about 4 cups of water (enough to cover the beets) to a boil on the stovetop. Cut stems off beets leaving about 1 inch of stem in tact. Wash thoroughly and place in boiling water for 45 minutes; until soft.
2) Remove beets from water and place in ice bath (you can retain and freeze beet juice from the boiling pot and use it for soup another time). Remove skins, they should fall off with slight nudge. Slice beets in ¼ inch cubes or discs.
3) Wash and blanch green beans (with a little water in a hot saucepan heat beans 2-3 minutes until they turn dark). Add on top of beets.
4) Sprinkle with Parmesan
5) Combine orange juice, lemon juice and vinegar in a small bowl. Drizzle over top when ready to serve.
Note: Sliced oranges would go nicely on this salad.


Head on over to Sweetnick's for today's ARF roundup!

Monday, April 10, 2006

Strawberry Tart


I never liked Strawberry Shortcake growing up. I’m not talking about the dessert, but the doll. She was terribly pink and I never was a fan of pink. All high and holy on her board game; Rainbow Bright was much better. She sported moon boots even when they went out of fashion, a mini skirt that looked like a flotation device, had a tattoo on her face (so risqué), and her best friend was an unicorn! Okay, so now Rainbow and her friends look like they have spent all night at a Rave doing copious amounts of acid, but back then, she was cool.

Strawberry Shortcake did allow me to remember one important bit of information: dessert has two “s” like Strawberry Shortcake, while desert, cannot be a cake—or doll.

While I have pretty much gotten over my loathsome tendencies toward Shortcake (the doll) I must say the dessert is pretty darn good. And really, there is nothing better to usher in the warmer months than strawberries—Just do a Google search for ”strawberry festival” and you can see over 3 million people agree.

Unfortunately, it is the one fruit (or vegetable) I do not particularly enjoy picking for myself. I picked blueberries, corn, nectarines and peaches in heat that topped 100 degrees last summer. The strawberry fields… I stayed away from. It is just too laborious of a task to bend so low and rummage for the ruby in the haystack. (Note to self: borrow young child who does not mind stooping over for 1 hour to pick self fresh strawberries.) But humans do crazy things for love and this is why strawberries hold the status they do.

This dessert is no shortcake. It is a little bit classier, looks spectacular, tastes sophisticated enough to hold its own at dinner party, and yet is festive enough to highlight a BBQ. Made only yesterday, it has almost vanished, smacking a smile on D’s face with each bite.

*This recipe is adapted from an April 2005 Gourmet magazine. In mine, the cream cheese filling has been altered, as well as the topping. I also made a quick crust found in The Joy of Cooking. The original used kiwis, a store-bought pre-made crust, and incorporated no herb.

STRAWBERRY TART
Makes: 8-10 servings. Active Time= 30 minutes. Inactive Time=15 minutes
The Crust
*This is the recipe as it appears in the The Joy of Cooking.
For a double-crust 9-inch, or a single-crust pie with a generous lattice, use the following amounts. For a one-crust 9-inch pie, use half the recipe.
Sift Together:
* 2 cups all-purpose flour
* 1 tsp salt
Measure and combine:
* 2/3 cup chilled leaf lard or shortening
* 2 Tbl chilled butter
Cut half the shortening into the flour mixture with a pastry blender, or work it in lightly with the tips of your fingers until it has the grain of cornmeal. Cut the remaining half coarsely into the dough until it is pea size. Sprinkle the dough with:
* 4 Tbl water
Blend the water lightly into the dough. You may lift the ingredients with a fork, allowing moisture to spread. If needed to hold the ingredients together, add:
* 1 tsp to 1 Tbl water
When you can gather the dough up into a tidy ball, stop handling it.
-------------
1) Preheat oven to 450F. Roll out the dough and place it into your pie tin or tart mold. Bring the dough about ¼ inch over the edge of the tin; fold back to reinforce the edge.
2) Poke dough several times with fork. Cover bottom with tinfoil, add pie weights or dry beans or rice. Bake for 6 minutes. Carefully remove the foil and weight. Bake for 7-10 minutes more; until crust is golden.
3) Place on rack to cool. While cooling, make the filling (below).


The Filling
*Adapted from Gourmet, April 2005. Use a pie tin with removable bottom for easy serving.
* 6 oz cream cheese, room temperature
* 2 Tbl sugar
* 2 Tbl milk
* 2 tsp finely grated fresh orange zest
* 1 tsp vanilla
* 2 tsp fresh mint, chopped
* 10-12 ripe strawberries, tops removed, sliced in half
1) While crust (above) is cooling, in a bowl, beat cream cheese, sugar, milk, zest, and vanilla with a mixer until smooth, 2 to 3 minutes.
2) Add chopped mint; mix with spatula to incorporate.
3) Spread cream cheese filling evenly in cooled shell; top with strawberry slices.
NOTE: Can be made ahead and chilled. Tart should be brought to room temperature before serving.


Head on over to Sweetnick's for today's ARF round up!

Friday, March 31, 2006

Burger w/ Sweet Potato Fries & Milkshake


Last night I took a little walk as I left one friend to meet up with D and his buddy uptown. I often find myself speedily walking the length of Manhattan island as it begins to warm, much more pleasant than the claustrophobic subway, watching as the people and their actions change with the neighborhood. On a weeknight, the walk is the best: the crowds have diminished, a few hardy souls stumble from bars attempting to make a last effort phone call, and tourists walk aimlessly, unaware of where they should be. In the spring, as night falls cool, a brisk walk is perfect to keep the blood flowing while appreciating time that can finally be spent comfortably outdoors.

My little walk turned into a 40 block trek and for one slight moment, a total of half a block, I smelled spring. It has officially arrived in New York City. It was a brief moment, just past a pile of garbage bags that the air lightened and suddenly Dogwood mingled with early purple violets. Blossoms are out; spring has arrived.

With the weather warming, D and I begin to think about our city escapes: camping. Just when the weather turns perfect, D plans our camping destination while I plan the (cheese) farms to hit up for produce along the way. Interspersed with our camping shenanigans are the precious city BBQs. Few and far between since outdoor space is a rarity, when they do come, they are perfect: on a rooftop, in a side alleyway, in a 5 foot plot of grass next to the front stoop, on the fire escape, and if you are lucky, on the coveted balcony.

So it is with these spring thoughts that D and I whip up our own little (indoor) BBQ. It is possibly the classic New York City diner meal (next to the corned beef sandwich): a burger with french fries and a black and white milkshake. The (best) black and white milkshakes, like the black and white cookie, are only found in the tri-state area [cough] -- New York City. On a trip home to Chicago one year I entered a diner and ordered one. I received a confused look and returned it with a smitten: “vanilla ice cream with chocolate sauce!?” Geesh, how can you not know?! But attempted (and tasted) in diners west and north, the best are found in the City. The black and white milkshake has the delicate pleasures of vanilla ice cream with that extra sweet richness of chocolate sauce. Like the classic hot fudge sundae or chocolate milk, you can make it as subtle or rich as desired. An even better play on this drink? The beershake-- really, it’s tasty. Or, the whiskyshake, which my New Orleans friend calls “milk punch.” The rest of the meal has received ink:

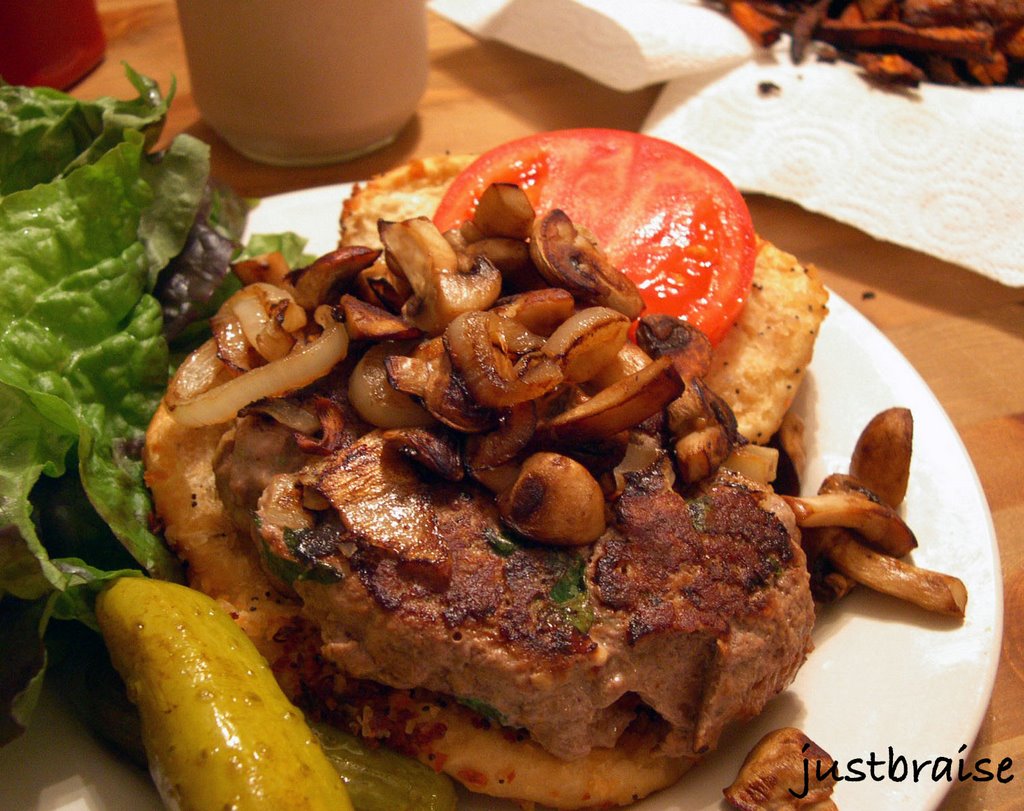
The Burger (made with caramelized onions and mushrooms; no cheese)
The Sweet Potato French Fries (made with salt, no cumin)

And without further ado…

BLACK & WHITE MILKSHAKE
Makes: 2 servings. Active Time= 5 minutes.
* 1-½ cups vanilla ice cream
* 1 Tbl chocolate sauce
* 2-½ cups milk

1) Blend all ingredients and serve immediately


THE BEERSHAKE
Makes: 2 servings. Active Time= 5 minutes.
* 1-½ cups chocolate ice cream
* 1 cup milk
* 1 pint good porter beer

1) Blend the ice cream with the milk.
2) Add beer, stir with spoon. (Do not attempt to blend the beer as it will produce a foamshake.


THE WHISKYSHAKE
Makes: 2 servings. Active Time= 5 minutes.
* 1-½ cups vanilla ice cream
* 1 Tbl chocolate sauce
* 2-½ cups milk
* 4 oz preferred whisky

1) Blend all ingredients and serve immediately

Monday, March 13, 2006

Golden Beet Salad


I cannot recall when I ate my first beet. I know my grandmother often served them at family meals. It sat cold and wiggley in between the sauerkraut and Jell-o; the beltway of the table I despised. Often times, when the plate got away from my small hands “grandma’s specialties” were loaded on. I sat there shifting the food around, building monuments in the likeness of Jabba the Hut, until all was an indistinguishable mess. It was many years before I willingly placed a beet in my mouth.

The first time must have been in New York City. It might even have been as late as my college years. I want to say that my first beet experience was in a sweet crimson borscht. Delicious and full of vegetables, I am sure I pondered how the soup acquired its rosy hue—that is until beer was in front of me and all was forgotten.

At some point I remember watching (or possibly reading?) a segment about food and how certain vegetables alter a person’s urine. Disgusting, I know, but I have two brothers so this was cool to me. What I take away from that program today: Asparagus= yellow and pungent. Beets= bright pink. To me this was fascinating. I tried consuming bowls of borscht, but that just filled me up. Eventually, I turned to the beet.

I remember again being at my grandmother’s home (post new scientific knowledge). Behold the plate of beets! My grandmother was the only one eating them. Being the dutiful, and only granddaughter, I plunged my fork into the platter and filled my plate with beets. I consumed them faster than I could taste them for fear of ruining my experiment with a bad tasting vegetable. It was halfway through my plate when I paused for breath, tasted, and realized the sweet joy that is the beet.

Today it seems my refrigerator is never without beets. They are the best of additions to any salad, powerful enough to stand on their own, and their leftover juice (the water they are boiled in) makes a superb addition to soup stock. I often cook up more than D or I can consume in one night then hide them in sandwiches, replacing the too common tomato (highly recommended!).

So it was with great joy that I spied the golden beet my supermarket. I bought a bunch, boiled them up and served them simply as pictured: with fresh peppercorn goat cheese, sage and a sprinkle of balsamic vinegar. This salad is pleasant and refreshing. The golden beet is a beautiful vegetable on its own, or paired with the more common red beet. It has a sweeter and more subtle flavor, making it an ideal “starter” beet. It is also a beautiful royal shade, reminiscent of the upcoming spring we all long for.

Oh, and my experiment worked. I called my grandmother into the bathroom to witness my feat. She was not impressed and thought I might be ill.

GOLDEN BEET SALAD
Serving Size= 2 persons. Active Time= 10 minutes. Inactive time= 45 minutes.
* 4 small golden beets
* 6 fresh sage leaves, pineapple sage is ideal if available
* 4 Tbl plain, herbed or peppercorn goat cheese

1) In a small pot over medium-high heat, bring water to a boil. Wash beets well and trim stalks, leaving about 1 inch in tact. Add beets to water, cover; reduce heat to medium. Cook beets about 45 minutes, until a fork can easily pierce the beets.
2) Remove beets from heat and run cold water over them until they can be handled. Push skin off (once cooked, beet skin easily falls off with a little nudge). Trim off stalk and slice as desired. Arrange on plate.
3) Sprinkle goat cheese over beets, or place on side. Shred sage and sprinkle over. Add a dash of balsamic to taste.

Monday, February 13, 2006

Frittata Up The River


There were few “food” days growing up that I enjoyed rising for. Weekday food treats meant my mother was appeasing one of the three kids about the upcoming school day: Would we be taken to the dentist after school? Did one of us have a test? This could all be gauged by the care put into the weekday breakfast: Chocolate chip pancakes are shots at a doctor’s annual. Cold cereal and orange juice is a regular day.

But oh, those fabulous Sundays! My brothers and I would be dragged kicking to Sunday school. One would complain of fever, one would hide in the closet. I always waited until I got into class. As the teacher began discussing King Solomon, I raised my hand: “I have to go to the bathroom.”
“Really, Stacey? The bathroom?”
“Yes, I have to go.”
“Fine. But come back this time!”
“Oh, yes, I will.”

I left class, walked past the bathroom, took a right at the lounge, made a beeline for the Sisterhood Gift Shop, entered the small glass cube, ducked behind the counter, and twisted 3 inch purple ribbon into bows for my mother, head shopkeeper. “What happened to class?”
“I had to go to the bathroom.”
I sat on the floor pulling bows for 45 minutes while my class was lectured about the King. Soon, the sound of footsteps echoed in the halls making their way to the congregation room. I found my class, sunk into the rhythm of their footsteps, and entered the room to sing for the next 20 minutes.

Song time ended and I returned to the gift shop. I helped my mother clean and lock up, my brothers would arrive, and we would meet my father at the local delicatessen. Within seconds our platter arrived. It was the same platter that we ordered every Sunday: 1 pound thinly sliced Nova smoked salmon, 2 slender glistening white fish, 1 scoop plain cream cheese, 1 scoop chive, sliced tomatoes, onions and a bucket of pickles. Each received a plate with their personal bagel: sesame for my father, everything for my mother, plain for my older brother, raisin for the younger, and egg for me-- all toasted or fresh according to taste.

Now, when I eat smoked salmon, I cannot help but remember those platters of fish for my family. Needless to say, I can appreciate smoked salmon in a variety of ways these days. It does not hurt to have a bagel with a schmear on the side, though. Smoked salmon is usually reserved for special occasions now-- a wee too decadent for weekly consumption.

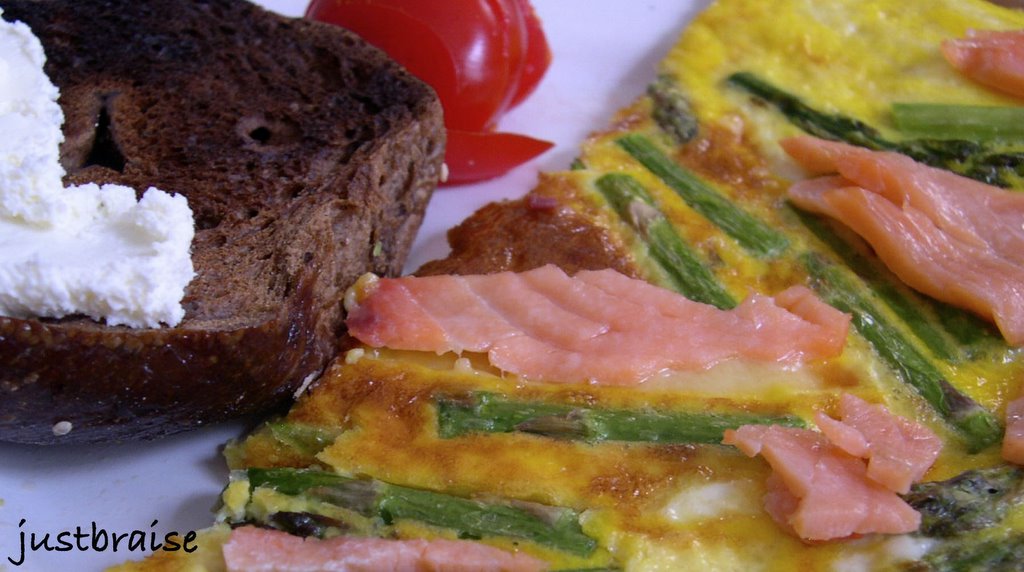
This Valentine’s Day, have a special meal. Better than going out is making something at home. It does not have to be overly expensive to be special, just good. Make your favorite meal with perfect care, if it’s for a special someone doing what you know will take the edge off. This frittata has two of my favorites: asparagus and smoked salmon (and a bagel with schmear on the side). So there you go, go up the river and bring back the memories—just leave King Solomon behind.

FRITTATA UP THE RIVER
Serving Size= 2. Prep + Cook Time= 15 minutes.
* 4 eggs
* 3 Tbl milk or cream
* 1 tsp pure vanilla extract
* 8 asparagus stalks, washed and cut into 1-inch pieces
* 4 slices (about ¼ pound) smoked salmon, cut into bite-size pieces
* 1 Tbl butter

1) In an oven-safe skillet on the stovetop over medium heat, warm pan and melt butter. While butter is warming, crack eggs into a bowl, add milk, vanilla and whisk together. When butter begins to bubble, sauté asparagus until a dark green, about 3 minutes. Add eggs over top, leave on heat for 3 minutes.
2) Turn broiler on. Place skillet under the broiler and bake 8-10 minutes. Eggs are done when they are set and lightly browned. Remove from broiler, place smoked salmon over top, return to broiler for no more than 20 seconds (you do not want to cook the salmon—it is already smoked—just warmed).
3) Serve with cream cheese schmeared toast or bagel.

Friday, February 10, 2006

The "Waldorf" Salad


I often use walnuts and dried cranberries (not sweetened Craisins) in my salads. It sweetens as well as breaks up the usual routine of tomato-carrot-celery. I once did this for my friend B from Egypt. I brought out the salad and to my delight B took a bite and was wowed: “How did you think to add the nuts with cranberries-- and pear?! This is amazing.” High on the powers of praise, I neglected to tell B that it is actually a fairly popular salad combination here in the States; I merely shrugged.

Much to my delight many a variety of the Waldorf salad is making its way onto menus across the country. Health conscious clientele are pushing the traditional mayonnaise-based dressing out of habit, calling for a more delicate covering, allowing natural tastes to break through.

The Waldorf salad’s namesake comes from the hotel it originated from: The Waldorf Astoria, in New York City. Created in 1886 by the maître d’hôtel, Oscar Tschirky, the original recipe calls for apples, celery and mayonnaise; it was later that walnuts were added to the mix. Since then, the salad has morphed into many variations.

I was recently taken to the famed Waldorf Astoria for a luncheon. The Waldorf salad was ordered out of respect for the establishment. The hotel now adds avocado to their salad, an excellent surprise. I unfortunately (or maybe happily) left that meal so stuffed I was in a food daze the remainder of the day. This meal was the catalyst to the birthday week of gluttony, ending with pants splitting along the leg seam. This incident will also cause me to take a more (somewhat) subdued and healthy approach to cooking this week, starting with this salad today.

There are too many modifications to suit specific tastes over the years that I will only say this: mix and match your favorite nuts, dried and fresh fruits, and lettuce bedding, and you will most likely produce a delicious, healthy salad. For my own, I usually stick with endive, pear and a tossing of good crumbly feta. Today I went without cheese and added radicchio (which resembles a small red cabbage with a slightly spicy taste). I also coated the salad liberally with Lot’s Wyfe New Zealand pink coral salt, and a sprinkle of Manicardi Balsamic Vinegar, my two new favorite kitchen additions. One can also make a light mustard-lemon juice-olive oil vinaigrette.

”WALDORF” SALAD
Serving Size= 2. Prep time= 5 minutes.
* 1 endive head, thinly sliced
* ½ radicchio head, thinly sliced
* ½ fennel bulb, thinly sliced
* 1 apple, thinly sliced (or pear)
* small handful of green beans, washed, trimmed and halved (optional; blanched or raw)
* ¼ cup dried cranberries (or other dried berry)
* ¼ cup chopped walnuts

1) Combine and mix the endive, radicchio, fennel, apple and green beans. Distribute onto 2 plates, sprinkle cranberries and walnuts on top. Drizzle with a good balsamic vinegar, or a homemade mustard-lemon based vinaigrette. Add salt/ fresh ground pepper to taste.
NOTE: Crumbled feta or blue cheese make excellent additions to this salad

Thursday, January 05, 2006

The Sweet Stink of Cheese


I must digress from my normal musings of my home-cooking adventures for this: Consider the stink.
I like cheese. I really do. It is fabulous: Stinky, sweaty, gooey cheese or firm, nutty and buttery-- cheese is just plain good.

Like most American families growing up, my refrigerator contained plastic— or rather, “American Cheese”. From time to time, we would head north to Wisconsin and pick up some good cheddar or swiss for a traditional grilled cheese. Every now and then, my mother would bless us with some brie. Delicious, buttery brie, which we would melt for a few seconds in the microwave and sop up with some good bread. I remember this distinctly. Most American children are not exposed to real cheese.

I began taking French language lessons in elementary school. I continued in junior high school, and like the other French language learners, I was provided a pen-pal in the 6th grade. The highlight of my school’s French program was the 8th grade: All French classes were given the opportunity to go to France and really apply our language skills. Even at this young age, I was consumed with wanderlust-- of course I went.

The fabulous parent-less journey was 3 weeks long. 1-½ weeks spent in Strasbourg with our pen-pals. We stayed with our pen-pal’s families, attended school, went wine tasting… Then 1 week in Paris for the traditional sites, and ½ week on the beaches of Nice, where most of us had our first topless experience.

My pen-mother was a fabulous cook. Every lunch, we sat down to a traditional French feast. The homemade cuisine featured many regional dishes, saturated in ham, they were pure and succulent. After every meal, my pen-father would yell to the son something I could never understand. Moments later, the sacred box of cheese would emerge. For the next 20 minutes, we gluttonously devoured our cheese course.

Years later, I found myself studying in Prague. Before my studies, I took some welcomed travels to visit my friend L who was living and studying in Paris. Everyday, we awoke late after a night out on the town. Next was the boulangerie for a baguette, then to fetch a reasonably priced local wine, and the favorite part of the shopping: the local market where cheese filled an entire aisle. L and I would walk up and down smelling all the unpasteurized goodness. We would return to the apartment, or the nearby park to a bench, and stuff ourselves silly. It was a deliciously cheese-laden time.

My friend A may attempt a claim that I do not like cheese. This is not true. A went through a macaroni period. (I must at this time point to the recent NY Times editorial on mac and cheese.) A, in fact, became an expert macaroni and cheese chef. She and her roommates tested and combined all varieties of cheese and added all sorts of sausages, hams, or beef to the mix. They perfected The gooey cheesey sauce. But I quickly became tired of the sometimes failed attempts (and the overindulgence of cheese) making claim that I could eat cheese no more…

Until a work holiday party at Artisanal. The sweet stink of this lovely restaurant. My coworkers and I walked in and were dutifully overwhelmed by the stench of this fabulous establishment. My boss at the time became giddy, standing on her tiptoes to spy the delights behind the counter. The uncultured men of the group complained they could have spent dinner in a locker-room for a more pleasant smell. But the fromagier in us knows when a bad stink means good.

I cannot recall the main course I ordered. I do remember the two savory, ribbon-like productions of our starter fondues as cheese dripped luxuriously from our forks. I will also reminisce on their famed cheese puffs (which inspired a much more simple recipe in me that is yet to come): Soft, fluffy balls of pure debauchery in the mouth. And of course, the final cheese platter. My boss and I ran to the counter to imbibe in cheese knowledge and select our desserts. Two tots in a toy store, we ogled, we salivated, we begged the master behind the counter for more of what we desired: cheese.

Today it brings me great pleasure to welcome Artisanal into my home. To my delight I hold in my possession two newly acquired stink bombs. The first, pictured on top is the Fium’Orbo. A goat cheese from Corsica that is “sheepy and persistent but not overly funky.” I say it is slightly salty, with a powerful and delightful afterglow that pairs well with dried fruit. Or, as D makes claim, “strong like Napoleon” (who was born in Corsica). At bottom the Flada, a Swiss cheese, I like to call The Brain. A much stronger flavor and “barnyardy aroma.” This one just melted as I indulged-- I traded my cheese knife for spoon as the stench filled my apartment. I suppose more of an acquired taste, D stated this one was more like “Napoleon’s stables.” His loss, more for me.

There actually is a proper way to eat, or prepare cheese:
1) Provide each cheese with one (more more) knives. This way cheese flavors will not intermingle when cutting.
2) Cheese should be served at room temperature to get the most flavor out of it. In other words, if you're having a party and cheese is involved, put the cheese out about 1 hour before guests arrive for full cheese flavor.

In the next few hours I will lose myself to cheese, adieu.

Wednesday, December 28, 2005

The Gourmand's Cheeseburger


Since leaving home to attend college—and remaining away—each visit back holds significance: My mother moved out the home I grew up in and into the city; My friends (now also in the city) have other friends outside of “the group” I am obliged to be with; In the spring, I returned with D in tow, to attend the wedding of one of my childhood friends-- When did we get so old? This recent trip home was marked by the holidays and upon further scrutiny, noticing how much my group of friends has matured-- in some ways.

I say “in some ways” because when we get together, really, we are the only ones that understand the jokes that make us laugh until we cry. We will beat a saying (or even a word) into the ground, and continue until it comes back to life. We recently gathered to create some pathetic looking sugar cookies (see picture at right). They tasted great, don’t get me wrong, but 5 bottles of wine down the line, well… we were decorating like we were 5 years old. We also will make it a point to travel to the suburbs for our old favorite restaurants and scoff in amazement (and hide) when we see people we know from high school (why is she at my restaurant?!). Then proceed to the local beach to run around the playground, even if our hands are freezing. But now, even though our gatherings are far and too few between, we also discuss our real fears, have real arguments, and no Di, I am not next on your marriage train.

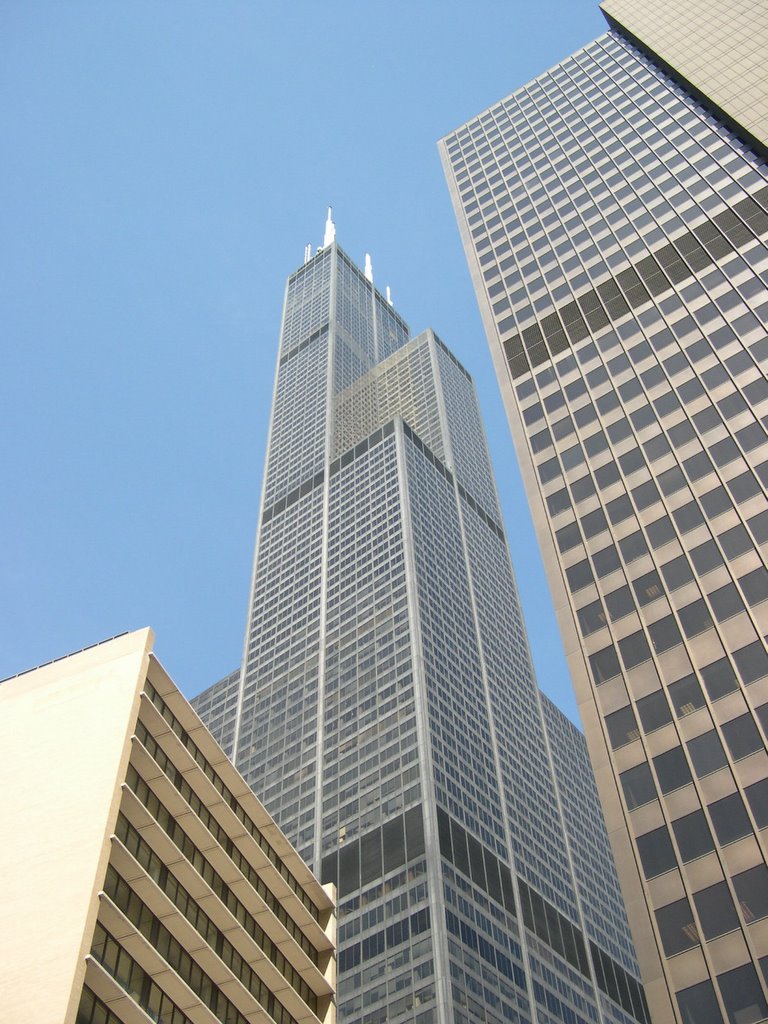
My dear city is home to a lot that makes me proud (other than my own brat pack of friends). I used to (and often still do) spout all the films and actors that graced “my” doorstep rather matter-of-factly: Home Alone was filmed 10 blocks from me. Bobbie Brown (the makeup artist) went to my high school, as did Moses—oh, I mean, Charlton Heston. Uncle Buck picked his niece up around the corner. Chris O’Donnell bought Robin figurines “for my nephew” at the toy store I worked at in high school. The Breakfast Club was based on my high school. And these are just my own suburban town’s claim to fame. The city itself is a jackpot for culture: Home of the blues, deep-dish pizza, the tallest building in North America, a thriving standup comedy/ improv scene, Chicago-style ‘dogs, the dear Cubbies with their ivy-laden walls, a breathtaking waterfront…. Chicago is the fabulous hub of the Midwest.

Indian for “field of onion,” or as I knew it growing up, “The Smelly Onion.” The city received its more recent nickname of The Windy City in the 1800’s. I have heard this phrase defined two ways: 1) Chicago is a very windy city (I have actually, literally, been stopped in my tracks by the wind of a late fall storm) and 2) because of all the politicians who blow their hot air through the city. I think it can go both ways.

But if you are in Chicago, onions should definitely be had, at least on a proper Chicago hot dog. And probably the best place to quench the ‘dog thirst is at Wrigley Field enjoying a Cubs game. Though it is a little cold for that now, and the ivy walls of one of the oldest ballparks in this country must be missed, head to any number of ‘dog joints that surround Wrigley (or nearby bars). My favorite is Demon Dogs, located conveniently close to my mother’s apartment, under the Fullerton El stop (others claim The Wiener’s Circle on Clark is top dog).

This time of year, I think it is more pleasing to snuggle up with a juicy burger and cold beer in front of a fireplace (also with onions, but caramelized) on some good pumpernickel or rye bread. Which brings to mind Chicago’s seedy past. I am not talking about Al Capone and his gangsters, booze and girls. I am talking about the meat industry highlighted in Upton Sinclair’s The Jungle. It has worked its way out thankfully, and a great piece of meat can now be found in this city. From steaks to ribs to burgers, some of my favorite memories include the smell of BBQ emanating from peoples’ backyards and balconies all over the city, regardless of the temperature.

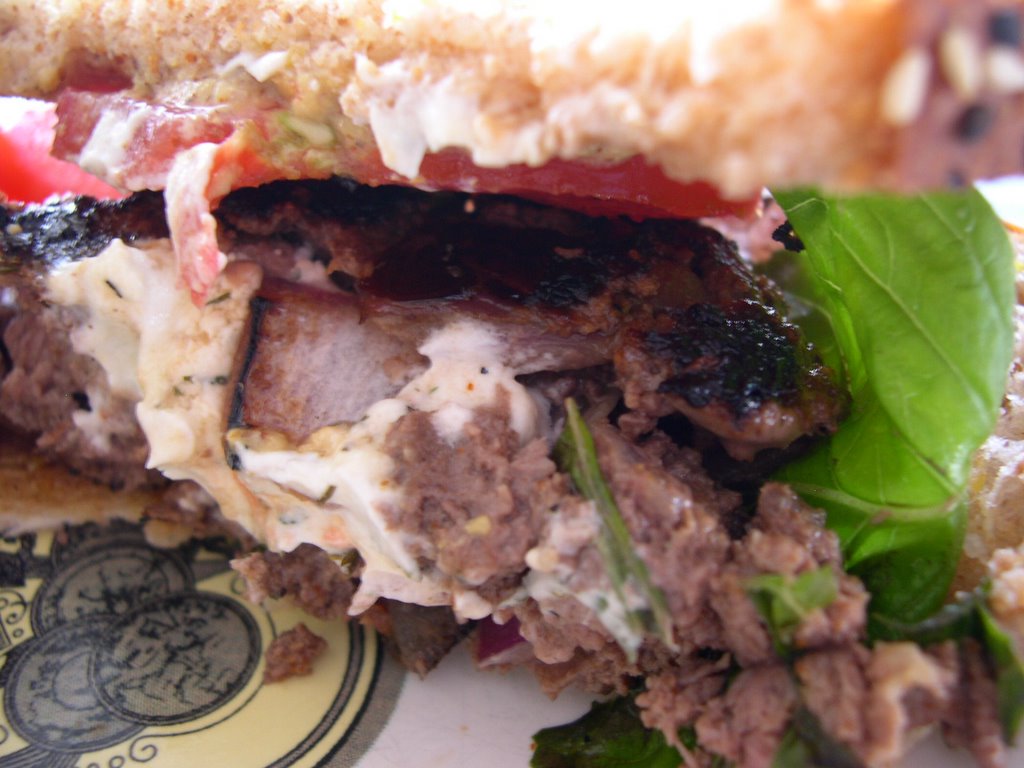
Below, my recipe for the cheeseburger all of us love, with the necessary (hidden) gourmand flare. These burgers are amazing on a grill, but can still be made inside on the stovetop. I produced this recipe a few years ago one humid summer’s night in New York. We were grilling at my friend A’s place and I took over the grill. I like to think it was not just the beer in people, but man and woman alike returned for seconds and thirds. They spouted their accolades: I should sell the recipe and retire off the wealth it would bring. But here, gratis, I offer you this fabulous burger that reminds me of my sweet home, Chicago:

THE GOURMAND’S CHEESE BURGER
Makes 4 burgers
1 lb freshly ground beef
½ cup red wine
2 cloves garlic, crushed
1 medium white onion, (1/2 chopped, 1/2 sliced)
¼ cup loosely packed fresh basil, chopped
½ tsp. cayenne pepper
4 dashes Worchester sauce
fresh pepper (to taste)
fresh goat cheese (I prefer this recipe with plain goat cheese. It can also be made with mozzarella or plain)
Honey
Spicy mustard
Fresh tomato
8 slices dark rye or pumpernickel bread

1) In a small pan on the stove, carmelize the sliced onion. To carmelize, keep the pan on medium-low heat. Add about 1 Tbl butter and cook the onions SLOWLY until they brown, sweetened to carmelized to goodness. Watch the cooking while you proceed with the burgers and stir periodically. Total cook time for the onions is about 20 min.
2) Mix the first 8 ingredients by hand (use only the chopped onion). Folding until evenly distributed.
3) (If using a stovetop, heat a sauté pan on medium high.) Break apart the mixture and form 4 thick patties.
4) Make an indentation with your thumb in the middle of each patty, about a 1inch diameter hole, halfway through the patty.
5) Place a spoonful of goat cheese into each hole. Using your fingertips, pinch the patties up and around to close the hole, hiding the goat cheese inside.
6) Place on hot grill or stovetop pan, cook until desired doneness (I cooked mine about 4 min each side on medium high heat).
7) While these are cooking, prepare the “buns”: lay out the 8 slices of dark rye or pumpernickel. Brush all 8 pieces of bread with about 2 tsp honey, spread mustard on 4 slices, place tomato on top of the mustard (you can also top this with 1-2 large basil leaves).
8) When meat is ready, place on “bun” and enjoy.

Note: The honey and goat cheese are a great sweet combination and delight playing upon the saltiness of the meat. When I recently made these, I had no honey. I substituted a small amount of maple syrup on the bread instead. It was a little sweeter, but worked well. I also ran out of onion and was unable to carmelize any. The burgers were still delicious without.

Wednesday, December 21, 2005

The Birthday


There comes a time in many peoples’ lives when heading to the bar is no longer very entertaining for the birthday. When I was in college at NYU, my good friends had a weekly beer spot. We were around 19-20 and found a dive bar in the East Village that did not card us. We loved that we were the youngest ones in there (or so we thought), we loved the faint smell of urine and puke, covered up by cigarettes (or so we thought). The found art objects installed on the wall were good conversation topics during the lax in our card games (we met for a round of Rummy 500 with a 1 pitcher purchase per person ruling). It was soon time for someone’s 21st birthday and we ordered a round of shots when our bartender, Rudy, came over to wish his congratulations: “How old are ye now?!” “21!” “But… you’ve been coming here for years?” “Thanks Rudy!”

2 years ago I paid $200 for an open beer bar for 2 hours. A great deal. There were so many beers stationed around the room one could leave a pint in one area, speak with a friend in another corner, and find beer interspersed throughout the trek for the taking.

But now, I like to be at least semi-conscious at the end of the night. I do not like waking up in the morning unable to do anything but mope. Yes, it is great fun to have a free night at the bar while your friend’s buy you drinks (really just seeing how drunk they can get you before you collapse into unconsciousness), but D and I both agree, a new kind of birthday should be celebrated this time around.

This past Saturday was D’s birthday. He called for a birthday dinner with his nearest and dearest. In his overzealous birthday glee, D set the hours of the night from 5pm to 4am—whether to come before one’s big night out, or end it at our place, was one’s prerogative. (Guests began arriving at 6pm and our last guest left around 3:30am.) Because of this time frame, I thought it best to provide the birthday goers with small nibbles of food to chat and eat the night away (and whoever would be there for the pumpkin cheesecake birthday cake would get to indulge). With this, we could also prepare just over half the food initially, and as others come, prepare the remainder. Without further ado, the menu for the curious:

• CHEESE PLATTER. Key to any gathering. Since there would be a lot of other food I only bought 3 varietals: one creamy and nutty cow’s milk (I think it was Thom), one salty cow’s milk (I forget the name, something like Paeve), and one super-aged, creamy, delicious goat’s milk (Humbolt Fog). Spectacular. Served with grapes.

• JALEPEÑO CHEESE POPPERS. These were on the initial menu I posted. They are really good and easy to make: egg whites, parmesan and jalapeños. They are best eaten warm, right off the oil. We decided to forgo these for…

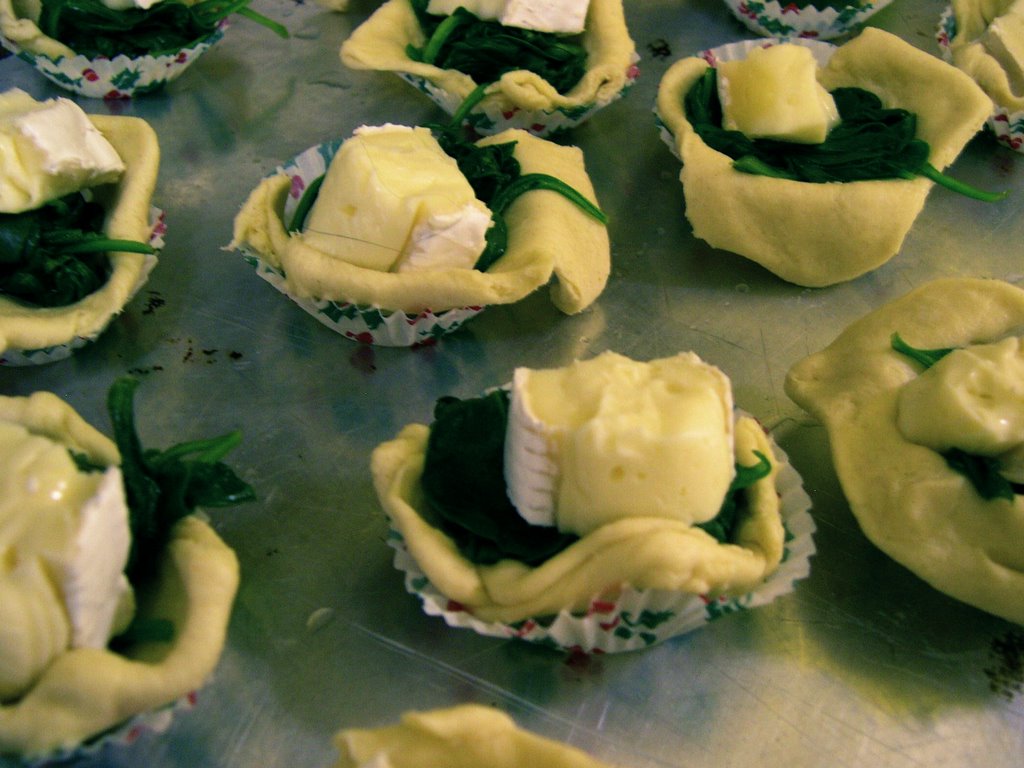
• BRIE BITES. I originally called this dish Brie Bombs, but have changed it for sensitivity purposes. These tiny morsels are so rich and gooey. The last “Halloween” or “Autumnal” party we had I made one giant brie-spinach-flaky pastry bake. It was gone in seconds. I decided this time to make individual “brie bites”:
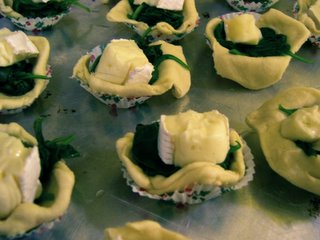
BRIE BITES
Makes about 18 pastries.
1 Medium wedge of brie, enough for 18 bite-sized pieces.
1 large handful (or 1 bunch) of fresh spinach, washed, drained and sautéed.
1 pre-made croissant dough roll.
1) Preheat the oven to 350F. In a saucepan over medium-low heat, sauté the spinach 2-3 min until wilted. While the spinach is going, cut the brie into about 20 bite-sized pieces.
2) The pre-made dough should be perforated into triangles. Pull apart the triangles carefully and tear or cut each triangle into two smaller triangles. Place each half-triangle into a mini cupcake liner or mini cupcake pan.
3) Place a small dollop of spinach onto the dough, then a chunk of brie. Assemble all bites. Using the tips of your fingers, gently pull the dough around the spinach and brie and pinch off at the top to close. They should look like dumplings.
4) Bake for about 15 min until tops are golden and brie begins to ooze out of the bites. Serve up hot (though people will eat them when they are cooled too).
NOTE: You can assemble the bites ahead of time and refrigerate. Bake them as guests start to arrive.


• VEGETARIAN THAI SPRING ROLLS. My mother recently sent me a package of rice noodle spring roll dough. I figured I would use them up for the party and whipped up a batch of spring rolls. Not so easy. These are fairly labor intensive, but everyone really enjoyed them, especially the peanut sauce accompaniment. I bought what I thought to be spring roll filling and combined ingredients that I thought would work for the sauce. It took a few trials to get these to hold together and work properly. Trial and error for the first time dish…
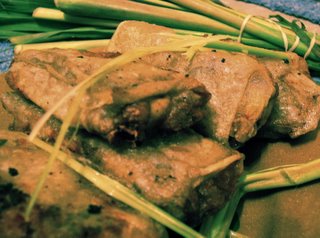
THAI SPRING ROLL W/ PEANUT DIPPING SAUCE
Makes 6-8 depending on your damage control
SPRING ROLLS
2 carrots, sliced julien (make these as thin as possible so as not to poke through the roll)
1 handful of Asian sprouts (the white-clear varietal)
1 large handful shiitake mushrooms, sliced julien
½ cucumber, sliced julien
1-2 Tbl soy sauce, depending on taste
2 Tbl sesame oil
1) In a saucepan, sauté all ingredients except for the cucumber about 5 min.
2) In luke-warm water, place the spring roll shells and allow to get soft and pliable.
3) Place a small helping of filling onto the center of the shell and add some cucumber strips, fold 2 opposite ends onto center, then roll dough tightly into a thick finger shape. Continue until all spring rolls are filled.
4) CAREFUL: In hot oil (I used vegetable), fry the spring rolls until shell hardens and hold together. This is where I had some casualties. Once done, place on a paper napkin to absorb some oil.


PEANUT DIPPING SAUCE
1/3 cup peanut butter (I used chunky)
1/3 cup soy sauce
4 Tbl sesame oil
2 tsp curry powder
1) Mix all ingredients well. I added more soy sauce or oil depending on the thickness to thin this sauce out so I stopped measuring.


• AVOCADO WRAPPED IN PROSCIUTTO. Thinking about these makes my mouth water. They are too easy to make and are so rich and decadent. I finished them off with a splash of lime juice. Everyone thought this a perfect hint of flavor to compliment and separate the flavors of the prosciutto from the avocado.
AVOCADO WRAPPED IN PROSCIUTTO
Makes 32 pieces.
2 avocados
½ lb prosciutto (I bought a fairly inexpensive variety I found at my local supermarket instead of the Italian deli)
½ lime, juiced
1) Slice avocadoes in half lengthwise and remove pit. Slice each half into 4 long spears, then each spear in half
2) Cut each sliced piece of prosciutto into half. Wrap around avocado and secure with a toothpick
3) Sprinkle with lime juice. (The lime juice also helps the avocado from aging and turning brown)


• MINI LATKES. It is just about Hanukah and for some reason I was craving latkes. I never really liked them growing up. It was the song I learned at temple: “Fry them in oil, wrap them in foil! L-l-l-l- latkes, golden brown! L-l-l-l latkes eat ‘um down…” Anyway, I could never eat them after that song—which I’m sure was created to help us young Jews remember tradition and food and eat it all down (and frying in oil allows us to remember the oil burning bright for the 8 long nights of Hanukah). I remember eating latkes that were slightly mushy (more like fried mashed potatoes). I think they are best fried crisp and flaky, or as D said, “why are we making flat, flaky fires?” These were tasty morsels. I really wanted to prepare them with some fresh chunky cranberry sauce, but I ran out of time (and had no cranberries). So if you make them, do the cranberry sauce and let me know how they turn out. I got this recipe from my newest gifted cookbook Jewish Cooking In America.
MINI LATKES
Makes Makes about 2 dozen latkes
2 lbs russet (or Yukon Gold) potatoes, peeled and grated
1 medium onion, grated
½ cup chopped scallions
1 large egg, beaten
salt/ fresh ground pepper to taste
1) Peel potatoes and put them in cold water. Using a grater, grate potatoes and onion. Place in a fine-mesh strainer or tea towel and squeeze out all the water over a bowl. The potato starch will settle to the bottom; reserve that after carefully pouring out water.
2) Mix potato and onion with the potato starch. Add scallions, eggs, and salt and pepper.
3) Heat a griddle or non-stick pan and coat with a thin film of vegetable oil. Take about 2 Tbl of the potato mixture in the palm of your hand and flatten [this is easily done by squeezing the potato mixture tightly between your two palms]. Place the potato mixture on the griddle, flatten with a large spatula, and fry for a few minutes until golden. Flip the pancake over and brown the other side. Remove to paper towels to drain. Serve immediately.


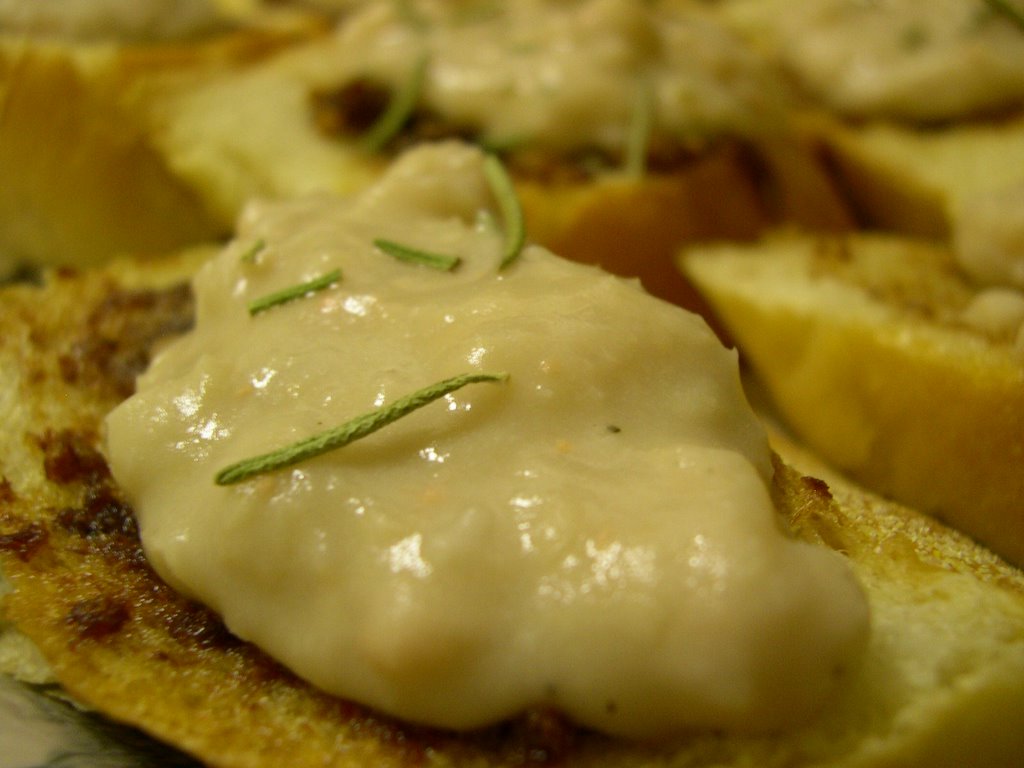
• WHITE BEAN BRUSCHETTA. This was my favorite. Salty, rosemary good. They were also tremendously easy to prepare. People were initially afraid of them. Yes, they do look slightly strange. But wow, delicious and savory. I had leftover anchovies from my anchovy garlic bread and thought to put it to use as a base for this bruschetta. The result was perfect.
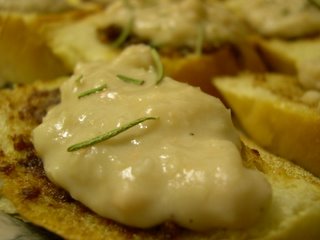
WHITE BEAN BRUSCHETTA
Makes about 20 pieces
1 loaf good French or Italian bread, sliced thin and at an angle
4-6 anchovies, drained of oil
4 garlic cloves, crushed
5 Tbl olive oil
1 Tbl butter
1 can white (Northern) beans, drained
1 Tbl rosemary
1) Preheat oven to 325F. Slice the bread and place on a baking sheet.
2) In a small sauce pan, combine 3 Tbl olive oil, butter, garlic and anchovies. Smash the anchovies with a fork or spoon and swirl, creating a paste. Cook for 2-3 min. Using a cooking brush, spread the anchovy paste onto the bread. Bake for 8-10 min until bread dries out and turns slightly golden.
3) While bread is baking, prepare the beans: combine beans, 2 Tbl olive oil and the rosemary. Using a handheld blender (my old safety) or a food processor, pulse the mixture (like hummus), leaving slight chunks, but a mostly creamy consistency.
4) Top each piece of anchovy dusted bread with beans and sprinkle some rosemary on top.


• SOUR CREAM DIP W/ VEGETABLES. Very simple. This was a last minute thought as a quick and dirty dip for guests to munch on while things were cooking. No need for a real recipe: 1 packet dry soup mix (like an onion soup mix), 1 12-oz container of sour cream. Mix, refrigerate for 1-2 hours, serve with sliced veggies. It is very good and people will be amazed how easy it is.

• MINI CRAB CAKES. These were okay. In our pressed time chunk crab meat could not be found—go figure. So canned crab, which looked more like pink tuna was bought. They were also a little spicy (which some really enjoyed)—compliments of chef D and his zeal for Tabasco. This recipe is from the Joy of Cooking, 1975 ed.
MINI CRAB CAKES
Makes about 12 2-inch cakes
1 2 Tbl butter
2 Tbl onion, chopped
2 eggs, beaten
½ cup cream
½ cup bread crumbs
2 cups lump crab meat, chopped
½ cup celery, finely chopped
½ tsp dry mustard
2 Tbl parsley, chopped
½ tsp salt
½ tsp paprika
1) In skillet over medium heat warm butter. Sauté onions in the butter, about 5 min.
2) In a medium-sized mixing bowl, combine all ingredients (including the onion- butter mixture). Refrigerate for 1 hour.
3) Warm a skillet over medium heat with 1 Tbl butter. Form small patties and brown both sides, about 5 min each side.


• PUMPKIN CHEESECAKE. I know this recipe keeps coming up. It must be my recipe of the year. It is tremendously delicious, creamy, pumpkiny and good. I topped this off with a drizzle of maple syrup and walnuts. Recipe does not need repeating, it can be found here.


Sunday, December 11, 2005

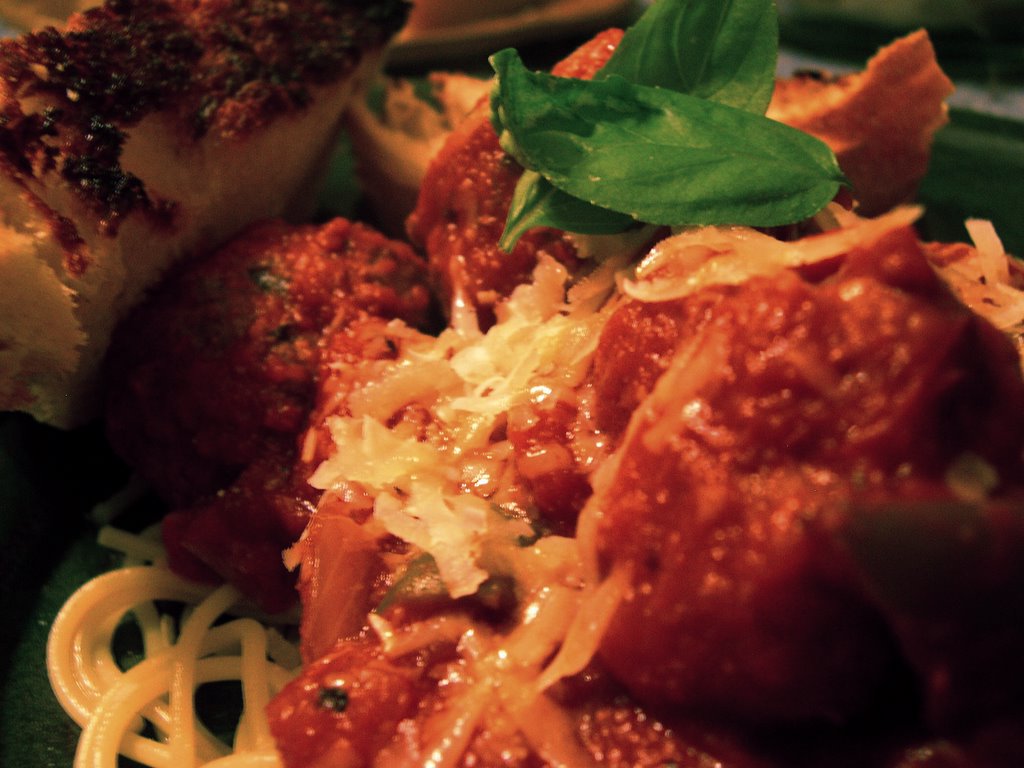
Classic Spaghetti & Meatballs w/ Anchovy Garlic Bread


D’s friend Jeremy recently commented how easy it is to make cranberry sauce. The same goes for a good tomato sauce. If you are willing to chop a few vegetables, it is remarkable how delicious a homemade classic tomato sauce can be (and how easy it is to create variations on the original).

Friends will eat your sauce and ask what brand it is. They will marvel at the chunks of vegetables they can actually taste. Most importantly, they will secretly love you for not killing them with the over abundance of salt that is found in most jar varieties. You will love them back because they will remain in your life longer—unless of course, you no longer desire this, I suggest any high-salt jar variety.

I will sometimes make this sauce with meat—otherwise known as Bolognese. But oh! To have giant meatballs doused in sauce looming on your plate! It makes you want to sing out—On top of spaghetti/ All covered with cheese/ I lost my poor meatball/ When I had to sneeze… But these meatballs, trust me, will be in the belly before anyone can sneeze. (I was eating leftovers today at lunch and was beyond stuffed. The glutton and greed in me pushed on, fighting to finish the last meatball before the plate was passed to D for completion. Who promptly asked, “where’d the meatballs go?!”)

To swank up this classic meal, aim was taken at the garlic bread. Tease peoples’ palates by adding anchovy to the butter/ olive oil mixture. There is no offensive taste that an anchovy can sometimes offer. For many, it is a salty afterthought that will leave them to wonder “what was that delicious spice?”. This bread is so good and easy to make I’ll sometimes prepare only this for lunch. My friend A loves it so much that whenever she comes over we make a big loaf of this as a snack. My vegetarian friend B loves it so much she breaks her will just for this occasion. And you didn’t garlic bread could get any better.

I will have to say the best part of the spaghetti dinner is the leftovers. I love warming spaghetti on the stovetop the next day. The sauce cooks into the noodles creating a single entity. Rather than sauce on noodles, the dish unites. What was once a delicious spaghetti and meatball becomes a hearty, home inducing memory…

SPAGHETTI & MEATBALLS w/ ANCHOVY GARLIC BREAD
Serves 6. Cook + Prep time= 40 min

THE SAUCE
1 cup button mushrooms, sliced
1 medium onion, chopped
1 bell pepper, chopped
4-5 garlic cloves
5-6 black olives, chopped
2 Tbl olive oil
1- 5oz can no salt added tomato paste
1-15oz can stewed (or diced) tomatoes, no salt added
1-28oz can crushed tomato, no salt added
2 Tbl brown sugar
2 bay leaves
10 leaves fresh basil, chopped
1 tsp oregano
fresh pepper/ salt to taste
1) In a saucepot on medium heat, warm the olive oil. Add onions, garlic and mushrooms. Sauté 10 min until onion is soft and mushrooms reduce and brown a little. Add olives and pepper, sauté 5 min. Add basil, oregano and stir. Add 3 cans of no salt added tomato sauces. Add bay leaves, brown sugar, salt/ pepper to taste, stir. Reduce heat to medium-low and allow to simmer while you prep the meatballs and noodles. Allow to cook at least 20 min.

NOTE: mouthwatering plays on this simple recipe: option 1- Add ¼ cup chopped sun-dried tomatoes to the sauce. Option 2- Blacken some red peppers in the oven. Remove skin, chop and add to sauce. Option 3- Using 5-6 lbs Roma tomatoes, cut into quarters and place on a non-reactive bake dish. Preheat oven to 450F. Add ½ cup olive oil, ½ cup balsamic vinegar, 10 garlic cloves. Roast for 40 min until tomatoes begin to blacken. Use this in lieu of the canned tomatoes. Option 4- Add meat with the onion/ garlic/ mushrooms to create a Bolognese sauce. Option 5- Use 2 portabella mushrooms instead of the button (or meat). Option 6- Add 2 cups chopped basil to create a pesto-tomato sauce.


MEATBALLS
Makes about 15 balls
2 lb meatloaf meat (veal/ beef/ pork)
1 medium white onion, chopped
¼ cup fresh parsley, chopped
½ tsp sage
2 garlic cloves, crushed
1 egg
1) In a mixing bowl, combine all ingredients until evenly distributed. Warm a skillet on medium heat with 2 Tbl oil.
2) Form 2-3 inch balls. Add to skillet and allow to brown on all sides, about 10 min. Once done, add to tomato sauce to warm through and absorb some tomato flavor. Let sit for at least 5 min before serving. (You can make your noodles now according to the package)


ANCHOVY GARLIC BREAD
Makes one loaf.
1 loaf good Italian bread
2 Tbl unsalted butter
2 Tbl olive oil
2-3 anchovies
2-3 garlic cloves, crushed
1) Cut loaf in bread lengthwise (a la hamburger style per Kindergarten terms)
2) In a small sauce pan on medium heat add all ingredients. Using a fork, mash up the anchovy as butter melts and stir everything together. Once garlic starts to sizzle, remove from heat and brush onto both sides of bread. Close bread, cut into pieces (cut so the bottom of the bread still holds together but pieces can be easily torn off. Sit on a baking sheet and broil 5-8 min until lightly golden, sizzling and delicious.


ORDER OF PREP:
1) Start the sauce first. While the onion/ garlic/ mushrooms warm, mix the meatball ingredients and form balls.
2) Once you add the cans of tomato for the sauce, cook the meatballs.
3) While meatballs cook, prepare the anchovy garlic bread filling.
4) Transfer meatballs to sauce. Begin noodles (unless fresh then wait until last min to prepare). Brush filling on bread and cook.

Sunday, November 27, 2005

Thanksgiving Feasting


As I debarked the plane in Chicago this past Tuesday, my mother surprised me: "So I thought you can drop your things at home, create a menu for Thursday, and we can go shopping?"
"What? You haven't done anything yet?"
"No, I thought you could help out this year."
What she really meant was, "Oh, I thought I would enslave you to do pretty close to everything this year."

To answer Mr. Shinn, I think having a large feast for Thanksgiving is okay. Yes, you cannot eat everything, you will be bloated for days, have leftovers for weeks to come, but it is nice when everyone brings an item to share (no one did this in my family this year, instead they brought wine) you will also have all your favorites present. After all, it is the traditional vision of Thanksgiving many of us hold historically correct, no? Besides, the variety would be a spectacle in and of itself. But I will say, a small feast can also be a delicious one.

My family awaits the leftovers to make our Latvian Pancakes and turkey soup from the carcass (and whatever meat cannot be picked clean). My high school friends (who mostly live in Chicago) await the leftovers at my house for a tasting of what was missed-- even when they are "stuffed" from their meals and "cannot fit another bite in," somehow most of them manage to make room for what lies in my family's fridge.

This year, my mother reversed roles. While she checked my proceedings to "make sure they are not poisonous," prepared the turkey and two-day gravy (which she claims to be the most essential part of the meal), I cooked the remaining choice items for my aunts and cousins who would soon arrive. Without further ado...

The Thanksgiving Menu
Hors'doeuvres
** cheese platter with olives and fruit
** salad (much like the previous post of the "Play on the Mediterranean Classic"
** butternut squash soup

Entree
** mashed sweet potatoes
** garlic mashed potatoes (leaving some of the red skin on for color)
** steamed asparagus in a black truffle vinaigrette
** oyster stuffing (not very heavy, no fishy taste, pure decadence)
** (two-day) mushroom gravy (from www.cuisineathome.com, December 2004)
** turkey stuffed with orange, lemon and an herb bouquet

Dessert
** cranberry macadamia white chocolate chip cookies
** pumpkin cheesecake
** A good, inexpensive, Washington Reisling


If any recipes not posted are desired... please call out.

The Process:
Tuesday: Make cranberry-macadamia-white-chocolate chip cookies
Wednesday: Make butternut squash soup, pumpkin cheesecake, and gravy. Pre-cut and mix all salad items (except for the avocado)
Thursday: Prepare stuffing and bake before putting turkey in the oven. Stuff turkey and put in the oven. Put cheese out 1 hour before guests arrive (cheese should be served at room temperature). Cut avocado and add to salad before ready to serve. 45 min before eating start potatoes. Prepare vinaigrette for asparagus. 5 minutes before eating, lightly steam asparagus. Dessert is already complete.

Saturday, November 26, 2005

A Play on a Mediterranean Classic


In my younger days salads were a despicable nutrition source (if they could be called that). They usually composed of the basic food items I most loathed-- vegetables. Or even more usual, they were made in the same boring combination day in, day out: iceberg lettuce, tomatoes and cucumber. Can people have less imagination? And how can a restaurant dare push this off as a "house salad" making people believe there is actually nutrition value in this salad (iceberg lettuce and cucumber are essentially water-logged with few vitamins) and people are receiving their daily vegetable intake? I fail to remember, did people actually feel better about themselves after eating one of these poor excuses for a salad.

I am now older, and I like to think wiser. I have come to understand a few of the essential vitamins my body needs, and I have come to understand combinations that taste good-- who knew fruits, vegetables and nuts are delicious? And how many combinations can there be...??

This Thanksgiving, when I asked my brother to aid in the food production (did I mention I made everything this year?), I almost fell to the floor in convulsions when he turned to the iceberg lettuce, began reaching for tomatoes, and announcing he could not find the cucumbers. No, no, no! (No worries, I set him on the right path.)

Saturday I put myself in charge of the luncheon salad. It was delicious, crisp, crunchy, sweet, salty, with each item perfectly indecipherable from the next. I make these salads in various fruit-cheese-nut-greens combinations depending on my fridge's availability and you can do the same. This was today's:

EASY GOURMET SALAD
Serves 4. Prep time= 10min
2 heaping handfuls of mixed greens
1 ripe avacado, sliced
1 ripe pear, sliced
8 dried apricot pieces, chopped
small handful of pecans, whole or chopped, candied or not
top with crumbled feta (or goat or parmesan)
3 sprigs fresh thyme (optional) sprinkle on salad


I covered this with a simple dressing to enhance the flavors:
1/2 orange, juiced (or lemon)
4-5 dashes of hazelnut oil (or olive oil if not available)
dash salt
fresh pepper to taste

Either juice/ throw all over top or mix separately and put over salad when ready to eat.

Saturday, November 19, 2005

Lasagna Mama

Pasta has received a bad rap recently. This is especially true when we discuss lasagna because it can be high in carbs, contains dairy, and is quite heavy. But pasta in some form probably receives note on most peoples' top ten food list. We must be honest with ourselves though: Lasagna peaks the pasta pyramid. It is simple to make. It can be created in a slew of different ways. It is very tasty. In complete, if made properly, it is a satisfying meal in itself. With Atkins now passé, and research declaring that dairy 3 times a day actually maintains a healthy motabalism why not make a lasagna to keep you warm and happy in the cooling weather?

As many people now know, pasta was invented in China. Brought west, it was soon taken on as a favorite in many lands. The dish, lasagna, as we know it might even be Chinese in origin (cookbooks have been found pre-dating any Greek or Italian description of a very similar dish). But the word Lasagna itself may be Latin in origin, "lasania,", "cooking pot" or classical Greek "lagana," "a type of unleavened bread not unlike pasta". In today's vernacular, "lasagne" is plural for the singular slice of "lasagna", which is how most Brits and N. Americans now refer to the dish. You call it lasagne, I call it lasagna-- either way, eat it up.

Lasagna can be made many ways: Traditional, with pasta and meat or vegetarian. One can also substitute the pasta for eggplant, zucchini, or a combination of both (meat or no). One easy shortcut to keep in mind when using pasta is that there is no need to cook the noodles before you assemble your lasagna: Put a thin layer of sauce on the bottom, cover with pasta, and continue as normal. The water from the sauce will cook the pasta perfectly in the oven. It is also great because the pasta will not fall apart as easily and you can break the pieces to size.

I made my lasagna with zucchini and meat. I put my basil plant to use and made fresh basil sauce-- okay, I bought plain, no salt/ no flavor tomato cans and added my own flavors (it is less salty this way and I know exactly what is going into the lasagna). But I have made it before from fresh tomatoes and this too is a great treat. I used fresh mozzarella, fresh ricotta and good parmesan. Using good, fresh cheese is a little more work but really adds to the flavor. This recipe is an Atkins lover dream (or for someone, like me, who ran out of pasta noodles). The best part is that there is plenty leftover for the rest of the week or to cut it up, wrap it in foil and freeze for a needy day or working lunch.


ZUCCHINI-MEAT LASAGNA
1 cup fresh ricotta, grated (you can buy 1/4 lb of the cheese and use all or save some for other dishes)
1 cup fresh good parmesan, grated (not that Kraft stuff)
1 good size fresh buffalo mozzarella, sliced
1- 15 oz can no salt/ no flavors added tomato sauce
1- 8oz can no salt/ no flavors added tomatoes, chopped
1- 6oz can no salt/ no flavors added tomato paste
1 lb good beef, ground (you can buy good meat at the butcher and have them grind it fresh for you)
1 medium onion, chopped
2-3 cloves garlic, pressed
6 white button mushrooms, chopped
6-8 sun-dried tomatoes, chopped
10 leaves fresh basil, chopped + some whole
5-6 kalamato olives, pitted and chopped
salt/pepper to taste
5 medium zucchinis, ends cut off and sliced long about 1/4 inch thick

The Sauce:
1) In a good sized pot, over medium heat, add beef (you do not need to add any butter/ oil. The fat from the meat will be enough), onions, mushrooms and garlic. Cook about 10-15 min until the meat and mushrooms are browned and the onion is clear and soft, stirring occasionally.
2) Add sun-dried tomatoes, olives and 10 chopped basil leaves. Cook about 3 min, stirring.
3) Add the tomato sauces.
4) Bring sauce to a light boil then turn down heat and allow to simmer about 10min (more if you want a thicker sauce)

Lasagna Assemblage:
1) Preheat oven to 350F. Ladle a thin layer of sauce into the bottom of 11 x 9 x 3 inch pyrex (or other non reactive pan). Cover bottom of pan with a layer of zucchini, a thin layer of the parmesan and thin layer of the ricotta.
2) Add layer of sauce, zucchini and cheeses again. Continue until layers reach top of dish. Finish off with one last layer of sauce and zucchini if you have any left. Then lay out the sliced mozzarella and place one basil leaf on each piece of mozzarella.
3) Create a foil dome using 3-4 toothpicks poking out of the mozzarella. Put in oven on the center rack for 30 min. (You may want to place a cookie sheet below to catch drippings.) Remove toothpicks and tinfoil and bake another 10-15 min until mozzarella is lightly browned on the edges (it will look like roasted marshmallow).

Eaten with a salad this is a fabulous feast. As you can see from the results, this was an excellent lasagna that kept its' form very well. It tasted even better than it looks.


View Stats
Rankingblogs.com: Defining your blogs worth..