Showing posts with label comfort food. Show all posts

Sunday, March 11, 2007

Brunch Braised Eggs


*Just Braise has moved. Please visit me at www.justbraise.com!*

Happy Daylight Savings Day if you live in the US in one of those cities that enjoy torturing inhabitants’ internal clocks with bi-yearly time changes. I am embracing bags under the eyes today to push through the pain. Remember to go to your computer maker's homepage and download the necessary plug in to update your operating system.

Thank you to everyone who participated in the last giveaway. As more suppliers come to me offering samples I will attempt to make them available to you so keep posted! Another offer coming up shortly…

Some of you may have noticed that JustBraise.com appears different than the current Blogspot site you are reading. I am working with a brilliant designer now to modernize, slim down and in general make clear what I can offer you. I am not fully aware of the final vision, but please be patient in the future if either site experiences loading problems or content is missing. I promise it will not last too long.

All that being said… brunch!

Here in NYC, yesterday blessed us with a hint of Spring. I took a short walk outside to enjoy the mild weather and even went so far as to open a window to let a refreshing breeze pass through (read: to cool the kitchen). Spring weather in NYC reminds me of brunch. Seemingly every New Yorkers' favorite weekend pastime when the weather finally reaches mild temperatures, outdoor seating emerges to take the place. Sidewalks are no longer crowded with bushy jackets but chairs overflowing with revelers of their leisurely 2pm brunching hour.

In the suburbs and many other cities, I seem to recall brunch falling around 10 or 11 am. For whatever reason, in New York City, the later you are able to make it to brunch the more it says “I don’t care, I am spending today drinking bloody marys.” For whatever reason, if your time is being spent brunching, your waste of a day is perfectly justified (it also says, “that’s right, I was at the secret after hours location until 6am, pssshhhh.”). One will often find brunch menus extend well past 4pm, overlapping with those early bird dinner specials.

In honor of brunch, my slightly early awakening this morning and the change of the season, I present this decadent dish. Soon it will be too warm to enjoy such a luxury— When a hot breakfast is about as appealing as that industrial air conditioner’s exhaust hitting your face on a 90 degree day in what seems to be 100% humidity and the soles of your shoes are melting and the buildings around you create a fabulously effective canyon for retaining heat and you become increasingly bitter at those who were smart enough (or simply have the means and schedule) to flee the City for the duration of the summer and bask in the cool waves of the ocean. No bitterness, I have my bucket garden to tend to.

On the other hand, this recipe may allow you to forget the beach and the heat of the summer and bask in the rich joys of winter.

BRUNCH BRAISED EGGS
Serving Size= 2. Active time= about 8 minutes. Cook time= about 10 minutes.
* 1-2 tablespoons butter
* 1 bunch spinach, washed well and drained
* ½ cup heavy cream or milk
* 2 tablespoons ricotta cheese
* 1 tablespoon parmesan
* 2 tablespoons cognac or brandy
* salt/ pepper
* 2 eggs

1) Preheat oven to 400F. In a large sauce pan on medium high heat, melt the butter. Once bubbling, add the spinach, cover and allow to wilt, about 3 minutes. Stir to bring wilted leaves to the top and complete wilting.
2) Add cream, ricotta, parmesan, salt and pepper. Bring just to a simmer, stirring often, about 2 minutes. Add cognac and return to simmer. Taste the broth and add more salt/ pepper if needed.
3) Divide the spinach and cream mixture between two oven safe bowls, reserving about 2 tablespoons of the cream-cognac mixture. Crack an egg over the top and add the remaining cream-cognac sauce.
4) Place the bowls on a cookie sheet for easy removal. Bake for 10 minutes, or until whites just set for runny yolks, longer for firmer yolks.
5) Serve warm with buttery toasted bread.

Saturday, March 03, 2007

Revelations Part I


*Just Braise has moved. Please visit me at www.justbraise.com!*


I apologize, but prompt drinking was essential...

Almond milk (homemade) + chocolate ice cream (Breyer's) = an amazing milkshake

Okay, so it's a little icier than creamy, but flavor makes up for it. If there is an almond infused chocolate bar out there please tell me. When Hershey's begins to make almond-chocolate syrup for my chocolate milk don't even attempt to hold me back.

I made one small milkshake for myself and all D heard was, "Oh gosh."
"What?"
"This is so good."
"Gimme. [Taste] Oh... this is so good. Make me one?"

As I've been going through The Cook's Book, I've been making random foods if I have ingredients on hand. In the Fruits & Nuts section I found a simple recipe for almond milk:

1 part blanched and skinned almonds (you can buy them like this, they are the all white, slightly unappetizing looking ones.
4 parts boiling water

1) Grind almonds in a food processor until they resemble course breadcrumbs. Put in bowl
2) Add boiling water, cover and let steep for at least 30 minutes.
3) Pour the mixture through a fine mesh strainer, press the ground nuts to release all the milk

It is good like this but I added a touch of honey and a dash of pure vanilla extract to spike the senses.

I have bought almond milk before and love it, but often find the storebought kinds too sugary. This homemade recipe is so simple and far superior. D and I used this milk in coffee this morning, deliciously nutty. It would be great in oatmeal. But tonight it hit peak flavor mixed with chocolate ice cream. Pure loving decadence.

Sunday, February 25, 2007

Cinnamon Date Coffee Bread


*Just Braise has moved. Please visit me at www.justbraise.com!*


Pictured above is a little piece of a hopefully sweet weekend (now if I win my office Oscar pool jackpot…).

Like most people, I presume, weekends are the time for me when some good cooking/baking can get under the belt. I have the leisure to wander the fruit/ veggie stands, fight for a spot at the butcher and joke with the fish monger about freshness. If it’s really cold outside a soup will be made and stored away for the week to come. If it’s mild enough to take my time shopping (no car), I have the opportunity to really let my mind wander, without worrying about exposed fingers falling off from the cold.

It is some of the worst days though, when the last thing I desire is to step outside. Not even my thick flannel pants I wear camping in the fall or my warmest sweater and thick mittens can convince me into the icy voyage. It is these days where the cookbook is a dear friend and a minimalist “whatever’s in the cabinet” recipe comes to the rescue.

It was on one of these bitter days that I picked up one of my new cookbooks and gave it a go.

I recently received a copy of The Cook’s Book from the publisher for review. An initial flip through offers some amazing color photos, many step-by-step, of recipes. It’s a great overall technique book that is easy to follow for a more experienced chef (I would not recommend it to a beginner). Much of what is inside is basics, how to’s and general tips and tricks of the trade—like how many minutes is a medium rare steak again? How do you fillet that fish? Yet many of the recipes can get very challenging, be it time consuming, a difficult step here or there, or a hard-to-find ingredient. (A more involved review in the weeks to come.)

That being said, my initial plunge into this book’s recipes have been extremely rewarding with many more to come. The first challenge was honey-lime truffles. These truffles were an absolute surprise-- who knew I could make such delicious truffles? They were silken and luxurious, sweet and sour and a true Valentine treat.

The above pictured specimen was the next step with this book. I was looking more for a bread, but as I said, it was cold outside. I had to stick with what I had in the cabinets. The dates were a recent birthday gift, I was good to go.

D is a huge fan of cinnamon rolls. Mind you, not the ones that drip with a sugary white glaze, but straight up cinnamon rolls, raisins optional. They are the ones where the deep twisted chasms are filled with gooey spice and the bread is dense, yet sponge-like in a perfect marriage. In fact, D considers me quite the curmudgeon because I refuse to let him have one every day. If I delight him with a purchase there is usually a portion of a follow up conversation that goes something like: “you never let me have the things that I love,” while cinnamon-sugar oozes between his fingers and sticks to his beard he’ll claim “I’m just saving some for later,” instead of wiping himself clean. I am a cruel person.

When I saw this recipe for cinnamon date bread I knew it was the perfect merge of D’s love (cinnamon rolls), ingredients (all on hand in the cabinet) and my favorite (the use of liquor in cooking). The perfect breakfast. While my final version is not nearly as clean looking as the version pictured in The Cook’s Book, I can only assume that it is far better in sweet gooey purity. Below is the recipe as it appears in the book.

CINNAMON & DATE COFFEE CAKE
Serving Size= 1 bread; 4 people. Active time= about 30 minutes. Cook time= 30 minutes.
Makes 1 Bread
* 2-½ tablespoon unsalted butter, softened, plus extra for the mold
* 1-2/3 cups all purpose flour
* 2 tablespoons granulated sugar
* 2 teaspoons baking powder
* 1 extra large egg
* 5 tablespoons milk

For layering the dough
* 6 tablespoons brown sugar
* ½ heaped cup roughly chopped dates
* 3-½ tablespoons unsalted butter, softened
* 1 teaspoon ground cinnamon
* 1-½ tablespoons dark rum [brandy works well too]

1) Preheat oven to 400F. Thickly butter an 8-½ in ring mold that is 2 in deep, or a cake pan of the same diameter. Line the bottom of the mold or pan with parchment paper.
2) Sift the flour, sugar, and baking powder into a bowl. Rub in the butter using your fingertips. Whisk the eggs with the milk in a cup until well combined, then stir this into the dry ingredients in the bowl. Work the mixture together well with your hands until you have an evenly mixed, soft dough. Scrape the dough out onto a floured work surface and lightly knead it for 10-15 seconds.
3) Mix together the brown sugar, dates butter and cinnamon and rum in a small bowl; keep to one side. Roll out the dough to a rectangle that is roughly ¼ in thick, 14 in long and 8 in wide.
4) Spread the date mixture evenly over the surface of the dough, then roll it up tightly like a jelly roll. With a sharp knife, cut the rolled dough in half lengthwise.
5) Twist the two pieces together, keeping the cut surfaces facing up, then curl into the mold. Bake in the middle of the oven for about 30 minutes. Let the coffee cake cool in the mold for 5 minutes, then unmold onto a wire rack. This is best served still warm.

Saturday, February 17, 2007

Split Pea Soup


*Just Braise has moved. Please visit me at www.justbraise.com!*

For the Chinese New Year of the Pig I’ll be finishing out my pork dishes.

This luxurious soup was made from that citrus-sweet pork shoulder way back when. (This blog is not exactly in Real Time-- although I suppose it is possible I froze the bone).

The weather this past week has been frigid. Growing up in the Chicagoland area, I can handle the cold (my school was once canceled because it was too cold to go outside, i.e. frostbite in under 1 second). When I first moved to New York City almost 10 years ago I used to (for brief stints outside) wear t-shirts in 30 degree weather. People thought I was crazy, I proclaimed it was the Chicagoan in me keeping me warm. But when winds blast exposed skin so it feels as though it is peeling right off your face… Well, that makes we want to crawl into a small room with a blazing fire and never leave.

When it is this cold outside and you can feel the cold shoot from the pavement through your shoes and freeze your bones, hot meals are all the more soothing. There is little better than the natural heating power of a steaming bowl of soup to keep you toasty (okay, maybe a steaming mug of hot cocoa or tea). This a the perfect soup for the blah weather. It is silky rich and deliciously filling with a little croute on top or crispy bread on the side.

My freezer is full of frozen individual portion sizes of soups. Once frozen and mixed up, they often turn into a game of surprise lunches that D and I will regale in after work: “Ooooh, I had that swiss chard soup from this summer-- even better warm!” or “I thought it was the ginger carrot, but once hot I realized it was the winter squash.” The supply sometimes seems endless and the addition of this split pea is a welcomed one. How else do you think D and I have had nary a sneeze these past two winters (forgetting the recent bout of food poisoning that just reinforces the benefits of home eating).

I remember my mother used to make split pea for us in the winter. Just before serving she would float hot dog slices into the soup (how very Chicago of her). As kids, we loved it and I distinctly remember plucking each hot dog piece out with my fingers and shoving my whole fist happily into my mouth, licking it clean in the process.

These days, I don’t need that extra salty kick of a hot dog to eat this soup (I prefer the kick of a little bacon). Once the split peas soften into the broth, this soup is deceivingly thick. If I didn’t make it myself I would swear there was gallons of cream laced into this creation. In fact, the only cream is the (optional) tablespoon I floated on top before serving.

This is the kind of soup that can melt you out of the warm house, allowing you to brave the nasty elements outside. It is filling on its own, paired with a light salad or a good sandwich.

SPLIT PEA SOUP
Serving Size= 8-10. Active time= about 20 minutes. Inactive time= about 2 hours.
* 2 tablespoons butter
* 1 tablespoon olive oil
* ½ pound bacon, cut into ½ inch pieces (optional and used instead of butter and olive oil)
* 1 large sweet onion, chopped
* 2 stalks celery plus leaves, chopped about 3 inches long
* 2 carrots, chopped about 3 inches long
* pork bone, the shoulder works well
* 10-12 cups water
* 2- 12 ounce bags green split peas, washed and brown ones discarded
* ½ cup loosely chopped parsley, plus extra for garnish
* 2-½ teaspoons cumin
* salt/ pepper to taste

1) Warm a large stock pot over medium-high heat. Add bacon and cook until browned, about 8 minutes. Remove bacon set aside. Keep about 2 tablespoons of fat in the stock pot, discard the remaining, soaking it up with a paper towel. (If not using bacon, warm the butter and olive oil and continue).
2) Add onion and sauté until translucent; about 5 minutes.
5) Add celery, carrots and pork bone, sauté about 5 minutes. Add water, cover and bring to a boil. Reduce heat to medium and uncover slightly.
6) Let simmer until pork bone begins to break down and smell infiltrates the air, about 1-½ hours. Add split peas, parsley, cumin and pepper. Follow directions for cooking length on back of package, usually the peas need about 30 minutes to cook.
7) Peas will have absorbed most liquid. Add salt to taste. Remove bone and cut any remaining pork into bite-sized pieces, add to soup. Additionally, if any pork remains uneaten from shoulder, about 2 cups of bite-sized pieces can be added to the pot. Add bacon, stir until evenly combined.
9) Serve plain or with croutes and a little heavy cream and/or parsley flakes drizzled over top.

Wednesday, February 07, 2007

Pork Tacos w/ Mango Black Bean Salsa


*Just Braise has moved. Please visit me at www.justbraise.com!*


I notice there are far too many sweets on display on this site. It appears we eat nothing but that sweet angel dust. In the next few days I'll be adding all the delicious porky creations made from the one 6 pound shoulder discussed below.

A few that went without photos:

The first post-roast creation was a delicious sandwich that had no chance at a photograph. Served on hearty Jewish rye bread (any offended excuse the sac-religious combination), Korean pears ( mentioned here ) and a generous smothering of honey mustard. A few minutes in the toaster oven set this to a perfect sweet-crisp combination.

Another hog-a-licious idea was to be pulled pork sandwiches smothered in a hickory BBQ sauce. Instead, we mixed the pork with avocado, lime juice and tomatoes and wrapped them in the tortillas that remained after the pork tacos pictured above. Similar to the tacos, yet a totally new flavor combination and equally delicious.

The pork tacos appearing above are served with a healthy scoop of a black bean mango salsa and a dusting of cilantro. They compete with the chorizo taco from my favorite taco truck down the street.

It goes to show you can eat well on a budget and create a symphony of tastes with the result. There are plenty of dishes that were not created that would be just as delicious: pork fried rice, rice and beans, breakfast hash, hammy macaroni, a number of soups (a rich split pea to come), empanadas, pork dumplings or piradzini (Latvian pork puffs, also to come).

A $20 pork shoulder can take two people far.

This black bean mango salsa is a great summertime side. It is great with the addition of corn and can be used for a number of taco combinations, my favorite being a grilled shrimp.

BLACK BEAN MANGO SALSA
Prep time= about 10 minutes.
* 1 ripe fresh mango, cut into ¼-inch cubes
* juice of 1 lime
* ¼ red onion, cut into ¼-inch cubes
* 1 can low-sodium black beans, washed and drained
* 1 ear of fresh corn, sliced from stalk (optional)
* 8 grape tomatoes, deseeded and cut in quarters (optional)
* ½ cup fresh cilantro, chopped loosely (optional)

1) Slice the mango and put it into a medium-sized bowl. The meat surrounding the pit can be squeezed into the bowl. Add lime juice, chopped onion, black beans, corn, tomatoes and cilantro. Stir and serve.

Wednesday, January 31, 2007

Lemongrass-Sugarcane Roasted Pork w/ Purple Sweet Potatoes


A few weeks back D and I found ourselves in Flushing, Queens. Flushing is the China-Korea-Thai Town of Queens. Larger and more crowded than New York City's, it seems to extend into Elmhurst and almost reach Jackson Heights where the Indian and Pakistani shops begin to mix with Columbian and Irish. We were in Flushing for Shabu Shabu, or hotpot.

In Japan they call it Shabu Shabu because of the sound the cooking food makes when it hits the water. In Korea it's called Shin Sul Ro, and is often a spicier creation, based in kimchi. In China it simply translates as "hotpot." All forms date back thousands of years from Emperors' banquets to Ghengis Khan's soldiers sharing a meager meal.

It's essentially one and the same: a steaming bowl of water or mildly flavored broth (today kept warm with a hot plate, not fire) brought to diners with added accoutrements: crab, tripe, chicken, fish balls, duck, vegetables, for example-- or a taste of all of the above. Various seasonings/ sauces from salty to sweet to spicey are added to your delight.

Originally, the hotpot was a shared dish and in China you can still find hotpot establishments "in the old way" with one pot for all diners (I have only seen it in China). Today it is more common that everyone is provided their own pot, as it was the day we were in Flushing.

Hotpot is the perfect cold weather meal. It warms the soul, fogs the glasses and leaves you full and as satisfied as Buddha.

The last time I took D for hotpot he was mildly terrified. We had just started dating and I took him into the depths of New York City’s Chinatown, under the Manhattan Bridge. His glasses fogged immediately as we entered the steamy dining room and being unable to see, and unable to understand the language around him, he meekly walked to the table pointing unconvincingly as he ordered pork from the waitress. I happily showed him the sauce counter, explained how to mix items, how long to cook them for and suggestions for mixing sauces.

Needless to say, when I suggested it again, he wasn’t too thrilled. I convinced him by offering to buy him some frozen handmade dumplings at the grocery and we were good to go with an explorative gourmand friend, R, in tow.

This time it was D explaining to R what he was in for: Jumping in by ordering extra fish balls, hitting the sauce station first and explaining how to best put creations together. We left, D received his 10 lb bag of dumpling reward, and I became mesmerized by items in the grocery aisles (which is none too difficult for me).

D and I scoured the soy sauces until we found a boutique variety without caramel coloring. We watched eels swim in their containers and crabs being tossed back and forth. In the fruits and vegetables I fought over plump kumquats and Korean pears on sale 4 for $1 (everyone else was doing it so why not join the fray?). I ogled the massive selection of seaweeds, keeping them in mind for a future visit and grabbed up some lemongrass.

I told D to keep a lookout for purple sweet potatoes. We had them at a restaurant once (where they called them Okinawa sweet potatoes. I was so fascinated by their rich color I could not believe there was no dye in them. He found them hiding behind a beige skin and we grabbed two large specimens. As we headed out my eyes landed on sugarcane sticks. My mind wandered to mojitos served with cane “straws” and I grabbed a package. Finally, D cut me off.

The next day we picked up a pork shoulder and remembering all my new treats in the fridge, I suggested we make a tropical glaze for the pig. I used the lemongrass, sugarcane, a lime and a bottle of cheap Brazilian beer to extract the flavors. I think allowing the meat to marinate in the resulting liquid would have been more successful, still, the pork turned out sugary sweet around the edges and perfectly juicy inside. While roasting, we wrapped a purple sweet potato in tin foil and threw it on the pan for baking.

The purple sweet potato is truly unique. It is sweeter than traditional sweet potatoes we are used to here in the U.S. with more of a honey overtone. It makes a beautiful presentation and would be perfect for a special Valentine’s Day meal. A few days later we sliced the second potato thin and fried it in some reserve bacon fat. The result was deliciously light and reminiscent of the Terra vegetable chips one can find in the markets.

LEMONGRASS-SUGARCANE PORK ROAST
Cook time= about 3 hours
* 1 pork shoulder, about 5 lbs
* 3 sticks lemongrass
* 2 sticks sugarcane, about 5 inches long, 1 inch thick
* ½ a lime
* 1 inch cube fresh ginger
* 2 Tablespoons honey
* 1 bottle lager beer

1) Using a sturdy blender, like a Cuisinart, puree lemongrass, sugarcane, lime (rind, juice and pulp), ginger. The result will be a mealy, fibrous consistency.
2) Warm a skillet on medium heat. Add puree and cook about 4 minutes, stirring often, until aroma begins to fill the room. Add beer and bring to a simmer. Cover and turn heat off, allow to sit 10 minutes. Warm again until just a simmer then remove from heat.
3) Line a large bowl with cheesecloth and place lemongrass-sugarcane puree into cheesecloth. Strain liquid, pressing the cheesecloth tight.
4) Warm an oven to 350F.
5) Wash and pat dry pork. Slash 2 inch diamonds along fat. Cover with ample salt and pepper.
6) Pour about half the lemongrass-sugarcane liquid over the pork, making sure some remains on top and inside the fat slices. If you have a syringe, inject some of the liquid into the pork. Reserve ¼-½ the liquid for later basting.
7) Bake on middle rack, basting 1-2 times, until pork’s internal temperature is 165F.


Oh, and Happy Birthday to me!!!
D and I are low-keying it today with a brunch out and lobster dinner at home. Okay, maybe that's not totally low-key.

Saturday, December 02, 2006

Thyme Cornbread


I was never a very big fan of cornbread. I had it at restaurants slathered in butter, sure. More often than not though, I preferred filling up with a heaping spoonful of mashed potatoes or thick creamed spinach. Delicious. Cornbread was too often dry and overly crumbly and needed too much butter to be palatable. That, or an attempt to moisten it with jalapeno peppers just made it soggy instead of giving it a due kick.

Well, D is a southern boy who likes his cornbread. Come to think of it, because of his Indiana roots, it’s really corn that he loves-- In any form, preferably fresh. Well, we’re out of fresh corn. The junk the markets are hawking as “late summer” corn is limp, withered and disgusting. So we turn to cornmeal for our corny fixings.

Since D has been around, I have been quite surprised to see just how far cornmeal can go. It appears in our mainstay breakfast pancakes and pops up in light fries like battered calamari. Over time I have begun to think highly of cornmeal and thought maybe cornbread should be given another try.

And so, with a little leftover thyme and a new cast iron pan c/o my mother, some “I  Cornbread” was created. When warm and fresh with a dab of butter this cornbread is moist and delicious. The thyme imparts the perfect herby sweetness to the final product making you think you might just be eating healthy—although even better with a side of cracklings.

THYME CORNBREAD
Makes about 12 sticks or small muffins. Active time= 10 minutes. Bake time= 15-20 minutes.
Have all ingredients at 70F
*3/4 cup sifted all-purpose flour
* 2-½ teaspoons double acting baking powder
* 1 to 2 tablespoons sugar
* 3/4 teaspoon salt
* 1-¼ cups yellow or white stone-ground cornmeal
* 1 egg
* 2 to 3 tablespoons melted butter or drippings
* 1 cup milk

1) Preheat oven to 425F. Grease cornbread pan with butter (cast iron is best) and place in oven while prepping ingredients
2) Sift flour, baking powder, sugar and salt together in a medium bowl.
3) Add cornmeal and stir until evenly combined (I recommend Sunny Slopes Farms Cornmeal in Indiana, email me for their phone number)
4) In a separate bowl beat the egg. Beat into it the butter and milk.
5) Combine all ingredients with a few quick rapid strokes until evenly combined.
6) Carefully remove pan from oven and place batter in hot pan about ¾ of the way full. Bake 15-20 minutes until just golden on top. Serve immediately.

Saturday, November 11, 2006

Cranberry Sweet Bread


The other week I was at the grocery store and noticed the bags of cranberries were finally set out. Mmmm, cranberry juice I mumbled, and in a trance walked over and placed them in the basket D was carrying.

“What are you going to do with those?”
“I dunno, they’re pretty.”

And so the pretty little rubies sat in the fridge for the better part of a week while I researched some recipes. I was looking for something fast and easy that would still look and taste delicious. I finally found it on a Chowhound forum-- a one bowl, just add, stir and bake recipe. I checked the comments and someone had already made it with wowed reaction so I decided to dig in as well.

This cake-like bread was delicious warm right out of the oven. The recipe recommends a caramel sauce, but I think whipped cream would be great too. I had it plain with coffee and it made a great mid-afternoon pick-me-up or breakfast.

This is the recipe list as it appears in Chowhound. There are other fabulous cranberry recipes listed there too so check it out.

*Note: This is not my mother listed below. Also, I cannot vouch for the caramel sauce because I did not make it. The changes I made are as follows: I used 2% milk instead of whole milk and increased the cranberries to one whole 16 ounce bag (from 2 cups). Lastly, I used a 7x11 pan as I wanted a thicker bread. I had to bake mine about 10 min more.

MOM’S CRANBERRY CAKE W/ CARAMEL SAUCE
Makes 1- 9x13 loaf. Active time= 10 minutes. Inactive time= about 30 minutes.
* 2 cups unsifted flour
* 1-½ cups sugar
* ½ teaspoon salt
* 2 teaspoons baking powder
* 4 tablespoons unsalted butter, soft
* 1 cup whole milk [2% works well too]
* 2 cups whole fresh cranberries [or 1-16 ounce bag]

1) Preheat the oven to 350F
2) Mix the flour, sugar, salt, baking powder and butter together until it resembles coarse crumbs.
3) Add milk and stir until evenly distributed. Fold in cranberries.
4) Pour batter into a buttered 9x13 pan. Bake for 30 minutes or until golden. Pour caramel sauce (below) over individual servings and serve.


CARAMEL SAUCE
* ½ cup butter
* ½ cup sugar
* ½ cup brown sugar
* ½ cup half and half

1) Combine all ingredients on stovetop and heat until thickened; do not boil.


Head over to Sweetnicks for the ARF roundup

Thursday, November 02, 2006

Asian Inspired Beef Braise


I know it’s a little vague to use the term “Asian Inspired” when describing this, or any, dish. Possibly Asian fusion works better, or simply, fusion braise (to go along with all the fusion restaurants we have these days).

For a few weeks now, D has been eyeing the 4-inch thick cuts of beef chuck at the butcher. They called out meat-protein overload to him, so when I finally okayed the purchase he was in heaven. As we headed next door to the vegetable stand and D picked out a few potatoes for the braise, he eyed me warily as I bagged up chestnuts and shiitake mushrooms. More than once I was told not to “ruin” his beef.

Last summer I was in China finishing up a Masters degree. Between tastings of dehydrated “rope” pork, emperor banquets of delicately crafted dim sum, ogling beetles and snakes on a stick and falling in love with the velvety sweet pulp of mangosteens, I became enthralled by the vibrant offerings of vegetables. Each dish was a still life: Broccoli was reshaped into flowering blossoms, mushrooms became lotus roots and lotus roots became dragon scales. I was constantly amazed by the care that was put into presentation, regardless of the establishment.

It was in these dishes that I came to re-appreciate the texture and versatility of the shiitake mushroom, amazed how it holds up in cooking. And it was here that I learned to love the chestnut-- popping up to add a rich flavor and thick creaminess to dishes I hadn’t known before. Used sparingly, mostly as a holiday embellishment (accordingly with their season), I don’t think the chestnut receives its fair exposure.

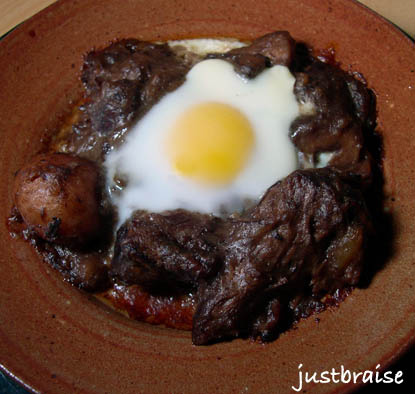
This dish is in some ways a remembrance of China, but more so, a way to incorporate the ingredients I came to appreciate in a succulent braise. We ate the braise bare at first and on the second and third day cracked an egg on top and enjoyed it baked. The egg adds another wonderful depth of texture and fabulous richness once the yolk is broken. And those little potatoes D gathered for the braise? Perfect for sopping all the juices up.

ASIAN INSPIRED BEEF BRAISE
Serves 6 persons. Active time= 20 minutes. Inactive time= 3-½ hours (depending on thickness of meat).
* 1 pound chestnuts, roasted and shelled
*5-6 pound cut of beef chuck (or other inexpensive cut)
* ½ pound shiitake mushrooms, cut into quarters
* 1 medium onion, sliced (or 2 bunches scallions)
* 3 tablespoons soy sauce
* 1 tablespoon sesame oil
* 1 teaspoon dried chili flakes
* ½ bottle red wine
* water
* ¾-1 pound (small) new potatoes, red or white, left whole

1) Roast the chestnuts before beginning. I apparently did not slice into the shells deep enough and a few exploded in the oven. Preheat oven to 350F. Carefully slice an “x” into the bottom flat nub of the chestnut. Place on a pan and roast for 30 minutes, until shells begin to peel away (or blow up in my case). Allow to cool and remove shells. Place meat aside in a bowl (okay if meat breaks apart).
2) Warm a dutch oven over medium high heat with a 1 tablespoon butter-1 tablespoon olive oil combination. Once warm, rinse off beef and pat dry. Salt and pepper both sides of the beef. Once pot of hot, add beef and brown on all sides, about 4-5 minutes each side. Remove meat from pot, set aside.
3) Add mushrooms, chestnuts and onion to pot. Sauté until onions turn translucent, mushrooms brown and chestnuts break down slightly; about 8 minutes.
4) Add soy sauce, chili flakes and sesame oil, stir to incorporate.
5) Push contents of pot to the sides and replace meat in the pot. Add red wine and enough water to come just below the top edge of the beef (depending on how thick your meat is, you might not need any).
6) Place potatoes around the top, but not in the liquid. Cover tightly, turn heat to low and allow to braise (slow cook) for 3-½-4 hours. Check on the pot once an hour. Turn heat down if liquid is boiling. Add more water if all liquid evaporates out. The dish is done when meat easily falls apart and sauce has thickened.
7) Enjoy warm as is or with a baked egg on top (see below).
8) With baked egg: Preheat oven to 350F. Dish up a portion in an oven safe bowl. Create a small divot and crack egg into the space. Place dish on cookie sheet for easy transport and place on middle rack in oven. For a runny yolk, bake for about 10 minutes, until yolk just begins to form a white covering.


Tags: , , , , , , .

Saturday, October 28, 2006

Winter Squash Soup


For some, the crisp fall weather is fearsome. It means cold weather, leafless trees, heavy jackets, and buckets of snow are on the way. Too worried about the future, they fail to appreciate the present and all the greatness this time of year has to offer. To them I say, be away with you-- move south!

Whatever happened to your love of sledding, apple picking, snowball fights, pumpkin carving, and snow angels? Jumping through billows of fresh fallen leaves or mounds of fresh pure snow? Waking up on a cold morning to icicles covering the windows and pole licking dares (à la A Christmas Story)?

Personally, fall is my favorite time of year. I love the brisk weather, the changing of the trees, and bundling up in sweaters and mittens. I especially love the food of the season: hot cocoa, soups, stews, the spices that emerge (nutmeg, cinnamon, peppermint) and the general hearty warming these things have on the state of mind.

I go into ration mode. I have the summer fruits I bought overripe and cheap, frozen away to be used in the dead of winter for a Caribbean-like fruit smoothie when its bitterly unbearable outside and reminders of warm weather are necessary. I also have my stockpile of soups that begin to accumulate in single serving sized containers, ready to accompany me to the office for a little internal snuggle or a fast dinner when the need arises.

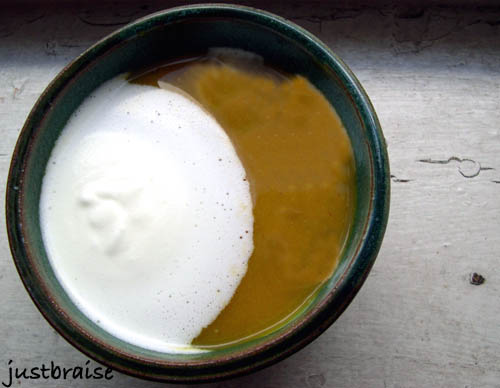
This soup is an exception. Naturally sweet, creamy and delicious, it is hard to put any aside for a later date. A perfect seasonal soup, this dish would look fabulous for a Halloween treat, Thanksgiving feast, or anything in between and beyond. Make this soup, and you may never make another again.

WINTER SQUASH SOUP
Serving Size= 8-10. Active time= about 40 minutes. Inactive time= about 1 hours.
* 1 White Acorn Squash (or regular Acorn Squash)
* 1 small Butternut Squash
* 1 small Golden Nugget Squash*
* 1 large sweet onion, chopped
* 1 stalk celery, chopped
* 2 carrots, chopped
* 8 cups chicken stock (or vegetable)
* 2 long sticks of fresh Rosemary
* 2 whole cinnamon sticks, about 3 inches long
* 1 teaspoon nutmeg

1) Preheat oven to 350F. Using a heavy sharp knife, slice the three squash down the middle vertically. Gut the seeds (set aside if you want to bake them for eating later, otherwise; discard).
2) Place the squash skin side down on a large cookie sheet and place in middle rack of oven. Bake for 40 minutes, or until soft when poked with a fork.
3) While squash are baking, prepare the other ingredients and begin the soup.
4) In a large stock pot on medium-high heat, warm 2 Tablespoons olive oil or butter (or combination of both). Add onion and sauté until translucent; about 8 minutes.
5) Add celery, carrots, chicken broth, rosemary and cinnamon sticks. Cover and bring to a boil. Reduce heat to medium and uncover slightly. The squash should be about done at this time.
6) Remove squash from oven when soft when touched with fork. Using a towel around your hand, or a fork and knife, either peel the skin off the squash, or slice it away, keeping as much meat as possible. Cut squash into 2-3 inch chunks and add to stock pot.
7) Cover and bring to a boil then reduce heat and remove cover.
8) Remove cinnamon sticks and rosemary twigs (leaves will have fallen off). Add nutmeg. Using a handheld blender, or carefully in batches with a regular blender, purée the soup until smooth.
9) Serve plain or with a little heavy cream.
*Note: If you are unable to find these squash in your local market, almost any combination of squash will work. Just Acorn and Butternut would work well, or Acorn, Butternut and pumpkin, etc.


Tags: , , , , , , , , .

Thursday, October 19, 2006

Applesauce


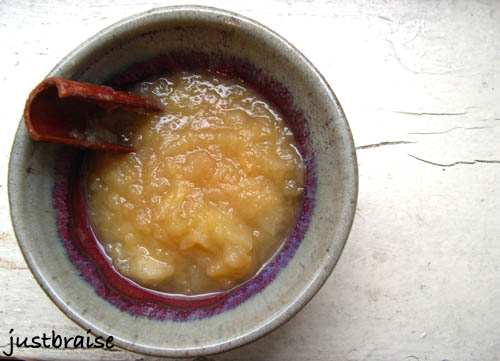
I almost forgot how much I enjoy applesauce as a snack on its own. Sweet, spiced and best of all, warm and fresh.

As noted, applesauce makes a great side to pork chops and is great as a side to almost any sandwich. I sometimes throw some applesauce into brownies and cake or pancake batters for some extra flavor and moistness.

Applesauce is incredibly easy to make so if you have the dregs of your picked apples lying around, just beginning to turn (or not), throw this on the stove, sit back and enjoy the fruits of your minimal labor in just about 20 minutes. I made mine with apple cider to give it extra sweetness and spices, but you can just as easily use water, some brown sugar and spices like nutmeg and cinnamon.

APPLESAUCE
Serving Size= 6. Active time= about 8 minutes. Cook time= 20 minutes.
* 8-10 small to medium sized apples, peeled, cored and chopped
* ½ cup apple cider
* 1 cinnamon stick, about 3 inches

1) Peel, core and loosely chop the apples into about ½ inch pieces. If you want smooth applesauce, chop all pieces uniform size. If chunky applesauce is desired, chop ¼ of the apples in larger chunks (1 inch or larger).
2) Place apple pieces, cider and cinnamon stick into a small stock pot over medium high heat. Bring to a boil then lower heat to medium. Simmer, slightly uncovered 15-20 minutes until applesauce is at desired consistency. Enjoy warm or cooled.


Check out other Fall Feast-ival items over at WellFed's FitFare!

Tags: , , , .

Sunday, October 15, 2006

Braised Pork Chops w/ Apples


*Just Braise has moved. Please visit me at www.justbraise.com!*

There are few things that complement pork chops as well as apples. Pork chops with applesauce is standard fare. And after years of this mundane preparation, I had essentially sworn off pork chops. It was not until I met D, with his penchant for pork that I began to eat “the other white meat” and truly appreciate it.

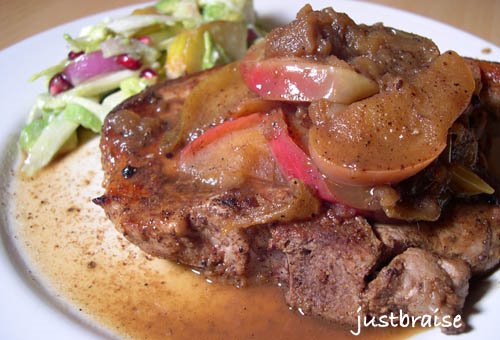
Over the years we have worked on our now standard pork chop recipe. Believe it or not, I clamor for it more often that D does these days. No sauce is used, but fresh apples-- All the better while they are in season and abundant. This fall, the recipe has truly reached perfection, braised in cider and rum, the result is sweet, moist meat with a sauce that deserves sopping.

Pork chops are easy to ruin. Overcooking creates dry, gristly meat and is all too common. To braise a pork chop then, is to eradicate the fear of overcooking while providing a savory sauce to accompany your meat.

This is a recipe I discussed previously. When D first made these chops, they were devoured in seconds. Again, D was in charge of the meat and I was happy sous chef to the operation. And again, I dare you not to devour these in seconds.

I think to truly make this dish perfect would be to serve it on top a bed of polenta. This way, all juices can be appreciated and none lost. This dish is a fabulous seasonal dish, so make it post haste.

BRAISED PORK CHOPS W/ APPLES
Serving Size= 2. Active time= about 10 minutes. Braise time= 15 minutes.
* ½ tablespoon unsalted butter
* olive oil
* 2 thick cut pork chops on the bone
* ½ teaspoon cinnamon
* 1 teaspoon cumin powder
* 1 teaspoon coriander powder
* salt/ pepper
* 2 good cooking apples (Granny Smith, Empire, Rome, Courtland), sliced into 16 wedges
* ¾ cup dark rum
* ¼ cup spiced apple cider

1) Preheat oven to 350F.
2) In a deep oven-safe pan (or dutch oven) over high heat, warm butter and olive oil (to barely coat bottom of pan).
3) While pan is warming, prepare the pork chops: Wash and fully dry the meat. Coat evenly on both sides with cinnamon, cumin, coriander, salt and pepper. Carefully place meat in pan and sear both sides until thoroughly browned; about 4 minutes each side. This seals in the pork chop juices and allows you to properly continue the braising. Do not be afraid to really brown the chops in this step.
4) Remove the pork chops from pan and reduce heat to medium. Deglaze by adding rum and scraping bits that have stuck to the pan up and into the rum. Add cider and apples. Braise the apple wedges in the juices until they are limp and have absorbed some juice; about 4 minutes.
5) Return pork chops to pan and move apples around the meat to cover sides and top (some may remain under the chops).
6) Cover pan and place in oven for 10-15 minutes until pork chops are juicy and succulent and liquid has reduced and holds a sweet, thick aroma. Serve with the apples crowing the meat and the sauce all around. Delicious.


Head on over to Sweetnick's for Tuesday's ARF round up!

Check out other Fall Feast-ival items over at WellFed's FitFare!

Tags: , , , , , .

Tuesday, September 19, 2006

Zucchini Pancakes


I can remember the moist zucchini-walnut bread my mother used to make when I was growing up. That, coupled with her infamous carrot bread, were worthy treats in the house and always much appreciated. In my years away from home I craved the breads (mind you, not cakes) and often called, requesting a loaf to be air-mailed to me without haste. Lucky for me, my mother usually obliged.

These days she has misplaced the treasured zucchini bread recipe. Sure it came from the depths of Joy of Cooking, we have failed to find the true source of the recipe; unable to replicate its sweet and wholesome moistness.
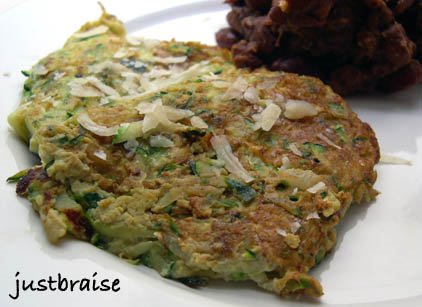
I bought these zucchinis craving that loved bread. Knowing D has a (vocal) aversion to squash—though once confronted with it will often happily eat it—I was sure I would be dining on these fruits alone. (And yes, zucchinis are in fact, a fruit.)

Knowing the bread eluded me, I began preparing these zucchinis much the same way my mother would have: by grating them into a tall pile. I continued on the fly: Throwing in a few more ingredients and sticking these on a hot buttered skillet. These might just be the next best thing—even better, D played a vanishing act finishing his in no time flat-- allowing me to dine with company.

Though I still crave that bread, I can happily buy zucchinis for the remainder of its soon-to-be-over season. We enjoyed these cakes so much, I’m thinking of attempting them in the bucket garden next year (even better, we would then have fresh squash flowers for frying!)

Oh, and that menacing darkness that hovers closely behind the zucchini cakes in this picture? Some leftover Louisiana-style beans made with a leftover ham shoulder—the combination was delicious! These pancakes are great for breakfast with a poached egg or as a dinner with beans (as pictured here). They can be added to a sandwich (a sort of veggie burger), had with a sour cream based dipping sauce, or simply snacked on the go. They are also quick and easy to make.

ZUCCHINI PANCAKES
Makes about 12 4-inch pancakes. Active time= about 30 minutes.
* 2 large zucchinis
* 2 eggs
* 2 teaspoons cumin
* 2 dashes Worcestershire sauce
* ¼ cup Parmesan cheese, grated
* 1 teaspoon chili pepper
* 2 dashes Tabasco sauce
* 1 teaspoon salt
* fresh ground pepper to taste
* 1 tablespoon butter or olive oil

1) Grate zucchinis. Grab up a small handful of grated zucchini and wring out the excess water over the sink. Set drained zucchini in a medium bowl, set aside. Continue until all zucchini is drained then dab with a paper towel to get remaining moisture out.
2) Add eggs, cumin, Worcestershire sauce, Parmesan, chili pepper, Tabasco sauce, salt and pepper to the bowl.
3) Use hands to incorporate all ingredients evenly.
4) Place butter on a medium sauté pan over medium-high heat. Once pan and butter are hot (butter will subside its bubbling and smell nutty), place small even handfuls of the zucchini mixture around the pan, use a spatula to gently press the pancakes flat. Allow to cook about 5 minutes each side, until golden brown. Serve warm, topped with fresh grated Parmesan.


Hop on over to Sweetnick's for ARF Tuesday!

Tags: , , , .

Tuesday, September 12, 2006

Roasted Red Pepper & Mushroom Soup


The recent spell of cool, wet weather along the east coast was nothing but pleasant for me. Fall foods are some of my favorite, full of hearty warmth. The passing storms sought to bring out the culinary colors of the season and my own penchant for soups.

In gloomy weather, reds are a bright choice for foods. Red makes us think of warmth, be it the heat of a hot pepper or an August sunset. The color brings us memories of the summer; think warm vine ripe tomatoes, raspberries or strawberries. When the dreary grey days of fall and winter have us down, there is nothing like a bright bowl of soup to cheer us up.

In the past, I have made brilliantly hued and high flavored roasted red pepper and tomato soup, as well as roasted tomato soup. Both delicious: the sweetness of pepper and tomato are enhanced in the roasting process; adding a pleasant finish to any soup.

In addition to the glorious red bell pepper, I adore mushrooms. Their earthy aroma and buttery flavor can compete with most anything delectable. So how to combine the sweetness of a pepper and the robustness of the mushroom? A soup of course-- Full of sweetness and heavy undertones. Perfect for these the days when fall looms ahead, yet light and colorful enough to remind us that summer still holds.

I topped this soup off with some heavy cream and homemade croutes (as Julia Child would say)—- or croutons. (These croutes were made weeks ago from stale bread, cut into 1-inch cubes and frozen. Once the soup was ready, the croutes were drizzled with 1 Tbl olive oil, fresh ground pepper, salt, a pinch of garlic powder and placed in a toaster oven until browned.)

ROASTED RED PEPPER & MUSHROOM SOUP
Serving Size= 6-8 persons. Active time= about 30 minutes. Inactive time= about 30 minutes.
* 2 red bell peppers, whole
* 1 large onion, chopped loose
* 4 cloves garlic, chopped
* 2 stalks celery, chopped loose
* 1 quart button mushrooms (or two large handfuls), chopped loose
* 2 Tbl non-salted butter (or olive oil)
* 6 cups chicken (or vegetable) broth (boxed or homemade)
* 1 small bunch parsley, washed well
* salt/ pepper to taste

1) The easiest way to roast a red pepper is in the broiler by following step one of this previous soup post. Alternatively, I prefer to use the “baba ganoush method:” rotate over an open flame (using tongs) until the pepper turns black, throw it into a paper bag for 15-20 minutes, peel off black char, discard innards, add to soup just before broth.
2) Place onion, garlic, celery and mushrooms into a large stock pot with 2 Tbl butter or olive oil. Sauté for about 10 minutes; until onions turn translucent and limp and mushrooms begin to brown and release juices.
3) Add roasted red peppers.
4) Add chicken broth and parsley. Cover, bring to a boil, then reduce heat and allow to simmer for 10 minutes.
5) Using a handheld blender or carefully in batches with a regular blender, puree the contents until smooth and even. If thicker than desired, cut soup with a little water. Taste for flavor, add salt/ pepper to taste.
6) Garnish with cream and parsley and serve with grilled cheese, peanut butter and jelly, cucumber onion (or any other preferred sandwich), a hunk of crusty bread, croutes, good cheese, a salad, or on its own.


Tags: , , , .

Tuesday, August 22, 2006

Paella de Pescados y Mariscos con Chorizo (Fish and Shellfish Paella w/ Chorizo)


My favorite thing about Spanish food is not the paella. Nor is it the Valencia orange, omelette or great variety of delicious tapas available-- though these things are all delightful. My favorite thing about Spanish food is the olive.

This unassuming fruit, a call to peace, is plentiful in the Mediterranean region. Squat trees line roadsides for miles and the bitter little drupe almost appears as a small plum from afar: an iridescent purple as it fades into its ripe green. Harvested with a shake to the tree bough it arrives to us along the culinary path marinated, as tapenade or oil.

In Spain, as you enter almost any food or drink establishment, olive pits abound.

A few years ago, my mother and I planned a quick trip around Spain. A country both of us had always wanted to visit, but never had the opportunity. For me, it was a culinary and ceramic feast I planned around clay factories, orange groves and funky architecture. For my mother, it was a wearing down of her feet stomping through the cities and country back roads with the salvation being sangria and tapas along the way (though she too enjoyed the clay factories and architecture).

On day one, hungry from a morning of walking, we stopped for lunch at a recommended establishment: “Oh! How disgusting!” my mother gasped as we walked inside, “this floor is covered in pits!” We shuffled in, unable to understand the debris covering the floor and took a table across from the bar, ordering up a jug of sangria and a seafood paella.

We waited for our food and heard the definite “pffffmmmp” of a person triumphantly releasing a pit from mouth into air. Our noses turned up in question, we looked at each other, then scanned the restaurant for the perpetrator. There he was, tan and stocky with a perfectly edged beard looming in the shadow: “pfffmmmp” he turned and released his bleached teeth in a wide grin towards us.

A bowl of olives came to our table along with the sangria. I popped a few olives into my mouth, but finding nowhere to discard the seeds, I held them in my cheek, a squirrel at harvest. More patrons entered the establishment. Soon that pfffmmmp echoed throughout the restaurant, shooting from the trunk of men and women alike, regardless of age, no one seeming to care except for the clueless Americans. I looked at my mom and shot out five pits in bulleted repetition: pffp pffp pffp ffllmp fllp.

We soon realized it was custom in Spain. Olives abound and are ingrained in the culture. A complimentary bowl is provided at coffee shops, bars and restaurants in lieu of bread or peanuts. The more olives I stuffed into my face the more I fell in love with Spain, pfffmmping them out with the best of the locals. (My mother on the other hand, continued her dismay at the littered floors and begrudgingly returned the bare pit to a cupped hand where it delicately dropped to the floor unnoticed by anyone.)

This past July, a college friend married a Spaniard. The wedding was a great bi-lingual affair of misunderstandings and general good humor at each person’s attempt to befriend a person from another country with little to no verbal language skills. Communication fell remarkably well and eventually I got onto the subject of olive pits on the floor.

“Yes!” my new Spanish friend exclaimed, “it means how good the place is.” He went on to explain that some establishments will even go to the trouble of adding pits to the floor, be it from the mouths of their employees or the previous night’s collection. Pits on the floor is a rating of popularity-- the more pits, the more favored the premises.

Here is a recipe in memory of that first paella and the realization that it is okay to spit out your leftovers in some cultures. And as the season turns, I may even surprise you with some home-marinated olives. Until then, paella it is.

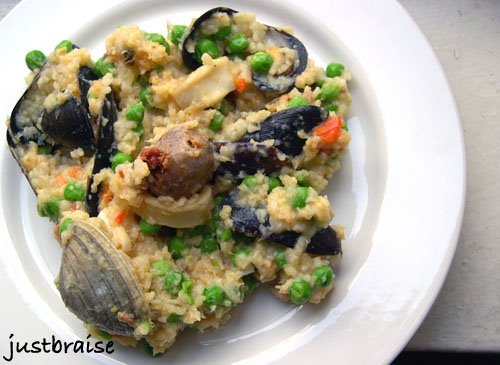
NOTE: Though I cannot remember if the paella I had in Spain was this moist, I enjoy the wet rice base. In this fashion, the rice sticks to everything, including the inside of the mussel and clam shells, forcing you to work for your food: sucking and rotating shells in your mouth to indulge in every bit. D and I found this much more enjoyable, and a more entertaining activity than simply wolfing down the dish without thought. We also felt it made you appreciate the variety of seafood present. I also enjoy eating with my hands, so take away what you will.

This paella is based on a recipe found in the Cuisines of Spain cookbook by, Teresa Barrenechea. It is essentially the same recipe with a few additions, namely peas, onion and chorizo.

This paella is fairly labor intensive, though if you make a large batch and have leftovers for the week it is worth it. We found that it is absolutely necessary to use fish stock and not chicken or vegetable. We felt the stock really enhanced the fish flavor throughout. Also, fresh seafood is essential.

PAELLA DE PESCADOS Y MARISCOS CON CHORIZO (FISH & SHELLFISH PAELLA w/ CHORIZO)
Serving Size= 8 persons. Active time= about 1 hour. Inactive time= 12 mintues.
* 1 dozen littleneck clams
* 2 Tbl coarse salt
* 6 large cloves garlic, unpeeled
* 9 cups fish stock (recipe below)
* 2 pinches saffron threads
* 2 pound mussels, scrubbed and de-bearded
* 2 cups water
* ½ cup olive oil
* 1 large red pepper, seeded and cut lengthwise into narrow strips
* 1 medium Spanish onion
* 8 ounces, about 4 links, chorizo, cut in half
* 1 pound monkfish (or grouper), cut into 2 inch chunks
* 1 pound large shrimp
* 1 pound small squid, whole and rings
* 1-½ tsp salt
* 4 cups Spanish (short grain) rice
* juice of 1 lemon plus extra for garnish

1) Preheat oven to 500F.
2) Clean clams under cold water. Discard any open clams, or those that do not close when touched. Place clams in a large bowl with the coarse salt and let stand for 30 minutes or up to 2 hours. Clams will release sand trapped in shells.
3) Place garlic in a small heat-resistant bowl or baking dish and roast in oven for 10-15 minutes; until skins are browned. (Alternatively, you can throw a whole garlic head in, chopping the top off for easy removal, and use the extra as a spread mixture with olive oil.)
3) In a small saucepan, bring stock to a boil. Add saffron and decrease the heat retain simmer.
4) When garlic is ready, remove from oven (leave oven on). When cool enough to handle, peel cloves and place in blender with ½ cup simmering stock. Process until blended.
5) In a medium saucepot, place mussels (discarding any that fail to close when touched) with 2 cups of water on high heat. Bring to a boil and cook 5 minutes, until shells open. Using a slotted spoon, lift the mussels and set aside (add mussel broth to stock or freeze for later use).
6) In a large paella pan or stock pot, heat the olive oil over medium heat. Add bell pepper, onion and chorizo, stirring occasionally for about 10 minutes, or until chorizo has cooked through and the aromas are strong. Add monkfish, squid and salt, increase heat to medium high. Sauté 5-10 minutes, until monkfish turn opaque.
7) Add rice and stir to blend, allowing rice grains to incorporate into the oils present. Add hot stock, increase heat to high and bring to a boil. Add garlic mixture, stir gently to incorporate and boil for 5 minutes without stirring.
8) Drain the clams. Add shrimp to pot, stir gently to incorporate. Add mussels and clams around the top of the pot. Place in oven (uncovered) for 12 minutes; rice will be absorbed and clams and shrimp will cook.
9) Remove from oven and discard any clams that do not open. Sprinkle lemon juice over top. Cover with lid or towel and let sit for 7 minutes. Serve with lemon as garnish


FISH STOCK
Serving Size= 2 Quarts. Active time= 10 minutes. Inactive time= 20 mintues.
Note: White fish is ideal to use: snapper, cod, hake or bass. Avoid fatty fish, such as tuna, sardines and salmon, among others.
* 2 pounds fish frames and heads
* 1 cup shrimp shells (can clean your shrimp from above and use)
* 1-½ cups mussel broth (see above)
* 1 large Spanish onion, coarsely chopped
* 2 carrots, coarsely chopped
* 1 bunch flat leaf parsley
* 3 Tbl olive oil
* 2 quarts water
* salt/ pepper to taste

1) In a stockpot on medium-high heat warm olive oil. Add fish frames, shrimp shells, onion, carrots, parsley, salt and pepper. Stir until shrimp shells turn pink. Add water and bring to a light boil.
2) Using a slotted spoon, discard any foam that forms on the surface.
3) Decrease to medium-low heat and simmer, partially uncovered, for 30 minutes, skimming foam off as needed. (Do not overcook or stock will turn bitter)
4) Strain the stock and season with salt as necessary.


Head on over to Sweetnick's for today's delicious ARF roundup!

Tags: , , , , .

Tuesday, July 25, 2006

Lemon Meringue Pie


When in history did the versatile lemon receive a bad rap? Akin to vanilla (as boring as vanilla ice cream; as plain as vanilla), negative lemon phrases pop up more than we might think: You’re being a sour lemon; When life gives you lemons, make lemonade; That car is a real lemon; You’re standing around like a lost lemon. What did this sun-bright fruit do to receive such sad associations? Why hasn’t the lime, an equally sour menace, gathered similar treatment? How did the sweet orange elude all the sour of its citrus brethren?

Many believe the first citrus the people of the Mediterranean tasted was the lemon-- Which makes sense since it pops up in many Middle Eastern dishes. But its origin probably stems further East than that (many suggest India is where the egg-shaped citrus first came into being). Today it’s grown in almost any climate warm enough to sustain it and almost everyone enjoys its sweeter sensibilities: from lemonade and limoncello to lemon oil and lemon curd. Life would have a lot less zest without it.

Imagine the world without mass transport and an excess of refined sweeteners. Where lemons weren't flown into the market willy nilly and that golden glow remained in flowers, not fruit. What was that first sip of pure summer like? Lemonade, with its sweet sourness. How much of a treat do you suppose the lemon once was to some? How much we take it all for granted, our availability of something so simple, once so foreign.

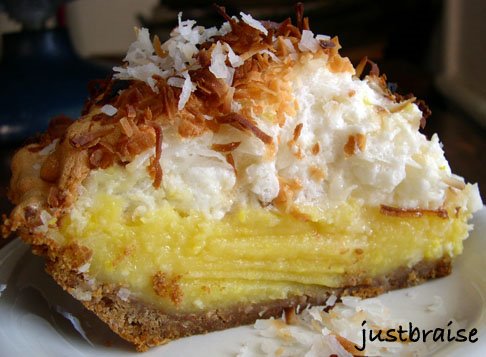
To pucker up to the lemon, try this (sweeter) dish: Lemon Meringue Pie. This pie’s cloud of meringue could barely fit into the oven—royal treatment considering the lemon’s often lowly placement as a mere garnish. D and I found this recipe in the epicurious.com archives as we searched for a perfectly light, refrigerated summer cake. This is the perfect treat with a hint of the tropics and much less painless than it sounds. (This is essentially the recipe from epicurious—the only difference being I used a graham cracker crust.)

LEMON MERINGUE PIE
Serving Size= 10 people. Active time= 40 minutes. Cook time= 1 hour 14 mintues. Inactive time= 4 hours
GRAHAM CRACKER CRUST
* 1 cup plain graham crackers (about 6 full crackers)
* ½ stick unsalted butter
* ¼ cup coconut


THE FILLING
* 1 cup sugar
* 2 tablespoons cornstarch
* 6 large egg yolks
* 4 large eggs
* ¾ cup fresh lemon juice
* Pinch of salt
* ¾ cup (1 1/2 sticks) unsalted butter, cut into 1/2-inch pieces


THE MERINGUE MOUNTAIN
* 6 large egg whites
* 1/4 teaspoon cream of tartar
* 1-1/3 cups powdered sugar
* 1 cup sweetened flaked coconut, lightly toasted

For crust:
1) Preheat oven to 350F. In a small saucepan (or in the microwave), melt the ½ stick of butter.
2) Using a food processor (or by hand crushing them with the back of a spoon), pulse the graham crackers into small crumbs. Once pulverized, add butter and ¼ cup coconut; mix until evenly distributed.
3) Put crumbs into 9 inch pie tin. Line the tin, pressing firmly against the bottom and sides.
4) Bake for 10 minutes. Once done, set aside to cool and continue on the filling:

For filling:
1) Preheat oven to 300°F.
2) Whisk sugar and cornstarch in heavy medium saucepan to blend.
3) Whisk in yolks, whole eggs, lemon juice, and salt. Whisk over medium heat until mixture thickens and just begins to boil around edges, about 6 minutes.
4) Add butter; whisk until smooth. Cool 10 minutes. Pour warm filling into crust.

For meringue:
1) Using electric mixer, beat egg whites in large bowl until foamy.
2) Add cream of tartar and 1 tablespoon powdered sugar and beat until soft peaks form.
3) Beat in remaining sugar, 1 tablespoon at a time, then beat until stiff glossy peaks form, about 7 minutes.
4) Gently fold ¾ cup toasted coconut into meringue.
5) Spread coconut meringue over warm filling, covering completely, sealing meringue to crust edges and mounding in center.
6) Bake pie 30 minutes. Reduce oven temperature to 275°F; bake 30 minutes longer.
7) Sprinkle remaining ¼ cup toasted coconut over pie; continue to bake until meringue is light golden brown and set when pie is shaken slightly, about 15 minutes longer. Transfer pie to rack and cool completely, about 4 hours. (Can be made 1 day ahead. Refrigerate uncovered.)


Head on over to Sweetnick's for the weekly ARF roundup!

Thursday, June 29, 2006

Chorizo-Lime BBQ Ribs


*Just Braise has moved. Please visit me at www.justbraise.com!*

Summer brings a new culture onto the streets of New York City. It lives and breathes the pavement and it waits out the humid days for the cooling nights, begging for a release with rain. People move from their cramped apartments onto stoops, lawn chairs, handball courts, public pools, beaches, parks— even an air conditioned store to roam aimlessly for a cool down.

I walked home the other day and witnessed my neighborhood in a new light. Every winter we tightly latch ourselves into our undersized apartments, bundled under blankets and layers of clothing. I begin to forget the people that live in my neighborhood-- that I pass everyday on the streets-- that I ride the train with into Manhattan while we forget where we are and where we are going. As summer’s heat finally hits hard, the close quarters are too much and private life blends into public.

My neighborhood is a multicultural whirlwind of ethnicities and personalities. A perfect microcosm of New York City, I can walk two blocks in one direction to restock my sheesha; two blocks in the other for the best gyro in the City (or the best frappe according to the New York Times). I can go to the Mexican bodega for $1 tamales on the weekends, the Bangladesh deli for a fresh mango smoothie, or the Indian bakery for fresh gulab jaman. The list continues into the night.

But what emerges in the summer holds more than the variety of stores I relish. It is a look into the lives of others. Purple-haired women drink orange soda as their granddaughters regale their waning days of the school year. A group of kids playing soccer in the streets knock their ball too close to a passerby. A mother sits on the stoop as her son practices handball against their brick building. Young girls seek out the icy man for fresh coconut ices. Neighbors rehash old ties, friendly waves cross intersections, the weight of clothing is reduced, it is summertime and the people are happy.

The heat draws people out of their home physically and mentally. Each day I pass the local bargain shop and spy the cheap charcoal grills, waiting for the perfect time to purchase the one-season specialties. Spending time in the kitchen is cut short as the heat of the oven is viewed as sin. Hamburgers, quick chickens, easy seafood and of course, ribs, are easy on the mind because they lend us the notion of lazy-weekend-outdoor-eating with friends and loved ones.

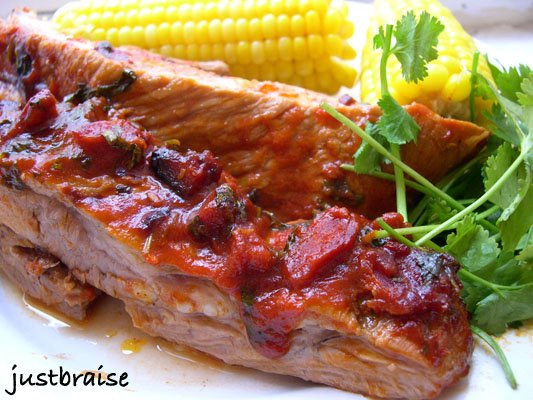
With that said, I justify yet another round of ribs (pork this time)—perfect for a 4th of July BBQ. This one is dripping tangy citrus flavors off the chin with every bite. It is a thick and chunky sauce, loaded with freshness that screams homemade. It is something to impress friends with and all too easy to make. D believes the sauce recipe is too heavy on tomatoes, but I think it sits perfectly on the ribs— with that said, do what you will with the quantity.

CHORIZO-LIME BBQ RIBS
Serving size= 4 people. Active time= 35 minutes. Inactive time= 1 hour 20 minutes
CHORIZO-LIME BBQ RIBS
* 5 pounds pork ribs, have the butcher crack the bone but do not separate the ribs
* Chorizo-Lime BBQ sauce (recipe below)

1) Preheat oven to 400F. While oven is warming, begin to prep sauce ingredients below. Place rack of ribs on a large oven-proof baking sheet with a rim, cover with tinfoil. When oven is ready, place ribs on center rack for 15 minutes.
2) As ribs are baking, finish up the sauce on the stovetop. The sauce should be ready around the same time as the ribs in the first part of the baking process.
3) Remove the sauce from the heat and the ribs from the oven (once the 15 minutes are up). Lower oven temperature to 350F. Remove tinfoil and generously coat the ribs with the sauce. Cover with tinfoil and return to the oven for 1 hour.


CHORIZO-LIME BBQ SAUCE
Serving size= 4 people. Active time= 30 minutes.
* 7 ounces, about 4 chorizo links, diced small
* ½ bunch cilantro, chopped
* 2- 6 ounce cans tomato paste, no salt added
* juice of 3 limes
* 1 cup cider vinegar
* 2 Tbl molasses
* 2 Tbl spicy mustard
* 1 Tbl favorite hot sauce
* ¼ cup water
salt/ pepper to taste

1) In a sauce pan on medium heat, warm the chorizo and cilantro until the cilantro wilts and aromas escape, about 3 minutes.
2) Add remaining ingredients. Bring to a boil then remove from heat. Coat ribs and bake or enjoy as extra dipping sauce on the side.


Head on over to Kalyn's Kitchen to catch this week's WHB roundup!

Thursday, June 15, 2006

Dry-Rubbed Beef Ribs


*Just Braise has moved. Please visit me at www.justbraise.com!*

This past weekend was the annual Big Apple BBQ in New York City. D and I were just coming off our sickness, placing our desire for large amounts of BBQ low. After a few hours, we were craving ribs. Knowing the lines would be killer, we took our newfound hunger into our own hands.

We headed to the butcher and upon arrival asked for beef ribs. Short ribs were brought out and we quickly sent them back. We were thinking Texas style and therefore needed dinosaur ribs. A plastic wrapped package was carried from the back recesses and undone. Ribs longer than my forearm tumbled onto the butcher block. D licked the drool from the corner of his mouth.

6 hulking ribs were purchased for 3 people, a watermelon, and a few supplies for coleslaw. Though D himself is from Virginia, his father is a born and bred Texan. D took the reigns when prepping this slab of meat and gave them a basic dry rub of salt and pepper, covered them, and sent them in the oven on low heat for 3 hours.

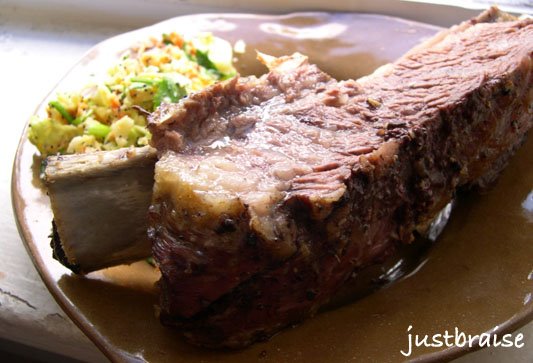
The result was succulent, juicy ribs that defied any size and flavor ever purchased before in a restaurant. Dripping with moisture the well marbleized meat fell right off the bone, making it all the easier to fill our mouths.

Every dry rub rib recipe I have had before left small amounts of tough, dry meat to be pulled off the bone. These hulking ribs were brimming with flavor, juice and meat-- an overall success.

Dry-Rubbed Beef Ribs
6 ribs (not short ribs) serves 4 with leftovers. Prep time= 5 minutes. Cook time= 3 hours
* 6 beef ribs (not short ribs); have the butcher remove the cartilegde from the underside and crack the ribs but do not separate ribs. Your butcher can also diamond cut across the meat so the dry rub can be rubbed into the meat more easily.
* 3 Tbl salt
* 4 Tbl fresh-ground pepper

1) Preheat the oven to 350F. Place the ribs in a large baking dish, meat up, and amply salt and pepper; rub into the meat.
2) Cover with tinfoil and place on center rack in the oven. Turn heat down to 300F. Cook for 3 hours.
3) To brown, remove foil and replace in oven for 10-15 minutes.
4) Meat will have pulled back from bone and be extremely juicy. Slice and serve.

Tuesday, June 13, 2006

Blueberry Pancakes


*Just Braise has moved. Please visit me at www.justbraise.com!*

As the summer haze blanketed the Chicagoland area my mother used to stuff us into the Jeep. We would head north into Wisconsin to go fishing at the crack of dawn, or south to the great flea market in Sandwich, Illinois. The best weekend trips were making the loop around the tip of the Lake and heading into Michigan.

We left early and drove with the windows down, only to lock them tight and hold our breath as we passed through Gary, Indiana. To ensure a speedy trip, my older brother forced the younger one to urinate in old take-out cups beneath a blanket in the back seat while my mother kept us wired with the odd stop at a gas station—we had our own fill-up of Pixy-sticks, Sixlettes, and Lick-a-Sticks.

We would arrive in Michigan, buzzed on sugar and ready for the task at hand: blueberry picking. Is it possible that the $5 candy allowance was to negate any possibility of sluggishness for the harvest? My brothers and I grabbed our buckets and dashed into the fields, whizzing past those poor saps who failed to realize the benefit of an 8AM sugar high.

I chose the rare specimens-- the blueberries that bypassed nature and could have landed in a Coney Island sideshow. Plump with juice and ready to burst, I picked the berries that would never make it into a store-bought pint. The berries my radar found were the size of apricots. Destiny had allowed these prized specimens extra strength in their branch, they pulled the bush down, but were refused to fall. They remained freakishly alone, awaiting my chubby little fingers to pluck them out.

Eventually our fingers and tongues faded into blue, the sun became too hot, and our highs turned to hunger. We left the blueberry patch for a friend’s beachside summerhouse where we could cool down in the lake. As everyone changed into suits I grabbed my blueberry pint and sorted my prized possessions—no one was to eat my ginormous ribbon winners. I removed each of my overgrown blueberries from the pint and placed them at my bedside table before I allowed myself to join everyone in the water.

The weekend would end with a bonfire on the beach. I transplanted my special berries into a paper cup and coddled them as we headed home. I would exit the car, run up to my bedroom and slowly remove each blueberry, scrutinizing it for any imperfections before I gently placed it on my windowsill. There they remained to rot, untouched by another human, admired until they deflated into a mush.

This recipe base is the same that appears for D’s Strawberry Banana Pancakes.

CORN MOUNTAIN PANCAKES
Makes about 15 4-inch pancakes. Prep time= 10 minutes.
* 1 egg
* 1-1/4 cup milk
* 5 Tbl vinegar
* 2 Tbl molasses
* 1/4 cup butter, melted
* 1 cup flour
* 1 tsp salt
* 1/2 tsp baking soda
* 2 tsp baking powder
* 3/4 cup yellow cornmeal
* 3/4 cup applesauce
* 1 pint fresh blueberries

1) Beat together egg, milk, vinegar, molasses, butter, and applesauce.
2) Add flour, sifted with salt, baking soda and baking powder, stir until blended.
3) Add cornmeal, stir until just blended.
4) Warm a skillet on medium-high heat. Melt ½ Tbl butter. When pan is hot, use a 1/4 cup measure to scoop and drop even batter. Sprinkle fruit on top of batter. Cook until bubbles begin to appear, about 3 minutes. Flip, cook for another 2 minutes.

NOTE: Sliced apples, pears, blueberries, or any other fruit is amazing with this batter. Another option is to use buttermilk instead of regular milk and vinegar.

Sunday, May 07, 2006

Soda-Braised Beef


D and I are gearing up for what we are dubbing The Epic Voyage. We leave next week and my mother is a doll to fly in from Chicago (okay, she was already coming for a short visit), but will be extending her stay to care for the cats, my plants and my little City Garden (I don’t think she actually knows the extent of her duties!). As D and I begin to get our trip in order, tie up loose ends, put in extra hours at work, finish open projects—don’t even mention packing—we are trying to clear out some perishables my mother will probably not use, e.g. the dregs of a cola bottle.

While D and I do some last minute scrimping, we figured a good cheap braise was in order. It would clear out our refrigerator and last us through the beginning of next week. So when I told D to just grab “whatever” in the fridge, he pulled out the soda: “Coke?” I thought for a few seconds before, “of course, soda can go in BBQ, marinades, and you can put juices in a braise, so why not soda? Dump it.” D splashed the remains into the pot and took the last swig for himself.

When I was younger, all sodas-- or colas, depending on where you are from, I referred to as, “coke”. My family would go to a restaurant and I would ask: “What kind of cokes do you have?” I received one of two stares: “idiot,” or “smartass.” In the Chicagoland area, “coke” came in diet and regular. I was supposed to ask for soda.

It was not until later that I found out that “coke” as a term for all carbonated beverages really is common. It is mostly used in the south, especially Georgia, where the Coca-Cola Company has their main headquarters. Still later, I found out that in my home state’s almost-neighbor, Ohio, cola was the proper term when discussing carbonated drinks, but they also say crick, begel and ruff (instead of creek, bagel and roof), so I don’t know if it is optimal to use their “cola” term.

Phraseology varies all over this country—don’t even start on the world. It is interesting, whether through travel, or everyday encounters, to find these idiosyncrasies. So as we creep ever closer to Memorial Day and the official start of summer travels, keep an ear out for these cultural flare-ups.

Oh, and the braise was pretty darn good. The sauce was not too sweet with an overall robustness that was quite delicious when paired with the meat. The carrots and celery especially took on the soda very well, turning into sticks of caramelized goodness. The new potatoes were perfect—a last minute decision to purchase these instead of using up some russets we had. Because the new potatoes were left in-tact, they held together nicely, took on the broth and were even better when dipped in a dab of sour cream.

SODA-BRAISED BEEF
Makes 6 servings. Active Time= 20 minutes. Cook Time= 3 hours.
* 6 pounds of beef, left whole (or in 2-3 pieces to fit in pot)
* 3-4 cloves of garlic, crushed
* 2 stalks of celery, cut 1-2 inches in length
* 2 carrots, cut 1-2 inches in length
* 10 white button mushrooms, cut in half
* 10 pearl onions, left whole (or 1 medium onion, sliced into 1 inch cubes)
* 15 new potatoes, washed well and left whole
* 2 cups beef broth (or water and bouillon)
* 2 cups Coca-Cola (Pepsi, Tab, Dr. Pepper or other dark soda)
* salt/ pepper to taste
* 2 bay leaves
* fresh herbs (rosemary, thyme, tarragon, parsley work well)
* 3 Tbl butter or oil

1) In a dutch oven, or other pot with tight fitting lid, warm the butter on medium-high heat. Rinse the beef and pat dry. Sprinkle with salt and pepper. Add to pot and brown on all sides. Add garlic.
2) Once meat is thoroughly browned, remove from pot and set aside. Add celery, carrots, mushroom, onions and potatoes. Sauté about 8 minutes, until onions are translucent.
3) Return beef to pot, add beef broth, soda, bay leaves and fresh herbs. Cover and bring to a boil. Remember: this is not a stew, it is a braise. Liquids should come just under the top of the beef.
4) Turn heat down to medium-low, leave covered and cook for 2½ - 3 hours, until meat falls apart.
Note: Served with fresh crisp bread or a good salty cheese this makes a great dish.


For all the herb lovers out there Kalyn’s Kitchen hosts WHB. My herbs this week: rosemary, parsley and thyme in this braise.

In non-food related activities we have WCB over at Eat Stuff. I really attempt to capture Kitty BoJangles in action. It is not that it is so rare, but it is true, she is often asleep. Her fun time is what I call her "night crazies." Just after dinner when she bolts the length of the apartment a few dozen times. There is no use getting a shot of her then, because frankly, if you get in her way it is damaging. Instead, I took a picture of her on a box post-night crazies. Shortly after this picture was taken, the box was thrown away. She had grown quite attached because she stared at me viciously as I removed her cooling pad.

And then there is the usual tormentor, Whiskey. He looks very innocent here, be warned, it is all a cute cover.


View Stats
Rankingblogs.com: Defining your blogs worth..