


Showing posts with label seafood. Show all posts

Monday, March 05, 2007

Cajun Salmon & Herb Marinated Calamari


*Just Braise has moved. Please visit me at www.justbraise.com!*

It is often that when I buy seafood I tend to go a little crazy. The briny smell, the lobsters swimming around, the gracious smiles and even the slight attitude I get when I ask something possibly(?) silly like, “what does that taste like?” Response: “White fish.” Or: “How do I cook this?” Response: “However you like.” Or my recent favorite, “I’m cooking this with capers, do you have capers?” Response: “I don’t even know what that is lady.” It all makes for that authenticity that screams burly fisherman and has me coming back for more than I really need.

Okay, so my local fishmonger spends little to no time on a boat actually fishing. More of it is spent “fishing” up in the Bronx at the newly relocated Fulton Fish Market. Still, entering the place is like hanging out with the boys on the docks—on a recent visit I overheard a few stories about the original Woodstock and how the “experience” was “a total trip.” I can guess a few enhancers that would lead to “trippy experiences” that my friendly fisherman might have partaken in. Instead, I kindly smiled and asked for a pound of calamari, cleaned, yes, thank you. And a pound of salmon too please.

While the two in combination are not totally exotic, they started to sound really good when I put words like “cajun blackening” and “Thai herb marinated” in front of them, albeit spicey. It also helps to have a winning cookbook (that’s right, The Cook’s Book, where every recipe is clearly laid out with fabulous photography and claims both these recipes as a cinch to make (which is true).

With a helper tuned to the task at hand, this meal can be whipped up in about 30 minutes, less if you are really on cue. The procession:

Person 1: Prep/ marinate salmon, prep/ marinate calamari.
Person 2: Prepare salad
Together: Prepare fish. The calamari takes a mere 3 minutes to cook and the salmon 6. If you start the salmon, get the calamari going, flip the salmon, remove calamari, the salmon is just about done, all remains hot to serve and you’re good to go.

Throw in a new favorite quick salad (our own invention) this meal is golden-- or better yet, a deliciously trippy experience.

The salmon and calamari recipe are as they appear in The Cook’s Book. When I made this I bought 1 pound of calamari and almost 1 pound of salmon and cut the salmon into 4 fillets. This meal was a satisfying dinner and an even better lunch the next day. It will definitely be made again. The salmon looks daunting, but many of the spices are staples (or should be) or could possibly be left out.

SALMON WITH CAJUN BLACKENING SPICES
Serving Size= 4. Active time= about 20 minutes. Cook time= about 8 minutes.
* 1 tablespoon ground cumin
* 1 tablespoon coriander seeds, crushed
* 1 tablespoon dried ground garlic
* 2 tablespoons paprika or pimento (smoked Spanish paprika)
* 1 tablespoon coarsely ground white or black pepper
* 1 tablespoon dried thyme
* 1 teaspoon dried oregano
* 2 tablespoons fine salt
* 4 salmon fillets, about 6 oz each (skinned)
* vegetable oil

1) Mix together all spices, herbs and salt. Using half the mixture [per side], rub into both sides of the pieces of salmon and lay them on a tray. Cover and leave at room temperature for up to 30 minutes.
2) Heat a heavy-based frying pan over high heat until very hot. Brush the pan with oil, then place the fillets in the pan. Let cook for 2 minutes without moving them. Turn the fish over, cover the pan, and cook for 2 more minutes. The spices will have blackened and the fish will be barely cooked inside. Transfer the salmon to warm plates and serve. [We cooked ours 3 minutes each side and they came out perfect, cooked almost all the way through.]


THAI BASIL & CILANTRO MARINATED SQUID
Serving Size= 4. Active time= about 8 minutes. Cook time= about 2 minutes.
* 1-½ heaped teaspoons white peppercorns [use about half if you only have black or mixed]
* ½ teaspoon salt
* 1 garlic clove
* handful of Thai basil [regular tastes good too]
* handful of cilantro, including roots, steams and leaves
* 14 oz squid, cleaned, then body finely sliced into rings and tentacles separated
* 2 teaspoons peanut oil
* 1 teaspoon nam pla (fish sauce)
* 2 teaspoons finely chopped or grated pale palm sugar [I omitted this ingredient]

1) Lightly pound the peppercorns, salt and garlic in a mortar with a pestle until combined. Add the basil and cilantro, and work into a chunky paste [alternately a food processor can be used]. Put the quid into a bowl and coat with the paste. Leave at room temperature for 15 minutes.
2) Heat a wok until smoking. Add half the oil and swirl it around. Add half the squid and cook over high heat for 30 seconds, tossing it a little. Tip the squid into a bowl. Wipe the wok clean, then cook the remaining squid in the same way.
3) Return the first batch of squid to the wok and add the fish sauce and palm sugar. Toss together and cook for 20 seconds longer.


OUR NEW FAVORITE WINTER SALAD
Serving Size= 4. Active time= about 8 minutes.
* ½ small red cabbage, thinly sliced (alternatively, a fennel bulb is delicious)
* 1 orange, peeled and cut into 1 inch pieces
* 1 grapefruit, peeled and cut into 1 inch pieces
* juice of ½ a lemon
* 2 tablespoons cider vinegar (or champagne vinegar)
* ¼ cup parmesan cheese, grated
* 1 teaspoon anise seeds (if using fennel bulb omit this)
* salt/ pepper to taste

1) Slice the vegetable and fruit. Put everything into a bowl, toss and serve.
Friday, November 24, 2006

Shrimp Bisque


It has been so long… I have a holiday sale coming up at my studio and made a mad push to fire one last kiln load before the big day. If you’re in the New York City area and think handmade ceramics might be up your gift giving alley (or for you personally), all are welcome. Eleven ceramic artists all with very different styles will have pieces on sale. Food, drinks and even some live music--music on Saturday only--will be part of the celebrations. The sale is Dec 7-10 in Long Island City, Queens (first stop into Queens from Manhattan, 15 minutes from midtown). Email me if you would like more details-- the bad news: this is our last sale, the building that houses our studio will be turned into luxury condos!

So are you already tired of all that turkey? Or maybe it’s the turkey that is making you tired. I’ve already turned my leftovers into my grandmother’s savory Latvian Pancakes and stashed them in the freezer for a rainy day. Okay, I popped a few along the way. But I learned that making these time consuming treasures is much easier taken in steps: day 1 make crepe batter and filling; day 2 make crepes, fill and finish. Mmm, I might go grab another one…

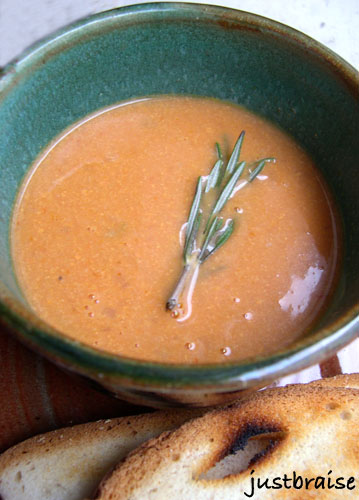
But really, the shrimp bisque already. If you have fish stock on hand this recipe is a cinch. It is quick, filling and warming on a cold, rainy day. With some warm bread (or in a bread bowl) this makes a fantastic meal.

My mother sent me Ina Garten’s new book Barefoot Contessa at Home: Everyday Recipes You'll Make Over and Over Again. Most recipes are pretty basic with ingredients that can easily be substituted for what you have on hand. I’ve heard the writing matches Ina’s personality, and if you don’t like her show, you won’t like the book. I don’t have cable (so I have never seen the show) and I haven't really taken the time to read her stories, so the recipes suit me well enough as a jumping off point.

I saw this shrimp bisque recipe and while I was really craving clam chowder, this recipe seemed a little less labor intensive (and I had clam chowder at a restaurant the previous night so why over due it?). With my old lean to, the handheld blender, I was able to whip this one up in just about 30 minutes. I had fish stock frozen and waiting for use from the seafood paella and today was its day!
SHRIMP BISQUE
Adapted from The Barefoot’s Contessa at Home cookbook
Makes about 6 servings. Active time= 20 minutes. Inactive time= about 10 minutes.
*1 pound shrimp, shells removed and set aside
* 1 tablespoon butter (or olive oil)
* 1 onion, chopped
* 3-4 cloves garlic, crushed
* 2 celery stalks, chopped
* 1 rosemary branch, 4-6 inches
* 2 teaspoons paprkia
* ½ cup brandy
* 5 cups fish stock (see my paella for a recipe if you cannot find it at the store)
* 1 8oz can tomato paste (get one with no salt/ no flavors added)
* 1 pint heavy cream or half and half

1) In a small pot on medium heat, bring fish stock and shrimp shells to a simmer, about 15 minutes. Do not boil.
2) While stock is warming, in your main stock pot over medium heat, warm 1 tablespoon butter. Add onions, garlic, celery and rosemary. Sauté 8-10 minutes, until onions turn translucent.
3) Add paprika and shrimp, cook for 3 minutes until shrimp begin to turn pink and curl.
4) Add brandy and cook for 3 minutes more.
5) Remove the rosemary branch (okay if some leaves remain). Strain the fish stock to remove the shrimp shells and add to the main pot.
6) Add tomato paste and stir until dissolved.
7) Using a handheld blender (or carefully in batches with a regular blender) pulse the soup. Break down most of the shrimp, but overall, leave the soup chunky. Add cream, bring to a simmer and serve.

Thursday, September 21, 2006

Soba Seafood Pasta


While in Indiana at the State Fair, D and I made our way into the 4-H barn “after hours”. Okay, it was really about 5pm, but this was when the real deal started: Well after top-notch vegetables had been judged, local wines swirled and alfalfa blocks adorned, the local apiaries took the stage for a little bee demonstration and hints of the trade.

We seemed to be the only ones fascinated by the discussion, complete with a live demonstration behind the speaker (a man relating the talk with live bees and hive). We asked our questions then dove into samples of over one dozen honey varieties as well as honey butter, honey laced yogurts, honey sticks, honeycomb, beeswax blocks and more.

Slightly stunned when we asked for a good contrasting honey for the soon-to-be-purchased molasses-hued buckwheat honey, we were given a deep shrug: “it’s honey.” Obviously not one of their top salespersons. Buckwheat honey and an amber toned wildflower honey made it into our bags and to New York in one piece-- along with sorghum, whole wheat flour and cracklin’s still fresh on the mind.

Back in New York, worlds away from Indiana, I was avoiding tourists in Chinatown. Ducking into one of the hundreds of food stalls that line the narrow streets, I found myself confronted with noodles. Hundreds of noodles: cellophane, egg, rice, ramen and soba (or buckwheat). The honey must have been on my mind because I grabbed a pack of soba noodles before heading home.

The excitement ended there and for weeks the noodles sat in the cupboard. The honey on the other hand, made excellent hot toddies-- a quick fix-me-up for a recent sick spell. Yet still the noodles sat.

But as the fridge progressed to barrenness (with a half bag of arugula) and the shelves held a few cloves of mighty garlic as well as my sweet looking noodles, I took the initiative and headed for the fish monger…

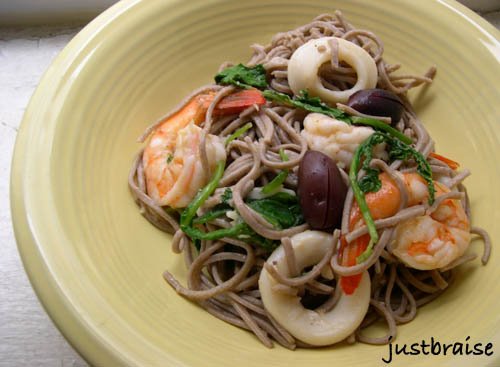
This dish is beyond simple to make. The rich buttery taste these noodles provide is a luxurious accompaniment to seafood. And because buckwheat is actually a fruit (a relative of rhubarb), not a wheat, it is safe for all those non-gluten folks, full of fiber, potassium, manganese and helps keep blood pressure and cholesterol levels down—how is that for tricking someone into eating pasta? Even better (I’m a visual person), the purplish hue of these noodles look amazing against bright vegetables and seafood.

SOBA SEAFOOD PASTA
Serving Size= 6 persons. Active time= about 20 minutes (less with pre-cleaned shrimp)
* 1 handful dry soba noodles (about 16 ounces)
* 2 tablespoons olive oil
* 4-5 cloves garlic, crushed
* 1 lb large shrimp, peeled and deveined
* 1 lb calamari rings, rinsed
* 1 large handful arugula, rinsed well
* ¼ cup Parmesan shavings (optional)
* 6-12 Kalamata olives

1) Peel and devein the shrimp, rinse calamari; set aside.
2) Bring water to a rapid boil in a medium pot. Add noodles, stir to separate and cook about 5 minutes, until done.
3) Drain water, rinse noodles with cold water and place in serving bowl. Return pot to stovetop over medium-high heat; add olive oil.
4) Add garlic and bring to a sizzle; about 3 minutes.
5) Add shrimp, calamari and arugula, cook until shrimp turn pink and curl; about 4 minutes.
6) Add shrimp, calamari, arugula, Parmesan and olives to soba noodles. Toss to incorporate. Add more olive oil if desired. Serve warm or cold.


Tags: , , , , ,

Tuesday, August 22, 2006

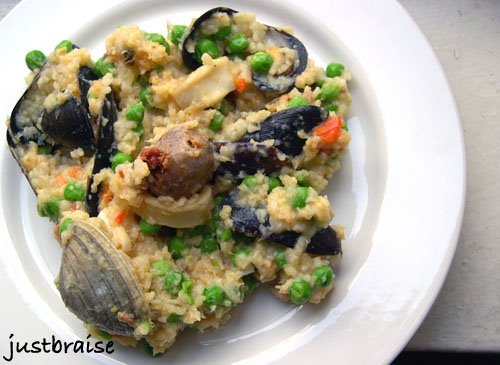
Paella de Pescados y Mariscos con Chorizo (Fish and Shellfish Paella w/ Chorizo)


My favorite thing about Spanish food is not the paella. Nor is it the Valencia orange, omelette or great variety of delicious tapas available-- though these things are all delightful. My favorite thing about Spanish food is the olive.

This unassuming fruit, a call to peace, is plentiful in the Mediterranean region. Squat trees line roadsides for miles and the bitter little drupe almost appears as a small plum from afar: an iridescent purple as it fades into its ripe green. Harvested with a shake to the tree bough it arrives to us along the culinary path marinated, as tapenade or oil.

In Spain, as you enter almost any food or drink establishment, olive pits abound.

A few years ago, my mother and I planned a quick trip around Spain. A country both of us had always wanted to visit, but never had the opportunity. For me, it was a culinary and ceramic feast I planned around clay factories, orange groves and funky architecture. For my mother, it was a wearing down of her feet stomping through the cities and country back roads with the salvation being sangria and tapas along the way (though she too enjoyed the clay factories and architecture).

On day one, hungry from a morning of walking, we stopped for lunch at a recommended establishment: “Oh! How disgusting!” my mother gasped as we walked inside, “this floor is covered in pits!” We shuffled in, unable to understand the debris covering the floor and took a table across from the bar, ordering up a jug of sangria and a seafood paella.

We waited for our food and heard the definite “pffffmmmp” of a person triumphantly releasing a pit from mouth into air. Our noses turned up in question, we looked at each other, then scanned the restaurant for the perpetrator. There he was, tan and stocky with a perfectly edged beard looming in the shadow: “pfffmmmp” he turned and released his bleached teeth in a wide grin towards us.

A bowl of olives came to our table along with the sangria. I popped a few olives into my mouth, but finding nowhere to discard the seeds, I held them in my cheek, a squirrel at harvest. More patrons entered the establishment. Soon that pfffmmmp echoed throughout the restaurant, shooting from the trunk of men and women alike, regardless of age, no one seeming to care except for the clueless Americans. I looked at my mom and shot out five pits in bulleted repetition: pffp pffp pffp ffllmp fllp.

We soon realized it was custom in Spain. Olives abound and are ingrained in the culture. A complimentary bowl is provided at coffee shops, bars and restaurants in lieu of bread or peanuts. The more olives I stuffed into my face the more I fell in love with Spain, pfffmmping them out with the best of the locals. (My mother on the other hand, continued her dismay at the littered floors and begrudgingly returned the bare pit to a cupped hand where it delicately dropped to the floor unnoticed by anyone.)

This past July, a college friend married a Spaniard. The wedding was a great bi-lingual affair of misunderstandings and general good humor at each person’s attempt to befriend a person from another country with little to no verbal language skills. Communication fell remarkably well and eventually I got onto the subject of olive pits on the floor.

“Yes!” my new Spanish friend exclaimed, “it means how good the place is.” He went on to explain that some establishments will even go to the trouble of adding pits to the floor, be it from the mouths of their employees or the previous night’s collection. Pits on the floor is a rating of popularity-- the more pits, the more favored the premises.

Here is a recipe in memory of that first paella and the realization that it is okay to spit out your leftovers in some cultures. And as the season turns, I may even surprise you with some home-marinated olives. Until then, paella it is.

NOTE: Though I cannot remember if the paella I had in Spain was this moist, I enjoy the wet rice base. In this fashion, the rice sticks to everything, including the inside of the mussel and clam shells, forcing you to work for your food: sucking and rotating shells in your mouth to indulge in every bit. D and I found this much more enjoyable, and a more entertaining activity than simply wolfing down the dish without thought. We also felt it made you appreciate the variety of seafood present. I also enjoy eating with my hands, so take away what you will.

This paella is based on a recipe found in the Cuisines of Spain cookbook by, Teresa Barrenechea. It is essentially the same recipe with a few additions, namely peas, onion and chorizo.

This paella is fairly labor intensive, though if you make a large batch and have leftovers for the week it is worth it. We found that it is absolutely necessary to use fish stock and not chicken or vegetable. We felt the stock really enhanced the fish flavor throughout. Also, fresh seafood is essential.

PAELLA DE PESCADOS Y MARISCOS CON CHORIZO (FISH & SHELLFISH PAELLA w/ CHORIZO)
Serving Size= 8 persons. Active time= about 1 hour. Inactive time= 12 mintues.
* 1 dozen littleneck clams
* 2 Tbl coarse salt
* 6 large cloves garlic, unpeeled
* 9 cups fish stock (recipe below)
* 2 pinches saffron threads
* 2 pound mussels, scrubbed and de-bearded
* 2 cups water
* ½ cup olive oil
* 1 large red pepper, seeded and cut lengthwise into narrow strips
* 1 medium Spanish onion
* 8 ounces, about 4 links, chorizo, cut in half
* 1 pound monkfish (or grouper), cut into 2 inch chunks
* 1 pound large shrimp
* 1 pound small squid, whole and rings
* 1-½ tsp salt
* 4 cups Spanish (short grain) rice
* juice of 1 lemon plus extra for garnish

1) Preheat oven to 500F.
2) Clean clams under cold water. Discard any open clams, or those that do not close when touched. Place clams in a large bowl with the coarse salt and let stand for 30 minutes or up to 2 hours. Clams will release sand trapped in shells.
3) Place garlic in a small heat-resistant bowl or baking dish and roast in oven for 10-15 minutes; until skins are browned. (Alternatively, you can throw a whole garlic head in, chopping the top off for easy removal, and use the extra as a spread mixture with olive oil.)
3) In a small saucepan, bring stock to a boil. Add saffron and decrease the heat retain simmer.
4) When garlic is ready, remove from oven (leave oven on). When cool enough to handle, peel cloves and place in blender with ½ cup simmering stock. Process until blended.
5) In a medium saucepot, place mussels (discarding any that fail to close when touched) with 2 cups of water on high heat. Bring to a boil and cook 5 minutes, until shells open. Using a slotted spoon, lift the mussels and set aside (add mussel broth to stock or freeze for later use).
6) In a large paella pan or stock pot, heat the olive oil over medium heat. Add bell pepper, onion and chorizo, stirring occasionally for about 10 minutes, or until chorizo has cooked through and the aromas are strong. Add monkfish, squid and salt, increase heat to medium high. Sauté 5-10 minutes, until monkfish turn opaque.
7) Add rice and stir to blend, allowing rice grains to incorporate into the oils present. Add hot stock, increase heat to high and bring to a boil. Add garlic mixture, stir gently to incorporate and boil for 5 minutes without stirring.
8) Drain the clams. Add shrimp to pot, stir gently to incorporate. Add mussels and clams around the top of the pot. Place in oven (uncovered) for 12 minutes; rice will be absorbed and clams and shrimp will cook.
9) Remove from oven and discard any clams that do not open. Sprinkle lemon juice over top. Cover with lid or towel and let sit for 7 minutes. Serve with lemon as garnish


FISH STOCK
Serving Size= 2 Quarts. Active time= 10 minutes. Inactive time= 20 mintues.
Note: White fish is ideal to use: snapper, cod, hake or bass. Avoid fatty fish, such as tuna, sardines and salmon, among others.
* 2 pounds fish frames and heads
* 1 cup shrimp shells (can clean your shrimp from above and use)
* 1-½ cups mussel broth (see above)
* 1 large Spanish onion, coarsely chopped
* 2 carrots, coarsely chopped
* 1 bunch flat leaf parsley
* 3 Tbl olive oil
* 2 quarts water
* salt/ pepper to taste

1) In a stockpot on medium-high heat warm olive oil. Add fish frames, shrimp shells, onion, carrots, parsley, salt and pepper. Stir until shrimp shells turn pink. Add water and bring to a light boil.
2) Using a slotted spoon, discard any foam that forms on the surface.
3) Decrease to medium-low heat and simmer, partially uncovered, for 30 minutes, skimming foam off as needed. (Do not overcook or stock will turn bitter)
4) Strain the stock and season with salt as necessary.


Head on over to Sweetnick's for today's delicious ARF roundup!

Tags: , , , , .

Saturday, July 29, 2006

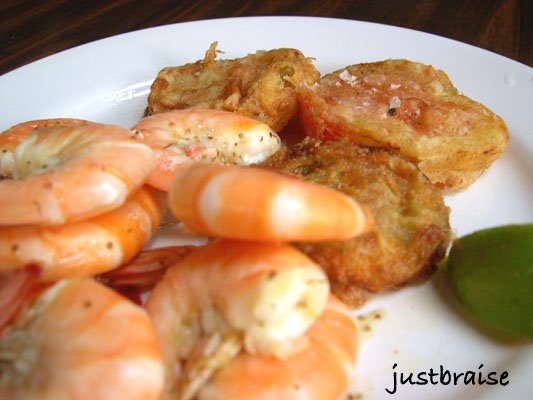
Cayenne Shrimp & Fried Green Tomatoes


The sticky heat making its way through the east coast brings me memories of the south. Even though the most south I have been is the northern reaches (Kentucky, Tennessee, North Carolina, Virginia and Florida), I hold images of sweeping porches, ice cold lemonade, rocking chairs and the tales of my Georgia-living friend. Complementing these images is the lemon meringue pie recently whipped up and rounding off the stereotype, I’ll add today’s fried green tomatoes and cayenne shrimp.

This simple meal kept us out of the kitchen, with the longest moment being the wait for the oil to heat up. It has already been repeated this summer, and will be made many more times for sure—it’s too easy and delicious not to indulge. The heat of the shrimp is cooled by the sweet tomatoes and when served with a cold white wine, this meal is perfection. The combination would stun eaters into awed delight on a sandwich (with the addition of arugula, avocado or perhaps some spicy mayonnaise or mustard).

So while I anxiously await my own tomatoes to ripen on the vine (I spied them yellowing at the edges today), I’ll enjoy these greenmarket finds.

FRIED GREEN TOMATOES
Serving Size= 2 persons. Active time= 15 minutes. Inactive time= 8 minutes.
* 2 large green tomatoes
* 1 cup 2% or whole milk
* 1-½ cups flour
* ½ Tbl paprika
* 2 tsp salt
* 1 tsp pepper
* vegetable oil

1) With a sauce pot, or deep skillet, on high heat, fill oil 1-inch up the sides of the pan. Slice the tomatoes into ¼-inch thick discs.
2) Place milk in one shallow bowl and flour, paprika, salt and pepper in another.
3) Dredge the tomato slices in the milk. [At this time you can start the Cayenne Shrimp; below]
4) Once oil is hot, transfer tomatoes to the dry ingredients and coat both sides. Transfer to oil and cook until lightly browned, about 3 minutes each side.
5) Remove the tomatoes from the oil once done and transfer to a paper towel covered plate. Sprinkle with a little more salt/ pepper and serve.


CAYENNE SHRIMP
Serving Size= 2 persons. Active time= 8 minutes.
* 1 pound large fresh shrimp, cleaned and de-veined
* 1 Tbl butter
* ½ Tbl cayenne pepper
* 1 tsp celery seed
* juice of 1 lime
* hot sauce to taste
* salt/ pepper to taste

1) In a large skillet on medium-high heat, melt butter.
2) When nutty smell of butter comes out, add shrimp and toss in pan to coat
3) Add remaining ingredients and toss again to coat.
4) Cook shrimp about 3 minutes each side, until pink and curled.

Saturday, June 10, 2006

The Return

One now out of control garden, trains, planes, ferries, buses, mountains, 1 rented car, the Underground and 1 glacier later… D and I have returned. Safe and fairly ill we crawled through our door, greeted by the kitties, who were happy to have us home— happier to be fed.

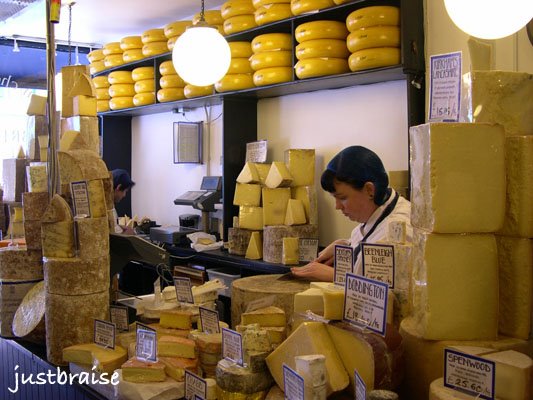
London was fab. A quick stint gave us one stunning play, Dying City, by Christopher Shinn, and one great musical, Sunday in the Park with George, by Stephen Sondheim. Both beautiful and should be seen by all. Other highlights include Neal's Yard Dairy with their wide selection of cheeses from around the United Kingdom and Rococo Chocolates. Their little bag of house truffles and organic dark chocolate cardamom bar offered delectable flavors in the coming days.

A 1 pence flight (how can you not love Ryan Air?) found us in Norway ogling at the fjords. Stunning, magnificent, imposing, breathtaking, Lord of the Rings multiplied by twenty; they should be seen by all in a lifetime. The delicacies of Norway include caviar at breakfast, stacking lox higher than pancakes at breakfast and getting nary a disapproving glance, Bergen's fish market (where a 1/2 kilo (just over 1 lb) of shrimp, caught and boiled that morning goes for $8. Peel and eat overlooking the harbor.), and a slew of smoked fish.

We jumped over to the highlands of Scotland for leg 3. The Isle of Skye was mystical enshrouded in clouds, the glens provided sweeping landscapes, and Ben Nevis (the highest peak in the UK) proved conquered, even in white-out conditions and a snow-capped top. Wee drams during whisky tours (no “e” in Scottish whisky) were an educational and peaty experience while the dairies we popped in at dished up some smooth spreads and great knowledge of the trade.

All in all, a fabulous time, though I am quite stunned to find no sheep crossing my path in New York City.

Saturday, April 29, 2006

Chipotle-Mustard Glazed Chilean Sea Bass w/ Green Beans


*Just Braise has moved. Please visit me at www.justbraise.com!*


I first encountered the chipotle pepper a few years back. It was my birthday and a friend brought me an orange can of La Morena Chipotle Peppers in Adobo Sauce. He had passed a Mexican bodega on the way to the party, stopped in, and bought the cheapest bizarre food item he could find—the 50 cent-7 ounce can was perfect. It was not the only strange food-related gift I would receive that year: a small jar of mint chutney, a bag of stale cotton candy, a can of tuna fish and gunpowder tea were some others. All, much to my own surprise, were put to use—except the chipotle peppers—I just did not know what to do with them.

I cannot say I was afraid of the little shriveled smoked pepper. I just did not make much Mexican food at home (a friend of mine worked at a fabulous Mexican restaurant that offered me a good deal on my meals). I did not know what to do with it. As I said, this was a few years ago. My adventures in mixing world cuisines were not so daring, that can of peppers sat in my cupboard for at least 1 year.

After years of eating chicken mole at said establishment, I finally craved that bittersweet chocolate sauce one night at home. I called my friend for the recipe, attempted my own measurements (since they make it in large vats) and low and behold, I had all the ingredients-- chipotle chili peppers being one of them. I whipped up a batch and I might say, mine was just as delicious as the one I had been eating for years.

I no longer shy away from buying that little orange can of peppers. Their deep smoky flavor is unique and their subtle spice is superb. So when I was sent a bottle of Chipotle-Mustard, I knew it would be delicious. That mustard started popping up in my tuna fish sandwiches, replacing regular deli mustard. I used it on kielbasas, in dips, for dressings on salads.

Inspiration hit the other day as D and I purchased some Chilean Sea Bass from the fishmonger. The problem I often have with D: I want to experiment and he will say something in the realm of: “We purchased the most expensive fish in there, nothing should be added, it’s like drenching a filet mignon in sauce! Fish should be simple: butter, lemon juice, done.” I assured him that even though I had no idea what I was doing, I knew what I was doing. The more you cook, the more you understand flavors and how they might coexist. I was finally able to convince D that replacing plain mustard with chipotle mustard would taste good.

The result? The fish just melted in the mouth. It was a superb combination of smoky chili to sweet mustard to buttery fish. Served alongside green beans this meal will have to be made again—possibly with more chipotle oomph.

CHIPOTLE-MUSTARD GLAZED CHILEAN SEA BASS w/ GREEN BEANS
Makes 2 servings. Active Time= 8 minutes. Cook Time= 20 minutes.
* 1 pound Chilean Sea Bass
* 1 Tbl Silver Springs Chipotle-Mustard
* 2 tsp granulated sugar
* 1 Tbl butter
* about 20 green beans, washed and ends plucked clean

1) Preheat oven to 250F. Melt butter over stovetop on medium-high in an oven-safe pan. While the pan is warming, mix the chipotle-mustard and sugar in a small bowl. Wash and pat dry the Sea Bass.
2) When pan is hot, sear the Sea Bass, skin side up for 2-3 minutes. Flip and sear skin side down for 2-3 minutes. (The thickest part of the fish should still be raw).
3) Brush the chipotle mix over the Sea Bass, place the green beans around the fish and put in center shelf of oven, uncovered, for 20 minutes.


For non-food related activities we have WCB over at Eat Stuff. Below we have one very inactive post-op Whiskey drugged up and sleepy.

As well as one comatose self-drugged (cat nip) Kitty BoJangles (note the fluffy toy that is stuffed full of nip).

Wednesday, April 19, 2006

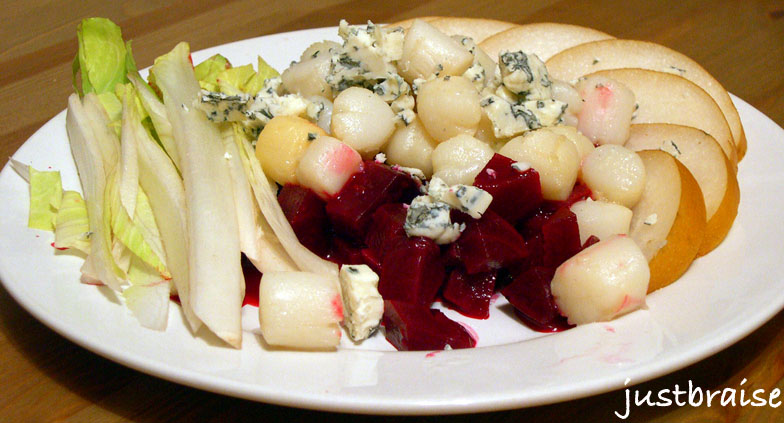
Scallop Salad


More beets and another salad… Can a girl get tired of such sweet treats?

While the sun decides to let me linger on the streets a little longer, it becomes more difficult after a day at work to take refuge to the kitchen. However, I have beets (the last of them) that need some quick vanishing (as well as a light purse to care for).

Light, sweet and buttery, I decided scallops were an unusual yet natural pairing with the beets. Accompanied with some classic, subtle salad ingredients, this meal is a winner for a quick and painless feast on a warm day.

Asian Pear is given space on this plate. A cross between a crisp, juicy apple and an almost ripe pear, this fruit provides a splash of exotica to the salad. There is a woman I work with who can go on at length about the perfect fruit. She is from the Philippines and wins the fruit battles that ensue when we talk, mentioning it always taste better at home, in the Philippines. I believe this is true for anyone, wherever they may be from: an American will swear their apples are the best only back home, an Egyptian proclaims their dates to be the sweetest only when seated by the Red Sea, and a Haitian will only eat mangoes when on their own shores.

So when I brought an Asian Pear into the office I was sure she would brush me off with another one of her, “oh, back home ours are much tastier. You have not lived…” Sure enough, she saw my pear: “Oh those pears, they grow all over in my country…” Finishing with “it is the only fruit I do not like.” I paused, unable to comprehend how someone could not love a combination of the two greatest fruits: “I prefer your American pears much better. So much sweeter.” And with that, she shrugged her shoulders and walked away. For those who agree, or do not have Asian Pear handy, a regular pear or crisp apple may be substituted in this meal.

I have discussed previously how to pick scallops, here offering an alternate cooking method. They may be chilled before being placed on the salad, or served warm scattered over top. Nuts may also be added to this salad for another crunch.

SCALLOP SALAD
Makes: 2 servings. Active Time= 10 minutes. Cook Time= 45 minutes (if beets are not already prepared).
* 1 medium beet
* ½ pound Bay Scallops
* 1 Asian Pear (apple or pear is suitable too), sliced thin
* 1 endive head, sliced this
* 2 Tbl blue cheese
* 1 Tbl butter
* 1 Tbl spicy mustard
* 1 Tbl vinegar (tarragon or wine)
* 1 Tbl fresh lemon juice

1) Braise or boil beets according to directions from previous two posts. Slice and place on plate.
2) Warm a pan over medium heat with the butter. Wash the scallops under water. Once pan is warm and butter melted, sauté the scallops about 8 minutes until lightly golden. While cooking, prepare the remaining salad.
3) Arrange sliced Asian Pear and endive on plate. Toss scallops on top, add crumbled blue cheese over whole.
4) In a small bowl mix mustard, vinegar and lemon juice. Pour over salad just before serving.

Saturday, March 18, 2006

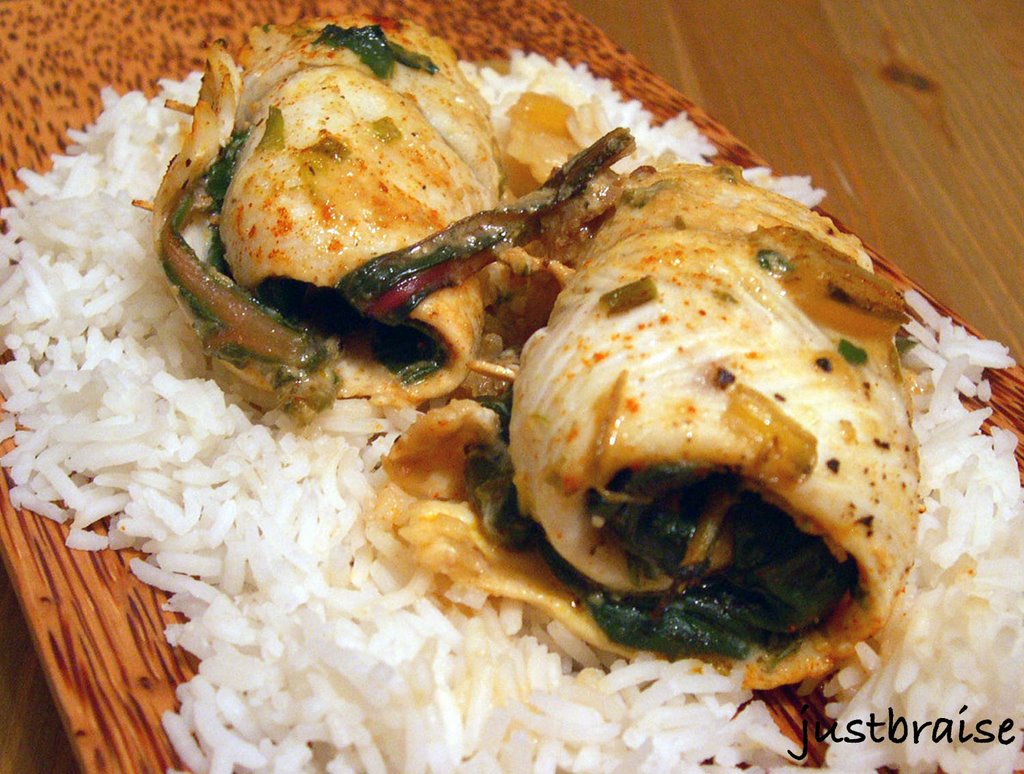
Braised Swiss Chard Wrapped in Filet of Sole (WCB #41)


As a child I was surprisingly tolerant of vegetables. This is probably what eventually drew me to become a vegetarian for a good six years: Carrots, spinach, radishes, mushrooms, and asparagus, it all tasted so good and earthy. My mother would often have me create the salads, calling me “rabbit” and promptly banishing me from the kitchen because I would start devouring the crisp vegetation before dinner was ready. This vegetable love eventually led me to my own tomato garden (which the deer and squirrels in our backyard ate) and drew me weekly to the farmer’s market and any grocery excursion.

Today I am still fascinated by farmer’s markets and grocery stores. If I have nothing better to do I will wonder over just to walk through, hypnotized by the produce, laid out in beautiful pyramids, or tucked into bins. I only wish I could take it all home. I often will purchase a fruit or vegetable just because it looks beautiful, strange, unloved, or overly loved. Often I have never tasted the item before. I bring it home, behold the power of the internet, and research different ways to eat whatever it is I acquired.

This quasi sense of adventure when it comes to buying produce led me to Swiss chard the other day. The bright red stalks initially drew me in. The veins and deep emerald bushel of leaves won me over. D has this same sense, though he does not like to admit it. It is not for produce, it is for the meats and fish. While I spend my time fondling over the fruits and vegetables, D heads over to the meat and seafood sections spying out whatever looks fresh. Surprisingly, more often than not, our tastes meet midway and we are able to concoct a meal that blends quite nicely.

This was one of those days. While I joined up with D he was having 6 filet of soles wrapped up. We returned home, me with the intent to braise my chard, even with D complaining he has never had it and would not enjoy it, and D still undecided on how to prepare his filets. After some research, on which sites I do not know, D announced we would wrap the chard up in the filet. He had found similar recipes for spinach, and I ensured him it would be easy enough to treat the chard with the same respects.

I braised away, D complained of hunger. Soon enough he was wrapping the chard in blankets of sole, pinning, baking, and we were both enjoying a very succulent meal. The flavors in this dish completed each other perfectly. Chard, with its slightly bitter taste, paired with the milk and bacon of the braise perfectly; a stunning platform for the sole. D announced he felt like we were eating in a 4-star restaurant. With all objectives met, we rubbed our bellies satisfied.

BRAISED SWISS CHARD WRAPPED IN FILET OF SOLE
Serving Size= 2. Active Time= 20 minutes. Inactive time= 30 minutes
* 1 bunch swiss chard (about 6 stalks); slice stems bite-size; tear leaf into more manageable sections
* 2 strips bacon, slice bite-size
* 2 scallions, whites and greens, chopped (one small onion would work too)
* 1 garlic clove, crushed
* 1-½ cups chicken broth
* ½ cup milk or cream
* 4-6 filets of sole (sole is quite thin; depending on hunger prepare more or less)
* juice of 1 lemon
* 2 tsp paprika
* 2 tsp mustard powder
* 2 tsp parsley
* salt/ pepper

1) Preheat the oven to 350F. In a skillet with a cover, over medium heat cook the bacon, scallions, garlic and chopped swiss chard stems until bacon browns, about 8 minutes.
2) Add swiss chard leaves, broth and milk. Cover, turn heat to medium-low; let simmer about 10 minutes, until leaves are limp.
3) While the chard braises, prepare the filets. On a large skillet or baking pan lay out the sole. Pour ½ the lemon juice over the filets, add salt, pepper and 1 tsp of paprika, mustard powder and parsley.
4) Once chard is complete, using tongs or a fork, place a thin layer of chard on top of the sole filets. Wrap tightly, being careful not to tear the fish; pin closed with one or two toothpicks. Arrange rolled up fish in a tight pack on baking dish. Top with remaining lemon juice, paprika, mustard powder, parsley, salt and pepper. Pour any remaining chard or sauce into the pan. Place in middle rack of oven for 20 minutes.


** Please check out my article regarding Umami over on Blog Critics. Soon enough the same piece will be posted to Paper Palate in the WellFed Network (and might make an appearance here as well).

In the non-food world of WCB, Eat Stuff serves up another winner. Below we have the spotlight on the young terror Whiskey. Yes, he may look cute and innocent now, but try moving your toes or rolling over when you are trying to sleep.

Here, we have Whiskey moments before on top of a rug, resting verticle, in the corner (about 6 feet high, you can see the doorframe of a closet). The young Whiskey whisked his way to the top, declared himself king of the world, and then awaited his sister to walk by below and attacked.


Head on over to Lindy Toast for the Something For Nothing wrap up!

Tuesday, February 28, 2006

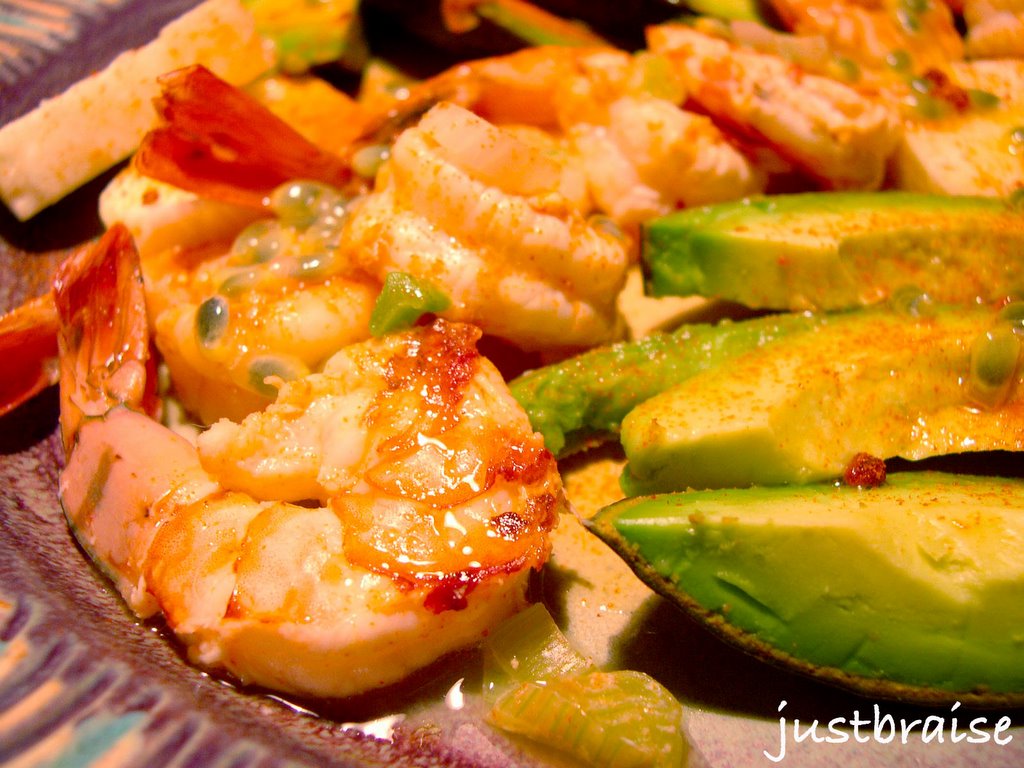
Jicama Passion Salad w/ Shrimp


I will admit there are many foods I have yet to try in my life. A semi-picky eater as a child, then vegetarian for six years, left me many missed opportunities. So it is only recently that I am opening my doors to the new. Last week it was skate, over the weekend it was pork belly, and today it is passion fruit.

It is true. I must sadly come to terms to the fact that I have never (knowingly) had passion fruit before today-- okay, two days before: At a recent brunch I discussed with friend, R, how I love Looza’s Tomato Juice because it is 100% pure tomato juice—the perfect base for an excellent Bloody Mary. He dared me to try the Passion Fruit, “truly amazing.” So the next time I saw it in stock I took the challenge and bought some. Once in my mouth I was brought to the Caribbean.

So as I went shopping one day my eyes fell upon a plum-looking fruit. The sign read “Passion Fruit.” A bit pricey at $1.50 a piece; I decided it needed trying, regardless.

Originally from Brazil, passion fruit got its name from Spanish missionaries who thought the fruit resembled religious symbols, like the crown of thorns. In Spanish, it is known as granadilla or “little pomegranate,” possibly because like the pomegranate, it is the pulpy seeds that are eaten.

Passion fruits are small with an overwhelmingly sweet pulp that is often strained for juice or sauces (though the seeds can be eaten). A good source of vitamins A, C and fiber (some claim it to be the highest fiber source of all fruits) and high in potassium, the flavor and health benefits of these little wonders go a long way.

Passion fruits are available in shades of purple or yellow (a more tart fruit) depending on the variety. When purchasing, pick the largest fruit available. It should be firm and as it ripens, the skin’s ridgidity should keep, while becoming slightly shriveled when ripe. When it is ready to eat, slice it in half, scoop out the seeds, and use them as-is or strain the pulp and just use the juice. Either way, this fruit is pure indulgence that should be tried.

The combination in this salad was pure tropic. The light, watery crispness of jicama (hick-e-ma) pairs perfectly with the buttery smoothness of avocado. A sprinkling of cayenne pepper gives this salad a great kick. When drizzled with passion fruit seeds and a smattering of shrimp, this salad is utterly delicious.

JICAMA PASSION SALAD w/ SHRIMP
Serves 2. Active Time= 15 minutes. Inactive time= 1 hour.
* 1 lb large shrimp, peeled and de-veined
* 1- 12oz can lager beer
* juice of 1 lime
* 2 scallions, chopped
* 1 avocado, sliced ¼-inch thick
* 1 jicama, peeled and sliced ¼-inch thick
* 1 passion fruit, pulp only
* 2 tsp cayenne pepper

1) Place the cleaned shrimp, beer, lime and scallion in a bowl. Mix and let marinate in the refrigerator for 1 hour.
2) When shrimp are done, using a grill pan (or real grill) set to medium cook the shrimp, 2-3 minutes each side, until they turn pink/ char slightly and curl. Place in a fresh bowl in the refrigerator to chill while prepping the rest.
3) Peel and slice the avocado and jicama, arranging them on 2 plates. Remove the shrimp from the refrigerator and arrange it on the plate. Sprinkle with cayenne pepper and passion fruit pulp. Drizzle with lime juice (optional).

Thursday, February 23, 2006

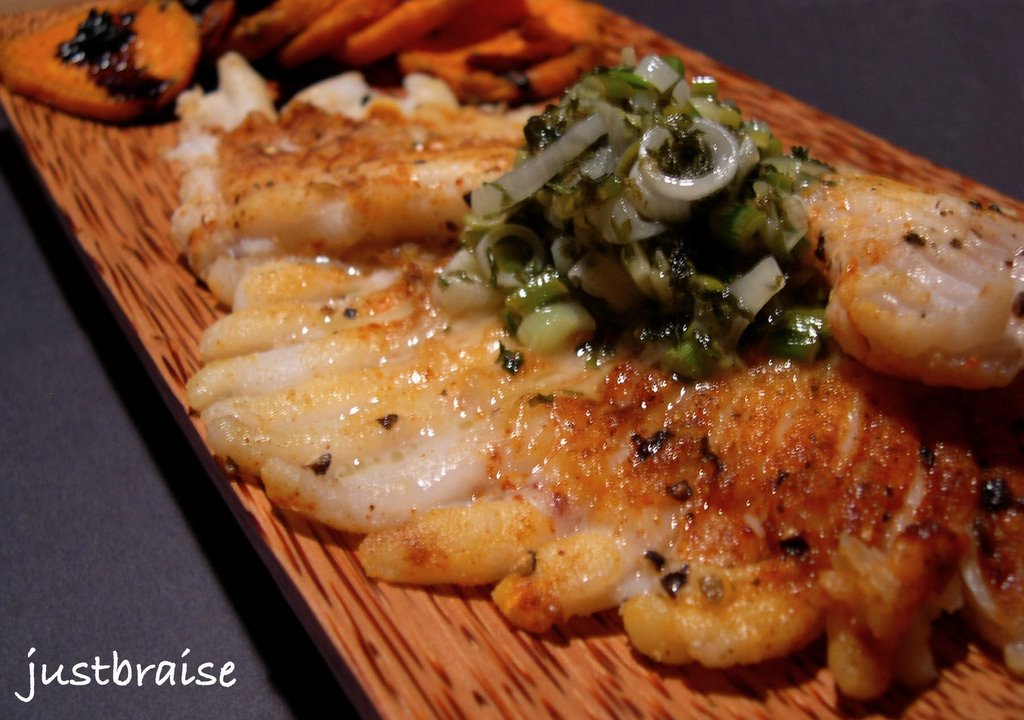
Skate au Buerre Noir & Sweet Potato Crisps w/ Balsamic Reduction (ARF/5#9)


*Please note on 2/28 this post was taken hostage for ARF/5#9 over at Sweetnicks. I've been overwhelmed lately, but will post more shortly*

Valued for centuries in Europe for its delicate scallop-like flavor and crab-like consistency, skate is the bottom dweller brought here to the spotlight.

Relative of the ray (as in sting ray), skates are oft admired for their smooth gliding ability. Their flattened diamond bodies barely skim the ocean floors, graceful and streamline, possibly the inspiration to many silver screen sci-fi futuristic machines—an interesting fact since these are some of the oldest underwater dwellers man knows.

Rumor has it that “faux” scallops are made from the meat of skate, but this is probably without merit. Though if the sweet scallop taste is desired, skate is an inexpensive and delicious alternative. It is also very healthy: low in calories and fat; loaded with protein and vitamin E. They are also without bones. Like sharks, the skate endoskeleton is made up of cartilage. This makes for easy cleaning and less hidden obstacles to choke down the throat.

Recently in the fish market I took notice to skates. Their fan-like “wings” create an appealing span visually. I probably bought this one because of the Olympics and so much skating (the sport) on television. I finally thought to give skate (the fish) a try.

In the New York area skates are at peak season April to June, and to a lesser extent now, October to February. For whatever reason, they have not gained much popularity in the United States and their cost reflects this (I found mine for $1.99 a pound). They are sometimes sold with their cartilage and skin in tact, though I found mine skinless and free of cartilage (often fish markets will de-“bone” them for you if asked).

Like most fish, the less put into it, the better it will taste, allowing its true delicate flavor to shine through. I did some rummaging and found most skate recipes called for a simple and quick pan fry, topped with a butter sauce. I followed this advice. The sweet potato chips with balsamic reduction were inspiration from a cooking show I saw on PBS over the weekend; balsamic reduction, placed over acorn squash. I did not have acorn squash, but thought sweet potato chips would do nicely.

This meal was filling, delicious, healthy and visually stunning. It is a semi-sweet, full of textures and flavors. For all the different elements, it is quick and easy to make and should be tried. Skate might just become your new favorite fish.

Note: All this may seem hectic and like a lot of steps to follow. It is really simple if you know what ingredients go to what and keep on top of things. Everything falls into place once you get started. Plus, so few ingredients are used it is difficult to really mess anything up.

Skate au Buerre Noir & Sweet Potato Crisps w/ Balsamic Reduction
Serves 2. Active Time= 30 minutes. Inactive time= 20 minutes.
The Sweet Potato Crisps w/ Balsamic Reduction
* 1 sweet potato, skinned
* 1 Tbl butter
* ½ cup balsamic vinegar
* 2 cloves garlic

1) In a small pot with water, over medium heat, add whole sweet potato (skinned). Bring to a boil and cook for 20 minutes.
2) Remove from boiling water and run under cold water to bring temperature down so you can handle the potato. Cut into ¼-inch discs.
3) On a skillet on medium heat, melt the butter. As butter is warming, in a separate saucepan on medium-high heat add the balsamic vinegar and garlic. (This will be brought to a boil, stirred occasionally for about 10 minutes; until thickened.)
4) In the skillet, fry the potato discs until lightly browned, about 8 minutes. The balsamic should be slightly thickened at this point. Remove the balsamic reduction from the heat, leaving in saucepan; it will continue to thicken. Place potatoes in the oven at 250F to keep warm while you prepare the skate (recipe below). When ready to serve, drizzle balsamic reduction over top.


The Skate au Buerre Noir
* 2 skate steaks
* salt/ pepper to taste
* 3 Tbl flour
* 2 tsp paprika
* 1 Tbl butter

1) Wash off and pat the skate dry. (If pan is large enough to fit both skates, leave whole; otherwise, cut into halves or quarters.) Cover with salt and pepper to taste; sprinkle one side with paprika. Sprinkle flour on both sides.
2) Melt 1 Tbl butter over medium heat. When warm, add skate. Cook 2-3 minutes each side until golden brown. Remove from heat and cover with buerre noir sauce (recipe follows)


Buerre Noir
* 3 Tbl butter
* 2 Tbl parsley
* 2 scallions, chopped

1) Begin sauce before prepping skate. Prep skate as butter is browning, keeping an eye so as not to burn. In a saucepan on medium heat, melt butter with scallions. Heat until butter begins to brown and emits a nutty aroma. Add parsley, stir and remove from heat.

Monday, February 13, 2006

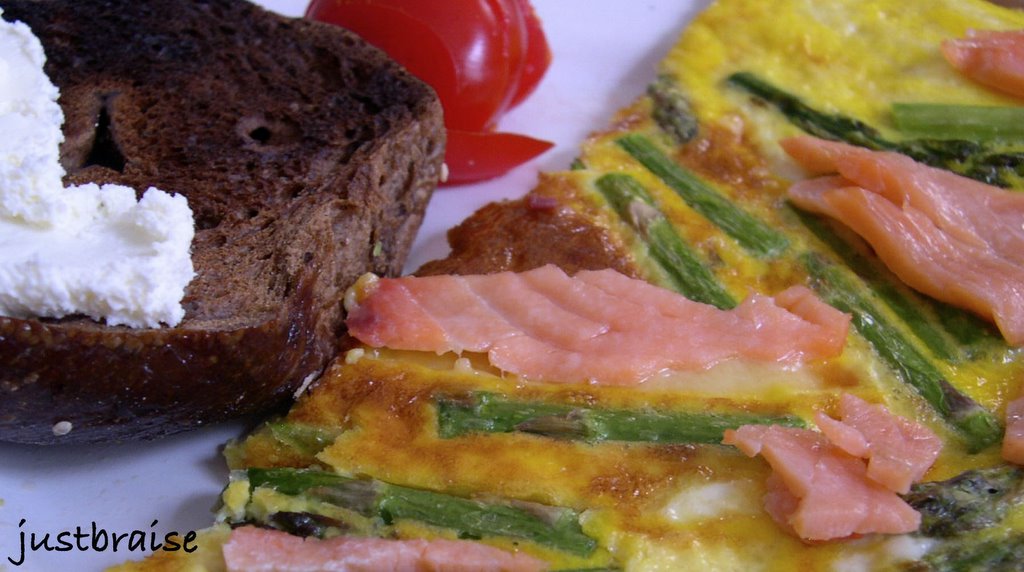
Frittata Up The River


There were few “food” days growing up that I enjoyed rising for. Weekday food treats meant my mother was appeasing one of the three kids about the upcoming school day: Would we be taken to the dentist after school? Did one of us have a test? This could all be gauged by the care put into the weekday breakfast: Chocolate chip pancakes are shots at a doctor’s annual. Cold cereal and orange juice is a regular day.

But oh, those fabulous Sundays! My brothers and I would be dragged kicking to Sunday school. One would complain of fever, one would hide in the closet. I always waited until I got into class. As the teacher began discussing King Solomon, I raised my hand: “I have to go to the bathroom.”
“Really, Stacey? The bathroom?”
“Yes, I have to go.”
“Fine. But come back this time!”
“Oh, yes, I will.”

I left class, walked past the bathroom, took a right at the lounge, made a beeline for the Sisterhood Gift Shop, entered the small glass cube, ducked behind the counter, and twisted 3 inch purple ribbon into bows for my mother, head shopkeeper. “What happened to class?”
“I had to go to the bathroom.”
I sat on the floor pulling bows for 45 minutes while my class was lectured about the King. Soon, the sound of footsteps echoed in the halls making their way to the congregation room. I found my class, sunk into the rhythm of their footsteps, and entered the room to sing for the next 20 minutes.

Song time ended and I returned to the gift shop. I helped my mother clean and lock up, my brothers would arrive, and we would meet my father at the local delicatessen. Within seconds our platter arrived. It was the same platter that we ordered every Sunday: 1 pound thinly sliced Nova smoked salmon, 2 slender glistening white fish, 1 scoop plain cream cheese, 1 scoop chive, sliced tomatoes, onions and a bucket of pickles. Each received a plate with their personal bagel: sesame for my father, everything for my mother, plain for my older brother, raisin for the younger, and egg for me-- all toasted or fresh according to taste.

Now, when I eat smoked salmon, I cannot help but remember those platters of fish for my family. Needless to say, I can appreciate smoked salmon in a variety of ways these days. It does not hurt to have a bagel with a schmear on the side, though. Smoked salmon is usually reserved for special occasions now-- a wee too decadent for weekly consumption.

This Valentine’s Day, have a special meal. Better than going out is making something at home. It does not have to be overly expensive to be special, just good. Make your favorite meal with perfect care, if it’s for a special someone doing what you know will take the edge off. This frittata has two of my favorites: asparagus and smoked salmon (and a bagel with schmear on the side). So there you go, go up the river and bring back the memories—just leave King Solomon behind.

FRITTATA UP THE RIVER
Serving Size= 2. Prep + Cook Time= 15 minutes.
* 4 eggs
* 3 Tbl milk or cream
* 1 tsp pure vanilla extract
* 8 asparagus stalks, washed and cut into 1-inch pieces
* 4 slices (about ¼ pound) smoked salmon, cut into bite-size pieces
* 1 Tbl butter

1) In an oven-safe skillet on the stovetop over medium heat, warm pan and melt butter. While butter is warming, crack eggs into a bowl, add milk, vanilla and whisk together. When butter begins to bubble, sauté asparagus until a dark green, about 3 minutes. Add eggs over top, leave on heat for 3 minutes.
2) Turn broiler on. Place skillet under the broiler and bake 8-10 minutes. Eggs are done when they are set and lightly browned. Remove from broiler, place smoked salmon over top, return to broiler for no more than 20 seconds (you do not want to cook the salmon—it is already smoked—just warmed).
3) Serve with cream cheese schmeared toast or bagel.

Friday, February 03, 2006

Broiled Scallops w/ Horseradish Mashed Potatoes Crowned by Caramelized Onions


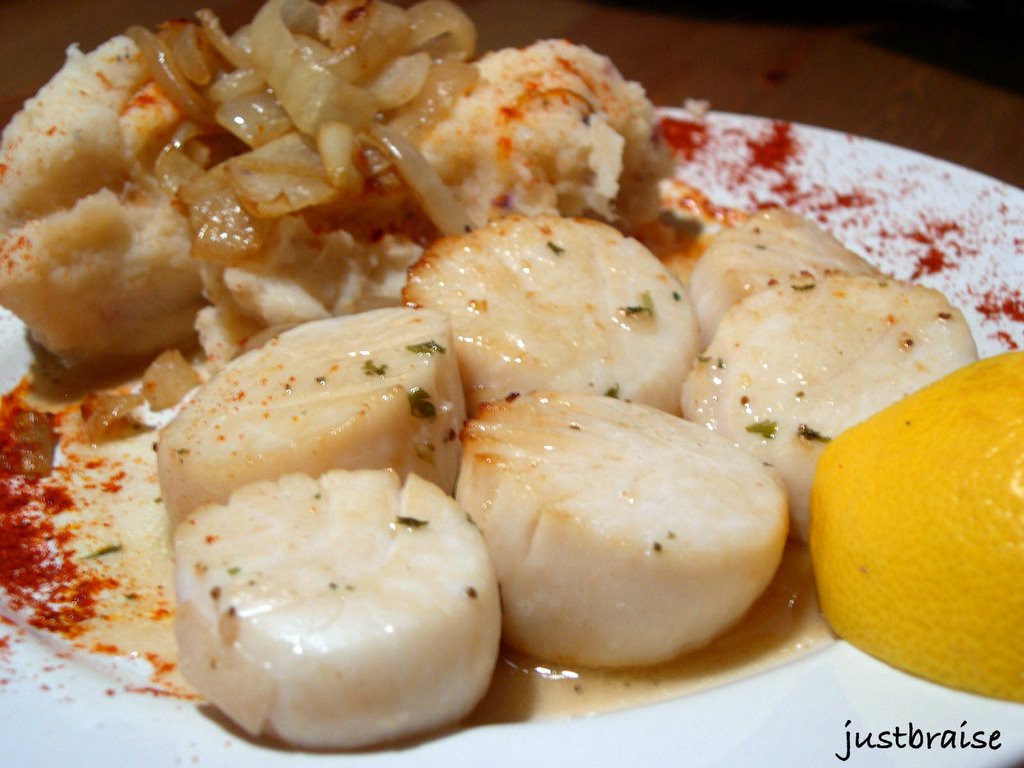
It seems that when the weather turns to the worst and our taste buds crave the joys of summer (namely fresh seasonal fruits), the ocean picks up some slack. Like mussels, the plump prizes known as scallops are in season October through March and should definitely be dined on. The jewel of the ocean: soft, sweet, and meaty-- these little bivalves are a kind pick.

Because of their sweet nature, scallops are an ideal pairing with uncommonly used entrée flavorings: sautéed with pear and honey; on a bed of creamy braised leeks; mango salsa; or in this case, accompanied with horseradish mashed potatoes crowned by caramelized onions.

High in flavor, protein, fatty acids, vitamin B12, magnesium, potassium, and low in calories, scallops are the perfect “good for your heart” meal. They are surprisingly filling so do not shy away from the cost that quality scallops can run. In my local fish market I can find the treasured bay scallop for $14 per pound-- I have seen them for as much as $35 per pound.

From the French escalope, written records show that scallops have been harvested in the bays of North America since the late-1700’s (probably even before this time). The scallop shell is the typical “seashell” image many of us carry in our mind—not the conch, mussel, or oyster, it is the circular wave-like shell with a flat base where the two halves connect. A scallop’s age can be gauged by counting the consecutive ridges on the shell. They are hermaphrodites, changing sexes depending on the water’s temperature (talk about a gaggle of girls).

When purchasing scallops, look at them first. Colors should range from off-white, slightly beige, to a pinkish hue. Sizes and shapes should vary slightly. If you see scallops are uniform in size they may be imitation (possibly shark) or cut from larger, less tender scallops. Pure white in color may be a sign that the scallops have been sitting out, absorbing water and chemicals. Next, smell them. They should not have an overly fishy aroma, but a slightly sweet scent. Like all fish, scallops must be kept cold. Immediately after purchasing, put the scallops in the refrigerator. Scallops can be kept fresh for up to two days. However you choose to eventually prepare your scallops, cooking time should be limited to a few minutes. Never overcook your scallops or they will turn into rubber. And in my belief, stay away from fried scallops as it breaks down the delicate quality that makes them so succulent to indulge.

This meal was a simple one. I chose to broil these scallops with a little butter, lemon juice and garlic. The end result was a sweet decadent treat. I was in the mood for horseradish (what is better to accompany fish?) and decided to throw them into buttery mashed potatoes. Topped by caramelized onions, this was a sweet and tangy pairing very fitting to the meal.

BROILED SCALLOPS w/ HORSERADISH MASHED POTATOES & A CROWN OF CARAMELIZED ONIONS
THE SCALLOPS
Makes 2 servings. Prep + Cook Time= 15 minutes.
* 1 lb fresh bay scallops
* 3 Tbl butter, sliced into small chunks
* 1 clove garlic, crushed
* juice of 1 lemon
* 1 tsp celery seed

1) Turn the broiler on. Wash the scallops and place on an oven-safe, non-reactive surface. Do not stack scallops. Add all ingredients evenly distributed over the scallops.
2) Broil 5 minutes, flip, broil 5 minutes (or until each side is slightly golden).


THE HORSERADISH POTATOES
Makes 2 servings. Prep time= 10 minutes. Cook time= 30 minutes
* 2 large red potatoes, peeled half-way and cut into quarters
* 4 Tbl butter
* ½ cup milk (or buttermilk)
* 2 Tbl fresh horseradish
* salt/ pepper to taste
* 1 large yellow onion, sliced

1) In a pot on the stovetop, place potatoes in cold water with a sprinkle of salt. Cover and bring to a boil on medium-high heat. Boil potatoes until soft when poked with a fork.
2) While potatoes are boiling, warm 2 Tbl butter on a skillet. Add onions. Sauté on medium-low heat until onions are golden, about 20 minutes. Stir frequently so onions do not burn.
3) When soft (about 30 minutes), drain water and return to potatoes in the pot to the stove (now place the scallops in the broiler). Add the remaining ingredients and mash until desired consistency (smooth or chunky) is reached. Cover and keep in warm pot until scallops are ready.

Monday, January 23, 2006

Mussels in Tomato-White Bean Sauce & Fried Calamari


On holiday in Italy, J and I broke off from the larger group. We ditched them in Rome with a bottle of Limoncello stuffed in our bag, and set off to explore the coast. Two girls ready for life with the locals, we were also two keen food snobs (a delight to be in Italy).

We began our journey heading south to Napoli. As we de-boarded the train, the energy and life of the city engulfed us. Two out-of-place New Yorkers, we felt at home amongst the bustle of locals. We found a cheap hotel near the train, threw our bags down, and headed to city central. We walked the narrow backstreets where young boys kicked soccer balls against the building walls. Laundry hung at haphazard angles overhead. Women teetered out the window, calling loudly to the children below. Men sat in small groups busily talking with their hands. We found the central piazza where the teenagers sat around the fountain. Surrounding the fountain were coffee shops where the twenty-somethingers flirted the afternoon away. We found a small stairway and sat down, taking in the spirit of the city.

Our stomachs growled as night came. We wandered into the commercial downtown and asked locals where to get some good seafood. In a winding backstreet full of street-hawkers, we were pointed into a restaurant. Led up to the second floor, we were seated on a balcony that overlooked the street. The smells overwhelmed us, and our stomachs deceived us—we ordered more than any two mortals could ever finish, daring ourselves to clear the plates.

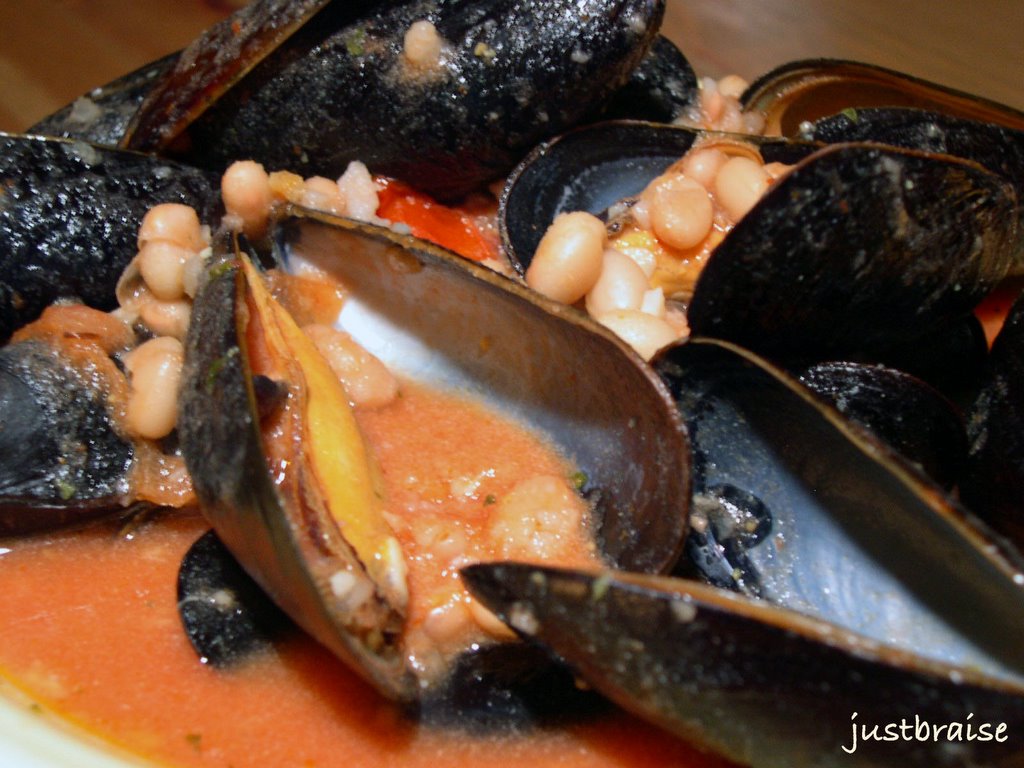
For starters, I ordered grilled calamari: Perfect oval squid bodies, with a full bunch of tentacles. I slowly plucked each single tentacle and dropped it into my mouth. These little critters were the right ratio of chew to crispy grilled flavor, drizzled in olive oil and garlic. For my entrée I had mussels. The most perfect mussels I have ever had swimming in a red tomato sauce: salty-sweet and a model broth consistency for easy scooping. J and I passed our dishes back and forth, well aware we were nearing the bursting point. The third hour of the meal rolled around and we began giggling in disbelief of our good fortune and full bellies. Our gluttony had driven us too far: we had consumed everything. We rolled ourselves out of the restaurant and back to our hotel. We slept the most content night that trip with visions of the ocean dancing in our head: we were satisfied.

A few years later, my mother would take my little brother and me to an Italian restaurant in Chicago. Hoping to re-create my fading memory of the gluttonous Napoli feast, I happily ordered the mussels. As family tradition would dictate, my brother decided on the fried calamari appetizer for the table. Rings of crispy calamari arrived. It is a dish that is easily ruined if the batter is too thick or soggy. These critters were a delight. Soon a half-moon bowl arrived overflowing with blue shells and hidden orange treasures. The broth in this mussel batch was thick with tomatoes. Pearls of white beans accompanied the texture and flavor of the dish to perfection. Buttery, salty, and savory, I was brought back to my gluttony. I sopped the final drops up with a crispy crustini: pure heaven.

This meal was inspired by past and future memories of calamari and mussels, probably my two favorite seafood dishes (lobster is up there too). For the calamari, D and I used the batter we use for our fried chicken. Because we use farm-fresh cornmeal (ordered direct from an Indiana farm), the texture is a bit grainy. For something as delicate and chewy as calamari, I think this texture fought a little too much with the dish. If extra-fine cornmeal is used, I think it would be perfect since the taste of the corn is an excellent compliment to the dish. At first D pooh-poohed my cocktail sauce. Soon he was licking the dish exclaiming, “but I didn’t think it would be so good!” It is the most simple of condiments to make (a dollop of ketchup and a heaping spoonful of good fresh horseradish).

I created this mussel recipe from memory and combined what I believe to be good compliments to the dish. This meal is far to easy and inexpensive not to eat more often. The result was a succulent tomato-based sauce with a hint of cream to amplify the texture and flavor. I think with some white wine, this sauce would have been even better (we were too lazy to run down the street to get some), without wine, it is very fresh tasting. The best part of this dish was our vegetable side: a steamed artichoke. Once all mussels were consumed and we were left with a bowl of tomato broth, the spoon-like leaves of the artichoke was used to scoop up the sauce and enjoy with the meaty earthiness of the vegetable.

Pre-Cooking Note: Be careful when cooking with hot oil. The key to cooking with oil is that it must be extremely hot for a quick fry. The oil splatters easily so it is advisable to wear an oven mitt over the hand, long sleeves, or use long tongs to place the food into the skillet. Remember to gently place the food down to prevent unnecessary splatter.

FRIED CALAMARI
Serves 2. Prep + Cook time= 15 minutes.
* ½ pound fresh calamari rings
* ¾ cup cornmeal
* ¾ cup breadcrumbs (or flour)
* salt/ pepper to taste
* 1 tsp paprika
* 1 egg, beaten
* 3 cups vegetable oil

1) In a high-rimmed skillet, heat the oil over medium-high heat until hot. While oil is heating, beat egg in a small bowl. Place the calamari rings into the bowl and stir to coat. In another bowl, mix the dry ingredients (cornmeal, breadcrumbs, salt, pepper, paprika). Toss the calamari in the dry mixture to coat well.
2) To test heat of oil, place on calamari into the skillet. If calamari sizzles, the pan is ready. Fill skillet with calamari. Cook about 2 minutes, flip, cook 2 minutes more. You may want to cover the pan to prevent splatter.
3) Remove calamari onto a napkin to absorb some oil. Transfer to serving plate and enjoy with a sprinkle of fresh lemon juice or cocktail sauce.


Pre-Cooking Note: Mussels are in season October- April, so now is a perfect time to enjoy these bivalves. They can really be eaten all year round, but it should be noted that spawning season is late spring and try to avoid them at this time. When buying fresh mussels, make sure all shells are closed. Any open shells should close immediately when tapped lightly with your finger. If they do not close, throw them away. These dead mussels will contaminate the fresh ones. Also discard any mussels with cracked shells, feel heavy (full of sand), or feel loose when shaken (mussel is dead). Trust your nose: anything that smells overly fishy is probably no good. You can store mussels for up to 2 days in your refrigerator. Place them in a bowl, covered with a damp cloth. Do not place them in an airtight container or in fresh water, this will kill them. Before cooking, debeard and scrub the shells clean under cold running water.

MUSSELS IN TOMATO-WHITE BEAN SAUCE
Serves 2. Prep + Cook time= 20 minutes.
* 2 lbs fresh mussels, debearded
* 2 Tbl olive oil
* 4 cloves garlic, crushed
* 1 small vine ripe tomato, cubed
* 1-½ cups water (or white wine)
* 1- 5oz can tomato paste
* 1-½ cups white Northern beans, thoroughly rinsed
* 1 Tbl dry parsley
* Fresh pepper to taste
* ¼ cup cream (half and half or milk works too)

1) In a large saucepan or pot, warm the olive oil over medium heat. While warming, clean the mussels well under running water.
2) When oil is warm, add garlic and sauté about 2 minutes so aroma is let out and garlic begins to turn golden. Add water (or wine) and chopped tomato. Let simmer for about 2 minutes to break down the tomato. Add mussels, cover to steam about 4 minutes. Watch for mussels to open.
3) Add tomato paste, beans, parsley, pepper and stir to distribute evenly. Cover and allow to simmer 5-8 minutes. Turn heat off and add cream, stir. Serve with crustini or fresh bread.

Sunday, December 25, 2005

Red Wine Infused Filet Mignon w/ Wasabi-Caviar Laced Baked Potatoes


Pure decadence in food is breathtaking. I find many of my meals very delicious and succulent, but I will often forgo a splash of this here, or the addition of that there to make budget, and none are the wiser. (For example: My fish does not need a white wine sauce. Or: Saffron? Eh, I’ll just work around that one.) But it is holiday time breeching on New Year's so one must eat as if dining at 4-5 star restaurants is the norm, no? Especially if it is in your own home and you are the chef. Splurge on that extra this or that, it makes a difference, your tongue will thank you, your belly will flip in joy, your eyes will glimmer in delight, and your overall physique will shine.

My personal reason I usually dismiss the marinade: I cannot think of my menu far enough in advance to actually marinade for the proper length of time (unless of course it is a party or special event and that is a different story). But the usual dinner planning often consists of me (or D) walking home from work, craving one thing, making the purchase, and cooking it up using whatever items that are readily available. Steak is usually done au poîvre, chickens are done with a rosemary-garlic-pomegranate molasses rub, and vegetables are simply broiled or steamed with some garlic and olive oil. It is amazing how delicious and quick simple meals can be. But as I stated, holidays are a special occasion and a meal you would not normally consume is an excellent substitute for the monotony of the norm.

My mother has been taking the odd cooking class at Whole Foods. Each time she leaves one, she calls me to rave about Chef Daniel: “Oh, he did this! And that! It was so easy! It just melted in your mouth! Oh we must try it!” Now, I had wanted to do a peppermint-encrusted rack of lamb for a holiday dinner, but my mother was so exuberant about Chef Daniel’s meal, I allowed her to choose the menu (peppermint-encrusted rack of lamb is sure to come shortly). This red wine infused filet is actually listed as a New Year’s menu with a side of butternut squash risotto. Although my mother raved to no end about the nutty-buttery risotto, she also mailed me the remaining grains, so we opted for baked potatoes with sour cream and a wasabi-caviar accent. This meal was a more classic steak and potato fair, but with a definite and positively luxurious spin on the starch, resting in the wasabi-laced caviar.

This marinade is so simple, quick, and requires so few items I actually now wonder why I do not plan ahead and do marinades more often. The baked potatoes were an excellent accompaniment (though I think the wasabi-caviar in mashed potato form would have been even better). The filet was so thick and tender it melted in the mouth, and under the knife. (We were able to use blunt knives and easily cut through the meat.) The original recipe discards the marinade. Instead, I added mushrooms (at the start) and we sautéed the leftovers and spooned them on top the filet. Mushrooms quickly absorb whatever they are added to so the result was a wine-spiked mushroom to go with the light wine flavoring of the meat, excellent. As I said, the baked potatoes were good, but I think might have been even better as a mash. Still, the wasabi-caviar was a surprise with its slightly spicy flavor bursts that added a nice green sparkle to the potato.

A note on meats: No matter how you prefer to cook your meat, if on a stovetop, they should always be sautéed quickly at high heats. Whether it is pork chops or beef filet, neither needs the addition of oil or butter to the pan, just some salt and pepper patted onto the meat. Make sure your pan is HOT before you begin (water should evaporate almost instantaneously when dropped on). The meat will cause a lot of smoke so make sure the area is well ventilated and maybe open a window.

RED WINE INFUSED FILET OF BEEF W/ WASABI CAVIAR BAKED POTATO
Serves 2. Active time about 20 min.

THE FILET
1 pound center cut of beef filet
1 red onion, thinly sliced
3 garlic cloves, thinly sliced
3 sprigs of rosemary
1 cup red wine
1 Tbl red wine vinegar
10 white mushroom buttons, sliced (my personal addition)

1) In a bowl, combine all ingredients, except for the filet. Mix until well combined.
2) Transfer to a large plastic freezer bag (cuts down on clean up) and add the filet. Seal off the bag and place on a dish and place in the refrigerator for at least 4 hours, up to 3 days. Flip bag halfway through sitting.
3) When ready to cook, Preheat oven to 450F. Heat an oven-safe sauté pan until very hot. Remove beef from bag and pat it dry, season with salt and pepper. Sear the meat until very brown on both sides (about 3-5 minutes each side). Transfer to the oven for 12 minutes for a medium rare cut, longer for more well done.
4) While beef is baking, in a small sauce pan warm a little olive oil. Remove a hanful of the red onion, rosemary and mushrooms from the marinade bag and about 4 Tbl of the red wine liquid. Saute on medium until mushrooms cook down (this will be done about the time you remove the meat from the oven)
5) Carefully (beef may stick a little) transfer beef from pan to plates and serve.


WASABI-CAVIAR BAKED POTATOES
2 russet potatoes
2 Tbl sour cream
1- 2oz container wasabi whitefish caviar (fairly inexpensive for caviar at about $30 a bottle)

1) Place the potatoes in the oven about 30 min before you begin the filet. Preheat oven to 400F. Puncture potatoes with a fork about 4-5 times and wrap in tin foil. Bake for 40-45 min. (If you are making the filet, it is alright to turn the heat up to 450F in the last 10 min of baking the potato. Remove the potatoes and keep wrapped in foil while the filet is baking. They will retain their heat and still be hot when ready to serve.)
2) Once done, remove from foil and slice lengthwise with a knife. Holding the potato with a napkin, squeeze in the sides to create an opening at the top. Add a scoop of sour cream and a small spoonful of caviar.

Friday, December 23, 2005

Not So Classic Tuna Sandwich


*Just Braise has moved. Please visit me at www.justbraise.com!*


Tuna sandwiches and I were a love-hate affair when I was younger. I thought they tasted good, but then I would look in a can only to be repulsed by the resemblance to cat food. I also found it strange that I did not like regular (non-canned) fish, but could eat canned tuna. It seemed too close to Spam-- which is just repulsive. I also was unable to eat other canned fish-- like canned salmon. To this day my mother buys it and makes what she calls “salmon patties”. These truly are cat food and I am sure my current cats would engulf those patties.

I also remember being terrified of the possibility at the lunch table in junior high school to be the kid with a tuna sandwich. Kids can be cruel and there is nothing worse than the smell of tuna; too easy of a target to make fun of. The only thing I can think of that is worse is being the kid with the pickle in the lunch bag (I was also sometimes that kid). It is one thing to pull a fresh tuna sandwich (or pickle) from a nicely refrigerated space and eat it immediately, but I think parents fail to realize a child’s lunch sits in their dank locker or backpack until lunch. How many bugs crawl through there? How often is the sack smashed into place? How much food has rotted in their by previous occupants? If you have children just try not to think about this. I don’t but now shutter thinking back to my own home-brought lunches (which always far surpassed the grease-laden-grade-D-garbage they sell at almost every school across the country, even if it did sometimes smell).

Once, I think I was in high school, I attempted to make my own tuna and eat it out of the bowl one night. I dumped the drained canned tuna in, added mayonnaise, celery and pepper and proceeded to eat it. I thought it tasted too fishy and needed more mayonnaise, so I kept adding mayonnaise: 1 Tbl, 2 Tbl, 3… Now I had a bowl of mayonnaise that hinted at tuna. It went into the garbage. I had thought I wanted tuna, but turns out my taste buds were not having it.

On Sundays my mother would purchase bagels and lox from a bagel shop.in a neighboring town. This place has such good bagels there would be a line outside the door on Sundays. Since we would devour the lox in one day, she would also buy a quart of their tuna to put on the remaining bagels. That tuna was so good (and I would think still is) that it sometimes would also disappear in one day—I would often catch my little brother shoving spoonfuls of the tuna into his mouth, returning it to the fridge, then repeating 2 min later. (They pulse the tuna and ingredients into a tuna “paste” which allows it to keep the shape when on top one’s bagel.) We attempted to imitate it at home, but failed. I now believe there is an opiate in it to make it so addictive. I have never found any store-produced tuna tasting so good.

Today, when I make a tuna sandwich, I do not use any mayonnaise. In fact, there is not even a jar of mayonnaise in my refrigerator. I made it once (mayonnaise) and was totally repulsed by the amount of oil that went into it, I figured I could drink it straight for the same effect, and now try my hardest to avoid the white stuff.

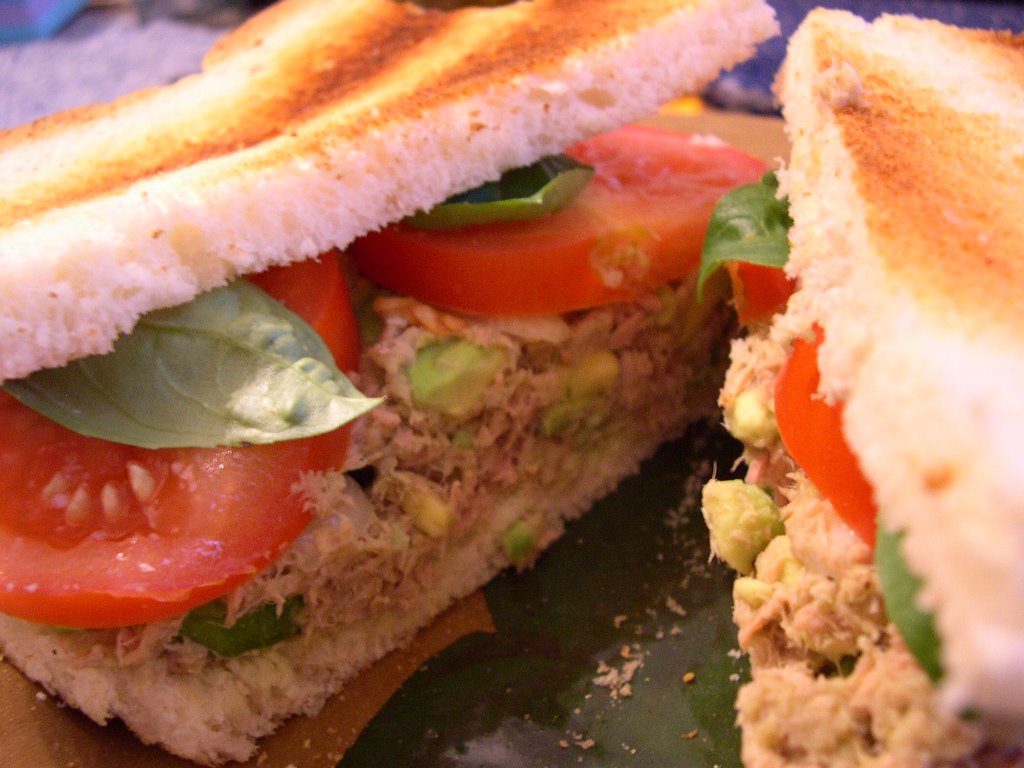
This tuna is a super protein tuna (for all you carb-phobes). It is meaty, chunky, crispy, smooth, rich, spicy and indulgent. It is made with avocado (not mayonnaise) and tastes amazing on toasted bread, in a salad or plain out of the bowl. It is one of those sandwiches you cannot wait to eat. You will dream about it coming home and turn the key a little faster to get at it sooner. Your cats will paw at you over the intoxicating smell of freshly opened tuna. The best part is, it can be altered to suite your taste or with what you have available.

NOT SO CLASSIC TUNA SANDWICH
Makes 2 sandwiches. Prep time= 5-10 min.
1 can albacore chunky tuna, drained (give the juice to your cats if you have)
1 ripe Hass avocado
1 stalk celery, chopped (a chopped pickle, olives, chopped grapes or raisins or 1 Tbl relish are other options)
1 small white onion, chopped
1-2 Tbl spicy mustard (Dijon or Deli is good)
salt/ fresh pepper to taste
2 tsp lemon juice
1 vine ripe tomato, sliced (or chop sun-dried into the bowl)
8 fresh leaves of basil
4 slices good bread, toasted (I used an Irish Soda Bread, but hearty nut-based is good)
1) Peel and deseed the avocado. Place it in a bowl and mash, it can be left slightly chunky.
2) Begin toasting bread. Add tuna, celery, onion, mustard, salt/ pepper and lemon juice. Mix until well blended.
3) Place bread on plate once toasted, add a heaping spoonful of tuna, cover with sliced tomato and basil. The result is mouthwatering, healthy and delicious.

NOTE: Hass avocadoes are rough-skinned and smaller. They have a nutty, buttery flavor. The thin-skinned large, lighter variety is not as flavorful and more watery. I have found it is best to purchase avocadoes when they are hard. This avoids ones you believe to be ripe; when in fact they are bruised. Allow them to sit on your counter (or fruit bowl) to ripen (or in a paper bag for faster results). This process will probably take about 3-4 days and the avocado skin will darken as it matures. The avocado is ripe when the skin gives under a little pressure (the innards are soft). Once they are ready, they can remain for a few more days on the counter or be placed in the refrigerator for about 2 weeks. When ripe, the skin easily peels off (once started with a knife) and the seed is easy to remove. If you do not use an entire avocado, sprinkle with lime or lemon juice and wrap it air tight to prevent discoloration. Here are some fun avocado facts.

Here we see 2 cats post-tuna juice indulgence.

Sunday, December 11, 2005

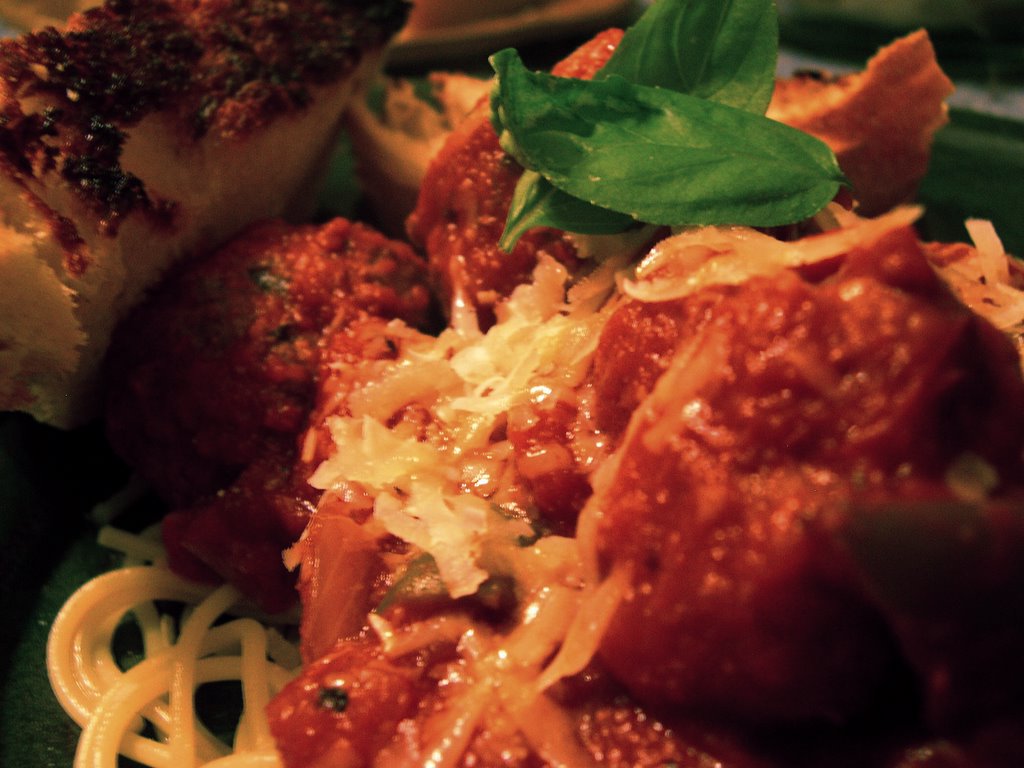
Classic Spaghetti & Meatballs w/ Anchovy Garlic Bread


D’s friend Jeremy recently commented how easy it is to make cranberry sauce. The same goes for a good tomato sauce. If you are willing to chop a few vegetables, it is remarkable how delicious a homemade classic tomato sauce can be (and how easy it is to create variations on the original).

Friends will eat your sauce and ask what brand it is. They will marvel at the chunks of vegetables they can actually taste. Most importantly, they will secretly love you for not killing them with the over abundance of salt that is found in most jar varieties. You will love them back because they will remain in your life longer—unless of course, you no longer desire this, I suggest any high-salt jar variety.

I will sometimes make this sauce with meat—otherwise known as Bolognese. But oh! To have giant meatballs doused in sauce looming on your plate! It makes you want to sing out—On top of spaghetti/ All covered with cheese/ I lost my poor meatball/ When I had to sneeze… But these meatballs, trust me, will be in the belly before anyone can sneeze. (I was eating leftovers today at lunch and was beyond stuffed. The glutton and greed in me pushed on, fighting to finish the last meatball before the plate was passed to D for completion. Who promptly asked, “where’d the meatballs go?!”)

To swank up this classic meal, aim was taken at the garlic bread. Tease peoples’ palates by adding anchovy to the butter/ olive oil mixture. There is no offensive taste that an anchovy can sometimes offer. For many, it is a salty afterthought that will leave them to wonder “what was that delicious spice?”. This bread is so good and easy to make I’ll sometimes prepare only this for lunch. My friend A loves it so much that whenever she comes over we make a big loaf of this as a snack. My vegetarian friend B loves it so much she breaks her will just for this occasion. And you didn’t garlic bread could get any better.

I will have to say the best part of the spaghetti dinner is the leftovers. I love warming spaghetti on the stovetop the next day. The sauce cooks into the noodles creating a single entity. Rather than sauce on noodles, the dish unites. What was once a delicious spaghetti and meatball becomes a hearty, home inducing memory…

SPAGHETTI & MEATBALLS w/ ANCHOVY GARLIC BREAD
Serves 6. Cook + Prep time= 40 min

THE SAUCE
1 cup button mushrooms, sliced
1 medium onion, chopped
1 bell pepper, chopped
4-5 garlic cloves
5-6 black olives, chopped
2 Tbl olive oil
1- 5oz can no salt added tomato paste
1-15oz can stewed (or diced) tomatoes, no salt added
1-28oz can crushed tomato, no salt added
2 Tbl brown sugar
2 bay leaves
10 leaves fresh basil, chopped
1 tsp oregano
fresh pepper/ salt to taste
1) In a saucepot on medium heat, warm the olive oil. Add onions, garlic and mushrooms. Sauté 10 min until onion is soft and mushrooms reduce and brown a little. Add olives and pepper, sauté 5 min. Add basil, oregano and stir. Add 3 cans of no salt added tomato sauces. Add bay leaves, brown sugar, salt/ pepper to taste, stir. Reduce heat to medium-low and allow to simmer while you prep the meatballs and noodles. Allow to cook at least 20 min.

NOTE: mouthwatering plays on this simple recipe: option 1- Add ¼ cup chopped sun-dried tomatoes to the sauce. Option 2- Blacken some red peppers in the oven. Remove skin, chop and add to sauce. Option 3- Using 5-6 lbs Roma tomatoes, cut into quarters and place on a non-reactive bake dish. Preheat oven to 450F. Add ½ cup olive oil, ½ cup balsamic vinegar, 10 garlic cloves. Roast for 40 min until tomatoes begin to blacken. Use this in lieu of the canned tomatoes. Option 4- Add meat with the onion/ garlic/ mushrooms to create a Bolognese sauce. Option 5- Use 2 portabella mushrooms instead of the button (or meat). Option 6- Add 2 cups chopped basil to create a pesto-tomato sauce.


MEATBALLS
Makes about 15 balls
2 lb meatloaf meat (veal/ beef/ pork)
1 medium white onion, chopped
¼ cup fresh parsley, chopped
½ tsp sage
2 garlic cloves, crushed
1 egg
1) In a mixing bowl, combine all ingredients until evenly distributed. Warm a skillet on medium heat with 2 Tbl oil.
2) Form 2-3 inch balls. Add to skillet and allow to brown on all sides, about 10 min. Once done, add to tomato sauce to warm through and absorb some tomato flavor. Let sit for at least 5 min before serving. (You can make your noodles now according to the package)


ANCHOVY GARLIC BREAD
Makes one loaf.
1 loaf good Italian bread
2 Tbl unsalted butter
2 Tbl olive oil
2-3 anchovies
2-3 garlic cloves, crushed
1) Cut loaf in bread lengthwise (a la hamburger style per Kindergarten terms)
2) In a small sauce pan on medium heat add all ingredients. Using a fork, mash up the anchovy as butter melts and stir everything together. Once garlic starts to sizzle, remove from heat and brush onto both sides of bread. Close bread, cut into pieces (cut so the bottom of the bread still holds together but pieces can be easily torn off. Sit on a baking sheet and broil 5-8 min until lightly golden, sizzling and delicious.


ORDER OF PREP:
1) Start the sauce first. While the onion/ garlic/ mushrooms warm, mix the meatball ingredients and form balls.
2) Once you add the cans of tomato for the sauce, cook the meatballs.
3) While meatballs cook, prepare the anchovy garlic bread filling.
4) Transfer meatballs to sauce. Begin noodles (unless fresh then wait until last min to prepare). Brush filling on bread and cook.


View Stats
Rankingblogs.com: Defining your blogs worth..