Showing posts with label pasta or rice. Show all posts

Thursday, September 21, 2006

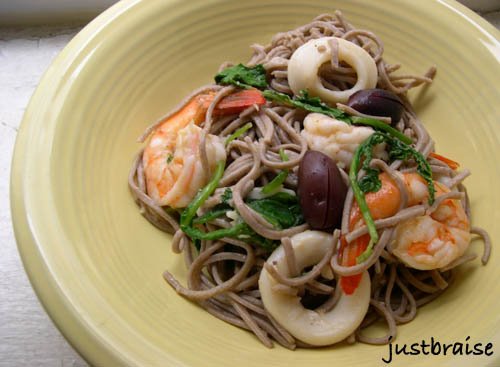
Soba Seafood Pasta


While in Indiana at the State Fair, D and I made our way into the 4-H barn “after hours”. Okay, it was really about 5pm, but this was when the real deal started: Well after top-notch vegetables had been judged, local wines swirled and alfalfa blocks adorned, the local apiaries took the stage for a little bee demonstration and hints of the trade.

We seemed to be the only ones fascinated by the discussion, complete with a live demonstration behind the speaker (a man relating the talk with live bees and hive). We asked our questions then dove into samples of over one dozen honey varieties as well as honey butter, honey laced yogurts, honey sticks, honeycomb, beeswax blocks and more.

Slightly stunned when we asked for a good contrasting honey for the soon-to-be-purchased molasses-hued buckwheat honey, we were given a deep shrug: “it’s honey.” Obviously not one of their top salespersons. Buckwheat honey and an amber toned wildflower honey made it into our bags and to New York in one piece-- along with sorghum, whole wheat flour and cracklin’s still fresh on the mind.

Back in New York, worlds away from Indiana, I was avoiding tourists in Chinatown. Ducking into one of the hundreds of food stalls that line the narrow streets, I found myself confronted with noodles. Hundreds of noodles: cellophane, egg, rice, ramen and soba (or buckwheat). The honey must have been on my mind because I grabbed a pack of soba noodles before heading home.

The excitement ended there and for weeks the noodles sat in the cupboard. The honey on the other hand, made excellent hot toddies-- a quick fix-me-up for a recent sick spell. Yet still the noodles sat.

But as the fridge progressed to barrenness (with a half bag of arugula) and the shelves held a few cloves of mighty garlic as well as my sweet looking noodles, I took the initiative and headed for the fish monger…

This dish is beyond simple to make. The rich buttery taste these noodles provide is a luxurious accompaniment to seafood. And because buckwheat is actually a fruit (a relative of rhubarb), not a wheat, it is safe for all those non-gluten folks, full of fiber, potassium, manganese and helps keep blood pressure and cholesterol levels down—how is that for tricking someone into eating pasta? Even better (I’m a visual person), the purplish hue of these noodles look amazing against bright vegetables and seafood.

SOBA SEAFOOD PASTA
Serving Size= 6 persons. Active time= about 20 minutes (less with pre-cleaned shrimp)
* 1 handful dry soba noodles (about 16 ounces)
* 2 tablespoons olive oil
* 4-5 cloves garlic, crushed
* 1 lb large shrimp, peeled and deveined
* 1 lb calamari rings, rinsed
* 1 large handful arugula, rinsed well
* ¼ cup Parmesan shavings (optional)
* 6-12 Kalamata olives

1) Peel and devein the shrimp, rinse calamari; set aside.
2) Bring water to a rapid boil in a medium pot. Add noodles, stir to separate and cook about 5 minutes, until done.
3) Drain water, rinse noodles with cold water and place in serving bowl. Return pot to stovetop over medium-high heat; add olive oil.
4) Add garlic and bring to a sizzle; about 3 minutes.
5) Add shrimp, calamari and arugula, cook until shrimp turn pink and curl; about 4 minutes.
6) Add shrimp, calamari, arugula, Parmesan and olives to soba noodles. Toss to incorporate. Add more olive oil if desired. Serve warm or cold.


Tags: , , , , ,

Tuesday, August 22, 2006

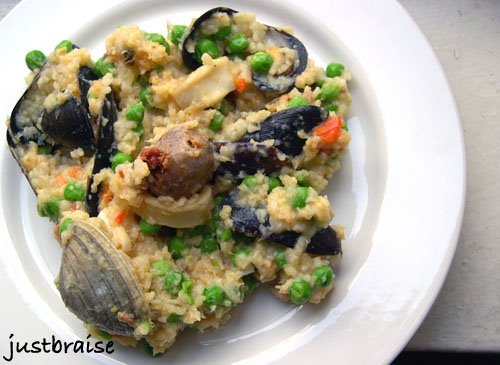
Paella de Pescados y Mariscos con Chorizo (Fish and Shellfish Paella w/ Chorizo)


My favorite thing about Spanish food is not the paella. Nor is it the Valencia orange, omelette or great variety of delicious tapas available-- though these things are all delightful. My favorite thing about Spanish food is the olive.

This unassuming fruit, a call to peace, is plentiful in the Mediterranean region. Squat trees line roadsides for miles and the bitter little drupe almost appears as a small plum from afar: an iridescent purple as it fades into its ripe green. Harvested with a shake to the tree bough it arrives to us along the culinary path marinated, as tapenade or oil.

In Spain, as you enter almost any food or drink establishment, olive pits abound.

A few years ago, my mother and I planned a quick trip around Spain. A country both of us had always wanted to visit, but never had the opportunity. For me, it was a culinary and ceramic feast I planned around clay factories, orange groves and funky architecture. For my mother, it was a wearing down of her feet stomping through the cities and country back roads with the salvation being sangria and tapas along the way (though she too enjoyed the clay factories and architecture).

On day one, hungry from a morning of walking, we stopped for lunch at a recommended establishment: “Oh! How disgusting!” my mother gasped as we walked inside, “this floor is covered in pits!” We shuffled in, unable to understand the debris covering the floor and took a table across from the bar, ordering up a jug of sangria and a seafood paella.

We waited for our food and heard the definite “pffffmmmp” of a person triumphantly releasing a pit from mouth into air. Our noses turned up in question, we looked at each other, then scanned the restaurant for the perpetrator. There he was, tan and stocky with a perfectly edged beard looming in the shadow: “pfffmmmp” he turned and released his bleached teeth in a wide grin towards us.

A bowl of olives came to our table along with the sangria. I popped a few olives into my mouth, but finding nowhere to discard the seeds, I held them in my cheek, a squirrel at harvest. More patrons entered the establishment. Soon that pfffmmmp echoed throughout the restaurant, shooting from the trunk of men and women alike, regardless of age, no one seeming to care except for the clueless Americans. I looked at my mom and shot out five pits in bulleted repetition: pffp pffp pffp ffllmp fllp.

We soon realized it was custom in Spain. Olives abound and are ingrained in the culture. A complimentary bowl is provided at coffee shops, bars and restaurants in lieu of bread or peanuts. The more olives I stuffed into my face the more I fell in love with Spain, pfffmmping them out with the best of the locals. (My mother on the other hand, continued her dismay at the littered floors and begrudgingly returned the bare pit to a cupped hand where it delicately dropped to the floor unnoticed by anyone.)

This past July, a college friend married a Spaniard. The wedding was a great bi-lingual affair of misunderstandings and general good humor at each person’s attempt to befriend a person from another country with little to no verbal language skills. Communication fell remarkably well and eventually I got onto the subject of olive pits on the floor.

“Yes!” my new Spanish friend exclaimed, “it means how good the place is.” He went on to explain that some establishments will even go to the trouble of adding pits to the floor, be it from the mouths of their employees or the previous night’s collection. Pits on the floor is a rating of popularity-- the more pits, the more favored the premises.

Here is a recipe in memory of that first paella and the realization that it is okay to spit out your leftovers in some cultures. And as the season turns, I may even surprise you with some home-marinated olives. Until then, paella it is.

NOTE: Though I cannot remember if the paella I had in Spain was this moist, I enjoy the wet rice base. In this fashion, the rice sticks to everything, including the inside of the mussel and clam shells, forcing you to work for your food: sucking and rotating shells in your mouth to indulge in every bit. D and I found this much more enjoyable, and a more entertaining activity than simply wolfing down the dish without thought. We also felt it made you appreciate the variety of seafood present. I also enjoy eating with my hands, so take away what you will.

This paella is based on a recipe found in the Cuisines of Spain cookbook by, Teresa Barrenechea. It is essentially the same recipe with a few additions, namely peas, onion and chorizo.

This paella is fairly labor intensive, though if you make a large batch and have leftovers for the week it is worth it. We found that it is absolutely necessary to use fish stock and not chicken or vegetable. We felt the stock really enhanced the fish flavor throughout. Also, fresh seafood is essential.

PAELLA DE PESCADOS Y MARISCOS CON CHORIZO (FISH & SHELLFISH PAELLA w/ CHORIZO)
Serving Size= 8 persons. Active time= about 1 hour. Inactive time= 12 mintues.
* 1 dozen littleneck clams
* 2 Tbl coarse salt
* 6 large cloves garlic, unpeeled
* 9 cups fish stock (recipe below)
* 2 pinches saffron threads
* 2 pound mussels, scrubbed and de-bearded
* 2 cups water
* ½ cup olive oil
* 1 large red pepper, seeded and cut lengthwise into narrow strips
* 1 medium Spanish onion
* 8 ounces, about 4 links, chorizo, cut in half
* 1 pound monkfish (or grouper), cut into 2 inch chunks
* 1 pound large shrimp
* 1 pound small squid, whole and rings
* 1-½ tsp salt
* 4 cups Spanish (short grain) rice
* juice of 1 lemon plus extra for garnish

1) Preheat oven to 500F.
2) Clean clams under cold water. Discard any open clams, or those that do not close when touched. Place clams in a large bowl with the coarse salt and let stand for 30 minutes or up to 2 hours. Clams will release sand trapped in shells.
3) Place garlic in a small heat-resistant bowl or baking dish and roast in oven for 10-15 minutes; until skins are browned. (Alternatively, you can throw a whole garlic head in, chopping the top off for easy removal, and use the extra as a spread mixture with olive oil.)
3) In a small saucepan, bring stock to a boil. Add saffron and decrease the heat retain simmer.
4) When garlic is ready, remove from oven (leave oven on). When cool enough to handle, peel cloves and place in blender with ½ cup simmering stock. Process until blended.
5) In a medium saucepot, place mussels (discarding any that fail to close when touched) with 2 cups of water on high heat. Bring to a boil and cook 5 minutes, until shells open. Using a slotted spoon, lift the mussels and set aside (add mussel broth to stock or freeze for later use).
6) In a large paella pan or stock pot, heat the olive oil over medium heat. Add bell pepper, onion and chorizo, stirring occasionally for about 10 minutes, or until chorizo has cooked through and the aromas are strong. Add monkfish, squid and salt, increase heat to medium high. Sauté 5-10 minutes, until monkfish turn opaque.
7) Add rice and stir to blend, allowing rice grains to incorporate into the oils present. Add hot stock, increase heat to high and bring to a boil. Add garlic mixture, stir gently to incorporate and boil for 5 minutes without stirring.
8) Drain the clams. Add shrimp to pot, stir gently to incorporate. Add mussels and clams around the top of the pot. Place in oven (uncovered) for 12 minutes; rice will be absorbed and clams and shrimp will cook.
9) Remove from oven and discard any clams that do not open. Sprinkle lemon juice over top. Cover with lid or towel and let sit for 7 minutes. Serve with lemon as garnish


FISH STOCK
Serving Size= 2 Quarts. Active time= 10 minutes. Inactive time= 20 mintues.
Note: White fish is ideal to use: snapper, cod, hake or bass. Avoid fatty fish, such as tuna, sardines and salmon, among others.
* 2 pounds fish frames and heads
* 1 cup shrimp shells (can clean your shrimp from above and use)
* 1-½ cups mussel broth (see above)
* 1 large Spanish onion, coarsely chopped
* 2 carrots, coarsely chopped
* 1 bunch flat leaf parsley
* 3 Tbl olive oil
* 2 quarts water
* salt/ pepper to taste

1) In a stockpot on medium-high heat warm olive oil. Add fish frames, shrimp shells, onion, carrots, parsley, salt and pepper. Stir until shrimp shells turn pink. Add water and bring to a light boil.
2) Using a slotted spoon, discard any foam that forms on the surface.
3) Decrease to medium-low heat and simmer, partially uncovered, for 30 minutes, skimming foam off as needed. (Do not overcook or stock will turn bitter)
4) Strain the stock and season with salt as necessary.


Head on over to Sweetnick's for today's delicious ARF roundup!

Tags: , , , , .

Saturday, August 05, 2006

Garden Pasta


My first personal (known) encounter with Swiss chard was the other year. While I am sure I have dined on it in restaurants, I had never sought to purchase the funky colored vegetable before. While at the grocery, the vegetable caught my eye and I scooped it into my basket. As D often does when he notices I am plucking items for their unique beauty rather than possible utility he queried what we could make with it. “I don’t know, but we’ll think of something.”

We turned “something” into Braised Swiss Chard wrapped in Sole. Swiss chard’s bitter sweetness won us over and D rarely questioned my random fruit and vegetable acquisitions again.

Over the months the rainbow vegetable remained on my mind and I eventually bought seeds for planting them when the bucket garden was a mere dream. They would soon sprout into their glory and remain a site as the stalks matured.

One day, impatient for my own chard to mature, I hit up the vegetable market for a bunch. They became a perfect accent to a delicious cold summer soup.

Finally the glory of my rainbow swiss chard in the buckets was breathtaking. Glowing yellows, radiant reds and electric pinks made the calling to me. I plucked them from their buckets and presented them to D. What to make when the temperature is too hot to handle the kitchen? Some quick and easy pasta, requiring minimal cooking.

As residents of Queens suffered through blackouts in the high temperatures D and I considered ourselves fortunate with our minimized power—at least we still had the refrigerator (and if that failed a few buckets of bounty outside). We ran to the grocery to pick up fresh pasta. Requiring a mere 2 minute boiling time, it would serve as an ideal backdrop to a cold dish.

Whipping up a large batch of pasta, D and I had a fresh meal to last us through the week; no stovetops required.

GARDEN PASTAspan>
Serving Size= 6-8 persons. Active time= 10 minutes.
* 2 pounds fresh spinach pasta
* 1 bunch rainbow swiss chard, loosely chopped
* 1- 15 ounce can garbanzo beans (chick peas), washed and drained
* 1 red bell pepper, sliced into ¼-inch strips
* 1 medium Spanish onion, chopped
* 3 large garlic cloves, crushed
* ½ cup fresh firm ricotta cheese, crumbled
* ½ cup kalamata olives
* 2 Tbl olive oil

1) In a sauce pot on medium-high heat, bring salted water to a boil. Add pasta, cover and cook for 2 minutes. Remove from heat, wash and drain. Set aside in a large bowl.
2) In a large skillet on medium heat, warm 2 Tbl olive oil. Add pepper, onion, garlic and cook until aroma is loosened (about 3 minutes). Add swiss chard, cover and cook until leaves wilt (4-6 minutes).
3) Add swiss chard, peppers, onions, garlic, garbanzo beans, ricotta and olives to pasta. Serve warm or cold.


Below is Kitty and her beloved squirrel toy. We train her to search and destroy these little critters that attack my garden—if only she were allowed outside to put her training work. The glazed look in her eye? We get her good and high so she can forget her killer instinct (the squirrel is full of catnip). Check out this weekend’s cat antic WCB over at Eat Stuff.

Monday, April 24, 2006

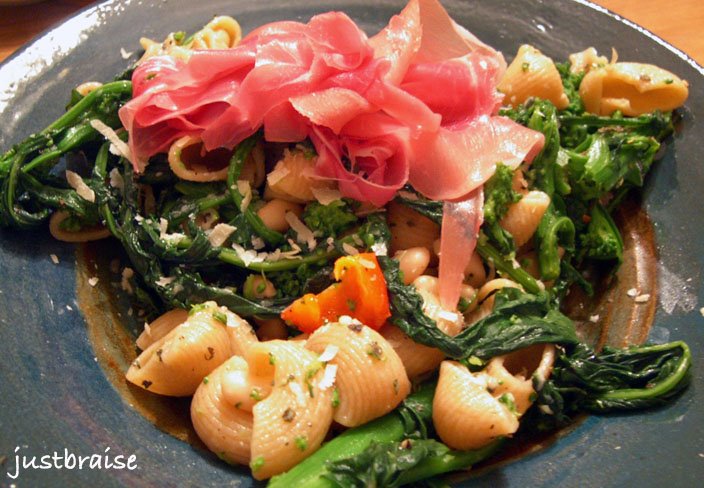
Mediterranean Pasta (or Red Pepper-Broccoli Rabe-White Bean & Procuitto Pasta)


There are some people that live and die by pasta. It is their favorite food, it is served at every meal-- it is utterly perfect. For myself, I (still) cannot really understand the effect pasta has on people. I have the same non-chalance with white rice. Sure, I can add butter and salt and it has a great flavor, but… it’s just... there. Does that make any sense? I mean, sure, it tastes good, but in a head-to-head with another starch: warm crisp bread or a baked potato; I’ll take the bread or potato.

Now, I know pasta is not just pasta, and it can be dolled up to create something beautiful on its own. Just like adding olive to bread, tomato paste, spinach or octopus ink added to pasta, all of a sudden creates an attractive taste sensation on the tongue. It is no longer mere pasta. This I accept.

But because of my initial blasé attitude towards pasta in general, I tend to walk past the pasta shelves with hardly a glance; even when they may have “enhanced” pastas. So when D complained that I “don’t let him eat pasta” I was slightly appalled (and quite content) that my own stance had taken hold: D finds his way to the grocery store just as much as I do and I have never not allowed him to buy anything he may want.

So when I was making a run for some flour my eyes were averted by my grocery’s newly expanding organic section. I noticed organic wheat pasta and figured I would give it a try. When I returned with pasta in tow and shared the news with D he could barely fathom his good fortune: “really, pasta?!” You would think we had been living on rations for months and had finally found the black market.

I must admit, there is so much flavor in this dish, the pasta is hardly noticed. If pasta was served like this all the time, I might eat it more often. Because there is no sauce beyond a drizzle of olive oil and sprinkle of Parmesan and fresh herbs, this dish is a pure breeze in terms of cleanup—it also tastes great warm or cold. The broccoli rabe offers a sweet bitterness that can hold its own against the salty procuitto. The white beans are little bundles of surprise as they dance in and out of the pasta “cups”. Most importantly of all, this dish was a rainbow of colors on the plate and palate.

MEDITERRANEAN PASTA
Makes: 4 servings. Active Time= 15 minutes. Cook Time= about 10 minutes. (Depends on pasta variety.)
* 2 cups pasta
* 6-8 stalks Broccoli Rabe, washed (left whole or chopped into large 2-3 inch pieces)
* ½ Red Bell Pepper, chopped into bite-size pieces
* 1 16-oz can White Beans, washed and drained
* 8 slices Procuitto
* 3-4 Tbl olive oil
* Parmesan to taste, freshly grated
* 2 tsp fresh thyme
* salt/ pepper to taste

1) Prepare pasta according to package instructions. While pasta cooks, prepare the vegetables. (If using fresh pasta, prepare after vegetables are combined, just before serving.)
2) In a large-sized skillet on medium-high heat, warm 1 Tbl olive oil. When hot, Add broccoli rabe and red peppers. Cover and allow to cook until broccoli rabe darkens and begins to wilt; about 4 minutes.
3) Add white beans to the vegetables. Stir, cover and cook another 3-4 minutes; until beans are warmed through. Turn heat low and keep covered until pasta is ready.
4) Drain pasta once ready and wash with cold water (this stops the pasta from cooking without cooling it down too much). Throw warm vegetables over, add a about 2 Tbl Parmesan (allow people to add most of their own quantity), olive oil, salt/ pepper and thyme. Toss to mix.
5) Serve up, adding Procuitto at last moment over the pasta (since Procuitto is already smoked, you want it to retain this flavor. Add it at the last moment to avoid cooking it.)


Head on over to Sweetnick's for today's ARF roundup!

Tuesday, April 04, 2006

Roast Lamb w/ Mango-Mint Sauce, Moroccan Millet & Rum Pineapple w/ Baby Almonds


Spring is a fabulous time to slow down a little before the summer hustle. It is the time when we come out of doors with welcome arms. Everyone seems happier, more active and generally more excited to be alive. With this in mind, it is also a great time to celebrate. Be it any occasion: holiday, birthday, the weather itself, friends or engagements, now is the time to invite your loved ones into your home.

It was the combination of a traveling actor friend in town and two recent engagements of marriage that my friends would dine with me tonight. Their task was simple: a few bottles of wine. My task was to prepare an ideal spring feast. I believe we all accomplished our set duties.

While mulling over menu options I was torn between chicken, pork or lamb. Chicken seemed too average and easy, pork was, you know, the other white meat. Lamb seemed exotic. But while many people take great fear of lamb, I figured my friends were the adventurous types and I would forge ahead.

Sure enough when we sat to the table my friend DR voiced his concern: “You know Stacey, I’ve never eaten good lamb. I’m kind of afraid. It’s all been slightly… barnyardy?”

“That’s okay,” I reassured him, “I’ve never cooked lamb before, so we’re kind of even.” With that, he finished off his glass of wine. DR’s fiancé then voiced her concerns, “I’ve eaten lamb in kibe (Middle Eastern lamb balls with other spices) and on kebabs, but any roasted lamb I’ve ever had has been terrible.”

“Well, I’m glad you’re in for an adventure.” I returned.

No sooner was the lamb brought to the table that forks were rearing to stab at it. Across the board the meal was a success. DR and his fiancé were reassured the merits of good lamb, and I was reassured that I can cook lamb. The spices were a great compliment to the sauce, and with the millet side, everything was the colorful festive spring feast I sought.

DR mentioned his barnyardy objection to lamb. I would have to agree that lamb, like any meat is easily spoiled if a few rules are not met: freshness and cooking time. Freshness is key. If kept in the refrigerator (or meat department of your grocery store) too long the meat will begin to spoil (obviously). In the refrigerator, it will pick up the odors of food around it. Make sure to check dates and grade of meat to ensure freshness. Overcooked meat is depressing. This is easily done if a good meat thermometer is not utilized, or placed incorrectly. It is important to know what cut of meat you have, how it’s best to prepare that cut, and the ideal temperature for the outcome you desire.

With that, a fabulous spring meal, perfect for the upcoming holidays…

ROAST LAMB w/ MANGO-MINT SAUCE
Makes: 6 servings. Active Time= 30 minutes. Inactive time= 5 hours to 2 days. Cook Time= depends on size of meat; about 40 minutes.
ROAST LAMB
* 6 pound leg of lamb, ask your butcher to crack the bone and butterfly the cut**
* 3 Tbl fresh rosemary, chopped
* 3 Tbl fresh mint, chopped
* 3 Tbl fresh sage, chopped
* 2 head of garlic, 1 crushed, 1 whole
* 20 pearl onions, 10 crushed, 10 whole
* 1 Tbl ground cumin
* 1 Tbl ground cardamom
* ½ Tbl ground cinnamon
* salt/ pepper
* 4 Tbl olive oil

1) Bring the meat to room temperature before cooking. Mix the first 3 ingredients, 1 head of garlic and the ten crushed pearl onions with fresh ground pepper. Rub 2 Tbl olive oil over the lamb and rub the herb mixture over the leg of lamb; between the cuts, top and bottom. Wrap tightly in plastic wrap and refrigerate 5 hours up to 2 days.
2) Preheat the oven to 300F. Remove the lamb from the refrigerator, brushing off about half the rub. Sprinkle with cumin, cardamom, and cinnamon. Amply salt and pepper both sides and between the cuts. Tie securely with twin to hold the meat together.
3) On the stovetop in a large skillet on high heat, warm 2 Tbl olive oil. Sear the leg on all sides. Apply a fresh sprig of mint and rosemary under the twine. Chop the top off the second head of garlic, just to expose the tips and place it on the skillet. Add the onions around the lamb.
4) Place on rack, fatty side up. Insert a meat thermometer deeply, almost to the bone.
5) The meat is done when the thermometer reads 125 for medium-rare.
6) Remove from oven and allow meat to rest on cutting board for 15 minutes before slicing.


** To butterfly meat is to slice it so the meat looks like a book with the bone as the book spine.

MANGO-MINT SAUCE
* 1 fresh mango, peeled and pit discarded
* 1 cup fresh mint
* 1 tsp Serrano pepper seeds
* 1 Tbl lemon juice
* pinch of salt

1) Use a hand-held or electric blender to purée all ingredients until evenly blended. Serve at room temperature to slightly chilled.


MOROCCAN MILLET
Makes: 6 servings. Active Time= 10 minutes. Cook Time= 25 minutes
* 3 cups dried millet
* 6 cups water
* 1 bunch spinach, washed well
* ½ cup dried cranberries or apricots
* ½ cup roasted pine nuts
* salt/ pepper to taste

1) Cook the millet according to package instructions. While it is cooking, sauté the spinach. Once done, leave on heat. Add spinach, cook about three minutes to reheat spinach; stirring to ensure the millet does not stick to the bottom of the pot.
2) Add dried fruit, nuts and salt/ pepper. Stir and place in serving bowl.


RUM PINEAPPLE w/ BABY ALMONDS
Makes: 6 servings. Active Time= 10 minutes. Inactive Time= 1 hour.
* 1 fresh ripe pineapple
* 2 Tbl butter
* 1 cup dark rum
* 2 Tbl brown sugar
* ½ cup baby almonds **

1) Slice top and bottom off pineapple; slice off skin. Cut into quarters. Remove center rind. Cut each quarter into 4 pieces lengthwise. Place pineapple slices in shallow dish and cover with rum and brown sugar. Refrigerate 1 hour.
2) On a skillet on medium heat, warm the butter. Sauté pineapple slices until lightly browned.
3) While pineapple is browning, in a small skillet on medium heat pour the sugar-rum mixture. Let it warm while the pineapple cooks. Serve pineapple slices with ice cream, coated in rum-sugar syrup with baby almonds sprinkled on top.

** Baby almonds are found usually around late March. They are immature almonds, still in their fuzzy pods, plucked before the almond has the opportunity to harden into the nut we love to eat. To use, peel off the fuzzy outer shell. The inner snow-white nut is the non-ripe almond you want to use in this dish. They are crunchy and contain a clear jell inside (that eventually hardens to white with maturity)


*** Remember to save your bones for soup!!! ***

Head on over to Sweetnick's for today's ARF round up!

Over at Kalyn’s Kitchen, check out some WHB action. Today’s herb? Mint.

Monday, March 06, 2006

Chicken Masala (ARF5/#10)


What happens when a fresh coconut in the middle of the winter is too hard to resist at the grocery store? When you try to impress friends from out of town by using your drill to get at the sweet, rich water inside (other than learn there are easier ways)? What do you do once everyone has had their fill of sweet coconut meat? You spend a week in coconut bliss…

It all started with a Coconut Banana Bread with Lime Glaze. Now, fresh coconut is not needed for this bread, but it tastes amazing sprinkled on top. Once all that coconut meat is shredded, there are about 4 cups to put to use. Coconut Banana Bread used about ½ cup. Today it was Chicken Masala. I must admit this was my first time ever cooking a “legitimate” Indian meal. In the past, I have sprinkled some curry, tumeric and cumin together and called it Indian. Sad, because I absolutely love Indian food. And bad, especially since I have most of the spices in my cabinet!

I found a fairly simple recipe on Mahanandi. This recipe was chosen over others because, well, I had all the ingredients. This recipe also did not take too much time—as long as everything is in front of you at the start. It also helps to have an extra hand in the kitchen (so while one is roasting spices, the other can grind). The final result was excellent and filled the home with an amazing aromatic essence.

First, the benefits of coconut.

At a recent dinner party, I ordered coconut milk. I offered some to a friend who dissed it, “Oh, that stuff is really high in saturated fats. I won’t touch it.” Your loss, it was good. Coconut Oil is one of the best oils a person can consume. For centuries, South East Asian cultures have called the coconut palm the Tree of Life. Coconut oil is antiviral, antibacterial, antimicrobial, and antiprotozoal. Not all saturated fats are alike. While coconut oil is one of the highest in saturated fats it is also one of the highest sources of medium chain triglycerides, many of which are important in building and maintaining the immune system. Some medium chain fatty acids, like coconut oil, help to maintain the metabolism. It is also very good for the skin as a moisturizer.

Coconut Meat is high in fiber, vitamins and minerals (vitamin C, E, calcium, magnesium, potassium and iron). It is also low in cholesterol and sodium. Other forms of coconut include Coconut Water which is the liquid found upon initially cracking the coconut open. And Coconut Milk, made by steeping coconut meat pulp in boiling water and then pressing for the milk. All these forms of coconut share similar health benefits up to a point.

Below is the second installation on coconuts. More to come shortly on this tasty and long lasting fruit! This recipe is taken from Mahanandi’s site. It is followed step by step with the replacement of chicken instead of potatoes. Interesting, because my masala turned out orangey-brown instead of red! It also was not as sauce-based as Mahanandi’s picture! Maybe more water (or plain tomato sauce?) would fix this. Well, it was still delicious! I served this on a bed of basmati rice. Once again, it is recommended to have all ingredients out before starting. And again, a second hand helps-- While D was roasting all ingredients on the stovetop I was busy puréeing the ingredients together in steps and keeping an eye on the rice. In the end, there is enough masala leftover for two lunches tomorrow.

The below recipe is the original Aloo Dum (Potatoes in Masala Sauce). This recipe seems like a lot of ingredients but it is really mostly spices. So give it a try.

ALOO DUM
Serving Size= 4. Active Time= 30-45 minutes.
The preparation is three step. First boil the baby potatoes until they are just tender. Roast and grind the spices, the vegetables and the nuts for masala sauce. Combine and cook them together. The whole preparation takes about 30 to 45 minutes, if you have everything at hand.:) And the main chunk of it is of course to wait for the potatoes to boil.

* 12 tiny baby potatoes

Veggies
* 4 medium sized ripe tomatoes, each cut into four quarters
* 1 medium sized red onion or 4 shallots cut into big chunks
* ¼ cup finely chopped coriander
* 1×1 inch piece of fresh ginger
* 2 big garlic cloves


Nuts
* ½ cup cashews
* ½ cup fresh grated coconut

Dry Masala
* 6 dried red chillies
* 1 teaspoon coriander seeds & cumin
* ½ teaspoon peppercorns
* 3 small cinnamon sticks and cloves
* 1 star anise


Popu/Tadka
* 2 teaspoons of peanut oil
*1 teaspoon of mustard seeds, cumin and some curry leaves
* ½ tsp of turmeric
* Salt to taste

1) Preparation is boil, roast-sauté-grind and cook.
Boil the potatoes until they are just fork-tender. When they are cool enough to handle, peel the skin. Prick them with a fork in multiple sites and keep them aside.
2) Gather the listed ingredients for masala sauce, ready on hand on a big plate. Heat an iron skillet and proceed like this.
3) Roast dry masala ingredients, for few minutes, until they release their smell. Remove them from the skillet and keep aside.
4) Roast cashews, then fresh grated coconut for few minutes. Remove them from the skillet and keep aside.
5) Roast ginger and garlic for few minutes. Remove them from the skillet and keep aside.
6) Finally heat one teaspoon of oil and roast onion and tomatoes for few minutes.
Let them cool down little bit. When they are cool enough to touch, put them in a blender. Add half glass of water and half teaspoon of salt. Grind them into smooth paste.
7) Cook: Heat one teaspoon of peanut oil in a big wide pan or kadai. Toast the popu ingredients (mustard seeds, cumin and curry leaves) until they start to splutter. Add the grinded masala paste and another half glass of water. Stir in turmeric. Taste and add salt if needed. Add baby potatoes. Cover and cook on medium heat for about 15 to 20 minutes. Finally stir in finely chopped cilantro and serve.

My Kitchen Notes: 
Don’t forget to prick the potatoes, so that they can absorb the sauce.
 Onions - avoid yellow onion and go with shallots or red onions. 
If you want, you can also stir in cream/yogurt at the end.


Head on over to Sweetnicks for all your ARF/5 round up!

Sunday, December 11, 2005

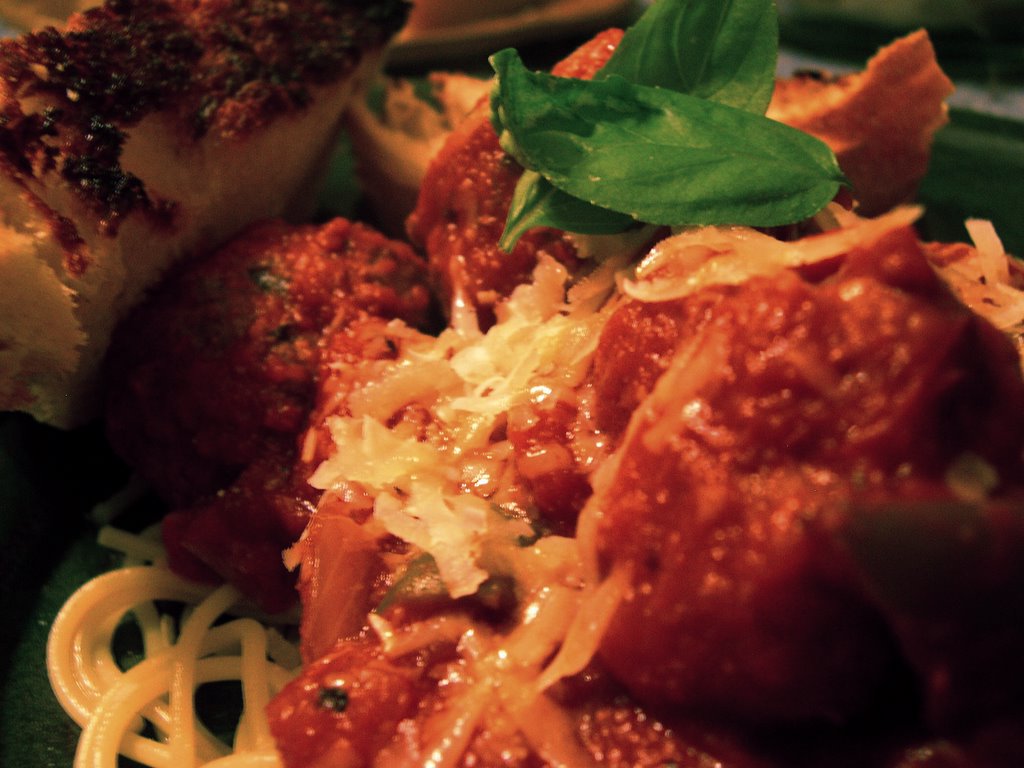
Classic Spaghetti & Meatballs w/ Anchovy Garlic Bread


D’s friend Jeremy recently commented how easy it is to make cranberry sauce. The same goes for a good tomato sauce. If you are willing to chop a few vegetables, it is remarkable how delicious a homemade classic tomato sauce can be (and how easy it is to create variations on the original).

Friends will eat your sauce and ask what brand it is. They will marvel at the chunks of vegetables they can actually taste. Most importantly, they will secretly love you for not killing them with the over abundance of salt that is found in most jar varieties. You will love them back because they will remain in your life longer—unless of course, you no longer desire this, I suggest any high-salt jar variety.

I will sometimes make this sauce with meat—otherwise known as Bolognese. But oh! To have giant meatballs doused in sauce looming on your plate! It makes you want to sing out—On top of spaghetti/ All covered with cheese/ I lost my poor meatball/ When I had to sneeze… But these meatballs, trust me, will be in the belly before anyone can sneeze. (I was eating leftovers today at lunch and was beyond stuffed. The glutton and greed in me pushed on, fighting to finish the last meatball before the plate was passed to D for completion. Who promptly asked, “where’d the meatballs go?!”)

To swank up this classic meal, aim was taken at the garlic bread. Tease peoples’ palates by adding anchovy to the butter/ olive oil mixture. There is no offensive taste that an anchovy can sometimes offer. For many, it is a salty afterthought that will leave them to wonder “what was that delicious spice?”. This bread is so good and easy to make I’ll sometimes prepare only this for lunch. My friend A loves it so much that whenever she comes over we make a big loaf of this as a snack. My vegetarian friend B loves it so much she breaks her will just for this occasion. And you didn’t garlic bread could get any better.

I will have to say the best part of the spaghetti dinner is the leftovers. I love warming spaghetti on the stovetop the next day. The sauce cooks into the noodles creating a single entity. Rather than sauce on noodles, the dish unites. What was once a delicious spaghetti and meatball becomes a hearty, home inducing memory…

SPAGHETTI & MEATBALLS w/ ANCHOVY GARLIC BREAD
Serves 6. Cook + Prep time= 40 min

THE SAUCE
1 cup button mushrooms, sliced
1 medium onion, chopped
1 bell pepper, chopped
4-5 garlic cloves
5-6 black olives, chopped
2 Tbl olive oil
1- 5oz can no salt added tomato paste
1-15oz can stewed (or diced) tomatoes, no salt added
1-28oz can crushed tomato, no salt added
2 Tbl brown sugar
2 bay leaves
10 leaves fresh basil, chopped
1 tsp oregano
fresh pepper/ salt to taste
1) In a saucepot on medium heat, warm the olive oil. Add onions, garlic and mushrooms. Sauté 10 min until onion is soft and mushrooms reduce and brown a little. Add olives and pepper, sauté 5 min. Add basil, oregano and stir. Add 3 cans of no salt added tomato sauces. Add bay leaves, brown sugar, salt/ pepper to taste, stir. Reduce heat to medium-low and allow to simmer while you prep the meatballs and noodles. Allow to cook at least 20 min.

NOTE: mouthwatering plays on this simple recipe: option 1- Add ¼ cup chopped sun-dried tomatoes to the sauce. Option 2- Blacken some red peppers in the oven. Remove skin, chop and add to sauce. Option 3- Using 5-6 lbs Roma tomatoes, cut into quarters and place on a non-reactive bake dish. Preheat oven to 450F. Add ½ cup olive oil, ½ cup balsamic vinegar, 10 garlic cloves. Roast for 40 min until tomatoes begin to blacken. Use this in lieu of the canned tomatoes. Option 4- Add meat with the onion/ garlic/ mushrooms to create a Bolognese sauce. Option 5- Use 2 portabella mushrooms instead of the button (or meat). Option 6- Add 2 cups chopped basil to create a pesto-tomato sauce.


MEATBALLS
Makes about 15 balls
2 lb meatloaf meat (veal/ beef/ pork)
1 medium white onion, chopped
¼ cup fresh parsley, chopped
½ tsp sage
2 garlic cloves, crushed
1 egg
1) In a mixing bowl, combine all ingredients until evenly distributed. Warm a skillet on medium heat with 2 Tbl oil.
2) Form 2-3 inch balls. Add to skillet and allow to brown on all sides, about 10 min. Once done, add to tomato sauce to warm through and absorb some tomato flavor. Let sit for at least 5 min before serving. (You can make your noodles now according to the package)


ANCHOVY GARLIC BREAD
Makes one loaf.
1 loaf good Italian bread
2 Tbl unsalted butter
2 Tbl olive oil
2-3 anchovies
2-3 garlic cloves, crushed
1) Cut loaf in bread lengthwise (a la hamburger style per Kindergarten terms)
2) In a small sauce pan on medium heat add all ingredients. Using a fork, mash up the anchovy as butter melts and stir everything together. Once garlic starts to sizzle, remove from heat and brush onto both sides of bread. Close bread, cut into pieces (cut so the bottom of the bread still holds together but pieces can be easily torn off. Sit on a baking sheet and broil 5-8 min until lightly golden, sizzling and delicious.


ORDER OF PREP:
1) Start the sauce first. While the onion/ garlic/ mushrooms warm, mix the meatball ingredients and form balls.
2) Once you add the cans of tomato for the sauce, cook the meatballs.
3) While meatballs cook, prepare the anchovy garlic bread filling.
4) Transfer meatballs to sauce. Begin noodles (unless fresh then wait until last min to prepare). Brush filling on bread and cook.

Saturday, November 19, 2005

Lasagna Mama

Pasta has received a bad rap recently. This is especially true when we discuss lasagna because it can be high in carbs, contains dairy, and is quite heavy. But pasta in some form probably receives note on most peoples' top ten food list. We must be honest with ourselves though: Lasagna peaks the pasta pyramid. It is simple to make. It can be created in a slew of different ways. It is very tasty. In complete, if made properly, it is a satisfying meal in itself. With Atkins now passé, and research declaring that dairy 3 times a day actually maintains a healthy motabalism why not make a lasagna to keep you warm and happy in the cooling weather?

As many people now know, pasta was invented in China. Brought west, it was soon taken on as a favorite in many lands. The dish, lasagna, as we know it might even be Chinese in origin (cookbooks have been found pre-dating any Greek or Italian description of a very similar dish). But the word Lasagna itself may be Latin in origin, "lasania,", "cooking pot" or classical Greek "lagana," "a type of unleavened bread not unlike pasta". In today's vernacular, "lasagne" is plural for the singular slice of "lasagna", which is how most Brits and N. Americans now refer to the dish. You call it lasagne, I call it lasagna-- either way, eat it up.

Lasagna can be made many ways: Traditional, with pasta and meat or vegetarian. One can also substitute the pasta for eggplant, zucchini, or a combination of both (meat or no). One easy shortcut to keep in mind when using pasta is that there is no need to cook the noodles before you assemble your lasagna: Put a thin layer of sauce on the bottom, cover with pasta, and continue as normal. The water from the sauce will cook the pasta perfectly in the oven. It is also great because the pasta will not fall apart as easily and you can break the pieces to size.

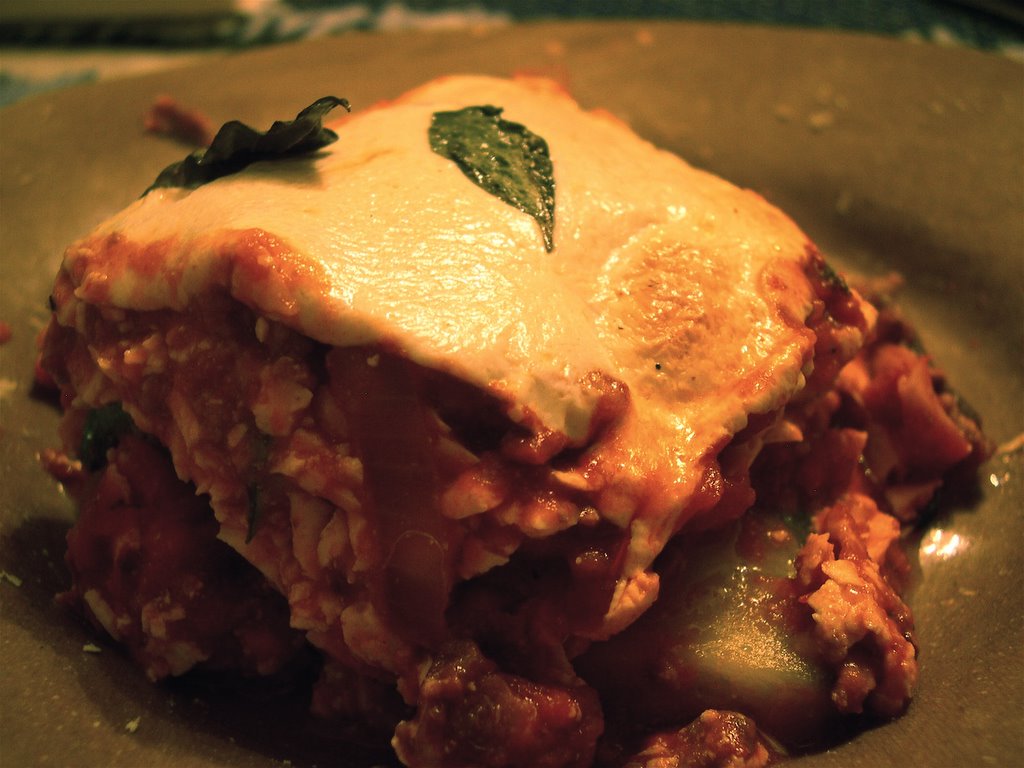
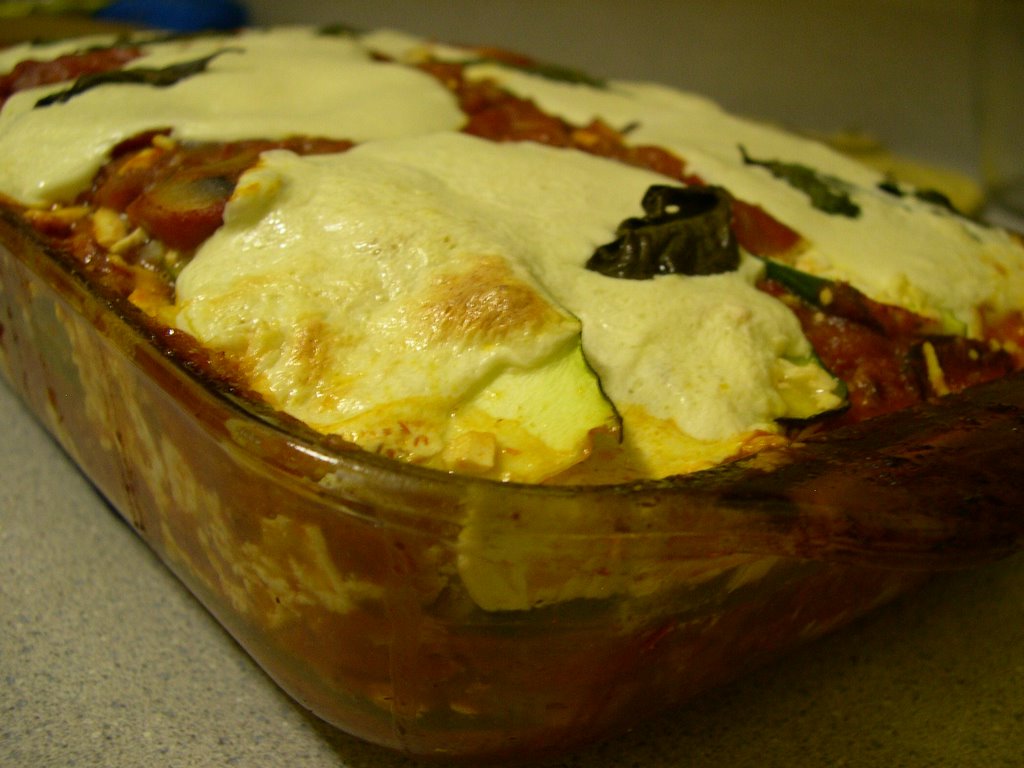
I made my lasagna with zucchini and meat. I put my basil plant to use and made fresh basil sauce-- okay, I bought plain, no salt/ no flavor tomato cans and added my own flavors (it is less salty this way and I know exactly what is going into the lasagna). But I have made it before from fresh tomatoes and this too is a great treat. I used fresh mozzarella, fresh ricotta and good parmesan. Using good, fresh cheese is a little more work but really adds to the flavor. This recipe is an Atkins lover dream (or for someone, like me, who ran out of pasta noodles). The best part is that there is plenty leftover for the rest of the week or to cut it up, wrap it in foil and freeze for a needy day or working lunch.


ZUCCHINI-MEAT LASAGNA
1 cup fresh ricotta, grated (you can buy 1/4 lb of the cheese and use all or save some for other dishes)
1 cup fresh good parmesan, grated (not that Kraft stuff)
1 good size fresh buffalo mozzarella, sliced
1- 15 oz can no salt/ no flavors added tomato sauce
1- 8oz can no salt/ no flavors added tomatoes, chopped
1- 6oz can no salt/ no flavors added tomato paste
1 lb good beef, ground (you can buy good meat at the butcher and have them grind it fresh for you)
1 medium onion, chopped
2-3 cloves garlic, pressed
6 white button mushrooms, chopped
6-8 sun-dried tomatoes, chopped
10 leaves fresh basil, chopped + some whole
5-6 kalamato olives, pitted and chopped
salt/pepper to taste
5 medium zucchinis, ends cut off and sliced long about 1/4 inch thick

The Sauce:
1) In a good sized pot, over medium heat, add beef (you do not need to add any butter/ oil. The fat from the meat will be enough), onions, mushrooms and garlic. Cook about 10-15 min until the meat and mushrooms are browned and the onion is clear and soft, stirring occasionally.
2) Add sun-dried tomatoes, olives and 10 chopped basil leaves. Cook about 3 min, stirring.
3) Add the tomato sauces.
4) Bring sauce to a light boil then turn down heat and allow to simmer about 10min (more if you want a thicker sauce)

Lasagna Assemblage:
1) Preheat oven to 350F. Ladle a thin layer of sauce into the bottom of 11 x 9 x 3 inch pyrex (or other non reactive pan). Cover bottom of pan with a layer of zucchini, a thin layer of the parmesan and thin layer of the ricotta.
2) Add layer of sauce, zucchini and cheeses again. Continue until layers reach top of dish. Finish off with one last layer of sauce and zucchini if you have any left. Then lay out the sliced mozzarella and place one basil leaf on each piece of mozzarella.
3) Create a foil dome using 3-4 toothpicks poking out of the mozzarella. Put in oven on the center rack for 30 min. (You may want to place a cookie sheet below to catch drippings.) Remove toothpicks and tinfoil and bake another 10-15 min until mozzarella is lightly browned on the edges (it will look like roasted marshmallow).

Eaten with a salad this is a fabulous feast. As you can see from the results, this was an excellent lasagna that kept its' form very well. It tasted even better than it looks.


View Stats
Rankingblogs.com: Defining your blogs worth..