Showing posts with label beef. Show all posts

Thursday, November 02, 2006

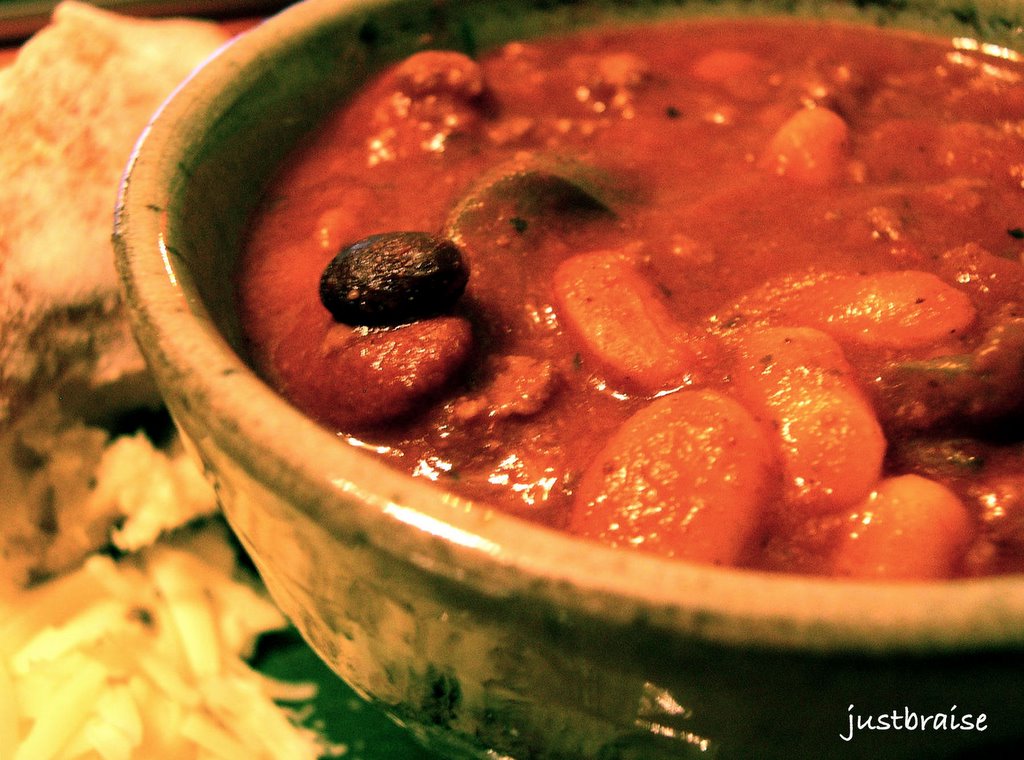
Asian Inspired Beef Braise


I know it’s a little vague to use the term “Asian Inspired” when describing this, or any, dish. Possibly Asian fusion works better, or simply, fusion braise (to go along with all the fusion restaurants we have these days).

For a few weeks now, D has been eyeing the 4-inch thick cuts of beef chuck at the butcher. They called out meat-protein overload to him, so when I finally okayed the purchase he was in heaven. As we headed next door to the vegetable stand and D picked out a few potatoes for the braise, he eyed me warily as I bagged up chestnuts and shiitake mushrooms. More than once I was told not to “ruin” his beef.

Last summer I was in China finishing up a Masters degree. Between tastings of dehydrated “rope” pork, emperor banquets of delicately crafted dim sum, ogling beetles and snakes on a stick and falling in love with the velvety sweet pulp of mangosteens, I became enthralled by the vibrant offerings of vegetables. Each dish was a still life: Broccoli was reshaped into flowering blossoms, mushrooms became lotus roots and lotus roots became dragon scales. I was constantly amazed by the care that was put into presentation, regardless of the establishment.

It was in these dishes that I came to re-appreciate the texture and versatility of the shiitake mushroom, amazed how it holds up in cooking. And it was here that I learned to love the chestnut-- popping up to add a rich flavor and thick creaminess to dishes I hadn’t known before. Used sparingly, mostly as a holiday embellishment (accordingly with their season), I don’t think the chestnut receives its fair exposure.

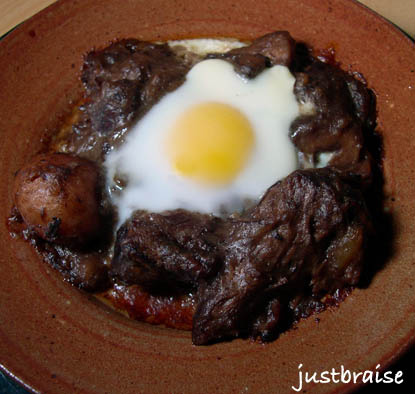
This dish is in some ways a remembrance of China, but more so, a way to incorporate the ingredients I came to appreciate in a succulent braise. We ate the braise bare at first and on the second and third day cracked an egg on top and enjoyed it baked. The egg adds another wonderful depth of texture and fabulous richness once the yolk is broken. And those little potatoes D gathered for the braise? Perfect for sopping all the juices up.

ASIAN INSPIRED BEEF BRAISE
Serves 6 persons. Active time= 20 minutes. Inactive time= 3-½ hours (depending on thickness of meat).
* 1 pound chestnuts, roasted and shelled
*5-6 pound cut of beef chuck (or other inexpensive cut)
* ½ pound shiitake mushrooms, cut into quarters
* 1 medium onion, sliced (or 2 bunches scallions)
* 3 tablespoons soy sauce
* 1 tablespoon sesame oil
* 1 teaspoon dried chili flakes
* ½ bottle red wine
* water
* ¾-1 pound (small) new potatoes, red or white, left whole

1) Roast the chestnuts before beginning. I apparently did not slice into the shells deep enough and a few exploded in the oven. Preheat oven to 350F. Carefully slice an “x” into the bottom flat nub of the chestnut. Place on a pan and roast for 30 minutes, until shells begin to peel away (or blow up in my case). Allow to cool and remove shells. Place meat aside in a bowl (okay if meat breaks apart).
2) Warm a dutch oven over medium high heat with a 1 tablespoon butter-1 tablespoon olive oil combination. Once warm, rinse off beef and pat dry. Salt and pepper both sides of the beef. Once pot of hot, add beef and brown on all sides, about 4-5 minutes each side. Remove meat from pot, set aside.
3) Add mushrooms, chestnuts and onion to pot. Sauté until onions turn translucent, mushrooms brown and chestnuts break down slightly; about 8 minutes.
4) Add soy sauce, chili flakes and sesame oil, stir to incorporate.
5) Push contents of pot to the sides and replace meat in the pot. Add red wine and enough water to come just below the top edge of the beef (depending on how thick your meat is, you might not need any).
6) Place potatoes around the top, but not in the liquid. Cover tightly, turn heat to low and allow to braise (slow cook) for 3-½-4 hours. Check on the pot once an hour. Turn heat down if liquid is boiling. Add more water if all liquid evaporates out. The dish is done when meat easily falls apart and sauce has thickened.
7) Enjoy warm as is or with a baked egg on top (see below).
8) With baked egg: Preheat oven to 350F. Dish up a portion in an oven safe bowl. Create a small divot and crack egg into the space. Place dish on cookie sheet for easy transport and place on middle rack in oven. For a runny yolk, bake for about 10 minutes, until yolk just begins to form a white covering.


Tags: , , , , , , .

Thursday, June 15, 2006

Dry-Rubbed Beef Ribs


*Just Braise has moved. Please visit me at www.justbraise.com!*

This past weekend was the annual Big Apple BBQ in New York City. D and I were just coming off our sickness, placing our desire for large amounts of BBQ low. After a few hours, we were craving ribs. Knowing the lines would be killer, we took our newfound hunger into our own hands.

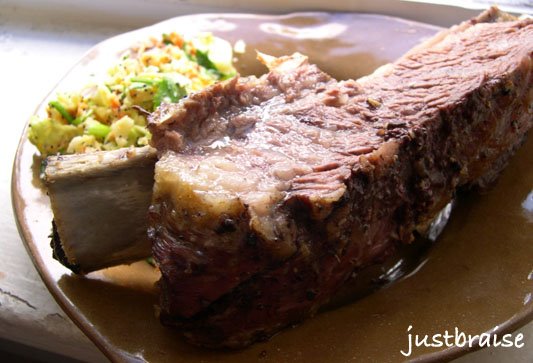
We headed to the butcher and upon arrival asked for beef ribs. Short ribs were brought out and we quickly sent them back. We were thinking Texas style and therefore needed dinosaur ribs. A plastic wrapped package was carried from the back recesses and undone. Ribs longer than my forearm tumbled onto the butcher block. D licked the drool from the corner of his mouth.

6 hulking ribs were purchased for 3 people, a watermelon, and a few supplies for coleslaw. Though D himself is from Virginia, his father is a born and bred Texan. D took the reigns when prepping this slab of meat and gave them a basic dry rub of salt and pepper, covered them, and sent them in the oven on low heat for 3 hours.

The result was succulent, juicy ribs that defied any size and flavor ever purchased before in a restaurant. Dripping with moisture the well marbleized meat fell right off the bone, making it all the easier to fill our mouths.

Every dry rub rib recipe I have had before left small amounts of tough, dry meat to be pulled off the bone. These hulking ribs were brimming with flavor, juice and meat-- an overall success.

Dry-Rubbed Beef Ribs
6 ribs (not short ribs) serves 4 with leftovers. Prep time= 5 minutes. Cook time= 3 hours
* 6 beef ribs (not short ribs); have the butcher remove the cartilegde from the underside and crack the ribs but do not separate ribs. Your butcher can also diamond cut across the meat so the dry rub can be rubbed into the meat more easily.
* 3 Tbl salt
* 4 Tbl fresh-ground pepper

1) Preheat the oven to 350F. Place the ribs in a large baking dish, meat up, and amply salt and pepper; rub into the meat.
2) Cover with tinfoil and place on center rack in the oven. Turn heat down to 300F. Cook for 3 hours.
3) To brown, remove foil and replace in oven for 10-15 minutes.
4) Meat will have pulled back from bone and be extremely juicy. Slice and serve.

Sunday, May 07, 2006

Soda-Braised Beef


D and I are gearing up for what we are dubbing The Epic Voyage. We leave next week and my mother is a doll to fly in from Chicago (okay, she was already coming for a short visit), but will be extending her stay to care for the cats, my plants and my little City Garden (I don’t think she actually knows the extent of her duties!). As D and I begin to get our trip in order, tie up loose ends, put in extra hours at work, finish open projects—don’t even mention packing—we are trying to clear out some perishables my mother will probably not use, e.g. the dregs of a cola bottle.

While D and I do some last minute scrimping, we figured a good cheap braise was in order. It would clear out our refrigerator and last us through the beginning of next week. So when I told D to just grab “whatever” in the fridge, he pulled out the soda: “Coke?” I thought for a few seconds before, “of course, soda can go in BBQ, marinades, and you can put juices in a braise, so why not soda? Dump it.” D splashed the remains into the pot and took the last swig for himself.

When I was younger, all sodas-- or colas, depending on where you are from, I referred to as, “coke”. My family would go to a restaurant and I would ask: “What kind of cokes do you have?” I received one of two stares: “idiot,” or “smartass.” In the Chicagoland area, “coke” came in diet and regular. I was supposed to ask for soda.

It was not until later that I found out that “coke” as a term for all carbonated beverages really is common. It is mostly used in the south, especially Georgia, where the Coca-Cola Company has their main headquarters. Still later, I found out that in my home state’s almost-neighbor, Ohio, cola was the proper term when discussing carbonated drinks, but they also say crick, begel and ruff (instead of creek, bagel and roof), so I don’t know if it is optimal to use their “cola” term.

Phraseology varies all over this country—don’t even start on the world. It is interesting, whether through travel, or everyday encounters, to find these idiosyncrasies. So as we creep ever closer to Memorial Day and the official start of summer travels, keep an ear out for these cultural flare-ups.

Oh, and the braise was pretty darn good. The sauce was not too sweet with an overall robustness that was quite delicious when paired with the meat. The carrots and celery especially took on the soda very well, turning into sticks of caramelized goodness. The new potatoes were perfect—a last minute decision to purchase these instead of using up some russets we had. Because the new potatoes were left in-tact, they held together nicely, took on the broth and were even better when dipped in a dab of sour cream.

SODA-BRAISED BEEF
Makes 6 servings. Active Time= 20 minutes. Cook Time= 3 hours.
* 6 pounds of beef, left whole (or in 2-3 pieces to fit in pot)
* 3-4 cloves of garlic, crushed
* 2 stalks of celery, cut 1-2 inches in length
* 2 carrots, cut 1-2 inches in length
* 10 white button mushrooms, cut in half
* 10 pearl onions, left whole (or 1 medium onion, sliced into 1 inch cubes)
* 15 new potatoes, washed well and left whole
* 2 cups beef broth (or water and bouillon)
* 2 cups Coca-Cola (Pepsi, Tab, Dr. Pepper or other dark soda)
* salt/ pepper to taste
* 2 bay leaves
* fresh herbs (rosemary, thyme, tarragon, parsley work well)
* 3 Tbl butter or oil

1) In a dutch oven, or other pot with tight fitting lid, warm the butter on medium-high heat. Rinse the beef and pat dry. Sprinkle with salt and pepper. Add to pot and brown on all sides. Add garlic.
2) Once meat is thoroughly browned, remove from pot and set aside. Add celery, carrots, mushroom, onions and potatoes. Sauté about 8 minutes, until onions are translucent.
3) Return beef to pot, add beef broth, soda, bay leaves and fresh herbs. Cover and bring to a boil. Remember: this is not a stew, it is a braise. Liquids should come just under the top of the beef.
4) Turn heat down to medium-low, leave covered and cook for 2½ - 3 hours, until meat falls apart.
Note: Served with fresh crisp bread or a good salty cheese this makes a great dish.


For all the herb lovers out there Kalyn’s Kitchen hosts WHB. My herbs this week: rosemary, parsley and thyme in this braise.

In non-food related activities we have WCB over at Eat Stuff. I really attempt to capture Kitty BoJangles in action. It is not that it is so rare, but it is true, she is often asleep. Her fun time is what I call her "night crazies." Just after dinner when she bolts the length of the apartment a few dozen times. There is no use getting a shot of her then, because frankly, if you get in her way it is damaging. Instead, I took a picture of her on a box post-night crazies. Shortly after this picture was taken, the box was thrown away. She had grown quite attached because she stared at me viciously as I removed her cooling pad.

And then there is the usual tormentor, Whiskey. He looks very innocent here, be warned, it is all a cute cover.

Tuesday, April 04, 2006

Roast Lamb w/ Mango-Mint Sauce, Moroccan Millet & Rum Pineapple w/ Baby Almonds


Spring is a fabulous time to slow down a little before the summer hustle. It is the time when we come out of doors with welcome arms. Everyone seems happier, more active and generally more excited to be alive. With this in mind, it is also a great time to celebrate. Be it any occasion: holiday, birthday, the weather itself, friends or engagements, now is the time to invite your loved ones into your home.

It was the combination of a traveling actor friend in town and two recent engagements of marriage that my friends would dine with me tonight. Their task was simple: a few bottles of wine. My task was to prepare an ideal spring feast. I believe we all accomplished our set duties.

While mulling over menu options I was torn between chicken, pork or lamb. Chicken seemed too average and easy, pork was, you know, the other white meat. Lamb seemed exotic. But while many people take great fear of lamb, I figured my friends were the adventurous types and I would forge ahead.

Sure enough when we sat to the table my friend DR voiced his concern: “You know Stacey, I’ve never eaten good lamb. I’m kind of afraid. It’s all been slightly… barnyardy?”

“That’s okay,” I reassured him, “I’ve never cooked lamb before, so we’re kind of even.” With that, he finished off his glass of wine. DR’s fiancé then voiced her concerns, “I’ve eaten lamb in kibe (Middle Eastern lamb balls with other spices) and on kebabs, but any roasted lamb I’ve ever had has been terrible.”

“Well, I’m glad you’re in for an adventure.” I returned.

No sooner was the lamb brought to the table that forks were rearing to stab at it. Across the board the meal was a success. DR and his fiancé were reassured the merits of good lamb, and I was reassured that I can cook lamb. The spices were a great compliment to the sauce, and with the millet side, everything was the colorful festive spring feast I sought.

DR mentioned his barnyardy objection to lamb. I would have to agree that lamb, like any meat is easily spoiled if a few rules are not met: freshness and cooking time. Freshness is key. If kept in the refrigerator (or meat department of your grocery store) too long the meat will begin to spoil (obviously). In the refrigerator, it will pick up the odors of food around it. Make sure to check dates and grade of meat to ensure freshness. Overcooked meat is depressing. This is easily done if a good meat thermometer is not utilized, or placed incorrectly. It is important to know what cut of meat you have, how it’s best to prepare that cut, and the ideal temperature for the outcome you desire.

With that, a fabulous spring meal, perfect for the upcoming holidays…

ROAST LAMB w/ MANGO-MINT SAUCE
Makes: 6 servings. Active Time= 30 minutes. Inactive time= 5 hours to 2 days. Cook Time= depends on size of meat; about 40 minutes.
ROAST LAMB
* 6 pound leg of lamb, ask your butcher to crack the bone and butterfly the cut**
* 3 Tbl fresh rosemary, chopped
* 3 Tbl fresh mint, chopped
* 3 Tbl fresh sage, chopped
* 2 head of garlic, 1 crushed, 1 whole
* 20 pearl onions, 10 crushed, 10 whole
* 1 Tbl ground cumin
* 1 Tbl ground cardamom
* ½ Tbl ground cinnamon
* salt/ pepper
* 4 Tbl olive oil

1) Bring the meat to room temperature before cooking. Mix the first 3 ingredients, 1 head of garlic and the ten crushed pearl onions with fresh ground pepper. Rub 2 Tbl olive oil over the lamb and rub the herb mixture over the leg of lamb; between the cuts, top and bottom. Wrap tightly in plastic wrap and refrigerate 5 hours up to 2 days.
2) Preheat the oven to 300F. Remove the lamb from the refrigerator, brushing off about half the rub. Sprinkle with cumin, cardamom, and cinnamon. Amply salt and pepper both sides and between the cuts. Tie securely with twin to hold the meat together.
3) On the stovetop in a large skillet on high heat, warm 2 Tbl olive oil. Sear the leg on all sides. Apply a fresh sprig of mint and rosemary under the twine. Chop the top off the second head of garlic, just to expose the tips and place it on the skillet. Add the onions around the lamb.
4) Place on rack, fatty side up. Insert a meat thermometer deeply, almost to the bone.
5) The meat is done when the thermometer reads 125 for medium-rare.
6) Remove from oven and allow meat to rest on cutting board for 15 minutes before slicing.


** To butterfly meat is to slice it so the meat looks like a book with the bone as the book spine.

MANGO-MINT SAUCE
* 1 fresh mango, peeled and pit discarded
* 1 cup fresh mint
* 1 tsp Serrano pepper seeds
* 1 Tbl lemon juice
* pinch of salt

1) Use a hand-held or electric blender to purée all ingredients until evenly blended. Serve at room temperature to slightly chilled.


MOROCCAN MILLET
Makes: 6 servings. Active Time= 10 minutes. Cook Time= 25 minutes
* 3 cups dried millet
* 6 cups water
* 1 bunch spinach, washed well
* ½ cup dried cranberries or apricots
* ½ cup roasted pine nuts
* salt/ pepper to taste

1) Cook the millet according to package instructions. While it is cooking, sauté the spinach. Once done, leave on heat. Add spinach, cook about three minutes to reheat spinach; stirring to ensure the millet does not stick to the bottom of the pot.
2) Add dried fruit, nuts and salt/ pepper. Stir and place in serving bowl.


RUM PINEAPPLE w/ BABY ALMONDS
Makes: 6 servings. Active Time= 10 minutes. Inactive Time= 1 hour.
* 1 fresh ripe pineapple
* 2 Tbl butter
* 1 cup dark rum
* 2 Tbl brown sugar
* ½ cup baby almonds **

1) Slice top and bottom off pineapple; slice off skin. Cut into quarters. Remove center rind. Cut each quarter into 4 pieces lengthwise. Place pineapple slices in shallow dish and cover with rum and brown sugar. Refrigerate 1 hour.
2) On a skillet on medium heat, warm the butter. Sauté pineapple slices until lightly browned.
3) While pineapple is browning, in a small skillet on medium heat pour the sugar-rum mixture. Let it warm while the pineapple cooks. Serve pineapple slices with ice cream, coated in rum-sugar syrup with baby almonds sprinkled on top.

** Baby almonds are found usually around late March. They are immature almonds, still in their fuzzy pods, plucked before the almond has the opportunity to harden into the nut we love to eat. To use, peel off the fuzzy outer shell. The inner snow-white nut is the non-ripe almond you want to use in this dish. They are crunchy and contain a clear jell inside (that eventually hardens to white with maturity)


*** Remember to save your bones for soup!!! ***

Head on over to Sweetnick's for today's ARF round up!

Over at Kalyn’s Kitchen, check out some WHB action. Today’s herb? Mint.

Friday, March 31, 2006

Burger w/ Sweet Potato Fries & Milkshake


Last night I took a little walk as I left one friend to meet up with D and his buddy uptown. I often find myself speedily walking the length of Manhattan island as it begins to warm, much more pleasant than the claustrophobic subway, watching as the people and their actions change with the neighborhood. On a weeknight, the walk is the best: the crowds have diminished, a few hardy souls stumble from bars attempting to make a last effort phone call, and tourists walk aimlessly, unaware of where they should be. In the spring, as night falls cool, a brisk walk is perfect to keep the blood flowing while appreciating time that can finally be spent comfortably outdoors.

My little walk turned into a 40 block trek and for one slight moment, a total of half a block, I smelled spring. It has officially arrived in New York City. It was a brief moment, just past a pile of garbage bags that the air lightened and suddenly Dogwood mingled with early purple violets. Blossoms are out; spring has arrived.

With the weather warming, D and I begin to think about our city escapes: camping. Just when the weather turns perfect, D plans our camping destination while I plan the (cheese) farms to hit up for produce along the way. Interspersed with our camping shenanigans are the precious city BBQs. Few and far between since outdoor space is a rarity, when they do come, they are perfect: on a rooftop, in a side alleyway, in a 5 foot plot of grass next to the front stoop, on the fire escape, and if you are lucky, on the coveted balcony.

So it is with these spring thoughts that D and I whip up our own little (indoor) BBQ. It is possibly the classic New York City diner meal (next to the corned beef sandwich): a burger with french fries and a black and white milkshake. The (best) black and white milkshakes, like the black and white cookie, are only found in the tri-state area [cough] -- New York City. On a trip home to Chicago one year I entered a diner and ordered one. I received a confused look and returned it with a smitten: “vanilla ice cream with chocolate sauce!?” Geesh, how can you not know?! But attempted (and tasted) in diners west and north, the best are found in the City. The black and white milkshake has the delicate pleasures of vanilla ice cream with that extra sweet richness of chocolate sauce. Like the classic hot fudge sundae or chocolate milk, you can make it as subtle or rich as desired. An even better play on this drink? The beershake-- really, it’s tasty. Or, the whiskyshake, which my New Orleans friend calls “milk punch.” The rest of the meal has received ink:

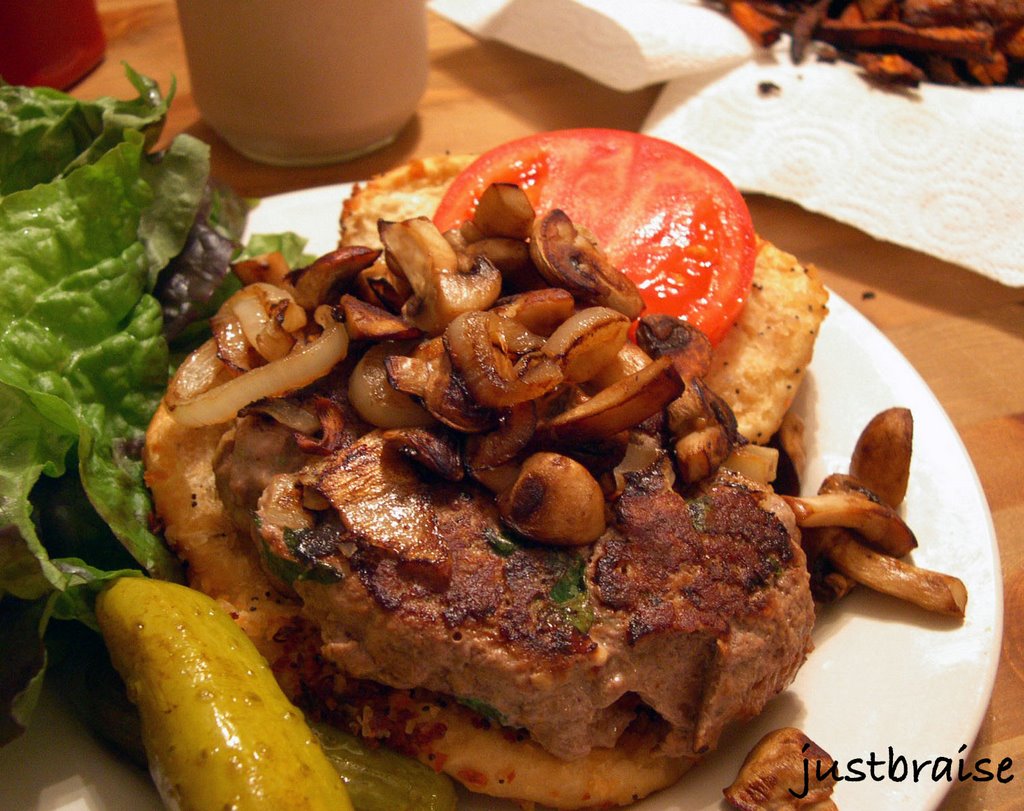
The Burger (made with caramelized onions and mushrooms; no cheese)
The Sweet Potato French Fries (made with salt, no cumin)

And without further ado…

BLACK & WHITE MILKSHAKE
Makes: 2 servings. Active Time= 5 minutes.
* 1-½ cups vanilla ice cream
* 1 Tbl chocolate sauce
* 2-½ cups milk

1) Blend all ingredients and serve immediately


THE BEERSHAKE
Makes: 2 servings. Active Time= 5 minutes.
* 1-½ cups chocolate ice cream
* 1 cup milk
* 1 pint good porter beer

1) Blend the ice cream with the milk.
2) Add beer, stir with spoon. (Do not attempt to blend the beer as it will produce a foamshake.


THE WHISKYSHAKE
Makes: 2 servings. Active Time= 5 minutes.
* 1-½ cups vanilla ice cream
* 1 Tbl chocolate sauce
* 2-½ cups milk
* 4 oz preferred whisky

1) Blend all ingredients and serve immediately

Wednesday, March 22, 2006

Steak au Poivre w/ Wasabi-Parsley Sauce


Add a little green to your palate. Does a better way exist to usher in spring? Okay, so I gaze longingly as I pass florists wishing on the first buds from the trees. I envy the recent talk regarding the planting of summer gardens. I occasionally under dress in the recent frosty spell, in hopes the weather forecast is wrong and spring is really here (not just on the calendar). Thoughts of lighter foods are on my mind, picnics, beaches, camping and farm visits (I love heading out of the city to seek out local grown produce). But why not a little steak before we finally say goodbye to winter?

On a recent Costco run, D and I nabbed a few steaks, hence the recent postings on steak. Costco is a tricky business. While I like to buy organic and from green markets as often as possible, I am still quite poor (the glories of fulfilling your dreams and living check to check) and cannot always afford quality organic pickings. And while I do not think everything is a bargain at Costco-- I can often beat the prices of fresh produce at my local markets-- I do think for a few essentials, if you have the room and do your comparative shopping magic, it can be worth a trip. Plus, I have found they have a fairly decent meat/ seafood department.

These steaks have been patient with us; quietly awaiting consumption in the freezer. As the fresh produce comes to an end and bellies are a’grumblin’ steak was the chosen one today. In honor of spring, the theme was green. Okay, I had some wilting parsley itching to be used.

Parsley is the underrated herb. Sadly, it often makes its appearance as a mere garnish, rarely taking center stage: A sprinkle here jazzes up soup; a bouquet there adds some color. Its crisp, salty wetness is rarely highlighted as main flavoring.

For me, parsley took center stage on my family’s Seder plate. Once a year it was my highlight of the service: dipping the leafy herb into salt water. Greedily (or perhaps to really remember the salty tears?) I often dipped two or three bunches, relishing the refreshment. I came to love parsley out of humoring myself. Later, there was a time when I always ate the garnish on my plate first—I defended this action declaring I was cleansing my palate. Sometimes it was a flower I would nibble gingerly at, more often than not, it was a large sprig of parsley.

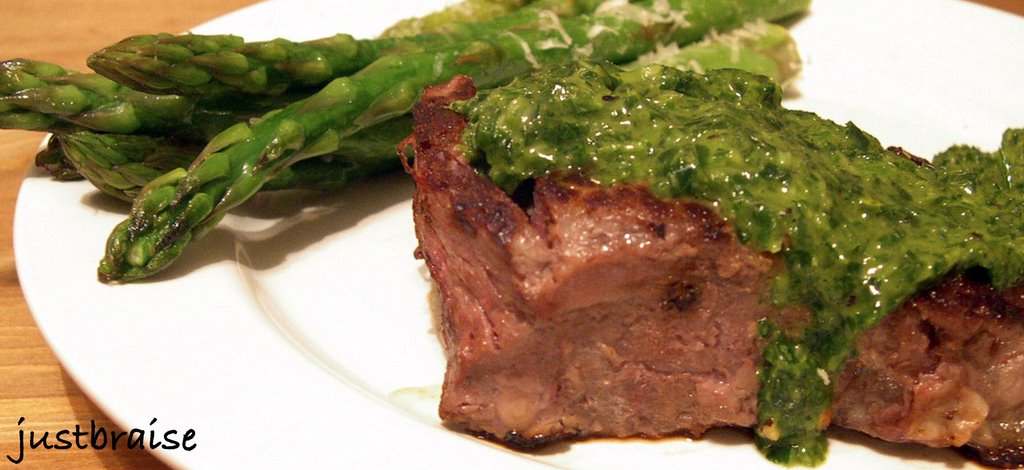
Today this delicate herb will take a much deserved bow. Boldly it will rest atop my steak and declare itself victorious in the tango of taste. This is a sauce that is easy to prepare. It is light, refreshing and the perfect accompaniment to this steak, as I am sure it would be to other meat, poultry or fish dishes. I often think of sauces as thick, creamy and full of fat. And while I love dipping my food into them, I often avoid them. This is one that need not fall in with this bad rap. For a little kick I added some wasabi horseradish. Plain wasabi or horseradish would do the trick as well.

STEAK AU POIVRE w/ WASABI-PARSLEY SAUCE
Serving Size= 2. Active Time= 10 minutes.
* 2 steaks, preferred cut
* 1 cup parsley, tightly packed
* 2 Tbl Silver Springs wasabi horseradish; 2 tsp plain wasabi or 1-2 Tbl plain horseradish would also add a kick
* 1 Tbl olive oil
* salt/ pepper

1) Preheat a pan on medium-high heat. Wash the steaks; pat dry. Add salt and ample fresh ground pepper to both sides. When pan is hot, add steak.
2) While steaks are cooking, prepare the Wasabi-Parsley Sauce. Using a blender, add parsley, wasabi horseradish, olive oil and salt/ pepper to taste. Blend until smooth and set aside.
3) Finish cooking the steaks. I give mine about 5 minutes on either side, depending on thickness, for a nice medium-rare. Once ready, spoon on sauce and enjoy.

Saturday, March 04, 2006

Horseradish Encrusted Steak (WCB#39)


There are some mornings when a good hunter’s breakfast is in order. On those mornings the cold freezes the world and the air is crisp, harsh and blue. The days when you go out and everything is in slow motion and appears 2-dimensional. When even the winter birds seem to slug their pace and when you wish you too, like so many other creatures, could take to hibernation. It is when Mother Nature plays tricks with your immunities and confidence: one day you are so sure you can smell spring; the next day an Arctic blast finds comfort in your surrounds and takes an extended vacation. It is these mornings when a hearty breakfast is due.

On some days a solid meal may be Scottish Oats laced with fresh fruits. Some days it is braised oxtail or simple poached eggs. The Joy of Cooking lists a significant 10 course (depending on how you count it) meal that should be had before the hunt—from pheasant to quail eggs, rabbits and three liquors to warm you and send you on the way.

Today’s hunter’s breakfast was a simpler one. Enough to warm the soul on this bitter day, filling enough to stand on its own-- yet not so much that dinner is hopeless. Eggs may be served with it, forming steak and eggs, some citrus to act as cleanser, or a sufficient Bloody Mary.

Note: I was recently sent some samples of Silver Springs horseradish products. I was given plain, freshly ground horseradish, as well as flavored: Cranberry Horseradish, Pineapple-Apricot Horseradish, Wasabi Horseradish, as well as two mustard flavors: Deli and Chiptole. In attempts to dig through these products with a more refined nose (after all, horseradish is all in the nose), I thought a head-to-head taste off comparing the products should be in order. I then thought better and decided to prepare a meal specifically for each product, qualifying the merits of the taste paired with each. For some, I will use two products, others I will use three.

Today’s was a simple steak. Though I am sure the Wasabi or Cranberry would have been delicious on steak, I wanted the meat’s simple flavor to really shine through. For this reason, it was the plain horseradish that was used. I found this recipe off of foodreference.com. I chose this over others because it was quick and simple. It was one of the few that I found that used no mayonnaise or sour cream and a binder. Because of the few ingredients, both the horseradish and the steak were able to take the platform for their own tasty merits.

HORSERADISH ENCRUSTED STEAK
Serves 4. Active Time= 10 minutes.
* 4 2-3” thick New York strip steaks
* 2 cups fine breadcrumbs
* ½ cup melted butter
* ½ cup ground horseradish
* ¼ cup chopped fresh flat leaf parsley

1) Mix together everything but the steaks; season to taste with salt and pepper.
2) Season the steaks with salt and pepper on both sides. Grill to preferred degree of doneness.
3) When steaks are almost ready, remove from grill, press horseradish crust onto one side of each steak.
4) Place under a hot broiler until breadcrumbs start to toast, you will see the butter bubbling and sizzling.


NOTE: If cooking indoors, as I did, make sure your kitchen is properly ventilated. I cooked my steaks on a HOT griddle, 4 minutes on each side producing medium-rare meat. The steaks were in the broiler for maybe 4 minutes; I saw no butter bubble or sizzle, but the breadcrumbs did toast very nicely.

Please check out my piece on Paper Palate. Paper Palate is part of the WellFed Network.

And for the non-food related segment of this post... WCB #39 hosted by Eat Stuff. Last time I brought you Face Off, today I bring you Disgruntled Bedside Lovers:

Friday, January 27, 2006

Braised Oxtail w/ Baked Eggs & The Perfect Bloody Mary


*Just Braise has moved. Please visit me at www.justbraise.com!*

As stated earlier, on a recent B&N trip, I “picked up” a few recipes from the book I was perusing. This one struck my eye (even though the picture does it no justice) because it sounded exotic: oxtail and baked eggs. I never thought to bake an egg before, other than a frittata. D being a huge carnivore, I knew he would be down for oxtails. We invited two other meat-lovers over and planned our day.

First, I must admit that when eating certain foods that resemble animals a little too much, contain too many bones, or are a little too gamey, I regress back to my vegetarian days. For six years (much to my mother’s objections and sneaking meat into my food) I was essentially animal-less. I broke down when studying in the meatastic city of Prague and am now a mostly happy meat-eater. Like many others I have met, the word oxtail can give me the meat-willies, but this recipe sounded too good to pass up. So all ye who fear the tail I say go forth!

What is oxtail? And why? Back in the day when oxen actually pulled our wagons cross country and got all yoked up, the oxtail consumed actually was the meat from the tail of oxen. Being thrifty folk and not wanting any part of the animal go to waste, the oxtail was consumed, often in a soup or hearty stew. As oxen have gone out of style and the use of cattle has become widespread, we again refuse to let any meat go to waste. Oxtail as we know it today is the tail meat from cows (of both genders).

Like all things fashionable, there are highs and lows. It is only recently that oxtail has returned to fashion. I have read fewer than twenty years ago, oxtails were so unpopular the meat was practically given away. It was a secret joy for chefs to use oxtail because the cost was so low ($1-2 a pound). Today, though not outrageous, old fans of oxtail shutter in horror as they dish out up to $6 a pound for quality “unwanted” meat. Oxtail seems to be the new “it” meat, recently springing up in restaurants all over town.

The first time I took notice to oxtail I was with D at his favorite feel-good-food joint Soul Spot. Ran by two men from The Gambia, these boys have nailed the southern cooking New Yorkers crave. An easy-to-miss whole-in-the-wall favorite of bus drivers, police, and locals alike, the Spot serves up choice of meat and two sides for an easy $10. I would usually order the chicken: jerk or BBQ, while D would switch up between meatloaf and oxtail both dripping in savory sauces. With trepidation—come on, what’s in name?— I tried the oxtail. I was hooked.

Like short ribs the “oxtail” meat can be a little tough so slow cooking is advised. This is where the braise comes into play, allowing the meat to fall right off the bone and enter the succulence stage. Oxtail tastes like any other “less than ideal” cut of beef, most resembling brisket (although it depends how it is cooked), so it is not to be shied away from. It makes an interesting, exotic sounding, and delicious alternative to the usual purchases, and should definitely be tried.

As a brunch item, this dish reminds me of The Joy of Cooking’s “Hunter’s Breakfast” which consists of about 10 different courses, from quail to ostrich eggs. More closely, it is similar to D’s favorite menu item at Norma’s: The Hudson Valley Duck Confit Hash a Cheval, consisting of a full duck and 4 eggs. D orders this with a huge grin and sops up all the sauce with their fresh baked bread, dribbling juice and laughing at the rest of the patrons pick at their jazzed up eggs (I recommend the Zillion Dollar Lobster Frittata, with “we dare you to expense this” as the price—okay, I’ve never had it, but the Artychoke Benedict is darn good).

This recipe takes a little planning (I marinated the oxtail in wine overnight). If it is made for brunch, remember it needs 2-½ - 3 hours of cook time so prepare it well before guests arrive, or quench the appetite with the perfect Bloody Mary (recipe below). I planned ahead and bought double what I thought 4 people could consume so I would have plenty of leftovers (which is recommended since the cooking process is lengthy). Much to my surprise, the leftovers were few: enough for a smaller brunch the following day. This meal is well worth it and is so hearty it serves as the only necessary meal of the day (we were good and content until about 11pm when we had a small snack of fresh mozzarella and tomatoes).

I know the picture is not fantastic, but this meal is. Anyone that has had it can attest to it. When the egg’s sunshine breaks loose and the juices mix, this dish is divine—just have some good bread on hand for the sauce. A Bloody Mary is a perfect accompaniment to this dish: The tangy horseradish is an ideal palate cleanser. Be a man, enjoy this dish, call the dogs, sound the horns, and go hunting.

BRAISE OXTAIL W/ BAKED EGGS
Serves 5. Prep time= 20 minutes. Cook time= 2-½- 3 hours.
* 4 lbs oxtail
* 1 bottle red wine (I used the inexpensive, but quite tasty $5 Gato Negro)
* 2 celery stalks, cut into 1-inch pieces
* 2 carrots, cut into 1-inch pieces
* 1 small onion, cut into quarters
* 1-5 oz can tomato paste
* salt/ pepper
* 1 Tbl dry parsley
* 5 eggs

1) Place the oxtail in a wide bowl with 1 bottle red wine. Marinate at least overnight, up to 2 days. If the wine does not cover all the meat, rotate and flip pieces every so often.
2) Preheat the oven to 400F. Warm an oven-safe pot (dutch oven) over medium-high heat. Remove the oxtail from the wine (save the wine). Dry off the oxtail and rub well with salt and fresh ground pepper. Brown all sides of the meat in the (dry) pot. This can be done in 2 rounds, takes about 3 minutes on all sides. This locks the meat moisture in. Remove and set aside.
3) In the meat juices, sauté the celery, carrots and onion, about 8 minutes until onions begin to soften. Add the tomato paste, reserved wine and parsley; stir to blend evenly. Add the oxtail (liquid should come just to the top, but not covering the oxtail. Add a little water, about 1 cup, if this is not the case) and cover tightly. Bake in middle of the oven for 2-½- 3 hours. Meat is done when it falls off the bone with little effort. Check the braising process once every hour to ensure liquid is still present. Add a little water if too much liquid evaporates (some liquid will cook off, but you want some sauce for the meal).
4) When meat is ready, remove from the oven and de-bone (reserving the bones for a future soup or stew). Push the vegetables through a large sieve (or mash with a potato masher) to create a thick sauce. Return the meat to the pot. Using the back of a large ladle, create 5 divots and crack one egg in each divot. Bake 10 minutes so eggs are just white and still runny.
NOTE: To be served with a Perfect Bloody Mary, recipe below.


THE PERFECT BLOODY MARY
Serves 4. Prep time= 8 minutes. Inactive time= 1 hour.
* 1 liter quality tomato juice, with no additives (I think Looza makes an excellent line of juices and nectars and should definitely be purchased if available.)
* juice of 1 lemon
* juice of 1 lime
* 1 Tbl Worchester Sauce
* 1 Tbl hot sauce
* 5 Tbl quality fresh, plain white horseradish
* 1 Tbl celery seeds
* fresh pepper to taste
* 1 Tbl balsamic vinegar
* 8 ounces vodka
* celery stalk with leaves for garnish (olives or pickled green beans work well too)

1) In a pitcher, mix tomato juice, lemon juice, lime juice, Worcester sauce, hot sauce, horseradish, celery seeds and fresh pepper. Cover and place in refrigerator for 1 hour.
2) When ready to serve, remove from refrigerator and stir well. Pour 2 oz vodka into each glass (4), add tomato mixture (another tsp horseradish is optional). Add celery garnish. Gently pour the balsamic vinegar over the top of the tomato mixture so it floats. This provides an excellent visual and olfactory effect. Once served, mix and enjoy.

NOTE: A good Bloody Mary starts in the juice. If one uses a poor quality juice, the final product will taste off. I have had this happen. Do not attempt it at home. The taste of a dish depends on the quality of the products used.
ON HOT SAUCE: I am by no means a hot sauce expert, but I do like a little flame every once in a while. I have foodie friends from New Orleans that will add Tabasco to everything. I surprised them with some Dragon’s Fire Hot Sauce from Greene’s Gourmet in Vermont. (D and I picked some up during a camping trip.) This boutique sauce is made with ginger root which we were told makes the sauce extra hot because it opens the sinuses giving one full onslaught of the pepper—the Naw’lins boys were speechless.

Sunday, January 15, 2006

Bourbon-Pomegranate Molasses Beef Short Ribs w/ Broccoli Rabe


*Just Braise has moved. Please visit me at www.justbraise.com!*

To braise, or not to braise, that is the question. Whether ‘tis nobler in the mind to purchase expensive meat and suffer the slings and arrows of outrageous fortune,-- or to fool your audience with inexpensive meat that melts in the mouth and is pure succulence.

I choose to fool, and with rave reviews.

Braising is the frugal gourmet’s trick on the audience: It turns tough meat tender. This is a process where one can throw everything-but-the-kitchen-sink into the pot, walk away, and return a few hours later to remove spectacular meat with little effort (I have discussed the process and various techniques more in depth in my first post of this New Year. I will also make the promise that more braising will be discussed this year, than last.) For tonight, it is beef short ribs.

As a child, I cannot remember ever eating authentic southern BBQ ribs. Steaks, BBQ chicken, hamburgers, hot dogs—those were all covered. I cannot recall once stepping foot into a BBQ joint until I was in high school. This moment was bliss and I often requested return trips.

My family did eat ribs though. There was only one location we ever consumed ribs: at New China Restaurant. We walked in, summoned by the larger-than-life giggling gilded Buddha that rested above the host stand, and soon sat at our regular table. I always thought we were so special sitting at this corner booth right near the bustling kitchen. Looking back, I am sure three young rowdy children are not a restaurant favorite. Regardless, their ribs were amazing, dripping with a soy-BBQ sauce that my family always had to order at least 2 plates of to satiate all.

But I have aged, and with age I have come to enjoy ribs beyond the comforts of the local Chinese restaurant. I still crave authentic southern BBQ. This is good since D is a southern boy: Tonight we summoned the southern kitchen.

On short ribs:
There are two kinds of beef short ribs. One is the shoulder (or chuck). These pieces are cut into individual rectangular slices, 2 to 3 inches long. They are thick, have layers of fat and connective tissue, and a thick bone running along them. The second kind of short rib is the short plate (underside of the chest). This is typically what you receive in a BBQ restaurant when you ask for “short ribs”. It usually consists of five connected ribs (numbers 6 to 10). This section is meaty but also contains a lot of connective tissue. Both cuts are tough and require long cooking (in this case braising) to soften them up.

When purchased in the supermarket, this cut of meat is a bargain. For tonight’s meal I purchased a package of chuck (loose) short ribs. They were large, meaty and marbled. They arrived in a package of 4, totaling just under $4. The rest of the ingredients are staples I generally have at home so with the broccoli rabe (about $2.50) this meal for two was about $7. I was happy with this math and returned home to braise. (Okay, the bourbon is not a staple, but leftover from a New Year party. This girl loves her hot toddies.)

Other notes on this recipe:
I combined and adapted this recipe from two I found online (one from starchefs, the other from epicurious). The pomegranate molasses can be substituted for regular molasses. I just happen to enjoy the sweeter pomegranate molasses. It is available in Middle Eastern markets (for about $1.50) or is now showing up in many general supermarkets (for about $3.00) in the Mediterranean food section. Whichever molasses you use, make sure to add it at the end of the cooking process. The pomegranate seeds in the braise process are also optional. I had some leftover seeds from a recent heavenly dessert and threw them in (as I said, everything-but-the-kitchen-sink.)

Bourbon-Molasses Beef Short Ribs w/ Broccoli Rabe
Makes 2 servings. Prep time= 20 min. Cook time= 2.5 hours
Bourbon-Molasses Beef Short Ribs
4 short ribs (Find ones with a good fat-meat ratio)
1 Tbl butter
4 cloves garlic, chopped
1 carrot, chopped
1 celery stalk, chopped
1 medium onion, chopped
1 jalepeño pepper, chopped (if a little spice is desired)
3 bay leaves
¼ tsp thyme
¼ cup bourbon
1 Tbl tomato paste
1-½ cups water
1 Tbl soy sauce
2 anchovy filets
seeds of ½ a pomegranate (optional)
1/3 cup pomegranate molasses (or regular molasses)
fresh ground pepper

1) Preheat oven to 350F. In an oven safe pot, or dutch oven, melt the butter over medium heat. Cover both sides of the short ribs with an ample amount of pepper and brown the ribs (about 3 minutes each side). In the braise process this initial quick heat process locks the juices inside the meat. Remove the ribs and place on a separate plate.
2) Add the garlic, carrot, celery, onion, jalepeño and anchovies. Sauté for 5 minutes.
3) Add bay leaves, thyme, bourbon, tomato paste, water, soy sauce and (optional) pomegranate seeds. Return ribs to pot, cover tightly and place in oven on center rack. Cook for 2.5 hours.
4) Once removed from the oven the sauce will have thickened and the aroma will be overwhelmingly delicious. Add pomegranate or regular molasses, stir and serve.


Broccoli Rabe
1 bunch broccoli rabe
2 Tbl butter

1) When there is 10 minutes left of the braising process above, warm a medium sized saucepot over medium heat with the butter. Add broccoli rabe, cover tightly and allow to sit for 5 minutes. Stir, cover again, and cook until leaves are wilted (about 4 more minutes). Remove and serve.


Check out this recipe featured on Chef Michele!

Head on over to Lindy Toast for the Something For Nothing wrap up!

Friday, January 06, 2006

Tri-Bean & Beef Chili


My first and second grade teacher was a fabulous mentor for all things culinary. Mrs. G must have been an amazing cook and she encouraged our little hands at the same. At one point, we must have been learning about bivalves. Something very basic I am sure (there is only so much bivalve information a first grader can pick up). Later that day, we had 3 large batches of mussels steaming in the back of the class, “see how they open when they are ready to eat!” Mrs. G exclaimed. During the lesson, I can remember thinking why would anyone want to eat a “muscle”?! I could not imagine the muscles in my body resembling these hard-shelled critters and I was slightly repulsed by these midnight blue orbs cooking away at the back of the class.

A few minutes later, everyone was served up a small plate of mussels. I cannot imagine that I ate mine. Now that I think about it, this lesson must have done the teachers’ lounge much more good, because I am sure that is where the bulk of the mussels ended up. If I was in that classroom now, I would steal all mussels from all those grubby little hands, devouring them in great triumph. I would later marvel at how strong my own muscles were to steal such a quantity away!

The following year, second grade, still with Mrs. G, my elementary school hosted an all-school event. Every classroom chose a booth to host: Some made popcorn, some spun cotton candy, others ran a musical-pie-chair (the winner won a home-baked pie). Mrs. G signed us up for the chili booth. (I wonder if we were consulted on this because for a second grader the other booths sound much more appealing.) Mrs. G came to class one day and told us we were making chili. Mrs. G told us she was an award-winning chili chef, and we would be making her secret chili recipe. (I guess secret chili recipe sounds good enough for a second grader.)

Sure enough, event day was approaching. Some facts to know before we proceed:
1) There were about 500 students in my elementary school.
2) The event was held on the weekend so parents could attend and therefore, help raise money.
3) This equals about 1,500 heads to feed (figuring on some families only 1 parent will show, or there are multiple children + the staff)
4) My class had maybe 25 students in it.
5) A classroom full of second and third graders were to make chili for say, 1,000 people (my school had a 1-2 then a 2-3 grade split which is how I had Mrs. G for 1st and then 2nd grade)

So as event day approached our classroom was full of green peppers, onions, beans, tomato sauce and other assorted secret ingredients, enough to feed 1,000 people. I was lucky enough to be a green pepper chopper. I now feel sorry for any student that was given onion duty. Each of us were handed 5-10 of each vegetable and proceeded to chop. The last thing I remember of this process was a field of greenery covering my desk. The following day my classroom worked in shifts of 2 or 3 serving up cupfuls of chili to hungry event-goers, “That’s right! I made it!”

Last I heard Mrs. G was around the San Francisco area working as a principal in an elementary school. While visiting relatives in the area in 5th grade, my mother and I took a detour to Mrs. G’s new home. I remember groves of avocado, lemon and orange trees as we drank tea and reminisced.

Today’s chili is in honor of Mrs. G. I cannot remember any of her secret ingredients, but I still think it is pretty darn good. I was a vegetarian for six years and one think I take away from that is filling my chili with extra beans. A more colorful chili, this one is made with three different beans. I also tried something new, and threw in some hot Italian sausage, in addition to the standard ground chuck-- an excellent spice surprise. Next time I might add a third meat or other sausage variety (like chorizo). Do not be overwhelmed by the long list below. Many of these are items you may already have at home (or different varieties of the same food).

3-BEAN & MEAT CHILI
Use a 16-quart pot. Makes 12 servings (enough to freeze for future lunches). Prep time= 30 min. Cook time= 3+ hours (less if you used canned, not dried beans)
4 Tbl olive oil
6 garlic cloves, crushed
1 green pepper, cubed
1 yellow pepper, cubed
1 large onion, cubed
4 large links hot Italian sausage, removed from casings
1 lb ground chuck
10 sun-dried tomatoes, sliced (optional)
12-15 jalepeño peppers, sliced (optional)
1- 28 oz can tomato puree (no salt added)
1- 28 oz can diced tomatoes (no salt added)
2- 8 oz cans tomato sauce (no salt added)
1-½ cups red kidney beans, dry**
1-½ cups black beans, dry
1-½ cups white beans, dry
1- 28 oz can water (if you use canned beans this is not necessary)
2 Tbl Worchester sauce
2-3 Tbl Tabasco sauce
5 Tbl chili powder
3 Tbl cumin
2 Tbl oregano
1 Tbl cinnamon
4 bay leaves

1) In a 16-quart pot, over medium heat, warm the olive oil. Once warm, add the first 8 ingredients (garlic, (2) peppers, onion, sausage, meat, sun-dried tomatoes, jalepeño peppers). Stir occasionally, and allow meats to fully brown, about 15 minutes.
2) Add remaining ingredients, stir and cover leaving the lid slightly cracked. Bring to a boil then turn heat to medium-low. Simmer until beans are soft (about 3 hours), stirring occasionally. Add more chili pepper/ cumin to taste.

NOTE: 1) I try to buy tomato sauces with no salt added and then add my own salt. If I cannot find any no salt added cans, I will dismiss my own salt addition. 2) You can mix and match any form of tomato product you like for the base sauce. I like diced tomatoes because they add a nice texture. 3) **If you use canned beans cooking time is only about 30 minutes. I like the dried because I can throw this on the stove and forget about it while the smell fills the house.

OTHER OPTIONS: 1) Try roasting some red peppers and/ or tomatoes and add to the chili (roast a red pepper by placing it directly over flame. This is messing since some juices will drip. Once totally charred, place in paper bag to cool. Peel off blackened skin, chop and add to chili). 2) Use more sun-dried tomatoes. 3) Add brown sugar, honey, unsweetened, or very little semi-sweet chocolate to the batch. 4) Try other meats. I’m trying a second sausage next time. Bacon might do well too. Veal or shredded pork are other options. 5) Shrimp might do well in the above recipe, though it might create more of a gumbo flavor. 6) Add a can of beer or 2 cups red wine

Monday, January 02, 2006

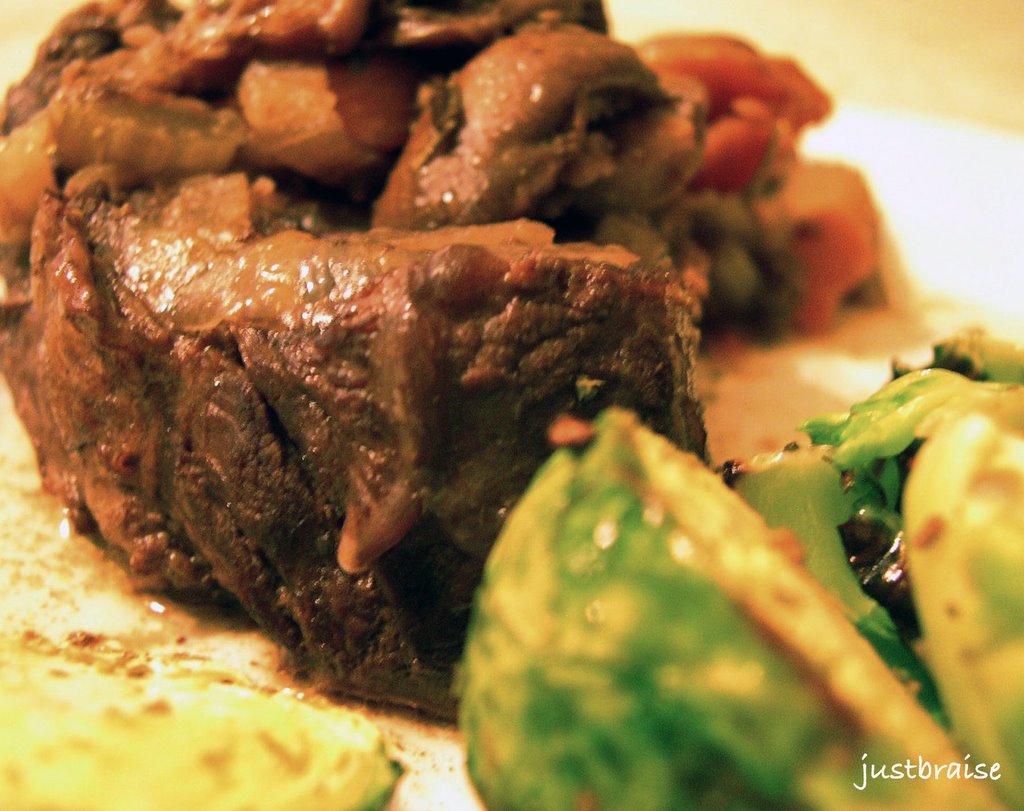
Braised Beef in Wine-Vegetable Bouillon w/ Broiled Brussels Sprouts


“Succulence. This is the true goal of braising; it is the aim toward which one strives, from the very beginning, and it is the direction in which all techniques and methods lead.”

I thought it only appropriate that the first meal of the New Year follow the namesake of the blog. Braising is a task all too simple. It is for those who are frugal with time or money when it comes to food and the preparation of. Braising makes an inexpensive cut of meat turn into a succulent $30 a pound filet that melts in the mouth. It also (in my case) turns an un-quaffable bottle of wine, into a mouth-watering gravy. Most anything can be braised: vegetables, fish, chicken, and meat. Sauce options are limitless as well: From a sweet prune and chestnut gravy to a savory vegetable and wine buillon-- or even a meat stew. This is what makes braising a pure joy.

Braising is at its utmost ease when little shopping is done towards the meal— just clean out the refrigerator and amaze your critics to one of the tastiest meals known. It is a dish that truly can be the odds-and-ends-everything-but-the-kitchen-sink. Your final dish will taste amazing. Braising is best done when turning a fair piece of meat into a tender cut. An expensive piece of meat, I believe, should be cooked quick-- it will naturally melt in the mouth. For a recipe option, see Red Wine Infused Filet Mignon.

To braise a piece of food, simply add 1-2 Tbl of butter or oil to a fry pan. Allow pan to get hot. You may sprinkle salt and pepper on each side of your food, or a breadcrumb or otherwise coating, this is optional. Add the food, cooking on high heat 3-5 minutes each side, until lightly browned. This browning technique traps the juices (especially of meats) inside. Add a sauce: tomato, wine, or water and add fruits, vegetables, or nuts. The sauce need not cover the piece of meat, but as it evaporates you may need to add more. Bring the contents to a boil, then reduce heat to low, cover and continue cooking on low heat for 2-3 hours. The longer you are able to leave the food alone, the more succulent it will become: Absorbing the juices and flavors of everything you have put into the pan. (Vegetables will cook for a shorter time, about 1 hour.)

To usher in the New Year, I braised a cheap cut of chuck ($2.50 a pound) in un-drinkable wine with assorted vegetables. The result truly was succulent. The meat fell right off the bone and all too quickly into the stomach. The meal was accompanied with broiled Brussels sprouts, covered simply with olive oil, salt and pepper. As M.F.K. Fisher notes in The Art of Eating, it is unnecessary to have each of your meals a complete protein-vegetable-starch affair. Enjoy a large salad for lunch and a meat and potato dinner. Or, oatmeal for breakfast, and a late lunch of meat and vegetables. Eating this way eases the nerves and clean up of any meal.

BRAISED BEEF IN A WINE-VEGETABLE BOUILLON
Serves 3. Prep time= 15 min. Cook time= 3 hours
2 lbs meat (I used a cheap cut of chuck)
2 Tbl butter
2 cloves garlic
10 white button mushrooms, sliced
1 medium onion, chopped
1 celery stalk, chopped
1 carrot, chopped
2 bay leaves
1 tsp dried rosemary
1 Tbl Worchester sauce
1-½ cups dry red wine (a cheap wine works well)

1) Heat a large skillet on medium-high heat. Melt the butter and sprinkle salt and fresh pepper on the meat. Add garlic. (You may cut the meat into serving size pieces.) Place meat on pan and brown both sides, about 2-3 minutes per side.
2) Add remaining ingredients and bring to a boil. Reduce heat to low, cover and allow to slowly stew 2-3 hours. To test doneness of meat, poke with a wooden spoon. Meat should be soft and tender.


BRUSSELS SPROUTS
Serves 3. Cook + Prep time= 10 min
1 handful Brussels sprouts
2 Tbl olive oil
salt/ pepper to taste

1) When just about ready to sit for the meal, wash and cut Brussels sprouts in half. Drizzle with olive oil and sprinkle with salt and pepper. Place in an oven-safe tin and broil 4 minutes. Remove from heat, flip sprouts, broil another 4 minutes. Brussels sprouts should be soft and buttery looking with a few blackened leaves.

Wednesday, December 28, 2005

The Gourmand's Cheeseburger


Since leaving home to attend college—and remaining away—each visit back holds significance: My mother moved out the home I grew up in and into the city; My friends (now also in the city) have other friends outside of “the group” I am obliged to be with; In the spring, I returned with D in tow, to attend the wedding of one of my childhood friends-- When did we get so old? This recent trip home was marked by the holidays and upon further scrutiny, noticing how much my group of friends has matured-- in some ways.

I say “in some ways” because when we get together, really, we are the only ones that understand the jokes that make us laugh until we cry. We will beat a saying (or even a word) into the ground, and continue until it comes back to life. We recently gathered to create some pathetic looking sugar cookies (see picture at right). They tasted great, don’t get me wrong, but 5 bottles of wine down the line, well… we were decorating like we were 5 years old. We also will make it a point to travel to the suburbs for our old favorite restaurants and scoff in amazement (and hide) when we see people we know from high school (why is she at my restaurant?!). Then proceed to the local beach to run around the playground, even if our hands are freezing. But now, even though our gatherings are far and too few between, we also discuss our real fears, have real arguments, and no Di, I am not next on your marriage train.

My dear city is home to a lot that makes me proud (other than my own brat pack of friends). I used to (and often still do) spout all the films and actors that graced “my” doorstep rather matter-of-factly: Home Alone was filmed 10 blocks from me. Bobbie Brown (the makeup artist) went to my high school, as did Moses—oh, I mean, Charlton Heston. Uncle Buck picked his niece up around the corner. Chris O’Donnell bought Robin figurines “for my nephew” at the toy store I worked at in high school. The Breakfast Club was based on my high school. And these are just my own suburban town’s claim to fame. The city itself is a jackpot for culture: Home of the blues, deep-dish pizza, the tallest building in North America, a thriving standup comedy/ improv scene, Chicago-style ‘dogs, the dear Cubbies with their ivy-laden walls, a breathtaking waterfront…. Chicago is the fabulous hub of the Midwest.

Indian for “field of onion,” or as I knew it growing up, “The Smelly Onion.” The city received its more recent nickname of The Windy City in the 1800’s. I have heard this phrase defined two ways: 1) Chicago is a very windy city (I have actually, literally, been stopped in my tracks by the wind of a late fall storm) and 2) because of all the politicians who blow their hot air through the city. I think it can go both ways.

But if you are in Chicago, onions should definitely be had, at least on a proper Chicago hot dog. And probably the best place to quench the ‘dog thirst is at Wrigley Field enjoying a Cubs game. Though it is a little cold for that now, and the ivy walls of one of the oldest ballparks in this country must be missed, head to any number of ‘dog joints that surround Wrigley (or nearby bars). My favorite is Demon Dogs, located conveniently close to my mother’s apartment, under the Fullerton El stop (others claim The Wiener’s Circle on Clark is top dog).

This time of year, I think it is more pleasing to snuggle up with a juicy burger and cold beer in front of a fireplace (also with onions, but caramelized) on some good pumpernickel or rye bread. Which brings to mind Chicago’s seedy past. I am not talking about Al Capone and his gangsters, booze and girls. I am talking about the meat industry highlighted in Upton Sinclair’s The Jungle. It has worked its way out thankfully, and a great piece of meat can now be found in this city. From steaks to ribs to burgers, some of my favorite memories include the smell of BBQ emanating from peoples’ backyards and balconies all over the city, regardless of the temperature.

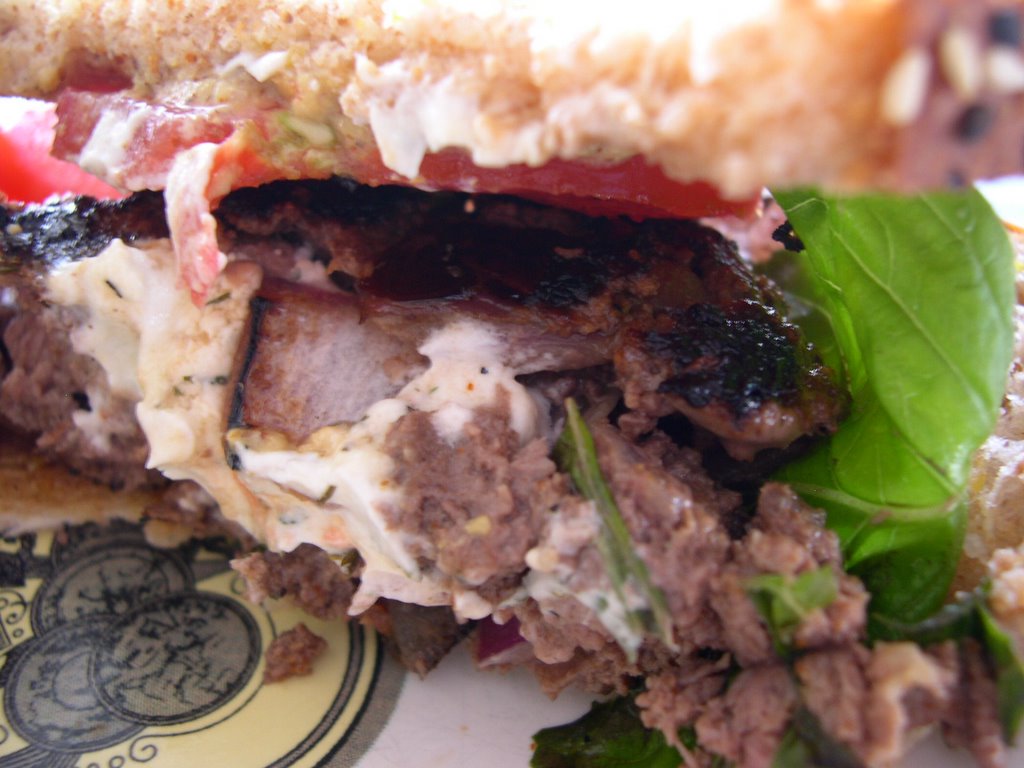
Below, my recipe for the cheeseburger all of us love, with the necessary (hidden) gourmand flare. These burgers are amazing on a grill, but can still be made inside on the stovetop. I produced this recipe a few years ago one humid summer’s night in New York. We were grilling at my friend A’s place and I took over the grill. I like to think it was not just the beer in people, but man and woman alike returned for seconds and thirds. They spouted their accolades: I should sell the recipe and retire off the wealth it would bring. But here, gratis, I offer you this fabulous burger that reminds me of my sweet home, Chicago:

THE GOURMAND’S CHEESE BURGER
Makes 4 burgers
1 lb freshly ground beef
½ cup red wine
2 cloves garlic, crushed
1 medium white onion, (1/2 chopped, 1/2 sliced)
¼ cup loosely packed fresh basil, chopped
½ tsp. cayenne pepper
4 dashes Worchester sauce
fresh pepper (to taste)
fresh goat cheese (I prefer this recipe with plain goat cheese. It can also be made with mozzarella or plain)
Honey
Spicy mustard
Fresh tomato
8 slices dark rye or pumpernickel bread

1) In a small pan on the stove, carmelize the sliced onion. To carmelize, keep the pan on medium-low heat. Add about 1 Tbl butter and cook the onions SLOWLY until they brown, sweetened to carmelized to goodness. Watch the cooking while you proceed with the burgers and stir periodically. Total cook time for the onions is about 20 min.
2) Mix the first 8 ingredients by hand (use only the chopped onion). Folding until evenly distributed.
3) (If using a stovetop, heat a sauté pan on medium high.) Break apart the mixture and form 4 thick patties.
4) Make an indentation with your thumb in the middle of each patty, about a 1inch diameter hole, halfway through the patty.
5) Place a spoonful of goat cheese into each hole. Using your fingertips, pinch the patties up and around to close the hole, hiding the goat cheese inside.
6) Place on hot grill or stovetop pan, cook until desired doneness (I cooked mine about 4 min each side on medium high heat).
7) While these are cooking, prepare the “buns”: lay out the 8 slices of dark rye or pumpernickel. Brush all 8 pieces of bread with about 2 tsp honey, spread mustard on 4 slices, place tomato on top of the mustard (you can also top this with 1-2 large basil leaves).
8) When meat is ready, place on “bun” and enjoy.

Note: The honey and goat cheese are a great sweet combination and delight playing upon the saltiness of the meat. When I recently made these, I had no honey. I substituted a small amount of maple syrup on the bread instead. It was a little sweeter, but worked well. I also ran out of onion and was unable to carmelize any. The burgers were still delicious without.

Sunday, December 25, 2005

Red Wine Infused Filet Mignon w/ Wasabi-Caviar Laced Baked Potatoes


Pure decadence in food is breathtaking. I find many of my meals very delicious and succulent, but I will often forgo a splash of this here, or the addition of that there to make budget, and none are the wiser. (For example: My fish does not need a white wine sauce. Or: Saffron? Eh, I’ll just work around that one.) But it is holiday time breeching on New Year's so one must eat as if dining at 4-5 star restaurants is the norm, no? Especially if it is in your own home and you are the chef. Splurge on that extra this or that, it makes a difference, your tongue will thank you, your belly will flip in joy, your eyes will glimmer in delight, and your overall physique will shine.

My personal reason I usually dismiss the marinade: I cannot think of my menu far enough in advance to actually marinade for the proper length of time (unless of course it is a party or special event and that is a different story). But the usual dinner planning often consists of me (or D) walking home from work, craving one thing, making the purchase, and cooking it up using whatever items that are readily available. Steak is usually done au poîvre, chickens are done with a rosemary-garlic-pomegranate molasses rub, and vegetables are simply broiled or steamed with some garlic and olive oil. It is amazing how delicious and quick simple meals can be. But as I stated, holidays are a special occasion and a meal you would not normally consume is an excellent substitute for the monotony of the norm.

My mother has been taking the odd cooking class at Whole Foods. Each time she leaves one, she calls me to rave about Chef Daniel: “Oh, he did this! And that! It was so easy! It just melted in your mouth! Oh we must try it!” Now, I had wanted to do a peppermint-encrusted rack of lamb for a holiday dinner, but my mother was so exuberant about Chef Daniel’s meal, I allowed her to choose the menu (peppermint-encrusted rack of lamb is sure to come shortly). This red wine infused filet is actually listed as a New Year’s menu with a side of butternut squash risotto. Although my mother raved to no end about the nutty-buttery risotto, she also mailed me the remaining grains, so we opted for baked potatoes with sour cream and a wasabi-caviar accent. This meal was a more classic steak and potato fair, but with a definite and positively luxurious spin on the starch, resting in the wasabi-laced caviar.

This marinade is so simple, quick, and requires so few items I actually now wonder why I do not plan ahead and do marinades more often. The baked potatoes were an excellent accompaniment (though I think the wasabi-caviar in mashed potato form would have been even better). The filet was so thick and tender it melted in the mouth, and under the knife. (We were able to use blunt knives and easily cut through the meat.) The original recipe discards the marinade. Instead, I added mushrooms (at the start) and we sautéed the leftovers and spooned them on top the filet. Mushrooms quickly absorb whatever they are added to so the result was a wine-spiked mushroom to go with the light wine flavoring of the meat, excellent. As I said, the baked potatoes were good, but I think might have been even better as a mash. Still, the wasabi-caviar was a surprise with its slightly spicy flavor bursts that added a nice green sparkle to the potato.

A note on meats: No matter how you prefer to cook your meat, if on a stovetop, they should always be sautéed quickly at high heats. Whether it is pork chops or beef filet, neither needs the addition of oil or butter to the pan, just some salt and pepper patted onto the meat. Make sure your pan is HOT before you begin (water should evaporate almost instantaneously when dropped on). The meat will cause a lot of smoke so make sure the area is well ventilated and maybe open a window.

RED WINE INFUSED FILET OF BEEF W/ WASABI CAVIAR BAKED POTATO
Serves 2. Active time about 20 min.

THE FILET
1 pound center cut of beef filet
1 red onion, thinly sliced
3 garlic cloves, thinly sliced
3 sprigs of rosemary
1 cup red wine
1 Tbl red wine vinegar
10 white mushroom buttons, sliced (my personal addition)

1) In a bowl, combine all ingredients, except for the filet. Mix until well combined.
2) Transfer to a large plastic freezer bag (cuts down on clean up) and add the filet. Seal off the bag and place on a dish and place in the refrigerator for at least 4 hours, up to 3 days. Flip bag halfway through sitting.
3) When ready to cook, Preheat oven to 450F. Heat an oven-safe sauté pan until very hot. Remove beef from bag and pat it dry, season with salt and pepper. Sear the meat until very brown on both sides (about 3-5 minutes each side). Transfer to the oven for 12 minutes for a medium rare cut, longer for more well done.
4) While beef is baking, in a small sauce pan warm a little olive oil. Remove a hanful of the red onion, rosemary and mushrooms from the marinade bag and about 4 Tbl of the red wine liquid. Saute on medium until mushrooms cook down (this will be done about the time you remove the meat from the oven)
5) Carefully (beef may stick a little) transfer beef from pan to plates and serve.


WASABI-CAVIAR BAKED POTATOES
2 russet potatoes
2 Tbl sour cream
1- 2oz container wasabi whitefish caviar (fairly inexpensive for caviar at about $30 a bottle)

1) Place the potatoes in the oven about 30 min before you begin the filet. Preheat oven to 400F. Puncture potatoes with a fork about 4-5 times and wrap in tin foil. Bake for 40-45 min. (If you are making the filet, it is alright to turn the heat up to 450F in the last 10 min of baking the potato. Remove the potatoes and keep wrapped in foil while the filet is baking. They will retain their heat and still be hot when ready to serve.)
2) Once done, remove from foil and slice lengthwise with a knife. Holding the potato with a napkin, squeeze in the sides to create an opening at the top. Add a scoop of sour cream and a small spoonful of caviar.

Wednesday, December 21, 2005

The Birthday


There comes a time in many peoples’ lives when heading to the bar is no longer very entertaining for the birthday. When I was in college at NYU, my good friends had a weekly beer spot. We were around 19-20 and found a dive bar in the East Village that did not card us. We loved that we were the youngest ones in there (or so we thought), we loved the faint smell of urine and puke, covered up by cigarettes (or so we thought). The found art objects installed on the wall were good conversation topics during the lax in our card games (we met for a round of Rummy 500 with a 1 pitcher purchase per person ruling). It was soon time for someone’s 21st birthday and we ordered a round of shots when our bartender, Rudy, came over to wish his congratulations: “How old are ye now?!” “21!” “But… you’ve been coming here for years?” “Thanks Rudy!”

2 years ago I paid $200 for an open beer bar for 2 hours. A great deal. There were so many beers stationed around the room one could leave a pint in one area, speak with a friend in another corner, and find beer interspersed throughout the trek for the taking.

But now, I like to be at least semi-conscious at the end of the night. I do not like waking up in the morning unable to do anything but mope. Yes, it is great fun to have a free night at the bar while your friend’s buy you drinks (really just seeing how drunk they can get you before you collapse into unconsciousness), but D and I both agree, a new kind of birthday should be celebrated this time around.

This past Saturday was D’s birthday. He called for a birthday dinner with his nearest and dearest. In his overzealous birthday glee, D set the hours of the night from 5pm to 4am—whether to come before one’s big night out, or end it at our place, was one’s prerogative. (Guests began arriving at 6pm and our last guest left around 3:30am.) Because of this time frame, I thought it best to provide the birthday goers with small nibbles of food to chat and eat the night away (and whoever would be there for the pumpkin cheesecake birthday cake would get to indulge). With this, we could also prepare just over half the food initially, and as others come, prepare the remainder. Without further ado, the menu for the curious:

• CHEESE PLATTER. Key to any gathering. Since there would be a lot of other food I only bought 3 varietals: one creamy and nutty cow’s milk (I think it was Thom), one salty cow’s milk (I forget the name, something like Paeve), and one super-aged, creamy, delicious goat’s milk (Humbolt Fog). Spectacular. Served with grapes.

• JALEPEÑO CHEESE POPPERS. These were on the initial menu I posted. They are really good and easy to make: egg whites, parmesan and jalapeños. They are best eaten warm, right off the oil. We decided to forgo these for…

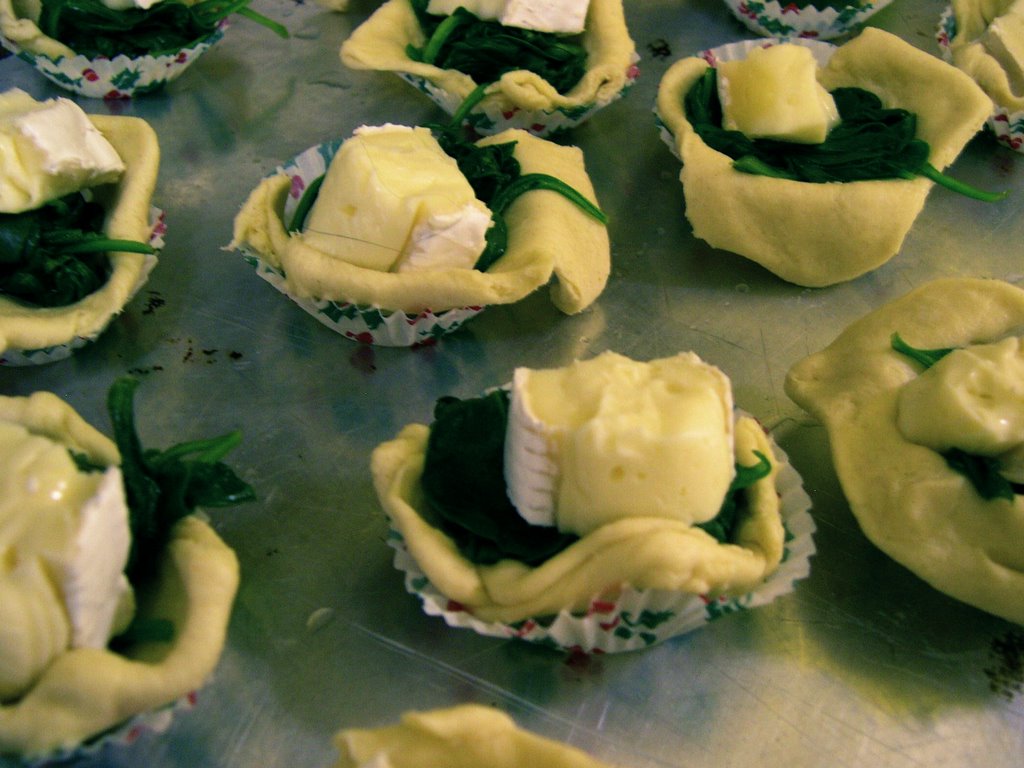
• BRIE BITES. I originally called this dish Brie Bombs, but have changed it for sensitivity purposes. These tiny morsels are so rich and gooey. The last “Halloween” or “Autumnal” party we had I made one giant brie-spinach-flaky pastry bake. It was gone in seconds. I decided this time to make individual “brie bites”:
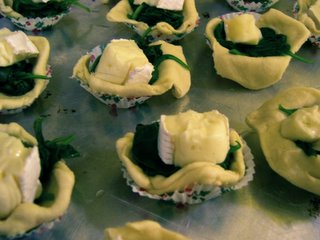
BRIE BITES
Makes about 18 pastries.
1 Medium wedge of brie, enough for 18 bite-sized pieces.
1 large handful (or 1 bunch) of fresh spinach, washed, drained and sautéed.
1 pre-made croissant dough roll.
1) Preheat the oven to 350F. In a saucepan over medium-low heat, sauté the spinach 2-3 min until wilted. While the spinach is going, cut the brie into about 20 bite-sized pieces.
2) The pre-made dough should be perforated into triangles. Pull apart the triangles carefully and tear or cut each triangle into two smaller triangles. Place each half-triangle into a mini cupcake liner or mini cupcake pan.
3) Place a small dollop of spinach onto the dough, then a chunk of brie. Assemble all bites. Using the tips of your fingers, gently pull the dough around the spinach and brie and pinch off at the top to close. They should look like dumplings.
4) Bake for about 15 min until tops are golden and brie begins to ooze out of the bites. Serve up hot (though people will eat them when they are cooled too).
NOTE: You can assemble the bites ahead of time and refrigerate. Bake them as guests start to arrive.


• VEGETARIAN THAI SPRING ROLLS. My mother recently sent me a package of rice noodle spring roll dough. I figured I would use them up for the party and whipped up a batch of spring rolls. Not so easy. These are fairly labor intensive, but everyone really enjoyed them, especially the peanut sauce accompaniment. I bought what I thought to be spring roll filling and combined ingredients that I thought would work for the sauce. It took a few trials to get these to hold together and work properly. Trial and error for the first time dish…
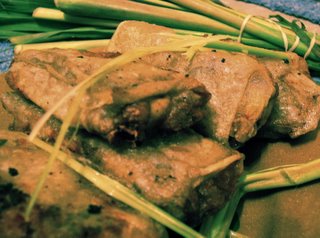
THAI SPRING ROLL W/ PEANUT DIPPING SAUCE
Makes 6-8 depending on your damage control
SPRING ROLLS
2 carrots, sliced julien (make these as thin as possible so as not to poke through the roll)
1 handful of Asian sprouts (the white-clear varietal)
1 large handful shiitake mushrooms, sliced julien
½ cucumber, sliced julien
1-2 Tbl soy sauce, depending on taste
2 Tbl sesame oil
1) In a saucepan, sauté all ingredients except for the cucumber about 5 min.
2) In luke-warm water, place the spring roll shells and allow to get soft and pliable.
3) Place a small helping of filling onto the center of the shell and add some cucumber strips, fold 2 opposite ends onto center, then roll dough tightly into a thick finger shape. Continue until all spring rolls are filled.
4) CAREFUL: In hot oil (I used vegetable), fry the spring rolls until shell hardens and hold together. This is where I had some casualties. Once done, place on a paper napkin to absorb some oil.


PEANUT DIPPING SAUCE
1/3 cup peanut butter (I used chunky)
1/3 cup soy sauce
4 Tbl sesame oil
2 tsp curry powder
1) Mix all ingredients well. I added more soy sauce or oil depending on the thickness to thin this sauce out so I stopped measuring.


• AVOCADO WRAPPED IN PROSCIUTTO. Thinking about these makes my mouth water. They are too easy to make and are so rich and decadent. I finished them off with a splash of lime juice. Everyone thought this a perfect hint of flavor to compliment and separate the flavors of the prosciutto from the avocado.
AVOCADO WRAPPED IN PROSCIUTTO
Makes 32 pieces.
2 avocados
½ lb prosciutto (I bought a fairly inexpensive variety I found at my local supermarket instead of the Italian deli)
½ lime, juiced
1) Slice avocadoes in half lengthwise and remove pit. Slice each half into 4 long spears, then each spear in half
2) Cut each sliced piece of prosciutto into half. Wrap around avocado and secure with a toothpick
3) Sprinkle with lime juice. (The lime juice also helps the avocado from aging and turning brown)


• MINI LATKES. It is just about Hanukah and for some reason I was craving latkes. I never really liked them growing up. It was the song I learned at temple: “Fry them in oil, wrap them in foil! L-l-l-l- latkes, golden brown! L-l-l-l latkes eat ‘um down…” Anyway, I could never eat them after that song—which I’m sure was created to help us young Jews remember tradition and food and eat it all down (and frying in oil allows us to remember the oil burning bright for the 8 long nights of Hanukah). I remember eating latkes that were slightly mushy (more like fried mashed potatoes). I think they are best fried crisp and flaky, or as D said, “why are we making flat, flaky fires?” These were tasty morsels. I really wanted to prepare them with some fresh chunky cranberry sauce, but I ran out of time (and had no cranberries). So if you make them, do the cranberry sauce and let me know how they turn out. I got this recipe from my newest gifted cookbook Jewish Cooking In America.
MINI LATKES
Makes Makes about 2 dozen latkes
2 lbs russet (or Yukon Gold) potatoes, peeled and grated
1 medium onion, grated
½ cup chopped scallions
1 large egg, beaten
salt/ fresh ground pepper to taste
1) Peel potatoes and put them in cold water. Using a grater, grate potatoes and onion. Place in a fine-mesh strainer or tea towel and squeeze out all the water over a bowl. The potato starch will settle to the bottom; reserve that after carefully pouring out water.
2) Mix potato and onion with the potato starch. Add scallions, eggs, and salt and pepper.
3) Heat a griddle or non-stick pan and coat with a thin film of vegetable oil. Take about 2 Tbl of the potato mixture in the palm of your hand and flatten [this is easily done by squeezing the potato mixture tightly between your two palms]. Place the potato mixture on the griddle, flatten with a large spatula, and fry for a few minutes until golden. Flip the pancake over and brown the other side. Remove to paper towels to drain. Serve immediately.


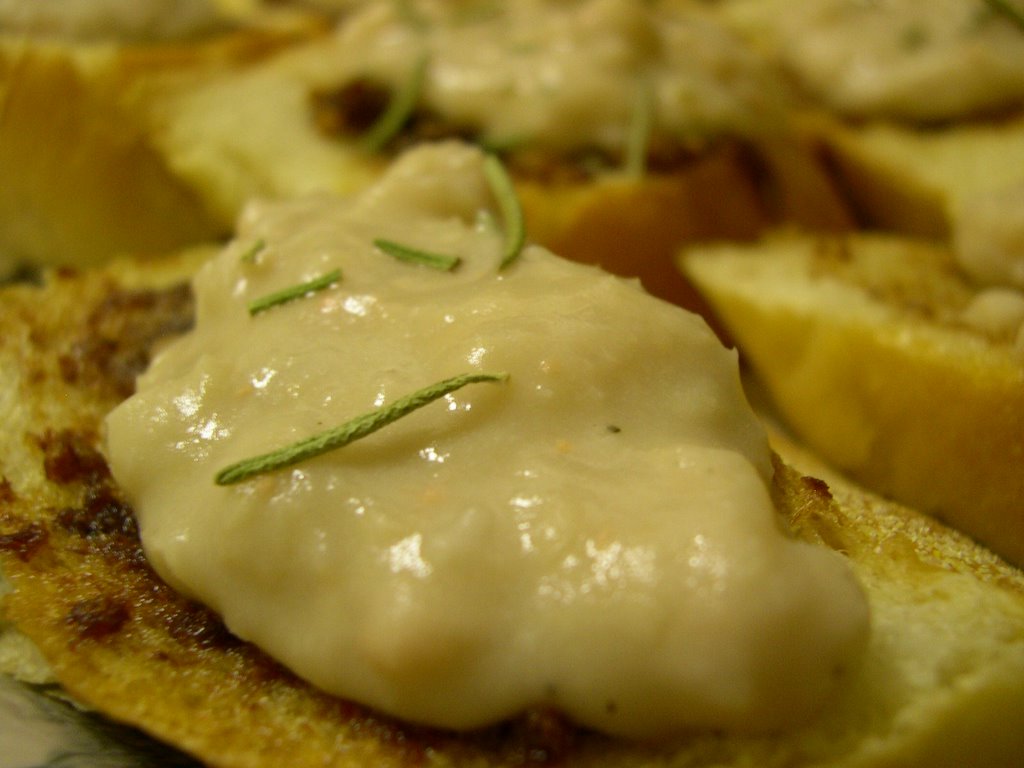
• WHITE BEAN BRUSCHETTA. This was my favorite. Salty, rosemary good. They were also tremendously easy to prepare. People were initially afraid of them. Yes, they do look slightly strange. But wow, delicious and savory. I had leftover anchovies from my anchovy garlic bread and thought to put it to use as a base for this bruschetta. The result was perfect.
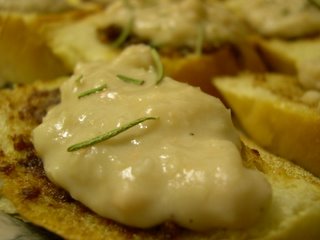
WHITE BEAN BRUSCHETTA
Makes about 20 pieces
1 loaf good French or Italian bread, sliced thin and at an angle
4-6 anchovies, drained of oil
4 garlic cloves, crushed
5 Tbl olive oil
1 Tbl butter
1 can white (Northern) beans, drained
1 Tbl rosemary
1) Preheat oven to 325F. Slice the bread and place on a baking sheet.
2) In a small sauce pan, combine 3 Tbl olive oil, butter, garlic and anchovies. Smash the anchovies with a fork or spoon and swirl, creating a paste. Cook for 2-3 min. Using a cooking brush, spread the anchovy paste onto the bread. Bake for 8-10 min until bread dries out and turns slightly golden.
3) While bread is baking, prepare the beans: combine beans, 2 Tbl olive oil and the rosemary. Using a handheld blender (my old safety) or a food processor, pulse the mixture (like hummus), leaving slight chunks, but a mostly creamy consistency.
4) Top each piece of anchovy dusted bread with beans and sprinkle some rosemary on top.


• SOUR CREAM DIP W/ VEGETABLES. Very simple. This was a last minute thought as a quick and dirty dip for guests to munch on while things were cooking. No need for a real recipe: 1 packet dry soup mix (like an onion soup mix), 1 12-oz container of sour cream. Mix, refrigerate for 1-2 hours, serve with sliced veggies. It is very good and people will be amazed how easy it is.

• MINI CRAB CAKES. These were okay. In our pressed time chunk crab meat could not be found—go figure. So canned crab, which looked more like pink tuna was bought. They were also a little spicy (which some really enjoyed)—compliments of chef D and his zeal for Tabasco. This recipe is from the Joy of Cooking, 1975 ed.
MINI CRAB CAKES
Makes about 12 2-inch cakes
1 2 Tbl butter
2 Tbl onion, chopped
2 eggs, beaten
½ cup cream
½ cup bread crumbs
2 cups lump crab meat, chopped
½ cup celery, finely chopped
½ tsp dry mustard
2 Tbl parsley, chopped
½ tsp salt
½ tsp paprika
1) In skillet over medium heat warm butter. Sauté onions in the butter, about 5 min.
2) In a medium-sized mixing bowl, combine all ingredients (including the onion- butter mixture). Refrigerate for 1 hour.
3) Warm a skillet over medium heat with 1 Tbl butter. Form small patties and brown both sides, about 5 min each side.


• PUMPKIN CHEESECAKE. I know this recipe keeps coming up. It must be my recipe of the year. It is tremendously delicious, creamy, pumpkiny and good. I topped this off with a drizzle of maple syrup and walnuts. Recipe does not need repeating, it can be found here.


Sunday, December 11, 2005

Classic Spaghetti & Meatballs w/ Anchovy Garlic Bread


D’s friend Jeremy recently commented how easy it is to make cranberry sauce. The same goes for a good tomato sauce. If you are willing to chop a few vegetables, it is remarkable how delicious a homemade classic tomato sauce can be (and how easy it is to create variations on the original).

Friends will eat your sauce and ask what brand it is. They will marvel at the chunks of vegetables they can actually taste. Most importantly, they will secretly love you for not killing them with the over abundance of salt that is found in most jar varieties. You will love them back because they will remain in your life longer—unless of course, you no longer desire this, I suggest any high-salt jar variety.

I will sometimes make this sauce with meat—otherwise known as Bolognese. But oh! To have giant meatballs doused in sauce looming on your plate! It makes you want to sing out—On top of spaghetti/ All covered with cheese/ I lost my poor meatball/ When I had to sneeze… But these meatballs, trust me, will be in the belly before anyone can sneeze. (I was eating leftovers today at lunch and was beyond stuffed. The glutton and greed in me pushed on, fighting to finish the last meatball before the plate was passed to D for completion. Who promptly asked, “where’d the meatballs go?!”)

To swank up this classic meal, aim was taken at the garlic bread. Tease peoples’ palates by adding anchovy to the butter/ olive oil mixture. There is no offensive taste that an anchovy can sometimes offer. For many, it is a salty afterthought that will leave them to wonder “what was that delicious spice?”. This bread is so good and easy to make I’ll sometimes prepare only this for lunch. My friend A loves it so much that whenever she comes over we make a big loaf of this as a snack. My vegetarian friend B loves it so much she breaks her will just for this occasion. And you didn’t garlic bread could get any better.

I will have to say the best part of the spaghetti dinner is the leftovers. I love warming spaghetti on the stovetop the next day. The sauce cooks into the noodles creating a single entity. Rather than sauce on noodles, the dish unites. What was once a delicious spaghetti and meatball becomes a hearty, home inducing memory…

SPAGHETTI & MEATBALLS w/ ANCHOVY GARLIC BREAD
Serves 6. Cook + Prep time= 40 min

THE SAUCE
1 cup button mushrooms, sliced
1 medium onion, chopped
1 bell pepper, chopped
4-5 garlic cloves
5-6 black olives, chopped
2 Tbl olive oil
1- 5oz can no salt added tomato paste
1-15oz can stewed (or diced) tomatoes, no salt added
1-28oz can crushed tomato, no salt added
2 Tbl brown sugar
2 bay leaves
10 leaves fresh basil, chopped
1 tsp oregano
fresh pepper/ salt to taste
1) In a saucepot on medium heat, warm the olive oil. Add onions, garlic and mushrooms. Sauté 10 min until onion is soft and mushrooms reduce and brown a little. Add olives and pepper, sauté 5 min. Add basil, oregano and stir. Add 3 cans of no salt added tomato sauces. Add bay leaves, brown sugar, salt/ pepper to taste, stir. Reduce heat to medium-low and allow to simmer while you prep the meatballs and noodles. Allow to cook at least 20 min.

NOTE: mouthwatering plays on this simple recipe: option 1- Add ¼ cup chopped sun-dried tomatoes to the sauce. Option 2- Blacken some red peppers in the oven. Remove skin, chop and add to sauce. Option 3- Using 5-6 lbs Roma tomatoes, cut into quarters and place on a non-reactive bake dish. Preheat oven to 450F. Add ½ cup olive oil, ½ cup balsamic vinegar, 10 garlic cloves. Roast for 40 min until tomatoes begin to blacken. Use this in lieu of the canned tomatoes. Option 4- Add meat with the onion/ garlic/ mushrooms to create a Bolognese sauce. Option 5- Use 2 portabella mushrooms instead of the button (or meat). Option 6- Add 2 cups chopped basil to create a pesto-tomato sauce.


MEATBALLS
Makes about 15 balls
2 lb meatloaf meat (veal/ beef/ pork)
1 medium white onion, chopped
¼ cup fresh parsley, chopped
½ tsp sage
2 garlic cloves, crushed
1 egg
1) In a mixing bowl, combine all ingredients until evenly distributed. Warm a skillet on medium heat with 2 Tbl oil.
2) Form 2-3 inch balls. Add to skillet and allow to brown on all sides, about 10 min. Once done, add to tomato sauce to warm through and absorb some tomato flavor. Let sit for at least 5 min before serving. (You can make your noodles now according to the package)


ANCHOVY GARLIC BREAD
Makes one loaf.
1 loaf good Italian bread
2 Tbl unsalted butter
2 Tbl olive oil
2-3 anchovies
2-3 garlic cloves, crushed
1) Cut loaf in bread lengthwise (a la hamburger style per Kindergarten terms)
2) In a small sauce pan on medium heat add all ingredients. Using a fork, mash up the anchovy as butter melts and stir everything together. Once garlic starts to sizzle, remove from heat and brush onto both sides of bread. Close bread, cut into pieces (cut so the bottom of the bread still holds together but pieces can be easily torn off. Sit on a baking sheet and broil 5-8 min until lightly golden, sizzling and delicious.


ORDER OF PREP:
1) Start the sauce first. While the onion/ garlic/ mushrooms warm, mix the meatball ingredients and form balls.
2) Once you add the cans of tomato for the sauce, cook the meatballs.
3) While meatballs cook, prepare the anchovy garlic bread filling.
4) Transfer meatballs to sauce. Begin noodles (unless fresh then wait until last min to prepare). Brush filling on bread and cook.


View Stats
Rankingblogs.com: Defining your blogs worth..