Showing posts with label holiday cooking. Show all posts

Tuesday, February 13, 2007

Red Velvet for Your Sweetheart... or Sweet Tooth


*Just Braise has moved. Please visit me at www.justbraise.com!*

It's getting to the last hours, do you know how you'll be spending your Valentine's Day?

If I had a fireplace mine would be spent in front of a roaring fire. Rather, that's how I would spend every night if I had a fireplace. If you're without fire, there are plenty of other options for this day of Hallmark-forced romance. I discussed many in this piece printed in the Queens Chronicle.

While your best bets are to keep the eats of the day light and healthy, who doesn’t love a little sugar high?

I had my first bite of the sweet seductress known as Red Velvet a few years ago. A yellow cake with a hint of cocoa and a strikingly white exterior, the cake won my heart from the first beat. I could soon be found getting my individual servings of Red Velvet cupcakes around town (my favorite are from Billy’s Bakery since they stick with a cream cheese based frosting).

A good recap of the red in Red Velvet can be found here, though I would like to amend the fact that baking soda and cocoa powder do still react to form red, it is a mere blush and these days we help our cakes along with a hefty dose of red food coloring.

I searched a number of online recipes for Red Velvet cakes and finally found a tried and tested one in Saveur's March 2006 issue. My boss, who swears by her local bakery, The Cake Man, in Brooklyn, will pick up a slice of his Red Velvet almost daily on her way home. Low and behold the recipe in Saveur is based on The Cake Man’s and after some slight tweaking of ingredients on my part, I have come up with a consistency of redness I like and a deliciously seductive cream cheese frosting.

This cupcake is sure to win the hearts of many. It is fast and easy to make and creates a perfect last minute cupid’s arrow.

RED VELVET CUPCAKES
Prep time= about 20 minutes. Makes about 18 cupcakes.
for the cake:
* 2-½ cups cake flour
* 1-½ cups sugar
* 1 teaspoon baking soda
* 1-½ tablespoons cocoa powder
* 1 teaspoon salt
* 2 eggs
* 1-½ cups vegetable oil
* 1 cup buttermilk
* 2 tablespoons (1 ounce) red food coloring
* 1 teaspoon vanilla extract
* 1 teaspoon white distilled vinegar

1) (Set cream cheese and butter for the frosting aside to soften.) Preheat oven to 350F. Line 18 cupcakes tins with cupcake liners.
2) In a large bowl, sift together flour, sugar, baking soda, cocoa and salt.
3) With an electric mixer, beat eggs, oil, buttermilk, food coloring, vanilla and vinegar together until evenly combined.
4) With the mixer on medium, slowly add dry ingredients to the wet ingredients until smooth, 1-2 minutes. Fill cupcake tins about ¾ full and bake on middle rack 20-25 minutes, until toothpick comes out clean. Remove from tins and cool onracks about 10 minutes. While cooling, make the frosting, below.


for the frosting:
* 8 ounces cream cheese, softened
* 1 stick butter, softened
* 1 teaspoon vanilla extract
* 2 cups confectioner’s sugar

* 1 cup chopped pecans

1) Beat cream cheese, butter and vanilla in a bowl with an electric mixer until well combined. Add sugar, beat until frosting is fluffy, about 5 minutes.
2) Cover each cupcake with about 1 heaping spoonful of frosting, spread with a knife. Sprinkle pecans over frosting and press in slightly so they stick.

Thursday, January 25, 2007

Truffles of Love


As January comes to an end our thoughts are set for Valentine's Day. While I am not totally rah rah for the Hallmark Holidays, I must admit I am a fan of the odd bouquet of flowers or box of chocolates (what gal isn’t?). D and I won't be doing anything "special" this Valentine's Day (at least not that I know of), but I am sure others will. For that, I present two delectable truffles, the chocolate kind, not the mushroom (though some think the mushroom intoxicates the senses). To really woo a person, a homemade treat is an amazing declaration of love.

Aphrodisiacs have been around since the ancient Greeks and Romans (and possibly before). The name is attributed to Aphrodite, the Greek goddess of love. For centuries, people have been known to hit the streets hawking potions that will make them fertile, randy, attractive or powerful over the opposite sex. Today we have the internet and hundreds of spammed Viagra adds to pick up the slack.

Chocolate is probably one of the oldest known aphrodisiacs. Much of this is due to the fact that it was once so hard to come by, the price was set for the well-to-do only. Times change, cacao is easier to come by, and thankfully most people can enjoy chocolate's deep, rich flavor-- though you can still find outrageously priced confections to prove your love.

An even older aphrodisiac is seafood. Possibly due to the fact that some believe Aphrodite was birthed from the seas, most anything that has come from salted waters has been thought to have powerful sexual powers at some point; from anchovies to clams to oysters.

Ginger is known to open the taste buds and therefore offers higher sense pleasures.

Chili pepper and garlic, both bring color to the face that match the color of “bed” time.

Honey is thought to be an aphrodisiac, apparently the birds and the bees really knew what was going on.

Also, anything that resembles either male or female sexual organs can hold aphrodisiac powers. You name it: figs, carrots, strawberries, cigars, starfruit, Georgia O'Keeffe paintings, etc.

Finally, wines and champagnes are known to loosen people up and allow them to lose inhibitions. Careful though, liquor is a depressant and too much can do just the opposite of what you may be looking for in a Valentine love-filled night.

Whatever your plans are for Valentine’s Day, gift the one you love or yearn for something sweet. These two truffle recipes are surprisingly simple. The first was taken from The Cook’s Book edited by Jill Norman. The book is a fantastic collection of tips and recipes from some of the top chefs around the world. The recipe is from pâtissiers Pierre Hermé (as it appears in The Cook’s Book). They are a unique combination of flavors and absolutely melt in the mouth. The other recipe is adapted from epicurious.com. They produce beautiful looking truffles whether you have a pastry bag or not. Both recipes are easy enough for beginners, though Hermé’s requires some drying time.

DARK CHOCOLATE TRUFFLES W/ LIME & HONEY
Makes About 50.
* 1 lb best quality bitter chocolate (60-70% cocoa solids)
* 7 tablespoons butter
* ¾ cup crème frâiche
* 2-3 limes
* 2-½ tablespoons acacia honey

for the coating
* finely grated zest of ½ lime
* ½ cup + 2 tablespoons sugar
* 1-1/3 cups unsweetened cocoa powder

1) Prepare the coating the day before needed. Mix the lime zest with the sugar and rub between palms of your hands. Spread in a thin layer on a nonstick baking sheet and let dry overnight at room temperature. Before mixing with the cocoa powder in step 8, check to be sure the sugar is completely dry.
2) The following day, chop the chocolate into small pieces with a serrated-edged knife and place in a large heatproof bowl. Cut the butter into walnut-sized pieces, place in a bowl, and let soften to room temperature.
3) Pour the crème frâiche into a pan and bring to a boil. Finely grate the zest from 1 lime into the crème frâiche. Remove the pan from the heat, cover, and let infuse for 10 minutes. Return to the heat and bring back just to a boil. Remove fromo the heat again.
4) While the crème frâiche is infusing, squeeze the limes to yield 3-½ tablespoons of juice. Put the lime juice and honey into another small pan. Warm without boiling.
5) Pour half of the hot crème frâiche over the chocolate and stir with a wooden spoon, starting at the center with small circles and moving outward. Add the rest of the crème frâiche and repeat the stirring process. Add the lime juice and honey mixture.
6) Once the chocolate mixture is smooth, add the pieces of butter, a few at a time, stirring them in gently. Chill until the ganache has thickened, at least 30 minutes.
7) Stir the ganache gently before pushing it into a pastry bag fitted with a No. 9 round tip. Pipe balls of ganache onto a baking sheet lined with parchment paper. Chill for 2 hours.
8) Mix the cocoa powder with the dry lime-flavored sugar and spread over a tray. Using a fork, roll the balls of ganache in the coating mixture. Remove with a slotted spoon, then shake gently in a strainer to remove any excess coating. Store in an airtight container.


HEART-FILLED (RASPBERRY) TRUFFLES
Makes About 60.
* 2 tablespoons heavy cream or crème frâiche
* zest of ½ a lime
* ½ cup (about ½ pint) fresh raspberries, washed and patted dry
* 4 ounces bittersweet chocolate (60-70% cocoa), chopped into ¼ inch pieces
* 1 tablespoon brandy (optional)
* ¼ cup unsweetened cocoa powder (100% is best)

1) Place cream and lime zest in a large sauce pan over medium heat. Using a wooden spoon, stir often, and bring to a simmer (do not boil). This will take just a few minutes. Remove from heat and add chocolate pieces. Stir until smooth and dissolved. Stir in brandy.
2) Line a cookie sheet with wax paper. Place ½ the raspberries into the ganache. Using two small forks, coat each raspberry individually in the ganache, remove and place on the wax paper. Do not let them touch. Continue until all raspberries are covered in the same fashion. Chill truffles for 1-2 hours.
3) Set the cocoa powder in a shallow bowl. Remove truffles from wax paper and drop into the bowl, coating with the cocoa powder. Remove and shake off excess cocoa.
4) Truffles should be kept refrigerated until ready to eat. Because you are using fresh raspberries, truffles should be eaten within 1 week, any truffles that will not be eaten immediately should be frozen.

Tuesday, December 12, 2006

Peppermint Rocky Road Cookies


The short and simple of it is that I was craving some Rocky Road Ice Cream the other day. Surprisingly, it's never been a favorite and I more often lean towards a mint based creation or black and white milk shake when it comes to ice cream indulgences. The other night, it was Rocky Road. The craving quite possibly was ignited by the need to use up some marshmallows left over from a late fall camping trip. They have been staring me down, mocking me with their fluffiness for a few months now.

"How about sweet potatoes?!" You say. As sweet potatoes go, I like them mashed or in a plain pie, no added marshmallows as I believe sweet potatoes are strongly sweet on their own.

So I thought brownies or Rocky Road Cookies. I knew I had all ingredients for cookies, so cookies it was.

But wait, there is no peppermint in Rocky Road. Well, in holiday Rocky Road there is. Or more likely, I was needing to rid myself of a stagnant pile of peppermints (a la the dark chocolate peppermint bark) that have been sitting around longer than I care to mention.

This recipe is (very slightly) based on those delicious Cranberry Macadamia White Chocolate Chip Cookies. I added cocoa powder to the batter to give them a chocolate base. More should have been added to really pump up the chocolate in this (which is why chocolate chips were added). When baked, the marshmallow oozes out of the cookies and provides a sweet crisp crunch along the edges which was a pleasant surprise. These cookies are chewy and a sweet meal in themselves!

PEPPERMINT ROCKY ROAD COOKIES"
Makes about 25 2-inch cookie drops
1-1/2 cups all purpose flour
1/2 tsp baking soda
1/4 tsp baking powder
1 tablespoon good cocoa powder
1/2 tsp salt
1-1/2 sticks butter, softened
3/4 cup firmly packed light brown sugar
1/2 cup granulated sugar
2 eggs
1 tsp vanilla
2 cups oatmeal
1 cup chocolate chips (your pick: dark, white, milk)
1/2 cup crushed peppermint
1/2 cup chopped pecans or walnuts
2 cups roughly chopped (or cut) marshmellows, in about 1/2 inch pieces. Plus extra for tops of cookies

1) Preheat oven to 350F
2) In a mixing bowl, whisk together flour, baking soda, baking powder, salt and cocoa.
3) With an electric mixer in another bowl, add butter and sugar, mixing until fluffy. Add the egg and vanilla, mix until well combined.
4) Beat in flour mixture until well combined.
5) Add remaining ingredients and stir until evenly combined.
6) With a spoon, drop dough about 2 inch apart. Top with an extra piece of marshmallow. Bake in batches in middle of the oven 10-12 min (or lightly golden) for soft cookies. Cool on racks.

Monday, December 04, 2006

Dark Peppermint Bark


Last Thanksgiving I was in Chicago when some family friends gifted us a tin of Williams Sonoma Peppermint Bark. It was so frighteningly addictive that I was eating sheets of it a day. My mother forced me to take it home to New York City and it was gone in a matter of days.

Little did I know that this might just be the easiest dessert to put together. I'll be making it again in white chocolate/ dark chocolate layers (a la Williams Sonoma for a fraction of the cost) for my ceramic studio's holiday sale, but just had to get this out to you now to create and be swayed by paying $25 for a box at the store! If you have some chocolate lying around and some peppermints piled up nabbed from restaurants, this is perfect use for them.

It is one of those recipes people will think you bought or spent all day laboring over and you will tell them you did and laugh to yourself. It would make a perfect holiday gift for friends—just buy a nice tin at the dollar store!

I will not even put quantities down because however much chocolate you have can be used and the peppermint quantity will depend on how strong you want the final product.

DARK PEPPERMINT BARK
Qty Depends on amount of chocolate used. Active time= 10 minutes. Inactive time= 6 hours-overnight.
* 1 bar dark chocolate
* peppermint canes or candy, crushed
* 1 teaspoon peppermint extract (optional)

1) Lay parchment paper on a cookie sheet.
2) Put peppermint in a paper bag and wrap with a clean dish towel. Use a hammer to crush the peppermint into pieces from dust to chunks.
3) Melt the chocolate in a double boiler*, add the peppermint extract and mix as it melts.
4) Once melted, pour onto parchment paper and use a spatula to spread chocolate about ¼ inch thick. Sprinkle with peppermint and allow to dry 6 hours to overnight.
5) Once dry, break chocolate apart into uneven chunks, store covered.
* If a double boiler is not available use two non-stick sauté pans. One should be larger and filled half way with water, brought to a boil. Place the smaller pan on top of the water, without it touching the other pan and melt chocolate in the smaller pan.

Friday, November 17, 2006

Thanksgiving Feasting, Part II

I will be making no Thanksgiving meal this year, nor will I be helping with preparations other than eating appetizing bits. There are so many clever little hints I've been picking up along the way that I would have loved to dish out, ways to spice up presentation, etc. Maybe next year. Until then... I will contemplate what I would have made (and make your searching a little easier in the days to come):

For munching, I would definitely have a cheese platter set out with dried fruit (apricot, plum, figs), assorted nuts (cashews, walnuts, roasted chestnuts) and some olives. A few cheeses I would absolutely have? Some of my old and new favorites: Bayley Hazen Blue, a stinky Epoisses, a butterscotched Gouda and the rich Monte Enebro. [Okay, not too difficult to figure out the key to my heart lies in cheese.] Serve it with a bold Zinfandel (the only wine pairing I will make).

If people really needed an afternoon snack I might whip up a batch of the recent cranberry bread. Fabulous with tea or coffee.

That should be enough to tide people over until a nice warming bowl of soup. How to choose since I love soup. A quick and easy one is Curried Butternut Squash or a zesty Carrot Ginger, a sweetly spiced new one is Winter Squash, and a decadent one, yet to be posted (but if you would like a recipe, let me know, it’s delicious) is a rich Chestnut Soup with Thick Bacon Bits.

A salad would follow. Probably endive, pear and walnut. Possibly with pomegranate. Much like the one here. Cleansing and delicious.

Turkey, of course. Broiled Brussels sprouts, sweet potato chips with an elegant balsamic reduction, garlic mashed potatoes topped with caramelized onions, braised beets and other root veggies for color, and maybe some sweet asparagus with a splash of truffle oil (and shavings if the budget allows). I’m not really a stuffing person, but I made this oyster stuffing, last year that was rich and delicious and scavenged to be taken home.

A pause for dessert. Maybe a walk around the block. Then dessert.

Hands down holiday favorite is the pumpkin cheesecake-- though this chocoalte espresso tart is luxurious. For the cookie lovers, pumpkin gingersnap cookies, gorgeous cranberry macadamia white chocolate chip cookies and rum raisin oatmeal cookies.

The following morning would be full of succulent Latvian Pancakes, with plenty to freeze for later snacking—the perfect way to get rid of those turkey day leftovers!

Enjoy your Turkey Day wherever you may be.

Saturday, November 11, 2006

Cranberry Sweet Bread


The other week I was at the grocery store and noticed the bags of cranberries were finally set out. Mmmm, cranberry juice I mumbled, and in a trance walked over and placed them in the basket D was carrying.

“What are you going to do with those?”
“I dunno, they’re pretty.”

And so the pretty little rubies sat in the fridge for the better part of a week while I researched some recipes. I was looking for something fast and easy that would still look and taste delicious. I finally found it on a Chowhound forum-- a one bowl, just add, stir and bake recipe. I checked the comments and someone had already made it with wowed reaction so I decided to dig in as well.

This cake-like bread was delicious warm right out of the oven. The recipe recommends a caramel sauce, but I think whipped cream would be great too. I had it plain with coffee and it made a great mid-afternoon pick-me-up or breakfast.

This is the recipe list as it appears in Chowhound. There are other fabulous cranberry recipes listed there too so check it out.

*Note: This is not my mother listed below. Also, I cannot vouch for the caramel sauce because I did not make it. The changes I made are as follows: I used 2% milk instead of whole milk and increased the cranberries to one whole 16 ounce bag (from 2 cups). Lastly, I used a 7x11 pan as I wanted a thicker bread. I had to bake mine about 10 min more.

MOM’S CRANBERRY CAKE W/ CARAMEL SAUCE
Makes 1- 9x13 loaf. Active time= 10 minutes. Inactive time= about 30 minutes.
* 2 cups unsifted flour
* 1-½ cups sugar
* ½ teaspoon salt
* 2 teaspoons baking powder
* 4 tablespoons unsalted butter, soft
* 1 cup whole milk [2% works well too]
* 2 cups whole fresh cranberries [or 1-16 ounce bag]

1) Preheat the oven to 350F
2) Mix the flour, sugar, salt, baking powder and butter together until it resembles coarse crumbs.
3) Add milk and stir until evenly distributed. Fold in cranberries.
4) Pour batter into a buttered 9x13 pan. Bake for 30 minutes or until golden. Pour caramel sauce (below) over individual servings and serve.


CARAMEL SAUCE
* ½ cup butter
* ½ cup sugar
* ½ cup brown sugar
* ½ cup half and half

1) Combine all ingredients on stovetop and heat until thickened; do not boil.


Head over to Sweetnicks for the ARF roundup

Sunday, October 29, 2006

The Bride of Frankenstein Madeleines


The real deal:

I’m not really so much into Halloween lately. It might be because here in the City, people are so terrified to let their children go door to door that instead they go store to store collecting candy. It takes the fun out when you can’t see kids all dressed up and excited coming and going.

When I first moved into my current apartment, my roommate at the time overloaded on candy, we received a solo trick-or-treater and were still eating through the bounty into the New Year. Today, D brought home a bag of Dove Dark Chocolate. “What’s that?” I asked. “For the trick-or-treaters.” “Mmm, kids really love dark chocolate.” “I don’t care, it’s for me.”

Which tends to be the attitude when we go collecting candy anyway, right? I remember my mother bought king-sized bars since we at most received 5 kids on Halloween and she wanted to award them for coming out of their way. Before Halloween she would remove some of the handout candy before kids came around and squirrel it away. The candy ended up being ours for the taking eventually. It's the same role my brothers and I took. We would arrive home from a night of Halloween, post egg and shaving cream fights, fears of local cats being skinned and bigger kids driving around with BB guns, and trade our candy between the three of us. We then stealthily (or so we thought) hid our candy in different areas of the house, taking a few pieces out for a daily (or hourly) sugar high, saving the prized pieces, those elusive king sized bars, for last. Some years, we were still eating through our stash into April.

There is also the added pressure of coming up with the “best” costume around Halloween. All those cops, slut angels and naughty doctors are tiresome. I could never think of a fabulously original idea I was happy with and inevitably went as “evil Stacey.” She looks just like normal Stacey but is certifiably evil. [It reminds me of pub/ bar quiz nights—where the cleverness of your team name can make or break your fame (at a recent quiz night our team name was Kim Jon Illin’, pretty good I think).]

Here are some good costume ideas from friends of mine I will share if you are still in need for tomorrow night:
Avian Bird Flu (bird feather, surgical mask and a few added funnies)
Ms. Scarlet and Professor Plum (a la Clue: carry a candlestick, library book, or other Clue-centric items. I think this would also be great for groups to go as all the Clue characters).

Will report if I see anything clever around the City tomorrow, so far just the standard Goth Pirate, “sexy” Kitty and red sweat suit wearing devil. As for the Madeleines below…

A few months ago my mother gave D a Madeleine pan. In the meantime we have been searching for the perfect recipe. After much contemplation, we went with one from Gourmet’s Best of Paris cookbook. They turned out fabulously puffy and moist with a great aroma and buttery flavor. I thought they had a slight resemblance to The Bride of Frankenstein so I doctored them up with a little cocoa powder.

MADELEINES
Makes 2-3 dozen cookies depending on cookie sheet size . Active time= 20 minutes. Inactive time= 40 minutes.
Special equipment: 3 madeleine pans
* 1-½ sticks (¾ cup) unsalted butter, melted and cooled, plus additional for brushing
* 1-¼ cups sifted cake flour (not self-rising; sift before measuring)
* ½ teaspoon baking powder
* ¼ teaspoon salt
* 3 large eggs
* 1 teaspoon vanilla
* 2/3 cup granulated sugar
* 2 teaspoons finely grated fresh lemon zest
Confectioners sugar for dusting (in this case, cocoa powder)

1) Set oven racks in upper and lower thirds of oven and preheat to 350F. Brush molds with melted butter.
2) Sift together flour, baking powder, and salt. Beat eggs in a large bowl with an electric mixer at high speed until light and foamy, about 30 seconds with a standing mixer or 1 minute with a handheld, then beat in vanilla.
3) Gradually add granulated sugar, beating constantly at high speed, and continue to beat until mixture is tripled in volume, about 3 minutes with a standing mixer or 5 minutes with a handheld.
4) Sift flour mixture in 3 or 4 batches over eggs, folding (with a spatula) in each batch until just combined. Then fold in zest and melted butter.
5) Spoon a rounded tablespoon of batter into each mold (about two-thirds full) and bake in upper and lower thirds of oven, switching position of pans halfway through baking, until golden around edges and a tester inserted comes out clean, 10 to 12 minutes total.
6) Invert madeleines onto a rack and dust scalloped sides with confectioners sugar.
NOTE: to get the Bride of Frankenstein effect cut out a piece of paper the size of a finished cookie. Use a pencil to outline The Bride’s hairline, noting that where you cut out will be darkened and where the paper is left behind will remain cookie-colored. Place cut-out over cookies and dust with cocoa powder. Use red food coloring, red hots or other small candies for eyes.


Tags: , , .

Saturday, October 28, 2006

Winter Squash Soup


For some, the crisp fall weather is fearsome. It means cold weather, leafless trees, heavy jackets, and buckets of snow are on the way. Too worried about the future, they fail to appreciate the present and all the greatness this time of year has to offer. To them I say, be away with you-- move south!

Whatever happened to your love of sledding, apple picking, snowball fights, pumpkin carving, and snow angels? Jumping through billows of fresh fallen leaves or mounds of fresh pure snow? Waking up on a cold morning to icicles covering the windows and pole licking dares (à la A Christmas Story)?

Personally, fall is my favorite time of year. I love the brisk weather, the changing of the trees, and bundling up in sweaters and mittens. I especially love the food of the season: hot cocoa, soups, stews, the spices that emerge (nutmeg, cinnamon, peppermint) and the general hearty warming these things have on the state of mind.

I go into ration mode. I have the summer fruits I bought overripe and cheap, frozen away to be used in the dead of winter for a Caribbean-like fruit smoothie when its bitterly unbearable outside and reminders of warm weather are necessary. I also have my stockpile of soups that begin to accumulate in single serving sized containers, ready to accompany me to the office for a little internal snuggle or a fast dinner when the need arises.

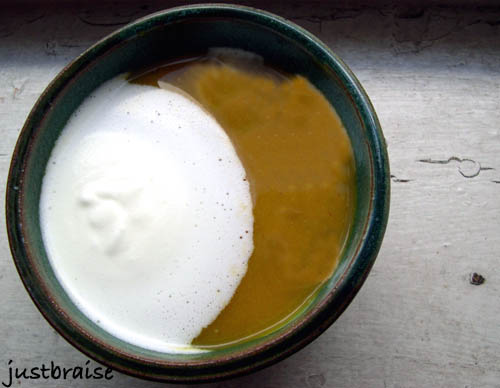
This soup is an exception. Naturally sweet, creamy and delicious, it is hard to put any aside for a later date. A perfect seasonal soup, this dish would look fabulous for a Halloween treat, Thanksgiving feast, or anything in between and beyond. Make this soup, and you may never make another again.

WINTER SQUASH SOUP
Serving Size= 8-10. Active time= about 40 minutes. Inactive time= about 1 hours.
* 1 White Acorn Squash (or regular Acorn Squash)
* 1 small Butternut Squash
* 1 small Golden Nugget Squash*
* 1 large sweet onion, chopped
* 1 stalk celery, chopped
* 2 carrots, chopped
* 8 cups chicken stock (or vegetable)
* 2 long sticks of fresh Rosemary
* 2 whole cinnamon sticks, about 3 inches long
* 1 teaspoon nutmeg

1) Preheat oven to 350F. Using a heavy sharp knife, slice the three squash down the middle vertically. Gut the seeds (set aside if you want to bake them for eating later, otherwise; discard).
2) Place the squash skin side down on a large cookie sheet and place in middle rack of oven. Bake for 40 minutes, or until soft when poked with a fork.
3) While squash are baking, prepare the other ingredients and begin the soup.
4) In a large stock pot on medium-high heat, warm 2 Tablespoons olive oil or butter (or combination of both). Add onion and sauté until translucent; about 8 minutes.
5) Add celery, carrots, chicken broth, rosemary and cinnamon sticks. Cover and bring to a boil. Reduce heat to medium and uncover slightly. The squash should be about done at this time.
6) Remove squash from oven when soft when touched with fork. Using a towel around your hand, or a fork and knife, either peel the skin off the squash, or slice it away, keeping as much meat as possible. Cut squash into 2-3 inch chunks and add to stock pot.
7) Cover and bring to a boil then reduce heat and remove cover.
8) Remove cinnamon sticks and rosemary twigs (leaves will have fallen off). Add nutmeg. Using a handheld blender, or carefully in batches with a regular blender, purée the soup until smooth.
9) Serve plain or with a little heavy cream.
*Note: If you are unable to find these squash in your local market, almost any combination of squash will work. Just Acorn and Butternut would work well, or Acorn, Butternut and pumpkin, etc.


Tags: , , , , , , , , .

Thursday, May 04, 2006

Chocolate-Espresso Tart


Chocolate is too seductive to dismiss. I have forgone meals to satisfy my craving, and I have drenched ice cream in fudgy syrup, making the original flavor unidentifiable. As a child, I would pull a bottle of chocolate sauce from the fridge and squirt the sugary treat direct on my tongue—chocolate milk was a daily addiction. Needless to say, I have trouble trusting those who claim, “I am not really into chocolate.”

Just out of college, I had a roommate any chocoholic would love: she worked at a haut chocolate shop. I quickly turned monthly visits to the store into daily happenings. With each drop in I claimed to be taste testing the wasabi-tinged truffles, ancho chili spiked hot chocolate and bars of white chocolate infused with lavender. In truth, I was in heaven.

When I spy chocolate on a menu I make sure to leave room for dessert—even better is when chocolate is part of the main course! D is often worse than me when it comes to the dark temptation: pushing to order the richest dessert when I might crave a lighter fare—and I thought girls were real chocolate junkies.

When I saw this dessert while flipping the pages of Marth Stewart Living it was too difficult to resist. Once tasted, I knew this tart would satisfy even D’s chocolate cravings: The cocoa crust lingers with the faint flavor of marscarpone in the filling, and the smooth rich ganache permeates with bitter espresso. It is a perfect dessert. Below is the recipe as it appears online.

CHOCOLATE-ESPRESSO TART
Makes 8 servings.
Better than a box of chocolates, this dessert is triply indulgent. The cocoa shell forms a crisp rectangular foundation for two decadent fillings: creamy, tangy mascarpone cheese and generous rosettes of silky-smooth espresso-flavored chocolate ganache.
For the Ganache:
* 8 ounces bittersweet chocolate (preferably 61 percent cacao), chopped
* 1-¼ cups heavy cream
* 2 tablespoons good-quality ground espresso beans

For the Tart Shell:
* 1 cup all-purpose flour, plus more for parchment paper
* ¾ teaspoon salt
* 1/3 cup unsweetened Dutch-process cocoa powder
* ½ cup (1 stick) unsalted butter, softened
* ¼ cup sugar
* 1 large egg
* ¾ teaspoon pure vanilla extract
* 3 tablespoons heavy cream

For the Filling:
* 1-½ cups mascarpone cheese

1) Make the ganache: Put chocolate into a medium heatproof bowl, and set aside. Bring cream and espresso to a boil in a small pan. Pour through a fine sieve over the chocolate; discard solids. Let stand 2 minutes, then whisk until smooth. Let cool to room temperature, 1 to 2 hours.
2) Make the tart shell: Sift flour, salt, and cocoa powder into a medium bowl; set aside. Put butter and sugar into the bowl of an electric mixer fitted with the paddle attachment; mix on medium speed until pale and fluffy, about 4 minutes. Add egg and vanilla, and mix until combined, scraping down sides of bowl as needed. Reduce speed to low. Gradually add the flour mixture in 3 batches, alternating with the cream. Shape dough into a thick rectangle; wrap in plastic. Refrigerate until cold, about 30 minutes.
3) Preheat oven to 350°. Roll out dough between 2 pieces of lightly floured parchment paper to a 16-by-6-inch rectangle, about 1/4 inch thick. Press dough into a 14-by-4 1/2-inch rectangular flan frame set on a baking sheet lined with parchment. Trim dough flush with top edge. Prick all over bottom of shell with a fork. Bake until firm, 18 to 20 minutes. Transfer to a wire rack; let cool completely. Unmold.
4) Put ganache into the bowl of an electric mixer fitted with the whisk attachment; beat on medium-high speed until soft peaks form, about 4 minutes. Transfer to a pastry bag fitted with a large star tip (such as Ateco #828).
5) Smooth mascarpone cheese over bottom of tart shell with an offset spatula.
6) Pipe ganache rosettes, one next to the other, on top of mascarpone to cover. Store in the refrigerator up to 1 day.
Note: Great Ganache: To turn out smooth ganache every time, make sure the mixture is at room temperature before whipping. Any warmer or colder, and its cream is likely to seize or become grainy.

Tuesday, April 04, 2006

Roast Lamb w/ Mango-Mint Sauce, Moroccan Millet & Rum Pineapple w/ Baby Almonds


Spring is a fabulous time to slow down a little before the summer hustle. It is the time when we come out of doors with welcome arms. Everyone seems happier, more active and generally more excited to be alive. With this in mind, it is also a great time to celebrate. Be it any occasion: holiday, birthday, the weather itself, friends or engagements, now is the time to invite your loved ones into your home.

It was the combination of a traveling actor friend in town and two recent engagements of marriage that my friends would dine with me tonight. Their task was simple: a few bottles of wine. My task was to prepare an ideal spring feast. I believe we all accomplished our set duties.

While mulling over menu options I was torn between chicken, pork or lamb. Chicken seemed too average and easy, pork was, you know, the other white meat. Lamb seemed exotic. But while many people take great fear of lamb, I figured my friends were the adventurous types and I would forge ahead.

Sure enough when we sat to the table my friend DR voiced his concern: “You know Stacey, I’ve never eaten good lamb. I’m kind of afraid. It’s all been slightly… barnyardy?”

“That’s okay,” I reassured him, “I’ve never cooked lamb before, so we’re kind of even.” With that, he finished off his glass of wine. DR’s fiancé then voiced her concerns, “I’ve eaten lamb in kibe (Middle Eastern lamb balls with other spices) and on kebabs, but any roasted lamb I’ve ever had has been terrible.”

“Well, I’m glad you’re in for an adventure.” I returned.

No sooner was the lamb brought to the table that forks were rearing to stab at it. Across the board the meal was a success. DR and his fiancé were reassured the merits of good lamb, and I was reassured that I can cook lamb. The spices were a great compliment to the sauce, and with the millet side, everything was the colorful festive spring feast I sought.

DR mentioned his barnyardy objection to lamb. I would have to agree that lamb, like any meat is easily spoiled if a few rules are not met: freshness and cooking time. Freshness is key. If kept in the refrigerator (or meat department of your grocery store) too long the meat will begin to spoil (obviously). In the refrigerator, it will pick up the odors of food around it. Make sure to check dates and grade of meat to ensure freshness. Overcooked meat is depressing. This is easily done if a good meat thermometer is not utilized, or placed incorrectly. It is important to know what cut of meat you have, how it’s best to prepare that cut, and the ideal temperature for the outcome you desire.

With that, a fabulous spring meal, perfect for the upcoming holidays…

ROAST LAMB w/ MANGO-MINT SAUCE
Makes: 6 servings. Active Time= 30 minutes. Inactive time= 5 hours to 2 days. Cook Time= depends on size of meat; about 40 minutes.
ROAST LAMB
* 6 pound leg of lamb, ask your butcher to crack the bone and butterfly the cut**
* 3 Tbl fresh rosemary, chopped
* 3 Tbl fresh mint, chopped
* 3 Tbl fresh sage, chopped
* 2 head of garlic, 1 crushed, 1 whole
* 20 pearl onions, 10 crushed, 10 whole
* 1 Tbl ground cumin
* 1 Tbl ground cardamom
* ½ Tbl ground cinnamon
* salt/ pepper
* 4 Tbl olive oil

1) Bring the meat to room temperature before cooking. Mix the first 3 ingredients, 1 head of garlic and the ten crushed pearl onions with fresh ground pepper. Rub 2 Tbl olive oil over the lamb and rub the herb mixture over the leg of lamb; between the cuts, top and bottom. Wrap tightly in plastic wrap and refrigerate 5 hours up to 2 days.
2) Preheat the oven to 300F. Remove the lamb from the refrigerator, brushing off about half the rub. Sprinkle with cumin, cardamom, and cinnamon. Amply salt and pepper both sides and between the cuts. Tie securely with twin to hold the meat together.
3) On the stovetop in a large skillet on high heat, warm 2 Tbl olive oil. Sear the leg on all sides. Apply a fresh sprig of mint and rosemary under the twine. Chop the top off the second head of garlic, just to expose the tips and place it on the skillet. Add the onions around the lamb.
4) Place on rack, fatty side up. Insert a meat thermometer deeply, almost to the bone.
5) The meat is done when the thermometer reads 125 for medium-rare.
6) Remove from oven and allow meat to rest on cutting board for 15 minutes before slicing.


** To butterfly meat is to slice it so the meat looks like a book with the bone as the book spine.

MANGO-MINT SAUCE
* 1 fresh mango, peeled and pit discarded
* 1 cup fresh mint
* 1 tsp Serrano pepper seeds
* 1 Tbl lemon juice
* pinch of salt

1) Use a hand-held or electric blender to purée all ingredients until evenly blended. Serve at room temperature to slightly chilled.


MOROCCAN MILLET
Makes: 6 servings. Active Time= 10 minutes. Cook Time= 25 minutes
* 3 cups dried millet
* 6 cups water
* 1 bunch spinach, washed well
* ½ cup dried cranberries or apricots
* ½ cup roasted pine nuts
* salt/ pepper to taste

1) Cook the millet according to package instructions. While it is cooking, sauté the spinach. Once done, leave on heat. Add spinach, cook about three minutes to reheat spinach; stirring to ensure the millet does not stick to the bottom of the pot.
2) Add dried fruit, nuts and salt/ pepper. Stir and place in serving bowl.


RUM PINEAPPLE w/ BABY ALMONDS
Makes: 6 servings. Active Time= 10 minutes. Inactive Time= 1 hour.
* 1 fresh ripe pineapple
* 2 Tbl butter
* 1 cup dark rum
* 2 Tbl brown sugar
* ½ cup baby almonds **

1) Slice top and bottom off pineapple; slice off skin. Cut into quarters. Remove center rind. Cut each quarter into 4 pieces lengthwise. Place pineapple slices in shallow dish and cover with rum and brown sugar. Refrigerate 1 hour.
2) On a skillet on medium heat, warm the butter. Sauté pineapple slices until lightly browned.
3) While pineapple is browning, in a small skillet on medium heat pour the sugar-rum mixture. Let it warm while the pineapple cooks. Serve pineapple slices with ice cream, coated in rum-sugar syrup with baby almonds sprinkled on top.

** Baby almonds are found usually around late March. They are immature almonds, still in their fuzzy pods, plucked before the almond has the opportunity to harden into the nut we love to eat. To use, peel off the fuzzy outer shell. The inner snow-white nut is the non-ripe almond you want to use in this dish. They are crunchy and contain a clear jell inside (that eventually hardens to white with maturity)


*** Remember to save your bones for soup!!! ***

Head on over to Sweetnick's for today's ARF round up!

Over at Kalyn’s Kitchen, check out some WHB action. Today’s herb? Mint.

Saturday, March 11, 2006

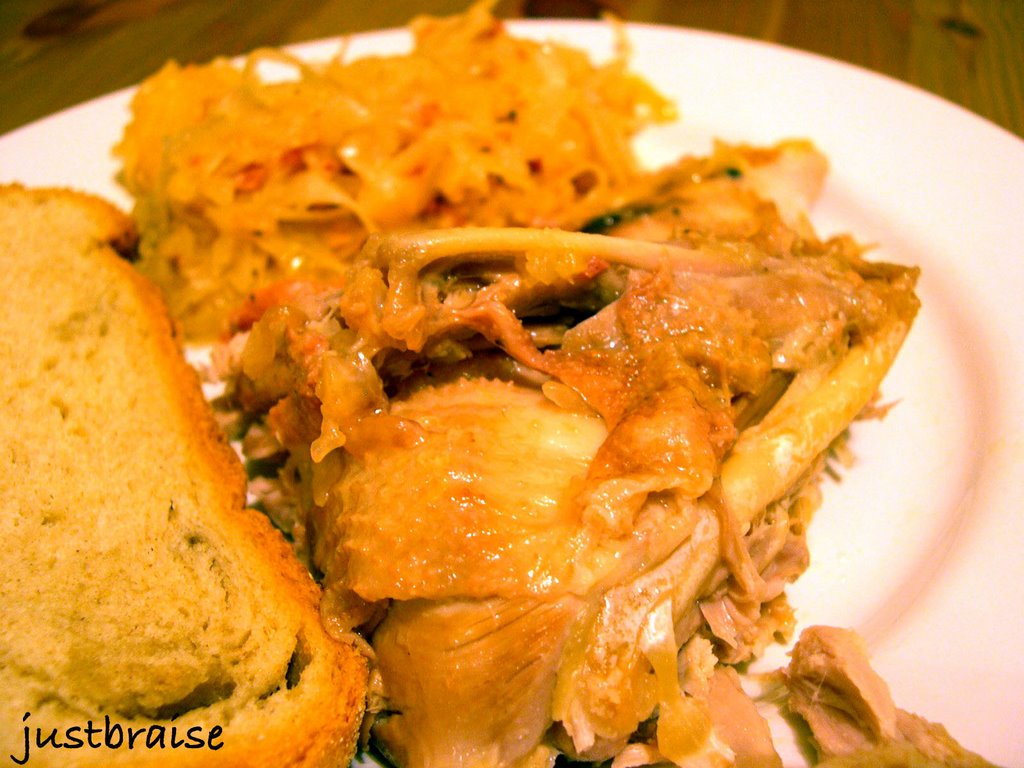
Braised Pheasant w/ Sauerkraut


A few years ago, I had an ideal roommate: she was an amazing baker while I was the meat and potatoes of the operation. Together we created some tantalizing meals that impressed all around us. We were an unstoppable duo, especially in the kitchen. She moved out, we move on, and now she lives half a continent away. On a recent visit, she imparted onto me the most precious gift of all: The Art of Eating by M.F.K. Fisher.

It is a hefty volume, almost 800 pages; a collection of Fisher’s best writings on food. But its cover was the most seductive image I had laid eyes on that I eventually cracked it, finishing it in one week’s time. Today I will not indulge the reader in a full review; that is for another time. I will say it is one of those books once picked up is impossible to put down. The writing is so voluptuous is calls to be read aloud to an audience.

With each sitting I grew hungry, not only for more of Fisher’s writing, but physically. Throughout the book, recipes wrapped in Fisher’s memories are found. Before I passed this book on to another friend, I copied a few of those recipes down to satiate my appetite another day. Many seem almost archaic today (in the United States at least)—roasted pigeon-- these are recipes that must be indulged at some point in one’s lifetime.

Today I unfurl one of those copied recipes with more to come. This one if found in the section “How to Cook A Wolf.” First published in 1937, this section is a guide for the housewife on how to scrimp and save in the bowels of wartime, as well as after. How does one continue to live a life of luxury when there is none to be found?

I must suppose pheasants were easier to come by in those days. A young boy could go on a hunt with his father and return with a sack of pheasant to feed the family for a week, nary a penny spent. Today, pheasant is a luxury (at least in New York City). I was determined to create this dish (and if I could not find pheasant, Cornish Hen or something of that sort would have to do). Low and behold today at the Green Market I found Game Dealers: Wild turkeys, chickens, geese, and of course, my dear pheasant! A little on the expensive side ($20 for a good sized bird!) but it was destiny to find and had to be bought. Add to that 1pound of fresh bacon (also from the Green Market) this meal is hardly a hungry wolf—it can now pass as a starving millionaire fare.

BRAISED PHEASANT (OR PARTRIDGE) IN SAUERKRAUT
Serving Size= 4 persons. Active Time= 45 minutes. Inactive time= 2½ - 3 hours.
This is the recipe as it appears in The Art of Eating.
* salt and pepper
* 2 small or 1 large bird (or 1 rabbit)
* bacon slices
* 3 tablespoons butter or good oil
* 1½ pounds sauerkraut
* 1 cup peeled and sliced apples
* 1 cup dry white wine (or half and half with water or vegetable stock)
* 1 tablespoon flour


Rub birds with cut lemon, and salt and pepper them. Wrap with the bacon and tie securely with twine. Heat the fat and brown the birds.
Wash the drained sauerkraut (unless it is very mild, [t]hen just drain it). Place a layer of it with the apple slices in the bottom of a casserole and imbed the birds. Cover with the rest of the kraut and apple, add the liquid, and cover closely. Let simmer very slowly for about 2 hours.
Put the birds on a hot plate, and thicken the kraut with the flour. Make nests in it, and replace the birds in them, ready to serve.


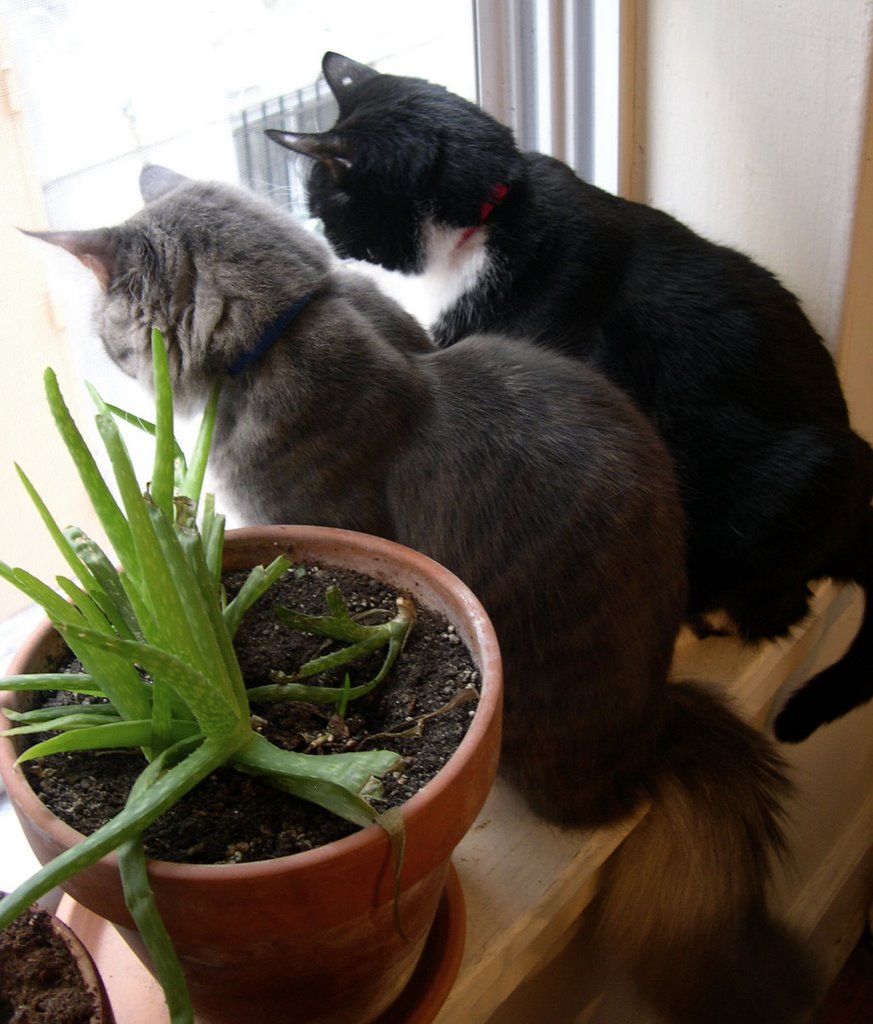
On non-food related musings, here is WCB # 40 over at Eat Stuff. Below we have Whiskey and Kitty BoJangles sitting at the first open window of the year...

Saturday, February 18, 2006

Rum Raisin Oatmeal Cookies (+ WCB #37)


My father loves ice cream. He will not admit it, claiming he is too healthy to put such garbage in his mouth. When I was younger, my father used to purchase ice cream “for the kids;" Rum Raisin and Coffee. I do not know very many children whose favorite ice cream flavors are Rum Raisin or Coffee. Placing the pints in the freezer, talking more to himself than any of us, he would exclaim, “don’t eat too much or you’ll get stomach aches.” In the morning, the pints were gone.

Exploring these two ice cream flavors as a child has probably done worlds for my taste buds: On a family vacation in the Dominican Republic I happily participated in taste tests at a rum factory. I am sure the top destination choice for my 6 year old self was in fact, the rum factory. Mesmerized by the gilded thread hugging the bottles, I did not blink when we left the factory with more caseloads of rum than could be carried.

Over the years I developed a taste for Rum Raisin ice cream. The smooth vanilla bean base blended perfectly with the spicy kick of rum. When a recent cookie craving threatened an otherwise sweet-less week, a bout of inspiration came to pass: oatmeal raisin cookies, spiked with rum.

As the raisins soaked overnight in their rum bath, I plucked one out for a tasting and was brought back to the rum factory; back to the vanishing pints in the freezer. I adapted this recipe from the best oatmeal raisin cookie I know: the bottom of the Quaker Oats box. The changes, other than the rum-soaked raisins, include less butter, allspice, and the addition of rum extract for an extra kick. These cookies are thin and golden with crisp edges, keeping soft centers days later. The rum provides the perfect winter spice while the oats whisper at a meal.

RUM RAISIN OATMEAL COOKIES
Makes about 25 cookies. Prep Time= 10 minutes. Cook Time= 10-12 minutes.
* ¾ cup (1-½ sticks) butter, softened
* 1 cup firmly packed brown sugar
* ½ cup granulated sugar
* 2 eggs
* ½ tsp vanilla extract
* ½ tsp rum extract
* 1-½ cups all-purpose flour
* 1 tsp baking soda
* 1 tsp cinnamon
* 1 tsp allspice
* ½ tsp salt
* 3 cups Quaker Oats
* 1-½ cups raisins, soaked overnight in white rum

1) Soak raisins in white rum overnight.
2) Preheat oven to 350F. Beat together butter and sugars until creamy. Add eggs, vanilla and rum extract; beat well.
3) Add combined flour, baking soda, cinnamon, allspice, and salt; mix well. Stir in oats and raisins; mix well.
4) Drop by heaping tablespoonfuls onto ungreased cookie sheet, 2 inches apart. Bake 10-12 minutes or until golden brown. Cool 1 minute on cookie sheet; remove to wire rack.


And for the non-food related WCB #37 hosted by Clare at Eat Stuff. I bring you The Face Off:

Tuesday, February 14, 2006

Love Potion #14


In grade school, each child is more or less required to present everyone a Valentine’s card. Digging through the bought selections, a child picks their favorite for that special someone. As elementary school turns into middle school, it becomes all the more important to receive a Valentine. Children form cliques and get catty. More precisely, children begin to figure themselves out at this time; children can be cruel. Receiving Valentines equates how many friends a child is surrounded by.

We get older and Valentines becomes more or less special depending on if we are “with” someone; desperate to find someone before the day approaches to avoid being alone. What someone does for Valentine’s Day is equal to how much one is loved. It becomes a competition between couples: who has the more romantic lover?

A few years ago, my roommate and I, both single, sat down to make Valentine cards. With paper in varying degrees of pinks and reds, we cut, pasted, and bejeweled about 100 cards. We hit work, hiding them on peoples’ desks. We hit the bars, handing them to cute single patrons. Everyone who received a card thoroughly enjoyed them, posting them on their bulletin boards for months to come (some still have them posted). I think this means that we do not trade love enough as we age. Desperate for a show of friendship, we will hang on to postcards from anyone and everyone: we want to show off our friends. Or maybe I live in a city full of lonely people.

I am now “with” someone, but having grown cynical over the years being “without,” Valentine’s Day is really any other day—people just wear more red. Everyone is still looking for love. Whether it is found amongst friends, lovers, or in food, it is natural to search for comfort.

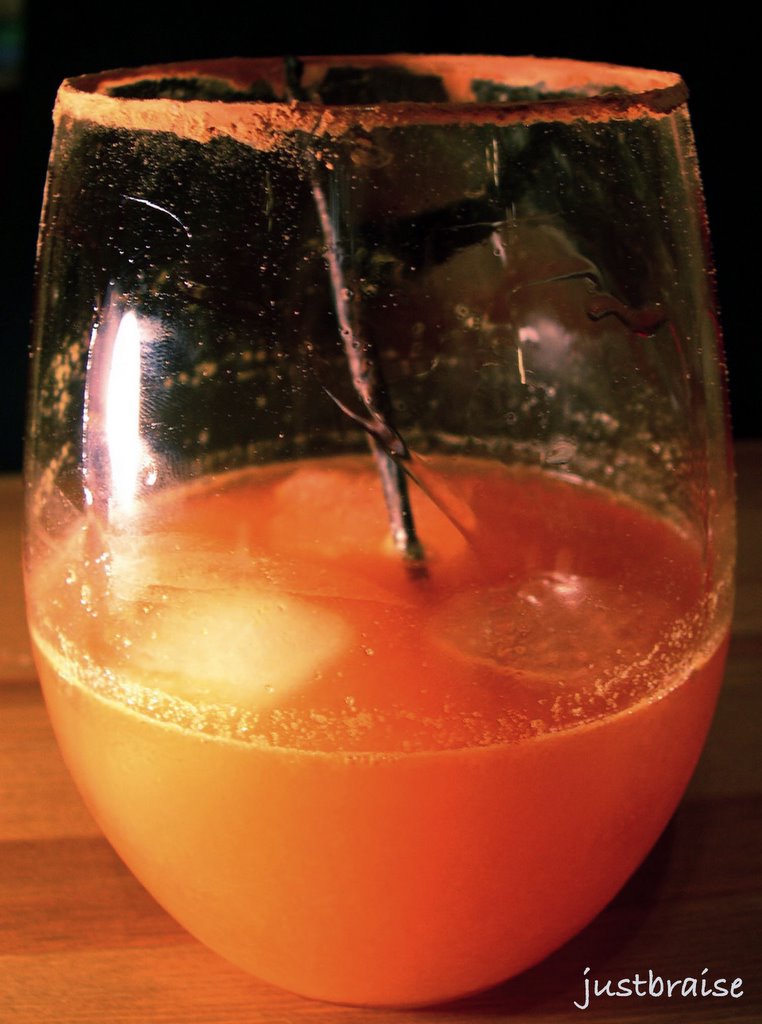
This is my Valentine to you dear reader. Enjoy this beverage at brunch as a sophisticated alternative to the classic mimosa. Present it at dinner for a winning combination. Alone, this beverage is the epitome of urban cosmopolitism.

LOVE POTION #14
Serving Size= adjust to quantity making. Prep Time= 5 minutes.
* cocoa powder
* 1 part blood orange juice
* 1 part champagne
* 1 part vanilla vodka (plain vodka is fine for something a little less sweet)
* 2 tsp pomegranate concentrate for each person
* garnish with vanilla bean

1) Place cocoa powder in a dish. Wet rim of glass with orange juice and dip the rim into the cocoa powder.
2) Fill glass with ice cubes. Pour in juice, champagne and vodka. Put the pomegranate concentrate on a spoon. With the spoon up to the inner edge of the glass, slowly release pomegranate concentrate around the inner glass, allowing it to coat the sides. Garnish with vanilla bean which also acts as a swizzle stick.

Saturday, January 28, 2006

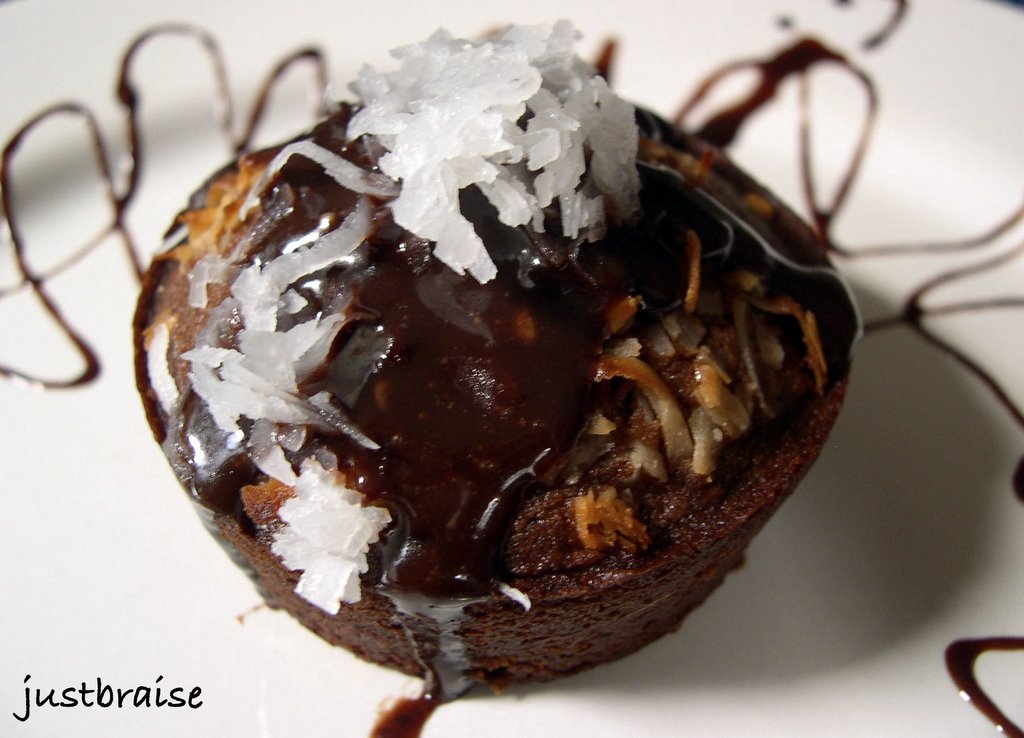
The "It's my birthday & I'll bake if I want to!" Chocolate Fudge Coconut Cupcake (& wcb 34)


Actually, it is not yet my birthday- 3 more days. But still, I’ll bake if I want to. In honor of me, and the fact that I had nothing in the fridge but carrots and eggs, I decided to bake a little treat to celebrate all days leading up to my birthday: The most decadent of cupcakes. After all, what is better than filling an empty stomach with sweet chocolate for lunch? Let me think… nothing. (Okay, maybe lobster, or smoked salmon-- caviar or champagne. But hey, I’m a simple girl.)

For me, baking is a real pleasure when there is little food (of sustenance) in the home. Yes, one could make biscuits, perhaps scones, but I prefer the sweeter things in life. As long as I have one egg handy, I rummage through my “baking” cabinet (which contains the sugar, cocoa, flour, etc) to check the quantities at hand, and while my sweet tooth glimmers in the morning sun, I gleefully search for the recipe of my desire.

Every year as my birthday approaches I remember grade school days. It was tradition at my school, as I am sure many others across the nation, maybe the world, that when one’s birthday came to pass cupcakes would be brought to share with the class. I always felt bad for those summer birthday kids who had to celebrate half birthdays. There was also one boy in my class that was born on a leap year. I felt even worse for him—celebrating his true birthday once every four years. Shame onto his parents, children can be cruel.

Every year as the last day of January approached my mother, older brother, and I would plan what kind of cupcake we would make (my older brother is 1 year, 11 months and 30 days older than me, just shy of 2 years). I would help with the baking and older brother and I would complete the decorating. I was not to be one of those sorry kids who carried store-bought cupcakes to my peers. I would uncover the delicacies, sit slightly uncomfortable as Happy Birthday was sung and then stuff the cupcake into my face: chocolate with vanilla frosting, always. When the cupcake was safely in my belly, I was sure to savor the last bit and threw the wrapping in my mouth, chewing on it until I could no longer taste the sweetness, then spit it into my napkin.

I can now resist chewing on the cupcake wrapper, though I will usually pick up any crumbs large enough to taste. This year I decided to make the most luxurious, richest, decadent cupcakes I could produce. I wanted fudge cupcakes. But I glanced at the counter at a pearly bag of coconut and decided I now wanted coconut fudge cupcakes.

Searching through my cookbooks I was at a loss. None of the recipes sounded rich enough. My mind was pooh-poohing cocoa powder, I wanted a recipe that would require a double boiler. I went to the internet to compare recipes. I found a fudge cupcake recipe that sounded almost right at 52 Cupcakes. I modified the recipe to create my own most decadent of birthday delights.

The final creation was perfect: Rich enough to be a meal; dense enough to act as cake; light enough to still be considered a cupcake; full of fragrant aromas; and just downright too swanky to be photographed in a group. These little fellas need their own 5 star accommodations.

COCONUT FUDGE CUPCAKES
Makes 12 cupcakes. Prep times= 20 minutes. Bake time= 15 minutes.
THE CUPCAKE
* 2 large egg yolks, at room temperature
* 1 ounce unsweetened chocolate
* 1 ounce semi-sweet chocolate
* ½ cup water
* ½ cup (1 stick) butter, bring to room temperature
* 1 cup firmly packed brown sugar
* 1 cup flour
* 1 tsp baking powder
* ½ tsp salt
* ¼ cup milk
* 1 tsp pure vanilla extract
* ½ vanilla bean, slit up the middle.

1) Set the oven rack to the middle setting. Preheat the oven to 400F. Amply butter a standard-size cupcake tin (12 slots). In a double boiler, place water, ½ cup milk (¼ cup is for the frosting) and vanilla bean. As milk is warming, scrape black seeds from the vanilla pod. Bring milk to a simmer, careful not to boil. Remove vanilla pod (dry it and place in sugar bin for vanilla sugar). Remove ¼ cup of the milk from heat and set aside for frosting. Add the unsweetened and semi-sweet chocolate to the double boiler. Stir until chocolate is melted and mixture is smooth.
2) In a mixing bowl, cream butter and sugar. Add yolks, chocolate mixture, and vanilla extract, stir until well combined.
3) In a small bowl, sift together flour, baking powder, and salt. Add the flour mixture gradually to the chocolate-sugar mixture until well combined.
4) Pour into cupcake tins, filling ½ - ¾ of each slot. Sprinkle a light coating of coconut on top of the batter. Push down lightly so coconut sticks to the batter. Bake 15-18 minutes, until a toothpick comes out clean. Remove from oven, extrude from tin, and set aside to cool on cooling rack. While cooling, make the frosting (below).


THE FROSTING
* 1 ounce unsweetened chocolate
* 1 ounce semi-sweet chocolate
* 1 Tbl butter
* 1 cup confectioner’s sugar (powdered sugar)
* ¼ cup milk
* 1 tsp pure vanilla extract

1) Return the set aside milk with vanilla to the double boiler. Add the chocolate and butter. Warm slowly, stirring, until the chocolate is evenly melted. Remove from heat. Stir in the confectioner’s sugar and vanilla extract, mix until smooth. You can make the frosting thicker by adding more confectioner’s sugar or thinner by adding more milk.
2) Allow the frosting to cool for about 5 minutes. Pour 1-2 Tbl frosting over the tops of the cupcakes. Top with coconut.


And here, WCB # 34
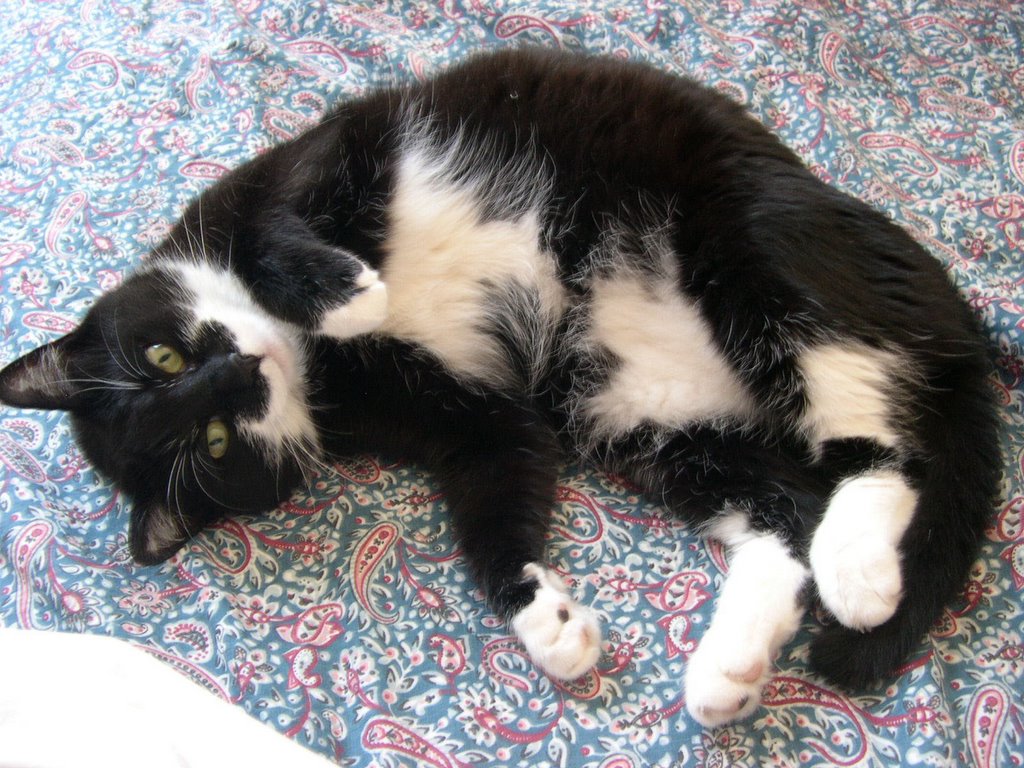
Big sister Kitty BoJangles found her sun spot on the bed this morning hiding from the torment of her little brother:


The little Whiskey monster, exhausted from beating up his sister, hid from the camera this afternoon:


Thanks to Masak-Masak for hosting this week.

Saturday, January 21, 2006

Stuffed Crème Anglaise French Toast


A good cookbook is a beautiful thing. One that is not a brick, that can easily be picked up and held close, with good crisp pages that are easy to turn, that is spectacular. One with a good table of recipes and an index of ingredients is a recipe-searchers dream. The best part about a cookbook, are the pictures.

The more pictures a book contains the more likely I am to purchase it. This is one reason I always post pictures about my recipes. I more often desire to try a recipe that is buddy to a picture than one that lacks a few good beauty shots. So it was upon a recent trip to the local B&N that I wandered to the food section and within seconds my eyes fell upon a very clean looking book with a delicious potato latke, smoked salmon egg benedict pictured, holding a simple title: Brunch .

Brunch is that fabulous meal everyone loves. It means one is at their leisure with the day and can rise late, mull about, then fix a casual and delicious spread. It reminds me of summer weekends when all of New York seems to be meeting up with friends and dining outside. My problem with brunch is I often feel at a loss for new ideas. How many ways can eggs, french toast or pancakes be glitzed up before we realize it really is just the same old meal with a different topping? So it was with hope that I cradled the book in my hands and retired to the second floor to find a good chair to park myself in.

Of course with the intent to eventually purchase, as I flipped through the pages I realized many of the recipes I was interested in were simple enough to memorize. Not the exact ratios, but many of these recipes called for some leeway in terms of personal taste, or were recipes common enough that I had already made them, with a little bit extra to create something truly special. I was hooked on the book (baked eggs?!) and flipped from page to page soaking up the pictures (which I think actually helps with remembering how to create the final product).

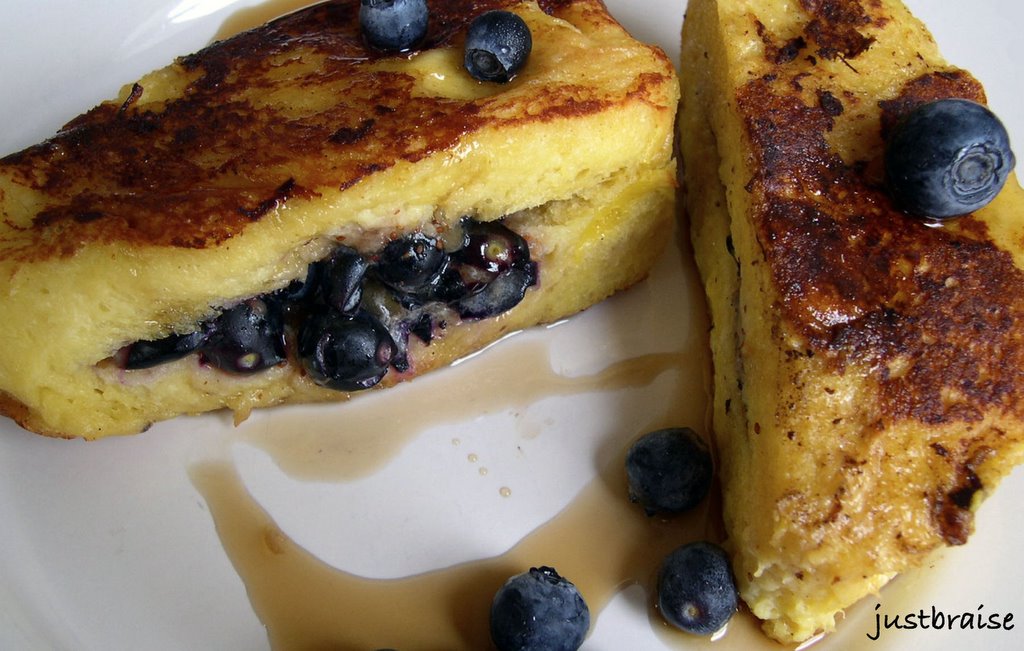
The recipe I saw that really drew my attention was french toast soaked in a crème anglaise batter. This sounded (and looked) fabulous because 1) I had some leftover crème angalise from the very decadent soufflé I made a few days back. And 2) because the secret (other than the rich, creamy, vanilla bean spiked batter to soak the bread in) is that this french toast is stuffed. The picture showed banana stuffed toast, but I had fresh package of blueberries calling my name in the fridge and they would be used instead. The last secret to this french toast is to buy an eggy bread (like challah) that you can slice yourself into thick 2-3 inch chunks.

STUFFED CRÈME ANGLAISE FRENCH TOAST
Serves 2. Prep + Cook time= 15 minutes.
* 4 thick (2-3 inches) slices of good egg-based bread, ends removed
* crème anglaise sauce (recipe below)
* ¼ cup fresh blueberries, slightly mashed with fork (or other fresh fruit like bananas, strawberries, etc)
* 1 Tbl butter

1) Cut the ends off the bread. Carefully with a knife, slice a small pocket in one end of the bread (keeping a few centimeters away from the edges).
2) Using a spoon or fork, carefully stuff the mashed blueberries into the bread. Dunk the bread into the crème anglaise making sure the bread readily absorbs the crème.
3) Place the soaked bread in a warm skillet on medium-low heat with the butter melted. Cook on both sides until golden brown, about 3 minutes.


CRÈME ANGLAISE
Makes about 4 servings. Prep time= 10 minutes. Inactive time= up to 2 hours.
* 2 cups half-and-half
* 1 vanilla bean, split lengthwise
* 5 large egg yolks
* 1/4 cup sugar
* 1 tablespoon dark rum, or to taste

1) In a small saucepan bring half-and-half just to a boil with vanilla bean and remove pan from heat. Scrape seeds from bean with a knife into half-and-half, reserving pod for another use if desired.
2) In a bowl, whisk together yolks, sugar, and a pinch of salt and whisk in hot half-and-half in a stream. Return custard to pan and cook over moderately low heat, stirring constantly with a wooden spoon, until thickened (170°F. on a candy or digital thermometer), do not let boil. Pour sauce through a fine sieve into a bowl and cool, stirring occasionally. Stir in rum. Chill sauce, covered, until very cold, at least 2 hours and up to 2 days.

Tuesday, January 17, 2006

Apricot Soufflé w/ Vanilla Rum Crème Anglaise


(Otherwise known as Heaven: Part II)

For New Year’s D and I threw a Sweet Cookie New Year Party. I scoured cookbooks, the Internet, recipes handed down on greased up pieces of, and even invented a concoction or two. There was one cookie I thought sounded amazing. It included a fabulously decadent vanilla bean in the recipe.

As D and I stood in the spice section marveling at all the colors, our eyes finally fell onto the prized vanilla bean. D picked up the container, the same size as all the other spice jars, and made some snide comment about there being a single pod resting comfortably at an angle, while all the others spices were packed to capacity. What a holy bean. After checking the price tag, I decided not to make the purchase—that was one cookie recipe we could do without.

I returned home to delve into the mysteries of the vanilla bean. How can such an ugly little pod hold so much value? I asked my mother’s friend who regaled me with stories of cooking shows in the 70’s using vanilla beans in the recipes. Those were the days when vanilla beans were $400-600 for a single pod. Imagine a 70’s housewife purchasing ingredients for that dinner realizing the single bean was that month’s mortgage payment! I thanked my stars I could actually afford a bean these days, even if the price still made me do a double-take.

A few months ago, I read Pollan’s The Botany of Desire. I passed it along to my friend D, who subsequently did a great summary of the text. As I dug into the chapter about tulips, I could not but help wonder why the chapter was not actually about orchids (though they were mentioned). With orchids fetching prices upwards of $50 per plant, why were these prized beauties not considered? Uncovering more vanilla history only made me wonder more…
____________________
Vanilla, Birds and the Bees:
The vanilla bean originally hails from Central America. The bean is the only edible byproduct of about 20,000 orchid varieties. In order for this orchid to produce a vanilla pod, it must be fertilized by a Melipona bee which is only found in Central America. This bee cannot survive outside of Central America’s vanilla region. With the wiles of science, we are fortunate enough have developed a hand pollination technique (developed in 1836) still used by commercial growers today. Problems do not stop there.

The vanilla bean orchid only opens once a year for less than 24 hours. Today’s commercial growers must patiently, and often, check these precious orchids, ready to pollinate by hand. The vanilla pod is the fruit that grows off this orchid’s vine. In the wild, these vines will reach the canopy of the rainforest. Commercially, they are trimmed to ease the picking process. After pollination, orchid flowers eventually develop into long green beans (up to 12 inches long). These pods are handpicked before they are ripe. Now, growers may begin fermentation which lasts 2 to 6 months until the beans become dark brown and develop white crystalline coating, called vanillin. This vanillin is the scent and flavor that is valued throughout the world. Still, the beans must be aged for up to 2 years to fully dry the bean out to prevent rotting, packaged airtight, and shipped around the world.

Today, vanilla is produced in 3 main areas of the world. Each area’s vanilla bean produces a specific flavor and coloring that is unique to the region.

1) Madagascar is the largest producer of vanilla beans with about 80% of the industry. Their vanilla is known as Madagascar Bourbon Vanilla. This vanilla is considered to be the highest quality pure vanilla available, described as having a creamy, sweet, smooth, and rich flavor. They are the thinnest beans grown.

2) Mexican vanilla, where the orchid originated, now produces only a small percentage of the world’s crop. The bean is thicker and darker with a smooth, spicy, rich fragrance and flavor. Many vanilla aficionados believe this to be the best vanilla available. Be warned: some manufacturers add coumarin to their vanilla. This is banned by the FDA because it can cause liver and kidney damage. So be wary of fabulous deals on Mexican vanilla and always buy from a reputable source.

3) Tahitian vanilla is more flowery and fruity than the other varieties. It is also the thickest and darkest of the three pods. This vanilla bean is more popular for fragrances.
____________________
Extracts:
Extracts are the most popular way vanilla is used in baking. Extract is produced by steeping vanilla beans in a water-alcohol solution for a number of months (sometimes with added sugar). The FDA requires vanilla labeled “pure” to contain 13.35 ounces of vanilla bean and 35% alcohol per gallon of liquid. This is the pure vanilla most often found at the grocery.

When buying vanilla, make sure to purchase “pure” vanilla. “Imitation” vanilla extract is produced with synthetic vanilla. Items labeled vanilla “flavoring” are a combination of pure and imitation vanilla extracts.
____________________
A tasty way to extend the life of a vanilla bean after its use in your custards, milks, creams, syrups, and soufflés is to remove, rinse and dry the used pod. Place it into granulated white sugar to create vanilla sugar. Use this as regular sugar with a hint of vanilla.

Pre-Cooking Note:
I found this recipe on epicurious. Because I had a vanilla bean, I searched recipes for “vanilla bean” and sorted by “fork rating”. This recipe received 4 forks and 100% “would make this again”. I will make this everyday. Before I provide the recipe, let me mention this: D tasted this and all he could say was “this is really, really, really, really goooood.” He took another bite: “This is sooooo good. This is better than anything I have ever had in any restaurant anywhere.” (Let me also add that D is a chocolate dessert man—not a fruity dessert man.) After finishing the soufflé, we both drank the remaining crème and contemplate adding the leftover to coffee in the morning…

APRICOT SOUFFLÉ W/ VANILLA RUM CRÈME ANGLAISE
Makes 6, 7-oz servings. Prep time= 30 min. Cook time= 30 minutes. Inactive time= 2 hours.
* 6 ounces dried apricots (about 1 ½ cups), quartered
*1 ½ cups water
* ¾ cup sugar plus additional for coating ramekins
* 1 tablespoon fresh lemon juice
* 1 tablespoon dark rum if desired
* ½ teaspoon vanilla
* 5 large egg whites
* 1/4 teaspoon cream of tartar
Crème Anglaise:
* 2 cups half-and-half
* 1 vanilla bean, split lengthwise
* 5 large egg yolks
* 1/4 cup sugar
* 1 tablespoon dark rum, or to taste

APRICOT SOUFFLÉ
1) In a saucepan simmer apricots, water, and ½ cup sugar, covered, 20 minutes. Transfer hot mixture to a food processor and purée until very smooth. Force purée through a fine sieve into a bowl and stir in lemon juice, rum, vanilla, and a pinch of salt. Cool purée completely. Purée may be made 2 days ahead and chilled, covered. Bring to room temperature before proceeding. Transfer purée to a large bowl.

2) Preheat oven to 350°F. Generously butter 7-ounce (3½ by 1¾ inch) ramekins and coat with additional sugar, knocking out excess. In a large bowl, beat whites with pinch of salt until foamy. Beat in cream of tartar and beat whites until they hold soft peaks. Beat in remaining ¼ cup sugar, a little at a time, and beat meringue until it just holds stiff peaks. Whisk about one forth meringue into purée to lighten and fold in remaining meringue gently but thoroughly. Ladle batter into ramekins and bake soufflés on a baking sheet in middle of oven 20 to 25 minutes, or until puffed, golden brown, and just set in center.

3) Remove ramekins from oven. With 2 forks pull open center of each soufflé and pour some crème anglaise into each opening. Serve soufflés immediately.


VANILLA RUM CRÈME ANGALAISE
1) In a small saucepan bring half-and-half just to a boil with vanilla bean and remove pan from heat. Scrape seeds from bean with a knife into half-and-half, reserving pod for another use if desired.

2) In a bowl, whisk together yolks, sugar, and a pinch of salt and whisk in hot half-and-half in a stream. Return custard to pan and cook over moderately low heat, stirring constantly with a wooden spoon, until thickened (170°F. on a candy or digital thermometer), do not let boil. Pour sauce through a fine sieve into a bowl and cool, stirring occasionally. Stir in rum. Chill sauce, covered, until very cold, at least 2 hours and up to 2 days.

NOTE: The most time consuming part of this was sieving the apricot purée. I was having a hard time so actually ended up dumping an extra spoonful of apricot that would not sieve through. In the end, this left some satisfying apricot chunks in the soufflé. To save time, make the apricot purée and crème anglaise 1-2 days ahead of time. I halved this recipe and made two heaping soufflés. The soufflé was actually peaking twice as high when taken out, but once it is pierced with a fork and the crème is poured in, it deflates, absorbing the crème. For the crème anglaise, even after halving this recipe, I added about 4 Tbl of dark run to the crème. This gave the sauce a very punchy rum, full flavor. The extra rum is highly recommended.

Tuesday, January 10, 2006

You Have Reached Heaven


I approached the gate. “Tickets, please,” said the Gatekeeper.
“Sorry sir, tickets, for heaven?”
“Everybody needs a ticket. End a’ da line.”
Searching for camaraderie, I spot a stout man. His skin is dark and rugged, like sea-faring men. A white top hat caps his thick silken hair melting down his back.
“Sir?”
A crimson plume flutters as he turns and with a broad smile he flashes his garnet teeth.
“My child, do not be alarmed,” he chuckles. The chuckle erupts into a laughter that soon becomes soundless-- full of motion: his shoulders convulse and his belly undulates with the weight of his happiness in his own voice. A small pool of drool forms at the corner of his mouth and dribbles down his chin.
“Sir?”
“Yes, my child?”
“I don’t have a ticket.”
“Everyone has a ticket. You must know where to find it.”
“But I don’t. I don’t have a ticket.”
From behind his back he flings a gnarled, ebony cane into the air: “You must know where to FIND IT!”
I search my pockets, patting myself over. I am at a loss. The line is progressing and still I am without a ticket. “Please sir,” I beg, “you must help me!”
The gate begins to radiate. In its ballooning heat it turns from gold to blue to red. Its heat is overtaking me. I am sweating, blind, losing control of my senses and I fall to my knees, desperate. The gate erupts, sprinkling a crimson dust onto the crowd. The stout man giggles. His dark skin quivers. Flinging off his white top hat, hopping from foot to foot, he flashes his scarlet teeth. The erupted gate covers his white top hat and dribbles onto his skin. It is thick, molasses-like. “You have FOUND IT!” He shouts. “My child you have found it!” It is heaven.

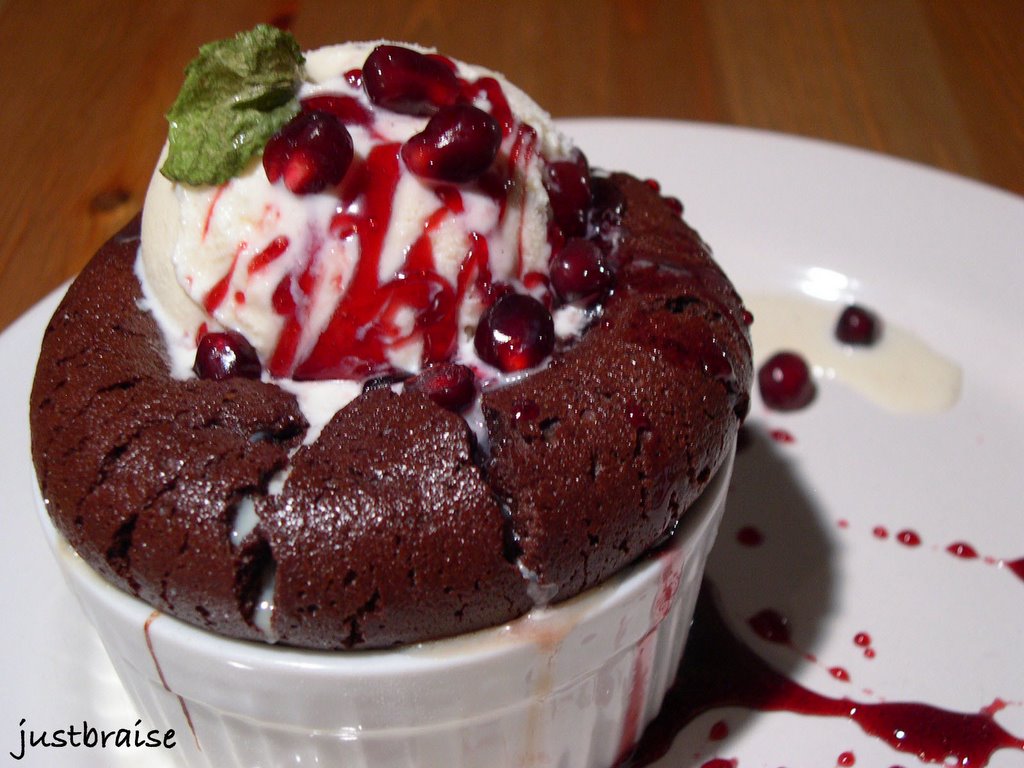
This cake is ecstasy. It is heaven. It is sin, joy, rich, chocolatey, gooey, crisp and pure, sweet gluttony. I received this recipe from my mother. As noted earlier, she takes the odd cooking class and passed this recipe on to me (though I added the crowning glory: a drizzle of pomegranate syrup).

This recipe is often found on menus. Usually it goes by the name of “Molten Lava Chocolate Cake” or something of the sort. That is a misnomer. It is more than that. It is perfect. It is decadence, gluttony, golden. It is heaven.

Weighing effort against results, this is one of the most painless recipes I have ever tried. When this emerged from the oven, D danced gleefully from foot to foot. He giggled incomprehensible words while he added the crown of ice cream, and his hands shook with anticipation when I began to drizzle the pomegranate syrup on top. When consumed, I sat motionless in my chair, unable to speak, smiling weakly at the stout man in my belly. I shamelessly licked my plate. I dare you not to.
HEAVEN
Makes 5- 4oz. ramekins. Prep time= 15 min. Cook time= 12-15min
FOR CAKE
8 Tbl unsalted Butter
8 oz bittersweet or dark Chocolate
4 large eggs
1 large egg yolk
1 tsp vanilla extract
¼ tsp salt
½ cup granulated sugar
2 Tbl all-purpose flour

1) Preheat oven to 400F. In a double boiler, melt the chocolate and butter
2) While melting, put the eggs, egg yolk, and sugar in a bowl. With a mixer fitted with a whisk attachment, whip the eggs until they triple in volume
3) Add salt and vanilla extract to the chocolate mixture. Fold the egg mixture into the chocolate mixture until it is fully incorporated. Sprinkle the flour into the mixture and gently fold until incorporated.
4) Pour into buttered and floured 4 oz ramekins. Bake 12-15 minutes. The tops should set, yet will jiggle slightly when shaken. Unmold and enjoy.
NOTE: Since we were only 2, I halved this recipe. It made two very full cakes. We baked them for 16 minutes, which I believe is too long—too much of the gooey chocolate filling cooked. Also, because this batter was a little large for two, when baked, the cake erupted over the edges of the ramekin (without spilling), making it impossible to remove. No loss, we covered it with ice cream and pomegranate syrup (recipe below).


FOR POMEGRANATE SYRUP
1 pomegranate, deseeded. Retain juice
½ cup sugar

1) Before starting cake, deseed pomegranate. On low heat on the stovetop, place all seeds, juice and sugar in a small saucepan.
2) Allow to simmer while you prepare the cake, stirring every so often so as not to burn. Let thicken. Mixture will bubble. This is okay, keep stirring.
3) With about 5 minutes left in the cake baking, turn heat off syrup. Once cakes are out and ice cream is on, hold a strainer over cake and pour mixture through, catching seeds as syrup drizzles onto the cake. At this point the syrup will be sugar-like crystals and if you're crafty enough you can build some sugar structures as it hardens on the ice cream surface. Succulence. Enjoy.

Saturday, December 31, 2005

A Sweet Cookie New Year


The big question this night is always: What will I do?! Are you lucky enough to have your mind at ease, already obtaining an invite to a party? Are you paying out of your teeth for a fancy hotel room for you and the honey? Are you heading to the swank clubs to pay $500 bottle service? Will you be caught on the N train at Union Square as the clock strikes midnight with your least favorite subway musician singing Marley tunes? I hope everyone finds the place where they want to be. This year, it seems the party never stops at my apartment: We will be hosting a “Sweet” New Year Party.

My high school friends were always together for New Year’s Eve. The two that stand out are: 1) “New Year’s 199-Fine” where we took over O’s house with 80 of our “closest” friends. The night ended with L crying, about how much she loved us. And 2) New Year’s 2000, spent in Jamaica, where the entire week leading up to The Night a local man ran around our hotel enlightening us in his thick Jamaican accent: “Everybody! The Millennium...! Is coming…!” Subsequently, at the bar on the Millennium, I took the waterslide from the second floor, into the ocean, where I was promptly stung by an extremely large jellyfish (which formed into an extensive rash up my arm). In college, I cannot remember very many memorable New Year’s. Many involved bars surrounded by a few friends and many people I did not know very well. Others were at apartments and The Night now blends into any other party (none had clever memorable names like the ones we came up with in high school or this year's). This year, I have also made sure I will not be caught on that N train again. I am keeping as far away as possible from trains as midnight approaches.

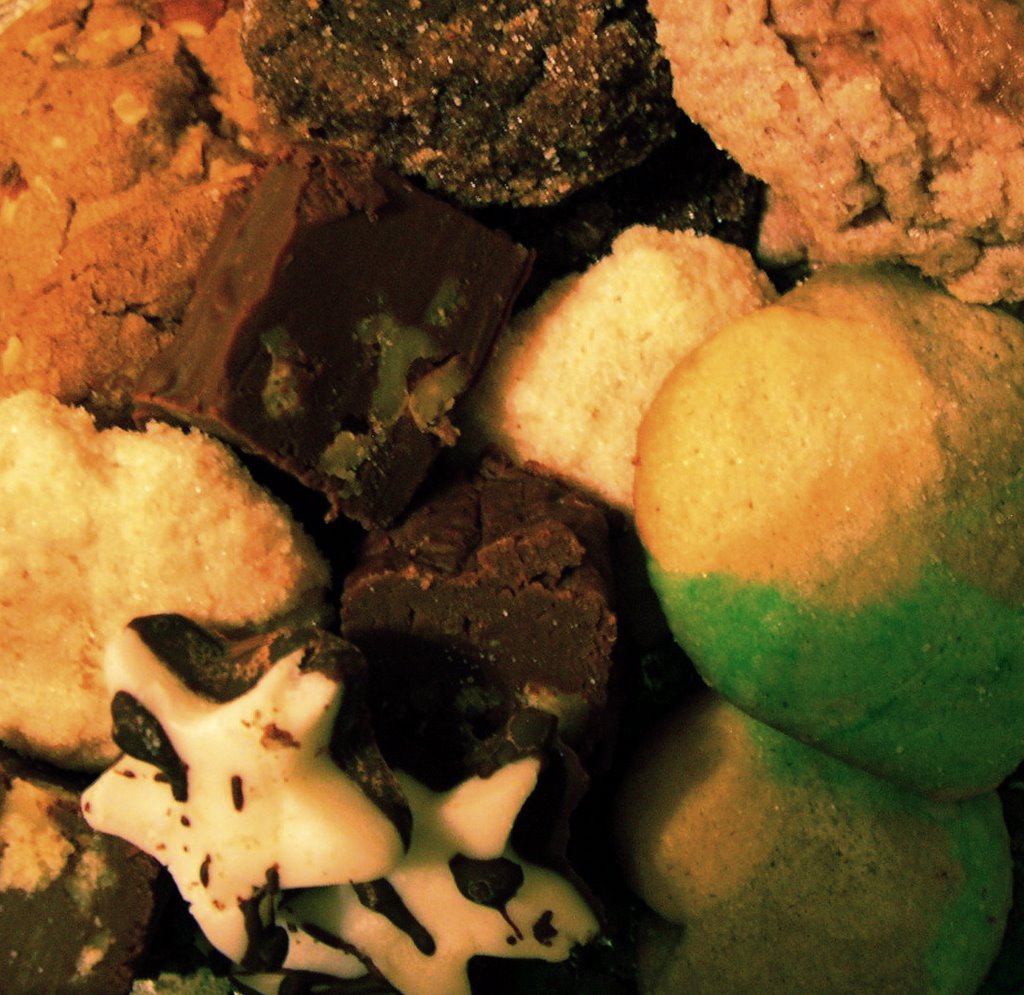
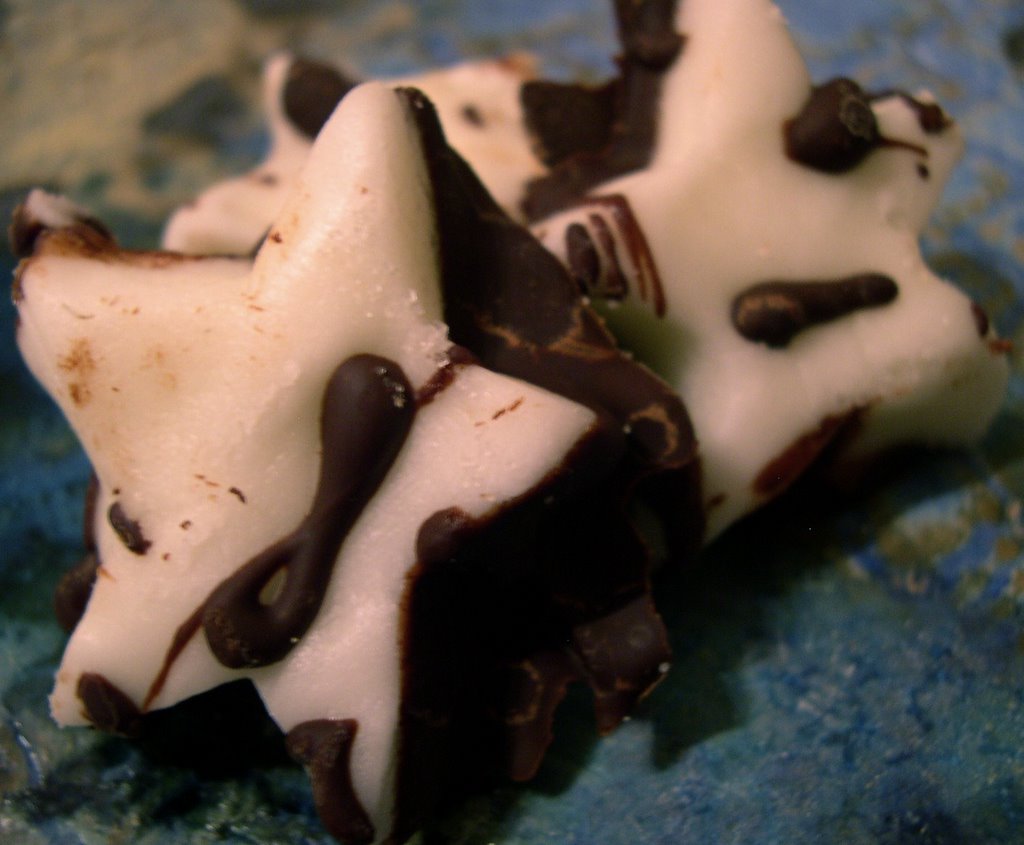
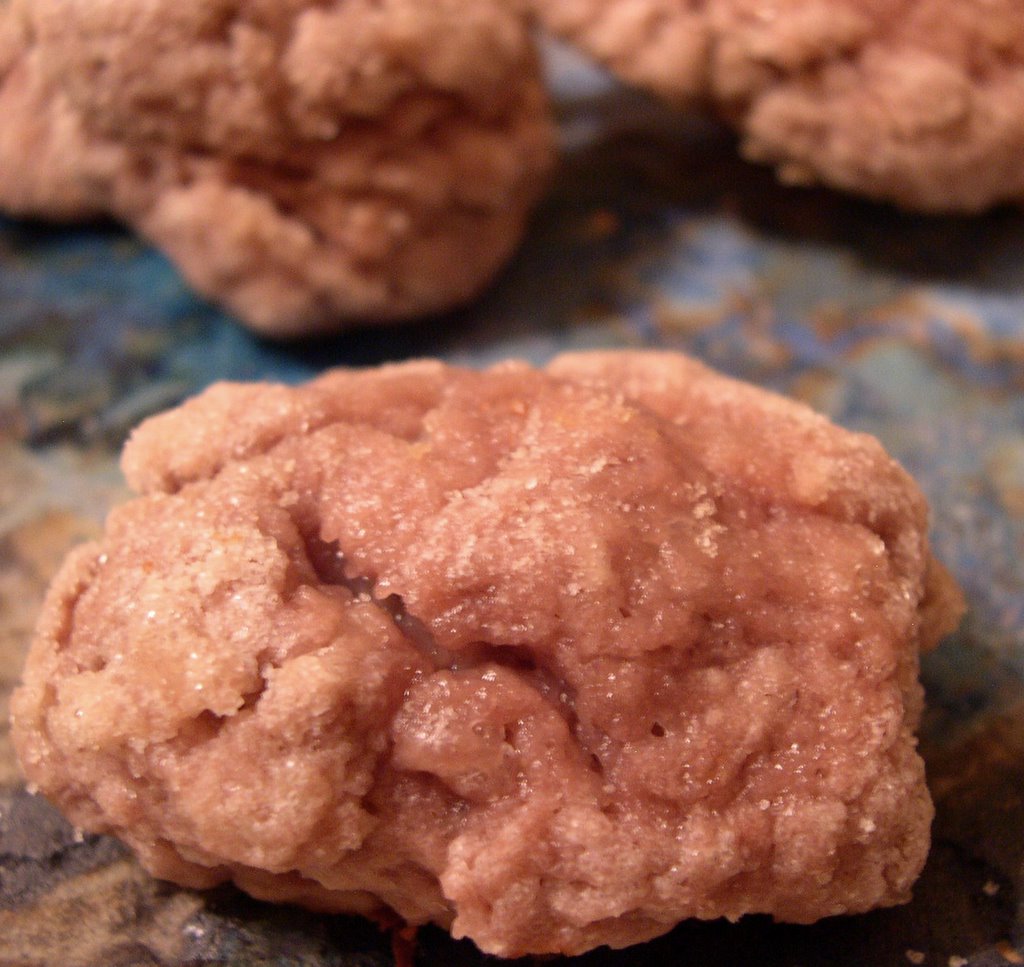
This year is “2006: A Sweet New Year”. To differentiate this night from all other nights we will eat cookies and other sweets. To usher in the sweetest of New Year’s, and to ensure our good health and humor in 2006, we will dine on nothing but gooey, delicious, mint, orange or champagne spiked treats. I spent all of yesterday baking up a storm. Some of these recipes (okay, the Champagne Cookies) I thought, "hmm, Champagne Cookies would be the perfect New Year cookie." But it was impossible to find a recipe, until finally luck struck. For others, I was flipping through some of my cookbooks until I found recipes that sounded so good it was hard to resist.

Last night, D and I were guests to a delicious New Orleans treat of rice and beans simmered with a ham hock. I will say this: our bellies were so full of the delicious meal and no one, especially our gracious hosts, could eat another bite. A few New Year cookie samples were brought out and voilà, what was once full was now empty and ready to receive. The cookies were happily plowed through. So I tease you with that as the night and recipes approach: A happy, healthy, and sweetest New Year yet.

CHAMPAGNE COOKIES
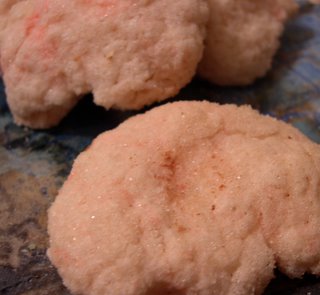
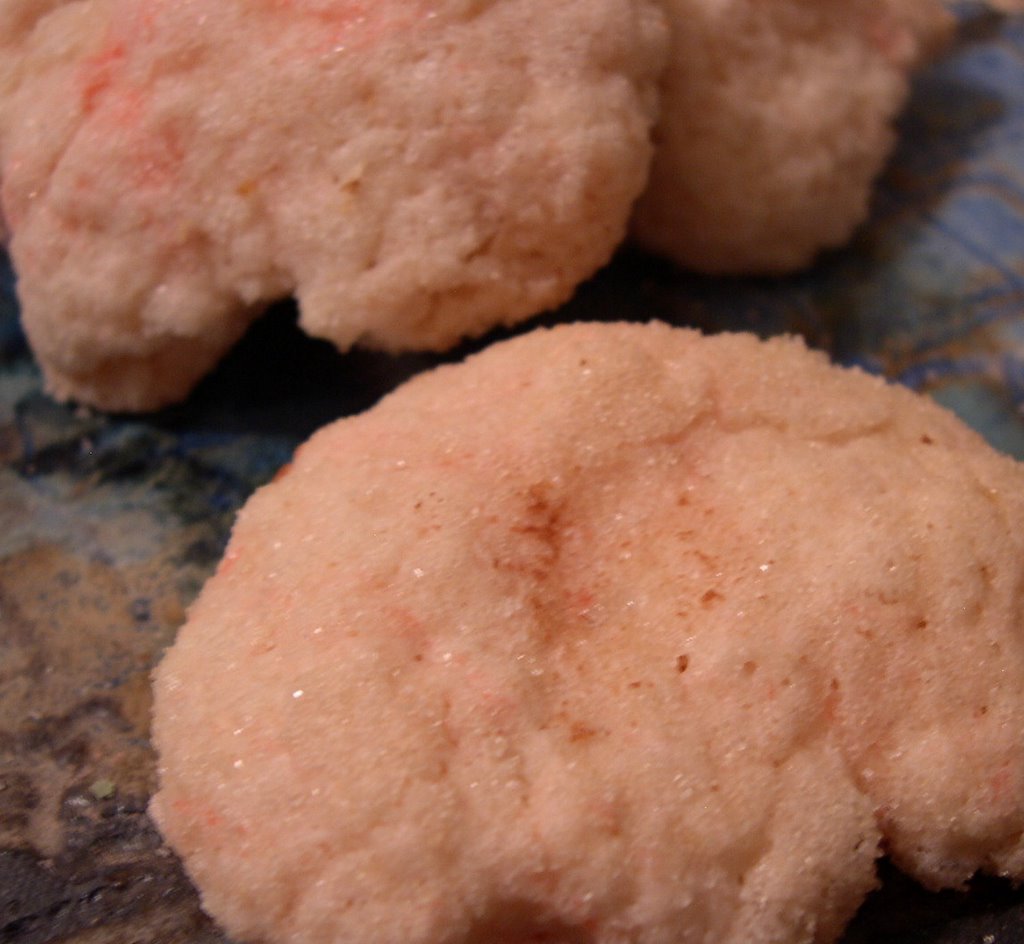
As stated above, this recipe hit me in a wave of inspiration. What is better than Champagne to usher in the New Year? And what better than Champagne Cookies as the sweetest of New Year treats? Low and behold my idea was so unique I found all of 2 recipes after an exhaustive search that lasted hours. One recipe is sealed away in a top secret $40 a year recipe vault I refused to pay for. The other I found on a blog with the posting dating about 3 years ago. Post-research and screened comments, I believe the top secret recipe is actually just butter cookies with a Pink Champagne frosting. The recipe I used (from the blog) actually has Pink Champagne in the cookies for a subtle Champagne flavor. I made these as drop cookies rolled in sugar for a sparkling effect (rather than the rolled out cookie cutter method called for in the recipe).

The result: The cookies were very festive in spirit. The Champagne flavor was not as intense as I would have liked-- Possibly the $3 Champagne? Next time, I believe I will follow the same recipe, since it is basically a sugar cookie, but add a Champagne frosting.
Makes about 24 cookies. Prep + Cook time= 20 min
1 cup flour
½ cup Pink Champagne
½ cup sugar
¼ cup shortening
1 tsp baking powder

1) Preheat oven to 375F. In a bowl, cream sugar, champagne, and shortening (will appear lumpy). Add baking powder. Blend again. Gradually add the flour.
2) In the bowl, gather dough into a ball. If too sticky, add more flour.
3) In a small bowl, pour about 1/2 cup sugar. Pull apart spoonfuls of dough and roll into a ball. Roll the ball in sugar and place on cookie sheet, about 2-inches apart. When cookie sheet is full, use fingers or bottom of glass to press cookies down.
4) Bake 12-15 minutes until cookies are lightly crisp.
NOTE: I added 1 drop of red food coloring because I did not receive the pink color I desired from the champagne.

OPTIONAL FROSTING
4 Tbl Pink Champagne
1-½ cup powdered sugar

1) Once cookies emerge from the oven, spoon a dollop of frosting onto the center. This will add a true champagne flavor.


CHOCOLATE DRIZZELED ORANGE CREAMS
I found this recipe in my Spago Chocolate cookbook. This is a fabulously seductive cookbook to have, but the occasion to make some of the recipes listed is limited. I do not readily have the necessary hours some recipes require. What happens? It becomes a cookbook that more often sits on the shelf than ruined with buttery and crinkled pages. This recipe sounded quick and delicious so I gave it a try. It also requires no baking which eased the kitchen heat.
The result: A fabulous orange treat. I would make these again but in the future use a little orange rind mixed into the batter for a bit more of a citrus burst.
Makes about 40 candies. Prep time= 30 min. Inactive time= 30 min.
4 Tbl unsalted butter at room temperature, cut into small pieces.
1/3 cup light corn syrup
1-½ tsp orange oil or orange extract (I think 2 tsp would have been better)
4 cups confectioners' sugar (powdered sugar)
4 ounces bittersweet or milk chocolate

1) In a mixing bowl, with a mixer on medium, combine butter, corn syrup and orange oil until smooth and creamy.
2) Reduce mixer speed to low and gradually add the sugar, 2 cups at a time. Remove the mixture from the bowl and place on a work surface that has been lightly sprinkled with sifted confectioners' sugar. "Knead" the mixture until it is a smooth ball. If it is sticky, add a little more confectioners' sugar, a little at a time. Don't add too much at one time; you want the mixture to stay creamy, and not dry out. Roll the "dough" into a round, flat "ball" about 1/2-inch thick. Cover with a clean towel and allow to rest for 30 minutes. Do not refrigerate.
3) Place a sheet of wax paper on a baking tray. Using a 1-inch cookie cutter [I used a star-shapped cookie cutter], cut out as many pieces as possible and arrange on the wax paper. Combine scraps, create another 1/2-inch thick slab and continue to slice out shapes, continue until all the "dough" has been used.
4) In a double boiler [I do not have a double boiler and put an old pie tin over a small sauce pan filled with water. The pie tins handles rested nicely on the saucepan creating a perfect double boiler], melt the chocolate. Once chocolate is ready, placing each candy piece on a fork or or truffle dipper, dip the bottom half of each candy cream into the chocolate. Arrange on wax paper to set. Using a small amount of chocolate on the fork, drizzle remaining chocolate over the candies with a slight "splatter" motion. Do not remove candies until totally set (at least 2 hours depending on heat in the area).


WINE COOKIES
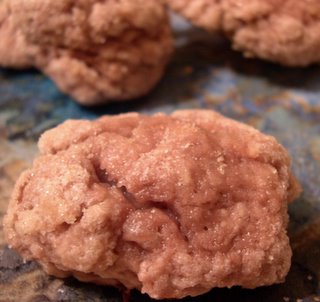
Perfect for the oenophile in us all. These cookies are too easy to make. The subtle wine odor and taste is a perfect combination with a glass of port. These cookies are a traditional Italian treat. They are not too sweet which made them a good pairing with the many sweet cookies I offered on The Night. My one problem when baking them is the recipe called for crisp cookies baked for 25 min. After 35 min my cookies were still not totally golden or crisp (I was thinking of a more biscotti-like cookie).
The Result: these were good, but I think would have been even better in the pre-conceived crunchy version. Was my wine not "dry" enough? Did I put too much in? I cannot say. These were still tasty and offered a light afterthought of vino.
Makes about 30 cookies
3 cups flour
1 tsp baking powder
1/3 cup + 3 Tbl sugar
1 cup dry red wine
½ cup vegetable oil

1) Preheat oven to 350F. Using a fork, blend flour, baking powder and 2 Tbl sugar until mixed. Add wine and oil and stir until blended. Add more flour if too moist.
2) In a bowl, place the 1/3 cup sugar. Roll spoonfulls of dough into a log shape and roll in sugar. Place on a baking sheet 2-inches apart. Gently push log shaped dough down to flaten a little.
3) Bake 25 min until golden and crispy. [As I said, mine were in the oven for 35 minutes and still were not totally crispy, but good.]


CAPPACCINO DELIGHTS

A note to cookbook publishers: Always include photos of the food that accompanies the recipe. I think this is so important. I will often dismiss a recipe because there is no photo evidence that the food will actually look good. And good-looking food is important. Grant it, many of my invented creations I would send back in a restaurant if I looked at it, but actually taste amazing.
I found this recipe on the Better Homes and Gardens website. The picture looked so good and I live with a coffee addict that I had to try them. Even better, they are quick and easy to make.
The Result: Delicious. There are just enough coffee beans in these cookies to give them a lightly roasted scent. Enough kick to keep one awake through midnight, and enough sugar to pack a punch in the moment.
Makes about 40 cookies. Prep time= 15 min. Bake time= 8 min.
1/3 cup unsalted butter, softened and cut into slices
1 cup brown sugar
2/3 cup unsweetened cocoa
1 Tbl coffee granules [I doubled this and used about 2-3 Tbl for a more powerful cookie]
1 tsp baking soda
1 tsp ground cinnamon
2 egg whites
1/3 cup vanilla yogurt
1-½ cup all purpose flour
¼ cup granulated sugar

1) Heat oven to 350F. In a mixing bowl, using an electric mixer, beat butter for 30 seconds until soft. Add brown sugar, cocoa, coffee, baking soda, and cinnamon. Mix until blended and creamy. Beat in egg whites and yogurt until well combined. Beat in as much flour as you can using the mixer, then use a spatula to mix the remainder in.
2) Place granulated sugar in a small bowl and drop heaping teaspoons into the bowl. Roll the dough in the sugar. Place on baking sheet 2-inches apart. Bake for 8-10 minutes until edges are firm.


FUDGE
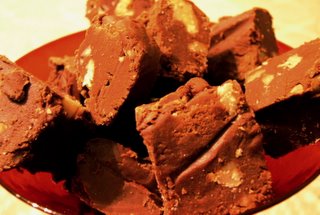
Fudge is surprisingly easy to make, especially with a digital (or candy) thermometer. It is quick and so delicious and the scent of melting marshmallow allows me to reminisce about the summer and s'mores by the campfire. It also brings me back to my Girl Scout days and a trip we took to Mackinac Island, later known as Fudge Fest. Here, I followed the recipe on the back of a Marshmallow Fluff jar. For a first time fudge maker like myself, it is a great starter recipe. And just think of all the future variations: coffee liquer, cherries, mint, rocky road, vanillas swirl...
Makes 2-1/2 pounds or about 30 1-inch square pieces
2-½ cups sugar
¾ tsp salt
½ stick butter or margarine
1- 5 oz. can evaporated milk (3/4 c.)
1- 7 1/2-oz. jar Marshmallow Fluff
¾ tsp vanilla
1- 12-oz. package semisweet-chocolate pieces
½ cup chopped walnuts

1) Grease a 9-inch square baking pan; set aside [or line it with tin foil]. In large saucepan combine first 5 ingredients. Stir over low heat until blended. Heat to a full-rolling boil being careful not to mistake escaping air bubbles for boiling. Boil slowly, stirring constantly, 5 minutes. [Mixture should reach a softball stage. The softball stage is when temperatures reach 232-234 degrees F. Do not overheat or fudge will be over hard. Do not under-heat or fudge will turn into goop.]
2) Remove from heat, stir in vanilla and chocolate until chocolate is melted. Add nuts. Turn into greased [or tin foil lined] pan and cool [about 4 hours].


MINT TWISTS
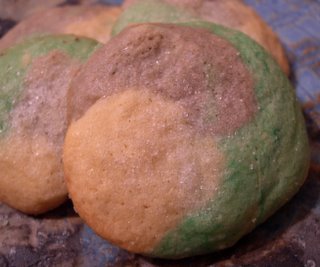
Another recipe found on Better Homes and Gardens. The picture of these again, looked so good and with mint being my favorite flavor, how could I pass up a mint cookie? The original recipe calls for peppermint extract. I could only find mint extract, which contains more spearmint flavors than peppermint. The cookies were still good and I think I would use more extract to heighten the taste next round of baking these.
The Result: The mention of these at the above mentioned dinner party sent my host on an eating frenzy. The translation: these cookies are so good you will not be able to stop eating them. The best part is you can mix and match colors to create your favorite color combinations (I made purple-green-plain swirls). I also made half the below recipe. This makes the dough a little more manageable.
Makes about 72 large (2-1/2-inch) cookies or 144 small (1-1/4-inch) cookies. Prep time= 30 minutes; Chill: 1-1/2 hours; Bake: 8 minutes
1 cup butter
1 cup sugar
½ tsp baking powder
1 egg
1 tsp vanilla
½ tsp peppermint extract
2 cups all-purpose flour
10 drops red food coloring [or other chosen color]
10 drops green food coloring [or other chosen color]
Sugar

1) In a large mixing bowl beat butter with an electric mixer on medium speed for 30 seconds. Add 1 cup sugar and baking powder. Beat until fluffy. Beat in egg, vanilla, and peppermint. Beat in as much of the flour as you can with the mixer. Stir in remaining flour.
2) Divide dough into 3 equal portions. Stir red {or chosen} food coloring into 1 portion, stir green [or chosen] food coloring into a second portion, and leave third portion plain. Cover each portion with foil or plastic wrap and chill in the refrigerator about 1 hour or until easy to handle.
3) Divide each color of dough into 4 equal portions. On a lightly floured surface, roll each portion into a 1/2-inch-diameter rope. Place a red, a green, and a plain rope side by side. Twist together. Repeat with remaining ropes. Chill twisted ropes for 20 minutes. Cut ropes into 1/2-inch-thick slices for larger cookies or 1/4-inch-thick slices for smaller ones. Carefully roll into balls, blending colors as little as possible. Place balls about 2 inch apart on ungreased cookie sheets. Using a glass dipped in sugar, flatten each ball to 1/4-inch thickness.
4) Bake cookies in a 375 degree F oven until edges are set (allow 8 to 10 minutes for larger cookies or 6 to 8 minutes for smaller ones). Transfer cookies to wire racks; cool.

PEANUT BUTTER-CHOCOLATE CHUNK COOKIES
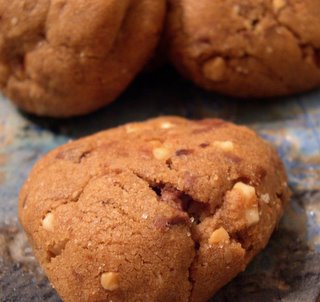
This is another Spago Chocolate recipe I could not wait to try out. Peanut butter cookies are so buttery good I thought they would be a perfect (and more ordinary) cookie addition to the New Year banquet. I also made only half this recipe and it came to a perfect amount.
The Result: Pure melt in your mouth butter. These cookies are a true peanut butter triumph. Unlike most peanut butter cookies, these appear light and fluffy and look lovely crackled open (as seen in picture). They are like little peanut butter bombs just waiting to go off once in the mouth. And they are-- Pure decadence.
Makes about 5 dozen cookies. Prep time= 20 min. Inactive= 2-3 hours. Bake time= 14 minutes.
2-1/4 cup all purpose flour
1 tsp baking soda
1 tsp salt
8 ounces (2 sticks) unsalted butter, at room temperature, cut into small piece
2 cups dark brown sugar, firmly packed
2/3 cup creamy peanut butter [In my halved recipe I used about 1/3 cup creamy and 1/3 cup chunky peanut butter]
2 eggs
2 tsp vanilla extract
1 pound milk chocolate, coarsely chopped (pieces about the size of chocolate chips)
1-½ cups unsalted peanuts, toasted, cooled and coarsely chopped.

1) Sift together the flour, baking soda, and salt. Set aside.
2) In a large bowl with an electric mixer, on medium speed, beat the butter until fluffy. Add the sugar. Raise the speed to high, and beat until fluffy, scraping down the sides of the bowl. Add the peanut butter and beat until incorporated. Lower the speed and add the eggs, one at a time, and the vanilla, again scraping down the sides of the bowl as necessary. Turn the speed to low, gradually pour in the flour mixture, and beat until just combined. Add the chocolate and peanuts, and again, beat until just combined.
3) Scrape the dough out of the bowl, wrap in plastic, and refrigerate until firm, 2-3 hours. [I made the dough the night before I was to bake it.]
4) Position the rack in the center of the oven and preheat to 350F. Line one or two baking trays with parchment [wax] paper.
5) Remove the dough from the refrigerator and divide into mounds, about 1 ounce each [or about 1 Tbl]. Roll into balls and place 2-inches apart on the cookie sheets. Bake until slightly firm to the touch, 14-15 min, reversing trays back to front after 7 minutes to ensure even baking. Place the trays on racks to cool and after a few minutes, remove the cookies with a wide metal spatula and place on racks to cool.



View Stats
Rankingblogs.com: Defining your blogs worth..