Showing posts with label cookies n' sweets. Show all posts

Sunday, March 18, 2007

Almond Tuiles Cookies


*Just Braise has moved. Please visit me at www.justbraise.com!*


It's true, I've been posting a lot of sweets lately. It's not because I'm not cooking "real" food, but because the past few weeks have seen me working more than usual. Returning around 8 PM (or later) and cooking while hungry and exhausted just does not put one in the mood to set up lighting for a shot. It also makes for more quick meals-- we're making great progress depleting the frozen soup stocks.

Cookies are a relaxing thing to cook for me. They are comforting and delicious and can usually be made fairly quickly. The bonus is that you know they will be delicious.

To make myself feel better I called these, "healthy cookies." They are full of almonds and egg whites and have very little flour-- the dessert version of ordering an egg white omelette I'd say. They are delicate yet filling and go nicely with an afternoon tea or coffee. Another plus, they are another winner from The Cook's Book.

Tuiles means tile in French and refers to the old curved roof tiles that are layered on homes.

Almond Tuiles Cookies
Serving Size= 25 large cookies. Active time= about 8 minutes. Inactive time= about 12 hours.
* 1-1/3 cups sliced almonds
* 1/2 cup + 2 tablespoons sugar
* 2 drops of vanilla extract or 2 pinches vanilla powder
* drop of bitter almond extract
* 2 egg whites
* 2 tablespoons butter
* 2-1/2 tablespoons cake or pastry flour

1) Using a rubber spatula, mix the almonds, sugar, vanilla extract or powder, bitter almond extract, and egg whites together in a bowl.
2) Melt the butter gently and, while it is still warm, pour it into the bowl. Mix thoroughly. Cover the bowl with plastic wrap and refrigerate overnight.
3) The next day, sift the flour into the bowl and mix in thoroughly. Place teaspoonfulls of the dough on a nonstick baking sheet, spaced well apart.
4) Preheat the oven to 300F. Flatten each cookie with the back of a large spoon dipped in cold water, then bake for 15-18 minutes. The cookies should be an even golden color with no white in the center.
5) Remove the cookies from the baking sheet using a metal spatula and slide into a sheet of parchment paper. Let cool.
Note on Shaped Tuiles: For the traditional roof-tile shape, lift each cookie off the baking sheet with a metal spatula and, while still hot, drape it over a [clean] wine bottle or rolling pin. Let cool and set.

Saturday, March 03, 2007

Revelations Part I


*Just Braise has moved. Please visit me at www.justbraise.com!*


I apologize, but prompt drinking was essential...

Almond milk (homemade) + chocolate ice cream (Breyer's) = an amazing milkshake

Okay, so it's a little icier than creamy, but flavor makes up for it. If there is an almond infused chocolate bar out there please tell me. When Hershey's begins to make almond-chocolate syrup for my chocolate milk don't even attempt to hold me back.

I made one small milkshake for myself and all D heard was, "Oh gosh."
"What?"
"This is so good."
"Gimme. [Taste] Oh... this is so good. Make me one?"

As I've been going through The Cook's Book, I've been making random foods if I have ingredients on hand. In the Fruits & Nuts section I found a simple recipe for almond milk:

1 part blanched and skinned almonds (you can buy them like this, they are the all white, slightly unappetizing looking ones.
4 parts boiling water

1) Grind almonds in a food processor until they resemble course breadcrumbs. Put in bowl
2) Add boiling water, cover and let steep for at least 30 minutes.
3) Pour the mixture through a fine mesh strainer, press the ground nuts to release all the milk

It is good like this but I added a touch of honey and a dash of pure vanilla extract to spike the senses.

I have bought almond milk before and love it, but often find the storebought kinds too sugary. This homemade recipe is so simple and far superior. D and I used this milk in coffee this morning, deliciously nutty. It would be great in oatmeal. But tonight it hit peak flavor mixed with chocolate ice cream. Pure loving decadence.

Sunday, February 25, 2007

Cinnamon Date Coffee Bread


*Just Braise has moved. Please visit me at www.justbraise.com!*


Pictured above is a little piece of a hopefully sweet weekend (now if I win my office Oscar pool jackpot…).

Like most people, I presume, weekends are the time for me when some good cooking/baking can get under the belt. I have the leisure to wander the fruit/ veggie stands, fight for a spot at the butcher and joke with the fish monger about freshness. If it’s really cold outside a soup will be made and stored away for the week to come. If it’s mild enough to take my time shopping (no car), I have the opportunity to really let my mind wander, without worrying about exposed fingers falling off from the cold.

It is some of the worst days though, when the last thing I desire is to step outside. Not even my thick flannel pants I wear camping in the fall or my warmest sweater and thick mittens can convince me into the icy voyage. It is these days where the cookbook is a dear friend and a minimalist “whatever’s in the cabinet” recipe comes to the rescue.

It was on one of these bitter days that I picked up one of my new cookbooks and gave it a go.

I recently received a copy of The Cook’s Book from the publisher for review. An initial flip through offers some amazing color photos, many step-by-step, of recipes. It’s a great overall technique book that is easy to follow for a more experienced chef (I would not recommend it to a beginner). Much of what is inside is basics, how to’s and general tips and tricks of the trade—like how many minutes is a medium rare steak again? How do you fillet that fish? Yet many of the recipes can get very challenging, be it time consuming, a difficult step here or there, or a hard-to-find ingredient. (A more involved review in the weeks to come.)

That being said, my initial plunge into this book’s recipes have been extremely rewarding with many more to come. The first challenge was honey-lime truffles. These truffles were an absolute surprise-- who knew I could make such delicious truffles? They were silken and luxurious, sweet and sour and a true Valentine treat.

The above pictured specimen was the next step with this book. I was looking more for a bread, but as I said, it was cold outside. I had to stick with what I had in the cabinets. The dates were a recent birthday gift, I was good to go.

D is a huge fan of cinnamon rolls. Mind you, not the ones that drip with a sugary white glaze, but straight up cinnamon rolls, raisins optional. They are the ones where the deep twisted chasms are filled with gooey spice and the bread is dense, yet sponge-like in a perfect marriage. In fact, D considers me quite the curmudgeon because I refuse to let him have one every day. If I delight him with a purchase there is usually a portion of a follow up conversation that goes something like: “you never let me have the things that I love,” while cinnamon-sugar oozes between his fingers and sticks to his beard he’ll claim “I’m just saving some for later,” instead of wiping himself clean. I am a cruel person.

When I saw this recipe for cinnamon date bread I knew it was the perfect merge of D’s love (cinnamon rolls), ingredients (all on hand in the cabinet) and my favorite (the use of liquor in cooking). The perfect breakfast. While my final version is not nearly as clean looking as the version pictured in The Cook’s Book, I can only assume that it is far better in sweet gooey purity. Below is the recipe as it appears in the book.

CINNAMON & DATE COFFEE CAKE
Serving Size= 1 bread; 4 people. Active time= about 30 minutes. Cook time= 30 minutes.
Makes 1 Bread
* 2-½ tablespoon unsalted butter, softened, plus extra for the mold
* 1-2/3 cups all purpose flour
* 2 tablespoons granulated sugar
* 2 teaspoons baking powder
* 1 extra large egg
* 5 tablespoons milk

For layering the dough
* 6 tablespoons brown sugar
* ½ heaped cup roughly chopped dates
* 3-½ tablespoons unsalted butter, softened
* 1 teaspoon ground cinnamon
* 1-½ tablespoons dark rum [brandy works well too]

1) Preheat oven to 400F. Thickly butter an 8-½ in ring mold that is 2 in deep, or a cake pan of the same diameter. Line the bottom of the mold or pan with parchment paper.
2) Sift the flour, sugar, and baking powder into a bowl. Rub in the butter using your fingertips. Whisk the eggs with the milk in a cup until well combined, then stir this into the dry ingredients in the bowl. Work the mixture together well with your hands until you have an evenly mixed, soft dough. Scrape the dough out onto a floured work surface and lightly knead it for 10-15 seconds.
3) Mix together the brown sugar, dates butter and cinnamon and rum in a small bowl; keep to one side. Roll out the dough to a rectangle that is roughly ¼ in thick, 14 in long and 8 in wide.
4) Spread the date mixture evenly over the surface of the dough, then roll it up tightly like a jelly roll. With a sharp knife, cut the rolled dough in half lengthwise.
5) Twist the two pieces together, keeping the cut surfaces facing up, then curl into the mold. Bake in the middle of the oven for about 30 minutes. Let the coffee cake cool in the mold for 5 minutes, then unmold onto a wire rack. This is best served still warm.

Tuesday, February 13, 2007

Red Velvet for Your Sweetheart... or Sweet Tooth


*Just Braise has moved. Please visit me at www.justbraise.com!*

It's getting to the last hours, do you know how you'll be spending your Valentine's Day?

If I had a fireplace mine would be spent in front of a roaring fire. Rather, that's how I would spend every night if I had a fireplace. If you're without fire, there are plenty of other options for this day of Hallmark-forced romance. I discussed many in this piece printed in the Queens Chronicle.

While your best bets are to keep the eats of the day light and healthy, who doesn’t love a little sugar high?

I had my first bite of the sweet seductress known as Red Velvet a few years ago. A yellow cake with a hint of cocoa and a strikingly white exterior, the cake won my heart from the first beat. I could soon be found getting my individual servings of Red Velvet cupcakes around town (my favorite are from Billy’s Bakery since they stick with a cream cheese based frosting).

A good recap of the red in Red Velvet can be found here, though I would like to amend the fact that baking soda and cocoa powder do still react to form red, it is a mere blush and these days we help our cakes along with a hefty dose of red food coloring.

I searched a number of online recipes for Red Velvet cakes and finally found a tried and tested one in Saveur's March 2006 issue. My boss, who swears by her local bakery, The Cake Man, in Brooklyn, will pick up a slice of his Red Velvet almost daily on her way home. Low and behold the recipe in Saveur is based on The Cake Man’s and after some slight tweaking of ingredients on my part, I have come up with a consistency of redness I like and a deliciously seductive cream cheese frosting.

This cupcake is sure to win the hearts of many. It is fast and easy to make and creates a perfect last minute cupid’s arrow.

RED VELVET CUPCAKES
Prep time= about 20 minutes. Makes about 18 cupcakes.
for the cake:
* 2-½ cups cake flour
* 1-½ cups sugar
* 1 teaspoon baking soda
* 1-½ tablespoons cocoa powder
* 1 teaspoon salt
* 2 eggs
* 1-½ cups vegetable oil
* 1 cup buttermilk
* 2 tablespoons (1 ounce) red food coloring
* 1 teaspoon vanilla extract
* 1 teaspoon white distilled vinegar

1) (Set cream cheese and butter for the frosting aside to soften.) Preheat oven to 350F. Line 18 cupcakes tins with cupcake liners.
2) In a large bowl, sift together flour, sugar, baking soda, cocoa and salt.
3) With an electric mixer, beat eggs, oil, buttermilk, food coloring, vanilla and vinegar together until evenly combined.
4) With the mixer on medium, slowly add dry ingredients to the wet ingredients until smooth, 1-2 minutes. Fill cupcake tins about ¾ full and bake on middle rack 20-25 minutes, until toothpick comes out clean. Remove from tins and cool onracks about 10 minutes. While cooling, make the frosting, below.


for the frosting:
* 8 ounces cream cheese, softened
* 1 stick butter, softened
* 1 teaspoon vanilla extract
* 2 cups confectioner’s sugar

* 1 cup chopped pecans

1) Beat cream cheese, butter and vanilla in a bowl with an electric mixer until well combined. Add sugar, beat until frosting is fluffy, about 5 minutes.
2) Cover each cupcake with about 1 heaping spoonful of frosting, spread with a knife. Sprinkle pecans over frosting and press in slightly so they stick.

Thursday, January 25, 2007

Truffles of Love


As January comes to an end our thoughts are set for Valentine's Day. While I am not totally rah rah for the Hallmark Holidays, I must admit I am a fan of the odd bouquet of flowers or box of chocolates (what gal isn’t?). D and I won't be doing anything "special" this Valentine's Day (at least not that I know of), but I am sure others will. For that, I present two delectable truffles, the chocolate kind, not the mushroom (though some think the mushroom intoxicates the senses). To really woo a person, a homemade treat is an amazing declaration of love.

Aphrodisiacs have been around since the ancient Greeks and Romans (and possibly before). The name is attributed to Aphrodite, the Greek goddess of love. For centuries, people have been known to hit the streets hawking potions that will make them fertile, randy, attractive or powerful over the opposite sex. Today we have the internet and hundreds of spammed Viagra adds to pick up the slack.

Chocolate is probably one of the oldest known aphrodisiacs. Much of this is due to the fact that it was once so hard to come by, the price was set for the well-to-do only. Times change, cacao is easier to come by, and thankfully most people can enjoy chocolate's deep, rich flavor-- though you can still find outrageously priced confections to prove your love.

An even older aphrodisiac is seafood. Possibly due to the fact that some believe Aphrodite was birthed from the seas, most anything that has come from salted waters has been thought to have powerful sexual powers at some point; from anchovies to clams to oysters.

Ginger is known to open the taste buds and therefore offers higher sense pleasures.

Chili pepper and garlic, both bring color to the face that match the color of “bed” time.

Honey is thought to be an aphrodisiac, apparently the birds and the bees really knew what was going on.

Also, anything that resembles either male or female sexual organs can hold aphrodisiac powers. You name it: figs, carrots, strawberries, cigars, starfruit, Georgia O'Keeffe paintings, etc.

Finally, wines and champagnes are known to loosen people up and allow them to lose inhibitions. Careful though, liquor is a depressant and too much can do just the opposite of what you may be looking for in a Valentine love-filled night.

Whatever your plans are for Valentine’s Day, gift the one you love or yearn for something sweet. These two truffle recipes are surprisingly simple. The first was taken from The Cook’s Book edited by Jill Norman. The book is a fantastic collection of tips and recipes from some of the top chefs around the world. The recipe is from pâtissiers Pierre Hermé (as it appears in The Cook’s Book). They are a unique combination of flavors and absolutely melt in the mouth. The other recipe is adapted from epicurious.com. They produce beautiful looking truffles whether you have a pastry bag or not. Both recipes are easy enough for beginners, though Hermé’s requires some drying time.

DARK CHOCOLATE TRUFFLES W/ LIME & HONEY
Makes About 50.
* 1 lb best quality bitter chocolate (60-70% cocoa solids)
* 7 tablespoons butter
* ¾ cup crème frâiche
* 2-3 limes
* 2-½ tablespoons acacia honey

for the coating
* finely grated zest of ½ lime
* ½ cup + 2 tablespoons sugar
* 1-1/3 cups unsweetened cocoa powder

1) Prepare the coating the day before needed. Mix the lime zest with the sugar and rub between palms of your hands. Spread in a thin layer on a nonstick baking sheet and let dry overnight at room temperature. Before mixing with the cocoa powder in step 8, check to be sure the sugar is completely dry.
2) The following day, chop the chocolate into small pieces with a serrated-edged knife and place in a large heatproof bowl. Cut the butter into walnut-sized pieces, place in a bowl, and let soften to room temperature.
3) Pour the crème frâiche into a pan and bring to a boil. Finely grate the zest from 1 lime into the crème frâiche. Remove the pan from the heat, cover, and let infuse for 10 minutes. Return to the heat and bring back just to a boil. Remove fromo the heat again.
4) While the crème frâiche is infusing, squeeze the limes to yield 3-½ tablespoons of juice. Put the lime juice and honey into another small pan. Warm without boiling.
5) Pour half of the hot crème frâiche over the chocolate and stir with a wooden spoon, starting at the center with small circles and moving outward. Add the rest of the crème frâiche and repeat the stirring process. Add the lime juice and honey mixture.
6) Once the chocolate mixture is smooth, add the pieces of butter, a few at a time, stirring them in gently. Chill until the ganache has thickened, at least 30 minutes.
7) Stir the ganache gently before pushing it into a pastry bag fitted with a No. 9 round tip. Pipe balls of ganache onto a baking sheet lined with parchment paper. Chill for 2 hours.
8) Mix the cocoa powder with the dry lime-flavored sugar and spread over a tray. Using a fork, roll the balls of ganache in the coating mixture. Remove with a slotted spoon, then shake gently in a strainer to remove any excess coating. Store in an airtight container.


HEART-FILLED (RASPBERRY) TRUFFLES
Makes About 60.
* 2 tablespoons heavy cream or crème frâiche
* zest of ½ a lime
* ½ cup (about ½ pint) fresh raspberries, washed and patted dry
* 4 ounces bittersweet chocolate (60-70% cocoa), chopped into ¼ inch pieces
* 1 tablespoon brandy (optional)
* ¼ cup unsweetened cocoa powder (100% is best)

1) Place cream and lime zest in a large sauce pan over medium heat. Using a wooden spoon, stir often, and bring to a simmer (do not boil). This will take just a few minutes. Remove from heat and add chocolate pieces. Stir until smooth and dissolved. Stir in brandy.
2) Line a cookie sheet with wax paper. Place ½ the raspberries into the ganache. Using two small forks, coat each raspberry individually in the ganache, remove and place on the wax paper. Do not let them touch. Continue until all raspberries are covered in the same fashion. Chill truffles for 1-2 hours.
3) Set the cocoa powder in a shallow bowl. Remove truffles from wax paper and drop into the bowl, coating with the cocoa powder. Remove and shake off excess cocoa.
4) Truffles should be kept refrigerated until ready to eat. Because you are using fresh raspberries, truffles should be eaten within 1 week, any truffles that will not be eaten immediately should be frozen.

Monday, December 18, 2006

Birthday Celebrations


I know, it’s been a while. This December has been unusually stress filled and crazed but the New Year promises to offer some clarity.

The craziness peaked with D’s birthday. Like last year, D decided to have some friends over for eats and drinks. Unlike last year, we decided to step the food preparations down a notch and enjoy our time with friends. We made pizza. Two nights before the birthday I bought, chopped and cooked all the pizza toppings (the food processor is my best friend). The day before the cake was started and the morning of, pizza dough was prepared and meringue was added to the cake-- Much less crazy than it sounds.

The day’s events brought pizza of choice to all who attended. The ingredients were on the table and as guests arrived we rolled out dough and people created pies. Everyone (seemed) to enjoy it and really, there is little better than fresh, warm, homemade pizza. The smell alone will drive you to drooling.

The highlight of the evening was by far the birthday cake. While D insisted on Red Velvet, I decided if I was making the cake, I was making something even more special.

Many foodies (and even some non-foodies) have realized that cupcakes have been all the rage in the past two years or so. There are multiple cookbooks devoted solely to cupcakes, a blog and in New York City, there is even a restaurant called Cupcakes and Burgers. Why do we love cupcakes? Who knows, but here is some possible insight: They are small, and we all know small food is cute food. They are individually sized (so it’s all equally me, me, me!)—or just the perfect serving, and they are easy to decorate (and if you mess up you have plenty more to try again).

Here in New York, I am fortunate (or not) to work in a foodie-friendly environment. We swap foodie tales and foodie destinations and sometimes we even take an extended lunch to head on down to Billy’s Bakery for a Red Velvet cupcake for a late afternoon pick-me-up. The favorite is by far the Red Velvet.

I brought one home to D one day and he was hooked. The striking red of the cake is beautiful against the pristine white of the cream cheese frosting (it would even make a fabulous Christmas cake for next year!). With a hint of cocoa they are perfect for the chocolate cake-vanilla frosting set as well as the vanilla cake-vanilla frosting set (sorry chocolate frosting lovers).

Skip ahead a few months and one of D’s office mates brought Red Velvet cupcakes into for all, proclaiming they were Billy’s Red Velvet and no red food coloring is used to make the cake brilliantly red. That in fact, it is the reaction of baking soda with cocoa powder that turns the cake it’s ruddy hue.

D ran home with the news to which I skeptically stated I was sure there was red food coloring in nearly every recipe of Red Velvet I had looked at. Further investigation revealed that this was once the cake. Today’s cocoa is processed in such a way that the red reaction no longer occurs but it is where we receive the term “Devil’s Food Cake”—or as we know it, delicious chocolate cake. So, today, in order to keep its bright hue, we add a good 1-2 tablespoons of red food coloring to our Red Velvet Cakes to ensure their brilliance is wowing.

So D was pushing for Red Velvet but I pushed (and ultimately won since I was baking) for the above pictured cake: Blackberry Chocolate Cake with Blackberry Meringue Frosting. It also helped that I found an amazing deal on blackberries that week ($1 per pint!). To make it extra special I purchased100% cocoa powder from La Maison du Chocolat for a hefty price. The cake tasted better than it looked and everyone especially loved the fresh blackberries inserted between each layer (4 layers to be exact).

While it all sounds complex the most involved part was sieving fresh blackberries for the cake batter. All else was a breeze—even assembly. My boss passed this recipe on to me with the warning “it’s a very special cake.” Well, the cake is amazing with a rich chocolate cake and surprisingly thick, yet light and fruity frosting. The recipe, I believe, is from Saveur Magazine. It is claimed to [gluttonously] serve 10 but is more like 15. This is the recipe as it was given to me.

BLACKBERRY CHOCOLATE CAKE w/ BLACKBERRY MERINGUE FROSTING
Serves 10. Active time= about 2 hours. Inactive time= about 1 hour.
BLACKBERRY CHOCOLATE CAKE
Can be made the day ahead and kept at room temperature.
* Vegetable oil spray
* 3 cups all-purpose flour
* 2 cups granulated sugar
* ¾ cup unsweetened Dutch-process cocoa powder
* 2 teaspoons baking soda
* 1 teaspoon salt
* 2-½ cups fresh or thawed frozen blackberries
* 1 cup low-fat (1.5%) buttermilk
* 2/3 cup vegetable oil
* 2 tablespoons distilled white vinegar
* 2 teaspoons pure vanilla extract

BLACKBERRY FILLING
* ¾ cup egg whites (about 6 cups)
* 1-½ cups granulated sugar
* ½ teaspoon cream of tartar
* 1-½ cups seedless blackberry preserves, at room temperature
* 1 pint fresh or thawed blackberries, plus additional berries for garnish
* 2 tablespoons confectioners’ sugar

1. Make the chocolate cake: Preheat oven to 350F. Coat two 9-by-2-inch round cake pans with vegetable oil spray and line the bottoms with parchment paper. Lightly spray the paper. In a large bowl, sift together the flour, sugar, cocoa, baking soda and salt.
2. Pass the blackberries through a fine strainer set over a bowl; you should have about 1 cup of puree. Whisk in the buttermilk, oil, vinegar and vanilla to the puree. Pour the blackberry mixture into the dry ingredients and mix until just combined.
3. Divide the batter evenly between the prepared pans and bake for about 40 minutes, or until the cakes pull away from the sides and the tops spring back when pressed. Let cool on a rack for 10 minutes, then unmold and cool completely.
4. Make the blackberry filling: In a large heatproof bowl set over a saucepan of simmering water, whisk the egg whites with granulated sugar and cream of tartar until the sugar dissolves and the whites are hot to the touch, about 5 minutes. Transfer to a standing mixer and beat at high speed until the meringue cools to room temperature and is very thick, about 15 minutes. Stir the blackberry preserves until smooth, then gently fold 1 cup into the meringue.
5. Using a serrated knife, split the cakes in half horizontally. Thinly spread the remaining ½ cup of preserves on 3 of the cut cakes layers. Set one of the layers on a large plate, preserve side up. *Spread one-third of the meringue on top and press one-third of the blackberries into the meringue. Repeat with the remaining preserve-spread layers and the remaining meringue and blackberries. Top the final cake layer and let stand at room temperature for 1 to 3 hours. Just before serving, sift the confectioners’ sugar over the top of the cake and garnish with additional blackberries.

*The amount of meringue created in this recipe was astounding. Instead of dividing it into thirds, I essentially divided it into fifths. Each layer received one-fifth and the remaining fifth covered the outside of the cake. I then topped the meringue with a final blackberry layer and sprinkled with confectioners’ sugar. I felt the cake looked more finished this way too—though you don’t see the layers until sliced.

Tuesday, December 12, 2006

Peppermint Rocky Road Cookies


The short and simple of it is that I was craving some Rocky Road Ice Cream the other day. Surprisingly, it's never been a favorite and I more often lean towards a mint based creation or black and white milk shake when it comes to ice cream indulgences. The other night, it was Rocky Road. The craving quite possibly was ignited by the need to use up some marshmallows left over from a late fall camping trip. They have been staring me down, mocking me with their fluffiness for a few months now.

"How about sweet potatoes?!" You say. As sweet potatoes go, I like them mashed or in a plain pie, no added marshmallows as I believe sweet potatoes are strongly sweet on their own.

So I thought brownies or Rocky Road Cookies. I knew I had all ingredients for cookies, so cookies it was.

But wait, there is no peppermint in Rocky Road. Well, in holiday Rocky Road there is. Or more likely, I was needing to rid myself of a stagnant pile of peppermints (a la the dark chocolate peppermint bark) that have been sitting around longer than I care to mention.

This recipe is (very slightly) based on those delicious Cranberry Macadamia White Chocolate Chip Cookies. I added cocoa powder to the batter to give them a chocolate base. More should have been added to really pump up the chocolate in this (which is why chocolate chips were added). When baked, the marshmallow oozes out of the cookies and provides a sweet crisp crunch along the edges which was a pleasant surprise. These cookies are chewy and a sweet meal in themselves!

PEPPERMINT ROCKY ROAD COOKIES"
Makes about 25 2-inch cookie drops
1-1/2 cups all purpose flour
1/2 tsp baking soda
1/4 tsp baking powder
1 tablespoon good cocoa powder
1/2 tsp salt
1-1/2 sticks butter, softened
3/4 cup firmly packed light brown sugar
1/2 cup granulated sugar
2 eggs
1 tsp vanilla
2 cups oatmeal
1 cup chocolate chips (your pick: dark, white, milk)
1/2 cup crushed peppermint
1/2 cup chopped pecans or walnuts
2 cups roughly chopped (or cut) marshmellows, in about 1/2 inch pieces. Plus extra for tops of cookies

1) Preheat oven to 350F
2) In a mixing bowl, whisk together flour, baking soda, baking powder, salt and cocoa.
3) With an electric mixer in another bowl, add butter and sugar, mixing until fluffy. Add the egg and vanilla, mix until well combined.
4) Beat in flour mixture until well combined.
5) Add remaining ingredients and stir until evenly combined.
6) With a spoon, drop dough about 2 inch apart. Top with an extra piece of marshmallow. Bake in batches in middle of the oven 10-12 min (or lightly golden) for soft cookies. Cool on racks.

Monday, December 04, 2006

Dark Peppermint Bark


Last Thanksgiving I was in Chicago when some family friends gifted us a tin of Williams Sonoma Peppermint Bark. It was so frighteningly addictive that I was eating sheets of it a day. My mother forced me to take it home to New York City and it was gone in a matter of days.

Little did I know that this might just be the easiest dessert to put together. I'll be making it again in white chocolate/ dark chocolate layers (a la Williams Sonoma for a fraction of the cost) for my ceramic studio's holiday sale, but just had to get this out to you now to create and be swayed by paying $25 for a box at the store! If you have some chocolate lying around and some peppermints piled up nabbed from restaurants, this is perfect use for them.

It is one of those recipes people will think you bought or spent all day laboring over and you will tell them you did and laugh to yourself. It would make a perfect holiday gift for friends—just buy a nice tin at the dollar store!

I will not even put quantities down because however much chocolate you have can be used and the peppermint quantity will depend on how strong you want the final product.

DARK PEPPERMINT BARK
Qty Depends on amount of chocolate used. Active time= 10 minutes. Inactive time= 6 hours-overnight.
* 1 bar dark chocolate
* peppermint canes or candy, crushed
* 1 teaspoon peppermint extract (optional)

1) Lay parchment paper on a cookie sheet.
2) Put peppermint in a paper bag and wrap with a clean dish towel. Use a hammer to crush the peppermint into pieces from dust to chunks.
3) Melt the chocolate in a double boiler*, add the peppermint extract and mix as it melts.
4) Once melted, pour onto parchment paper and use a spatula to spread chocolate about ¼ inch thick. Sprinkle with peppermint and allow to dry 6 hours to overnight.
5) Once dry, break chocolate apart into uneven chunks, store covered.
* If a double boiler is not available use two non-stick sauté pans. One should be larger and filled half way with water, brought to a boil. Place the smaller pan on top of the water, without it touching the other pan and melt chocolate in the smaller pan.

Saturday, November 11, 2006

Cranberry Sweet Bread


The other week I was at the grocery store and noticed the bags of cranberries were finally set out. Mmmm, cranberry juice I mumbled, and in a trance walked over and placed them in the basket D was carrying.

“What are you going to do with those?”
“I dunno, they’re pretty.”

And so the pretty little rubies sat in the fridge for the better part of a week while I researched some recipes. I was looking for something fast and easy that would still look and taste delicious. I finally found it on a Chowhound forum-- a one bowl, just add, stir and bake recipe. I checked the comments and someone had already made it with wowed reaction so I decided to dig in as well.

This cake-like bread was delicious warm right out of the oven. The recipe recommends a caramel sauce, but I think whipped cream would be great too. I had it plain with coffee and it made a great mid-afternoon pick-me-up or breakfast.

This is the recipe list as it appears in Chowhound. There are other fabulous cranberry recipes listed there too so check it out.

*Note: This is not my mother listed below. Also, I cannot vouch for the caramel sauce because I did not make it. The changes I made are as follows: I used 2% milk instead of whole milk and increased the cranberries to one whole 16 ounce bag (from 2 cups). Lastly, I used a 7x11 pan as I wanted a thicker bread. I had to bake mine about 10 min more.

MOM’S CRANBERRY CAKE W/ CARAMEL SAUCE
Makes 1- 9x13 loaf. Active time= 10 minutes. Inactive time= about 30 minutes.
* 2 cups unsifted flour
* 1-½ cups sugar
* ½ teaspoon salt
* 2 teaspoons baking powder
* 4 tablespoons unsalted butter, soft
* 1 cup whole milk [2% works well too]
* 2 cups whole fresh cranberries [or 1-16 ounce bag]

1) Preheat the oven to 350F
2) Mix the flour, sugar, salt, baking powder and butter together until it resembles coarse crumbs.
3) Add milk and stir until evenly distributed. Fold in cranberries.
4) Pour batter into a buttered 9x13 pan. Bake for 30 minutes or until golden. Pour caramel sauce (below) over individual servings and serve.


CARAMEL SAUCE
* ½ cup butter
* ½ cup sugar
* ½ cup brown sugar
* ½ cup half and half

1) Combine all ingredients on stovetop and heat until thickened; do not boil.


Head over to Sweetnicks for the ARF roundup

Sunday, October 29, 2006

The Bride of Frankenstein Madeleines


The real deal:

I’m not really so much into Halloween lately. It might be because here in the City, people are so terrified to let their children go door to door that instead they go store to store collecting candy. It takes the fun out when you can’t see kids all dressed up and excited coming and going.

When I first moved into my current apartment, my roommate at the time overloaded on candy, we received a solo trick-or-treater and were still eating through the bounty into the New Year. Today, D brought home a bag of Dove Dark Chocolate. “What’s that?” I asked. “For the trick-or-treaters.” “Mmm, kids really love dark chocolate.” “I don’t care, it’s for me.”

Which tends to be the attitude when we go collecting candy anyway, right? I remember my mother bought king-sized bars since we at most received 5 kids on Halloween and she wanted to award them for coming out of their way. Before Halloween she would remove some of the handout candy before kids came around and squirrel it away. The candy ended up being ours for the taking eventually. It's the same role my brothers and I took. We would arrive home from a night of Halloween, post egg and shaving cream fights, fears of local cats being skinned and bigger kids driving around with BB guns, and trade our candy between the three of us. We then stealthily (or so we thought) hid our candy in different areas of the house, taking a few pieces out for a daily (or hourly) sugar high, saving the prized pieces, those elusive king sized bars, for last. Some years, we were still eating through our stash into April.

There is also the added pressure of coming up with the “best” costume around Halloween. All those cops, slut angels and naughty doctors are tiresome. I could never think of a fabulously original idea I was happy with and inevitably went as “evil Stacey.” She looks just like normal Stacey but is certifiably evil. [It reminds me of pub/ bar quiz nights—where the cleverness of your team name can make or break your fame (at a recent quiz night our team name was Kim Jon Illin’, pretty good I think).]

Here are some good costume ideas from friends of mine I will share if you are still in need for tomorrow night:
Avian Bird Flu (bird feather, surgical mask and a few added funnies)
Ms. Scarlet and Professor Plum (a la Clue: carry a candlestick, library book, or other Clue-centric items. I think this would also be great for groups to go as all the Clue characters).

Will report if I see anything clever around the City tomorrow, so far just the standard Goth Pirate, “sexy” Kitty and red sweat suit wearing devil. As for the Madeleines below…

A few months ago my mother gave D a Madeleine pan. In the meantime we have been searching for the perfect recipe. After much contemplation, we went with one from Gourmet’s Best of Paris cookbook. They turned out fabulously puffy and moist with a great aroma and buttery flavor. I thought they had a slight resemblance to The Bride of Frankenstein so I doctored them up with a little cocoa powder.

MADELEINES
Makes 2-3 dozen cookies depending on cookie sheet size . Active time= 20 minutes. Inactive time= 40 minutes.
Special equipment: 3 madeleine pans
* 1-½ sticks (¾ cup) unsalted butter, melted and cooled, plus additional for brushing
* 1-¼ cups sifted cake flour (not self-rising; sift before measuring)
* ½ teaspoon baking powder
* ¼ teaspoon salt
* 3 large eggs
* 1 teaspoon vanilla
* 2/3 cup granulated sugar
* 2 teaspoons finely grated fresh lemon zest
Confectioners sugar for dusting (in this case, cocoa powder)

1) Set oven racks in upper and lower thirds of oven and preheat to 350F. Brush molds with melted butter.
2) Sift together flour, baking powder, and salt. Beat eggs in a large bowl with an electric mixer at high speed until light and foamy, about 30 seconds with a standing mixer or 1 minute with a handheld, then beat in vanilla.
3) Gradually add granulated sugar, beating constantly at high speed, and continue to beat until mixture is tripled in volume, about 3 minutes with a standing mixer or 5 minutes with a handheld.
4) Sift flour mixture in 3 or 4 batches over eggs, folding (with a spatula) in each batch until just combined. Then fold in zest and melted butter.
5) Spoon a rounded tablespoon of batter into each mold (about two-thirds full) and bake in upper and lower thirds of oven, switching position of pans halfway through baking, until golden around edges and a tester inserted comes out clean, 10 to 12 minutes total.
6) Invert madeleines onto a rack and dust scalloped sides with confectioners sugar.
NOTE: to get the Bride of Frankenstein effect cut out a piece of paper the size of a finished cookie. Use a pencil to outline The Bride’s hairline, noting that where you cut out will be darkened and where the paper is left behind will remain cookie-colored. Place cut-out over cookies and dust with cocoa powder. Use red food coloring, red hots or other small candies for eyes.


Tags: , , .

Friday, October 06, 2006

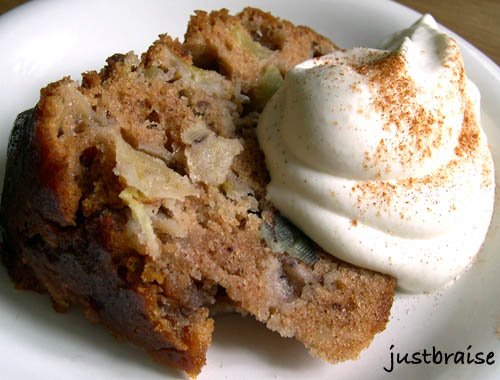
Apple Spice Cake


Many may think we leave it to the wisdom and foresight of Johnny Appleseed to spread the goodness of apple orchards throughout the United States. While Johnny can be accredited to spreading the seeds, few of the apples that came to be would ever be worthy of eating fresh picked.

Edible apples, rather those sweet enough to make it into our lunch sacks or slathered with peanut butter, need splicing to reproduce. Meaning the Red Delicious we eat today is very much a piece of the original Red Delicious tree first produced (not a seed descendent). Planting seeds of apples produce 10 very different fruit trees, more than likely none of which will be as sweet as the original.

The short of the long of it, our dear Johnny enjoyed knocking back a few in his day and thought it best to spread the good cheer throughout the land. Spreading seeds of apples, and therefore many a tart variety, led to a massive production of cider (the hard kind). Unfortunately, due to Prohibition, many of the orchards that Johnny is accredited with helping along were chopped down. On the flipside, clearing the bitter orchards very well may have led to space for the cherished sweet varietals we know and love today (my current favorite is the new Honeycrisp-- crisp, juicy and tastes like honey mixed into apple cider).

Any way you slice it, and any way you consume them, apples are delicious and deserve eating this time of year. Yet another tasty apple treat... (c/o D's favorite cake lady, Martha Stewart.)

APPLE SPICE CAKE
Serving Size= 10-12 servings. Active time= about 15 minutes. Cook time= 1-¼ hours.
*1-1/3 cups vegetable oil
* 3 cups all-purpose flour
* 1 tablespoon ground cinnamon
* 1 teaspoon baking soda
* 1 teaspoon salt
* 2 cups sugar
* 3 large eggs
* 3 to 4 Granny Smith apples [or other tart apple], cored and cut into 1/2-inch pieces (3 cups)
* 1 cup chopped assorted nuts, such as pecans and walnuts (optional)
* 1 teaspoon pure vanilla extract
* Nonstick cooking spray with flour
[* I also added a 1/2 tsp of ground ginger and 1/2 tsp of allspice]

1) Preheat oven to 350°. Spray a 12-cup bundt pan with cooking spray [or butter]; set aside.
2) Working over a large sheet of parchment paper, sift together flour, cinnamon,[allspice and ground ginger] baking soda, and salt; gather sifted ingredients into center of sheet; set aside.
3) In the bowl of an electric mixer fitted with the paddle attachment, combine vegetable oil, sugar, and eggs; mix on high speed until lemon yellow.
4) Fold reserved parchment in half lengthwise; with mixer on medium speed, gradually shake in dry ingredients until just incorporated.
5) Add apples and, if desired, nuts, to batter; mix to combine [using the electric beater. The juice from the apples will escape a little as they break down and loosen the batter]. Add vanilla, mixing until incorporated.
6) Pour batter into prepared pan, and bake until a cake tester inserted in the center comes out clean, 75 to 90 minutes.
7) Remove from oven, and cool slightly on a wire rack.
8) Invert cake onto rack; turn cake right-side up to cool completely on rack; serve with whipped cream, ice cream or plain.


Check out other Fall Feast-ival items over at WellFed's FitFare!

Tags: , , , ,

Monday, October 02, 2006

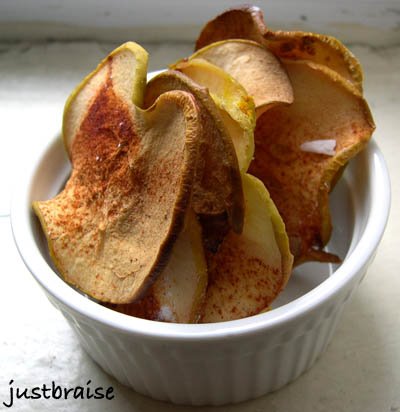
Apple Chips


*Just Braise has moved. Please visit me at www.justbraise.com!*

This past weekend, surrounded by mountains screaming color, D and I headed upstate with some friends to camp. As we have learned from past fall foliage camping years, no trip in the creeping fall days is complete without some apple picking (as well as apple cider and apple donuts).

We ate more than our fill, testing the varietal that would win our hearts and make it into our oversized ½ peck to return to the city. We picked rotten ones from the ground and threw them into the high reaches of trees, attempting to knock loose a prized specimen. We made running high jumps into the branches grasping a seemingly perfect morsel—only to have hopes dashed and eyes splashed with rotten juices. And in the over exuberance of finding a tree of Red Delicious full of fruit, we even came branch to arm with a healthy dose of poison ivy (though none has broken through yet, fingers crossed).

There are few things that feel more fall or are as delicious as a freshly picked apple. And there are few things more rewarding than admiring one’s gathering skills with a bushel of rubies stacked high in the kitchen.

But the bushel sits and the mind must wander into what to do with so many apples. Last night it was braised pork chops in rum cider with apple slices (made too late and eaten too hungerly for a picture). This morning I called upon my days in the third grade for inspiration...

My third grade teacher is what we used to refer to as a “nature freak.” Strange for us suburban kids to find someone so caught up in nature— she once yelled at a classmate of mine because the girl stepped on an ant—“how would you like to be that ant?!” Well, it’s dead now, so we wouldn’t thank you.

But there were some great teachings, most now forgotten, that lay between Pioneer Days (where we dressed like Little House in the Prairie, went to a neighboring school, “hunted” and ate venison stew, churned butter and home schooled our “children”), candle making and Apple Days (where we went apple picking and sat for 2 days peeling, chopping and slicing apples for apple sauce and strung ribbons of apple slices that dried into apple chips in our windows).

So this morning as I looked to our fresh apples I remembered the apple chips. And even faster than stringing them into the window waiting two weeks for them to dry, is the almost instant gratification of drying them in the oven, low and slow until crisp and delicious.

APPLE CHIPS
Serving Size= about 60 chips. Active time= about 20 minutes w/ a Cuisinart or other slicer, more if slicing by hand. Cook time= 2 to 2-¼ hours.
* 5 Granny Smith, Rome or Golden Delicious apples, sliced into even 1/8-1/4 inch discs
* 2 Tbl powdered sugar per baking sheet
* assorted spices depending on flavor desired (lime juice-cumin-curry, cinnamon-sugar, salted or plain are all delicious).

1) Set oven racks on bottom and top quarter of the oven. Preheat to 225F. Line baking sheets with parchment paper and dust each with powdered sugar.
2) Line sheets with apples, do not overlap apples or they will stick together.
3) Dust top of apples with selected spice combination.
4) Place one sheet on top rack, one on bottom and back for 2- 2-¼ hours, until apples are golden. Rotate bake sheets half way through cooking and remove apples immediately from sheets onto a cooling rack once out of the oven.
NOTE: Serve as a snack (like regular potato chips) or as a side to sadwiches, on top of ice cream or other creamy fall dessert, in a salad, with pork chops or whatever else you can imagine.


Head over to Sweetnick's for today's ARF round up!

Check out other Fall Feast-ival items over at WellFed's FitFare!

Tags: , , , ,

Wednesday, September 06, 2006

Mini Fruit Tart


I knowingly had lemon curd for the first time this past summer. I know, a late bloomer for all things delectable. The truth is, the stuff is not in my blood and I am sure my parents thought better than to get me started on another sugar addiction (I already had ice cream and cookies and found Nutella on my own).

D, on the other hand, has curd running through his veins: From his southern pull to his British blood, the boy is practically dripping the goop— and while we’re on it, clotted cream as well. It was when the two of us spent some time in London and around Scotland this summer that D ordered it with gusto and the stuff popped onto my radar. It did not take long for my cravings to begin.

The first tasting was at high tea: scones, clotted cream and lemon curd—oh awake from the dreaming-- the sweetest of combinations! How the Brits avoid title as World’s Fattest is beyond me. Upon arrival in Scotland we glutted ourselves on the substance and bought it in gift form for our return (I was informed it’s quite expensive in the U.S., which upon recent investigation found it is in fact, expensive).

We returned with our own little curd booty. Despite attempts of opening the sacred jar, it remains, stashed in the cupboard for a rainy day when the scent of scones fills the apartment.

A few weeks back when a whopping lemon meringue pie graced the table, I hadn’t the slightest notion that the filling I produced was, more or less, a curd. Sure, it was custardy, but when I think “curd” images of cottage cheese and sour milk fill the void.

In the attempt to work through an over zealous fruit purchase, images of vanilla custard clouds with mountains of fruit undulated through the sky. But as I searched for recipes, none caught my fancy. Instead I found this recipe for lime curd on epicurious.com and was shocked back to Britain. I prepared this little concoction. Let’s just pretend this is a healthy way to enjoy this stuff.

FRESH FRUIT TART
Serving Size= 6 persons. Active time= about 30 minutes. Inactive time= about 2 hours.
* walnut-graham cracker crusts (below)
* lime curd (below)
* fresh fruit topping (below)
* fresh mashed walnuts for topping (optional)

1) Just before serving, fill each walnut-graham cracker crust ramekin with lime curd (this will prevent the crust from becoming soggy).
2) Top with 2-3 large spoonfuls of fresh fruit mixture.
3) Can be served with a dusting of freshly ground walnuts, a splattering of heavy cream, fresh whipped cream, a scoop of ice cream or a light cookie.


THE CRUST
* 5 graham crackers
* 1/3 cup walnuts
* ½ stick butter, melted

1) Preheat oven to 350F.
2) Combine graham crackers and walnuts in food processor or blender. Process until grainy. Add melted butter, process until well combined.
3) Press graham cracker mixture around the edges and bottom of 6 ramekins. Arrange on a cookie sheet and bake 10 minutes, until edges turn golden.
4) While crusts bake, begin the lime curd (below).


THE LIME CURD
* ½ cup sugar
* 1/3 cup fresh lime juice
* 4 large egg yolks
* 5 tablespoons unsalted butter, cut into 1/2-inch cubes
* 1-½ teaspoons grated lime peel

1) Add sugar, lime juice, egg yolks and butter to a heavy saucepan over medium-high heat. Whisk to combine. Set lime peel in a heat-proof bowl aside.
2) Cook over medium-low heat until thick, smooth, and just beginning to bubble, stirring constantly, about 10 minutes.
3) Remove from heat and strain into bowl with lime peel. Stir to combine. Cover with plastic over the surface of the curd and refrigerate until cold; about two hours. (Can keep up to 1 week.)


FRESH FRUIT TOPPING
* ½ cup fresh blueberries
* 1 cup fresh Bing cherries, quartered and pits removed
* 1 mango, sliced into chunks
* 1 Tbl lime juice
* 1 Tbl sugar

1) Add all ingredients to a bowl and stir to combine. Let set for at least 10 minutes before assembling tart.


Tags: , , , , , , .

Tuesday, July 25, 2006

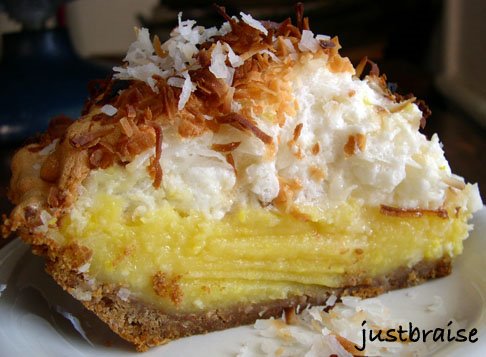
Lemon Meringue Pie


When in history did the versatile lemon receive a bad rap? Akin to vanilla (as boring as vanilla ice cream; as plain as vanilla), negative lemon phrases pop up more than we might think: You’re being a sour lemon; When life gives you lemons, make lemonade; That car is a real lemon; You’re standing around like a lost lemon. What did this sun-bright fruit do to receive such sad associations? Why hasn’t the lime, an equally sour menace, gathered similar treatment? How did the sweet orange elude all the sour of its citrus brethren?

Many believe the first citrus the people of the Mediterranean tasted was the lemon-- Which makes sense since it pops up in many Middle Eastern dishes. But its origin probably stems further East than that (many suggest India is where the egg-shaped citrus first came into being). Today it’s grown in almost any climate warm enough to sustain it and almost everyone enjoys its sweeter sensibilities: from lemonade and limoncello to lemon oil and lemon curd. Life would have a lot less zest without it.

Imagine the world without mass transport and an excess of refined sweeteners. Where lemons weren't flown into the market willy nilly and that golden glow remained in flowers, not fruit. What was that first sip of pure summer like? Lemonade, with its sweet sourness. How much of a treat do you suppose the lemon once was to some? How much we take it all for granted, our availability of something so simple, once so foreign.

To pucker up to the lemon, try this (sweeter) dish: Lemon Meringue Pie. This pie’s cloud of meringue could barely fit into the oven—royal treatment considering the lemon’s often lowly placement as a mere garnish. D and I found this recipe in the epicurious.com archives as we searched for a perfectly light, refrigerated summer cake. This is the perfect treat with a hint of the tropics and much less painless than it sounds. (This is essentially the recipe from epicurious—the only difference being I used a graham cracker crust.)

LEMON MERINGUE PIE
Serving Size= 10 people. Active time= 40 minutes. Cook time= 1 hour 14 mintues. Inactive time= 4 hours
GRAHAM CRACKER CRUST
* 1 cup plain graham crackers (about 6 full crackers)
* ½ stick unsalted butter
* ¼ cup coconut


THE FILLING
* 1 cup sugar
* 2 tablespoons cornstarch
* 6 large egg yolks
* 4 large eggs
* ¾ cup fresh lemon juice
* Pinch of salt
* ¾ cup (1 1/2 sticks) unsalted butter, cut into 1/2-inch pieces


THE MERINGUE MOUNTAIN
* 6 large egg whites
* 1/4 teaspoon cream of tartar
* 1-1/3 cups powdered sugar
* 1 cup sweetened flaked coconut, lightly toasted

For crust:
1) Preheat oven to 350F. In a small saucepan (or in the microwave), melt the ½ stick of butter.
2) Using a food processor (or by hand crushing them with the back of a spoon), pulse the graham crackers into small crumbs. Once pulverized, add butter and ¼ cup coconut; mix until evenly distributed.
3) Put crumbs into 9 inch pie tin. Line the tin, pressing firmly against the bottom and sides.
4) Bake for 10 minutes. Once done, set aside to cool and continue on the filling:

For filling:
1) Preheat oven to 300°F.
2) Whisk sugar and cornstarch in heavy medium saucepan to blend.
3) Whisk in yolks, whole eggs, lemon juice, and salt. Whisk over medium heat until mixture thickens and just begins to boil around edges, about 6 minutes.
4) Add butter; whisk until smooth. Cool 10 minutes. Pour warm filling into crust.

For meringue:
1) Using electric mixer, beat egg whites in large bowl until foamy.
2) Add cream of tartar and 1 tablespoon powdered sugar and beat until soft peaks form.
3) Beat in remaining sugar, 1 tablespoon at a time, then beat until stiff glossy peaks form, about 7 minutes.
4) Gently fold ¾ cup toasted coconut into meringue.
5) Spread coconut meringue over warm filling, covering completely, sealing meringue to crust edges and mounding in center.
6) Bake pie 30 minutes. Reduce oven temperature to 275°F; bake 30 minutes longer.
7) Sprinkle remaining ¼ cup toasted coconut over pie; continue to bake until meringue is light golden brown and set when pie is shaken slightly, about 15 minutes longer. Transfer pie to rack and cool completely, about 4 hours. (Can be made 1 day ahead. Refrigerate uncovered.)


Head on over to Sweetnick's for the weekly ARF roundup!

Tuesday, June 20, 2006

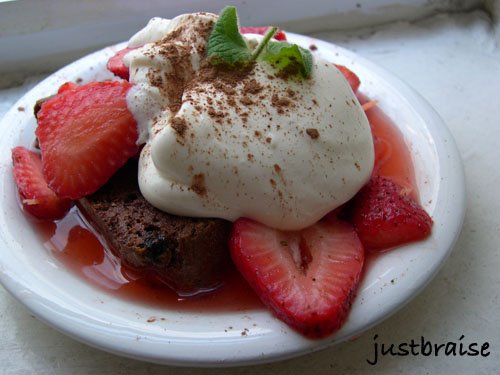
Macerated Strawberries & Blueberry-Jalapeno Mojitos


Fruit is an all too easy summer fallback dessert. While the heat beats us down, time spent in a kitchen presents itself as a not too pleasant option. And now, while fruit begin their turn to the sweetest, is the perfect time to jazz up an already perfect food into superstardom. These two fruity dishes; one beverage, one dessert, allows you more time where you belong in the summer: outside.

The dessert is one that tastes far more complicated and time consuming than it is, a plus for any entertainer. The beverage, originally presented to me by fellow food-lover RF, is a surprisingly sweet compliment to a typically hot notion: jalapeno peppers.

D and I enjoyed these with company. We paired them together at the close of our meal. While the strawberries were a pleasingly sweet and luxurious dish, the blueberry mojitos were refreshingly smooth. Both offer a fabulous cool down in the intense heat of the upcoming season.

Head on over to Sweetnick's for more ARF friendly items!

MACERATED STRAWBERRIES
Serving size= 4 people. Active time= 8 minutes. Inactive time= 2 hours
* 1 quart strawberries, devined and quartered
* ½ cup + 2 Tbl sugar
* 1 cup orange liqueur (Cointreau)
* juice of 1 lemon
* 1 Tbl lemon zest
* 8 pieces chocolate biscotti
* 12 ounces mascarpone cheese
* 1 pint heavy cream

1) In a medium bowl, mix strawberries, ½ cup sugar, orange liqueur, lemon juice and lemon zest. Cover and refrigerate 2 hours to overnight.
2) Just before serving, make the whipped cream: In a chilled bowl with cold ingredients, beat the mascarpone with the heavy cream and 2 Tbl sugar until soft peaks form.
3) Assemble: layer on a plate or deep glass (for example wine glass) biscotti, then divide strawberries and liquid over biscotti. Top with whipped mascarpone-cream mixture. Coco powder can be dusted on top or mint sprig placed over.


BLUEBERRY-JALAPENO MOJITOS
Serving size= 4 people. Active time= 8 minutes
* 6 ounces white rum
* 1 bunch fresh mint
* 1 pint blueberries
* 2 fresh jalapeno peppers, diced
* juice of 2 limes + 1 for garnish
* 1 liter club soda
* 4 Tbl sugar
* crushed ice

1) Place ½ pint blueberries, 1 diced jalapeno, mint, sugar and lime juice in a pitcher or divide amongst glasses. Muddle (crush) to extract aromas and flavors.
2) Add remaining blueberries and jalapeno peppers, crushed ice, rum, and top with club soda; stir to incorporate.
3) Garnish with lime wedges and serve.

Saturday, May 13, 2006

Bittersweet Chocolate Mousse


I seldom have so many sweets creeping up on me, but I suppose everyone is entitled to a little sweet tooth every now and then, no? And because D and I are gearing up to high tail it out of here, I know these sugary treats will be consumed in no time flat. With Mother’s Day just around the corner, I tried out a few recipes and found this one to be a winner. My own mother agrees, having devoured two servings already.

I found this recipe scanning The Chicago Tribune this weekend. While flowers can be particular per person-- allergies, matching colors and varietals all play into effect-- most of us can agree on the decadence of chocolate. I know few mothers who could resist this sugary kiss that says love.

This dessert is brought to us from Wolfgang Puck, adding a guaranteed winner to the recipe box. If done right, it is seductively light, making it an ideal warm weather dessert. Enjoy it with a tall glass of milk, champagne, or a kiss. Any way you enjoy it, mom will know it was made with love (and quite easily too!).

A quick note: do not use ultra-pasteurized whipping cream. It was all I had in the house and because departure is upon us I did not want to buy more. Ultra-pasteurized “whipped” cream turns out flat, as pictured above. Still, it is just as delicious.

This is the recipe as it appears in the Tribune.
BITTERSWEET CHOCOLATE MOUSSE
Preparation time: 20 minutes. Cooking time: 3 minutes. Yield: 6 servings
* 1-½ cups whipping cream plus more for garnish
* 6 ounces bittersweet chocolate, chopped into 1/4-inch pieces
* 4 whites of pasteurized eggs, see note
* 1/8 teaspoon each: cream of tartar, salt
* 1/4 cup sugar

1) Heat half of the cream to a boil in a saucepan over medium-high heat; pour the cream over the chocolate in a large bowl, making sure all of the chocolate is covered with cream. Set aside 1 minute. Slowly stir the mixture together with a heatproof spatula until blended; set aside.
2) Beat the egg whites with a mixer on medium speed until whites begin to foam, about 2 minutes. Beat in the cream of tartar and the salt, beating until soft peaks form, about 3 minutes. Sprinkle in the sugar, beating just until stiff (but not dry) peaks form, about 4 minutes. Gently fold the egg whites into the chocolate mixture with a spatula until blended.
3) Add the remaining cream to the bowl used to beat the egg whites; beat on medium speed until soft peaks form, about 3 minutes. Gently fold the whipped cream into the egg white-chocolate mixture.
4) Spoon the mousse into individual parfait glasses, ramekins or small bowls. Cover with plastic wrap; refrigerate until well chilled and firmly set, at least 2 hours. Garnish with whipped cream, if desired.
Note: Due to the possible presence of salmonella, pasteurized eggs are recommended for mousse. They are available in large supermarkets in the egg department.


In non-food related news, Eat Stuff brings us the beloved WCB. Today Whiskey & Kitty BoJangles show a little love to the outdoor world awaiting the arrival of somebody special.

Monday, May 08, 2006

Sunshine Cake


D is at it again. He spies a girl on the street eating a fluffy lemon poppy seed muffin and crave mode hits. Like a greedy child in a sandbox, another has the object of your desire and it must become yours. Better yet, why have the same toy, when you can make it bigger and better? Why make a lemon poppy seed muffin when a cream cheese glazed cake is that much more seductive? Why inhibit your sweet intake by making wimpy cupcakes when you can increase your serving portions with an entire cake?

Don’t get me wrong, I’m a fan of D's overactive food desires, and when he came home the other night researching lemon poppy seed cakes I knew it was time to step back: “I just need to have it!” So I retreated, awaiting the results. He finally found the object of his desire on his old favorite, Martha Stewart Living.

He returned complaining that every found recipe called for something along the lines of “add powdered lemon poppy seed mix.” It was when he found the Martha recipe, calling for three sticks of butter and 7 eggs, that he knew he found gold, or rather, citrus yellow.

A few months back I was dropping a CD off at a bakery for a friend. I was told upon delivery, “get the sunshine muffin before you leave.” When I arrived, every homemade delicacy looked amazing: mixed berry scones, peanut butter muffins and the sunshine muffin. I bagged one of each meaning to eat a little on my way home, bringing the remains back to D. The remains turned into a tasting spec of the peanut butter muffin and the berry scone—the sunshine muffin, or lemon poppy seed, was happily in my belly. This cake would ensure no muffin would be eaten before D would have a taste.

Without further ado, D has done the research for you to find the ultimate lemon poppy seed cake recipe. This one is quite good: terrifically moist, with sweet cream cheese frosting holding the layers together. The recipe below, taken from Martha’s website, was followed with a few exceptions: lesser shiny cream cheese frosting was made and used. We added it between the layers, then thinned it with some lemon juice and added poppy seeds to drizzle over the top. D also wanted a pure lemon cake and we replaced the orange and lime zest for all lemon. I’m sure the original recipe is just as decadent.

CITRUS POPPYSEED CAKE
Makes 1 eight-inch-round layer cake
So the glaze will be soft and shiny, apply it just before serving.
* 1-½ cups (3 sticks) unsalted butter, room temperature, plus more for pans
* 3-¾ cups all-purpose flour, plus more for pans
* 2-½ teaspoons baking powder
* ¾ teaspoon salt
* 2-½ cups granulated sugar
* 7 large eggs, lightly beaten, room temperature
* 1-½ teaspoons pure vanilla extract
* 1 cup milk, room temperature
* ½ teaspoon grated lemon zest
* ½ teaspoon grated orange zest
* ½ teaspoon grated lime zest
* 1/3 cup poppy seeds, plus more for sprinkling

1) Heat oven to 350°; place two racks in center of oven. Butter three 8-by-2-inch round cake pans; line each with a circle of parchment paper. Butter paper, and dust pans with flour; tap out excess. Set aside.
2) Sift together flour, baking powder, and salt in a medium mixing bowl. Set aside.
3) In the bowl of an electric mixer fitted with the paddle attachment, cream butter on medium-low speed until lightened, 1 to 2 minutes. Gradually add sugar; beat until color has lightened, 3 to 4 minutes, scraping down sides of bowl once or twice. Drizzle in eggs, a little at a time, beating on medium-low speed after each addition until batter is no longer slick but is smooth and fluffy, about 5 minutes. Stop to scrape down bowl once or twice so batter will combine well. Beat in vanilla on medium-low speed.
4) Reduce the mixer speed to low. Alternately add reserved flour mixture and milk, a little of each at a time, beginning and ending with flour mixture. Scrape down the bowl once or twice. Beat in lemon zest, orange zest, lime zest, and 1/3 cup poppy seeds.
5) Divide batter evenly among the prepared pans. Bake 30 minutes, then rotate pans for even browning. Bake until a cake tester inserted into center of cakes comes out clean, 5 to 10 minutes more. Transfer to wire racks to cool, 15 minutes. Turn out cakes, and set on racks, tops up. Cool completely.
6) Remove parchment from bottom of each layer. Save best-looking layer for the top. Place one layer on the serving platter. Spread 1 1/2 cups cream-cheese frosting over the top. Place second cake layer on top, and spread remaining 1 1/2 cups frosting over top. Place reserved layer on top. Chill cake, loosely covered with plastic wrap, 1 hour.
7) To serve, stir lemon glaze well, then pour onto center of top layer of cake, letting it run down the sides. Using a single-hole zester, cut long strips of zest from orange and lemon, if desired. Arrange zest in loose spirals on the top of cake, and sprinkle lightly with poppy seeds.


SHINY CREAM CHEESE FROSTING
Makes 3 cups
Let this frosting chill for at least three hours before spreading. Use this to frost Citrus Poppyseed Cake or your favorite cupcakes.
* 12 ounces cream cheese, room temperature
* 6 tablespoons unsalted butter, room temperature
* cups confectioners' sugar

1) In the bowl of an electric mixer fitted with the paddle attachment, beat cream cheese on medium-low speed until smooth, about 1 minute. Add butter, and cream until smooth, about 2 minutes. Add confectioners' sugar on low speed, and mix until completely combined.
2) Beat frosting on medium speed until smooth and fluffy, about 1 minute. Transfer to an airtight container, and chill until firm, 3 hours or overnight


I did not copy the lemon glaze, but you can find it here.

Thursday, May 04, 2006

Chocolate-Espresso Tart


Chocolate is too seductive to dismiss. I have forgone meals to satisfy my craving, and I have drenched ice cream in fudgy syrup, making the original flavor unidentifiable. As a child, I would pull a bottle of chocolate sauce from the fridge and squirt the sugary treat direct on my tongue—chocolate milk was a daily addiction. Needless to say, I have trouble trusting those who claim, “I am not really into chocolate.”

Just out of college, I had a roommate any chocoholic would love: she worked at a haut chocolate shop. I quickly turned monthly visits to the store into daily happenings. With each drop in I claimed to be taste testing the wasabi-tinged truffles, ancho chili spiked hot chocolate and bars of white chocolate infused with lavender. In truth, I was in heaven.

When I spy chocolate on a menu I make sure to leave room for dessert—even better is when chocolate is part of the main course! D is often worse than me when it comes to the dark temptation: pushing to order the richest dessert when I might crave a lighter fare—and I thought girls were real chocolate junkies.

When I saw this dessert while flipping the pages of Marth Stewart Living it was too difficult to resist. Once tasted, I knew this tart would satisfy even D’s chocolate cravings: The cocoa crust lingers with the faint flavor of marscarpone in the filling, and the smooth rich ganache permeates with bitter espresso. It is a perfect dessert. Below is the recipe as it appears online.

CHOCOLATE-ESPRESSO TART
Makes 8 servings.
Better than a box of chocolates, this dessert is triply indulgent. The cocoa shell forms a crisp rectangular foundation for two decadent fillings: creamy, tangy mascarpone cheese and generous rosettes of silky-smooth espresso-flavored chocolate ganache.
For the Ganache:
* 8 ounces bittersweet chocolate (preferably 61 percent cacao), chopped
* 1-¼ cups heavy cream
* 2 tablespoons good-quality ground espresso beans

For the Tart Shell:
* 1 cup all-purpose flour, plus more for parchment paper
* ¾ teaspoon salt
* 1/3 cup unsweetened Dutch-process cocoa powder
* ½ cup (1 stick) unsalted butter, softened
* ¼ cup sugar
* 1 large egg
* ¾ teaspoon pure vanilla extract
* 3 tablespoons heavy cream

For the Filling:
* 1-½ cups mascarpone cheese

1) Make the ganache: Put chocolate into a medium heatproof bowl, and set aside. Bring cream and espresso to a boil in a small pan. Pour through a fine sieve over the chocolate; discard solids. Let stand 2 minutes, then whisk until smooth. Let cool to room temperature, 1 to 2 hours.
2) Make the tart shell: Sift flour, salt, and cocoa powder into a medium bowl; set aside. Put butter and sugar into the bowl of an electric mixer fitted with the paddle attachment; mix on medium speed until pale and fluffy, about 4 minutes. Add egg and vanilla, and mix until combined, scraping down sides of bowl as needed. Reduce speed to low. Gradually add the flour mixture in 3 batches, alternating with the cream. Shape dough into a thick rectangle; wrap in plastic. Refrigerate until cold, about 30 minutes.
3) Preheat oven to 350°. Roll out dough between 2 pieces of lightly floured parchment paper to a 16-by-6-inch rectangle, about 1/4 inch thick. Press dough into a 14-by-4 1/2-inch rectangular flan frame set on a baking sheet lined with parchment. Trim dough flush with top edge. Prick all over bottom of shell with a fork. Bake until firm, 18 to 20 minutes. Transfer to a wire rack; let cool completely. Unmold.
4) Put ganache into the bowl of an electric mixer fitted with the whisk attachment; beat on medium-high speed until soft peaks form, about 4 minutes. Transfer to a pastry bag fitted with a large star tip (such as Ateco #828).
5) Smooth mascarpone cheese over bottom of tart shell with an offset spatula.
6) Pipe ganache rosettes, one next to the other, on top of mascarpone to cover. Store in the refrigerator up to 1 day.
Note: Great Ganache: To turn out smooth ganache every time, make sure the mixture is at room temperature before whipping. Any warmer or colder, and its cream is likely to seize or become grainy.

Sunday, April 30, 2006

Open-Faced FBS


The BLT [Bacon-Lettuce-Tomato if you dare not know], might just be the most underrated sandwich there is. It shares its lowly status with the sardine sandwich, liver sandwich, and tongue. There might even be an equation—or possibly just a graphable body of data-- that while young, it is the holy grail of grilled cheese that rates as favorite. As we age we teeter off for the more classic sliced meats, and as old age creeps in, we can return to the classics: sardine, liver and tongue.

But where is the BLT in the equation. And more importantly, am I old too young because I appreciate a good sardine sandwich on rye? A schmear of liver? A slab of tongue? Actually, scratch the tongue—I could never get over the bumpy texture.

Who orders a BLT? It is a perfect meat-to-vegetable-to-crisp-lettuce ratio in every bite and yet, it is too often overlooked for something “more hearty”. I am known to pass by it on a menu, even when that sweet-salty bacon is all I crave, unable to spend $5 for what I consider a $3 sandwich. To spruce the classic up, I have seen restaurants create the BALT (adding avocado), a BBLT (with brie), and even [gasp] TBLT (turkey bacon)! But nobody seems to understand it is no longer its simple and perfect self when this happens.

I awoke Sunday morning craving breakfast, but also a BLT. How to make a breakfast version without destroying the BLT's simplicity? I headed over to the butcher while I considered my options. I had him slice up fresh bacon, ¼ inch thick (thick bacon being the key to a BLT). As I passed the bakery to grab my bread I saw the solution: Sureki. Sureki is the Greek’s Challah-- a sweet braided egg bread. I picked up the loaf envisioning my goal: The FBS.

Still at a loss?

FBS, or French Toast-Bacon-Strawberry, is the perfect Sunday morning breakfast sandwich. Offering the best parts of the BLT: crisp bacon and fluffy bread, with a sweeter breakfast flare. Instead of your daily vegetable you receive your daily fruit. For an extra zing, lime and orange zest are used, fresh orange juice and basil as your greens (instead of lettuce).

OPEN-FACED FBS
Makes 2 servings. Active Time= 15 minutes.
* 4 thick-slices egg-based bread (challah works well)
* 4 eggs
* ½ orange, zested and juiced
* 1 tsp lime zest (about ½ a lime)
* 2 Tbl milk (preferred percentage)
* 4-¼ inch thick slices of bacon (ask your butcher to slice it thick)
* 10 strawberries
* 4-5 leaves fresh basil, chopped
* 1 Tbl butter
* cinnamon/ sugar

1) Place one skillet (for bacon) on medium-high heat. Place one skillet on medium heat (for the French toast) with butter.
2) In a wide-brimmed bowl, crack eggs, add milk, juice from ¼ of the orange and orange zest. Beat until well mixed. Drench bread slices in egg mixture until well-drenched. Once egg mixture is done, the two skillets should be warmed.
3) Place bacon on skillet to cook. Place bread on second skillet. Cook 3-4 minutes one side, flip, 3-4 minutes opposite side. Cook until golden brown. Depending on preferred doneness, bacon should receive 4-5 minutes each side. If bacon finishes before bread, place bread in oven to stay warm, set at 250F.
4) Keeping an eye on the bread, make the strawberry topping: Combine strawberries, lime zest, juice from ¼ orange and basil in a small bowl. Using a fork, mash the strawberries into a thick pulp. Serve at room temperature, set aside until ready to serve.
5) Once bread is done, sprinkle with cinnamon and sugar (*do not put this on while on the skillet as it will just burn. Putting this on after it is done cooking will allow the mixture to melt right into the bread).
6) Remove bacon when ready.
7) Sandwich can be open-faced or closed. Layer the sandwich: French Toast, Bacon, Strawberry mixture.


Head on over to Sweetnick's for today's ARF roundup!

Head on over to Kalyn's Kitchen for the WHB roundup!

Monday, April 10, 2006

Strawberry Tart


I never liked Strawberry Shortcake growing up. I’m not talking about the dessert, but the doll. She was terribly pink and I never was a fan of pink. All high and holy on her board game; Rainbow Bright was much better. She sported moon boots even when they went out of fashion, a mini skirt that looked like a flotation device, had a tattoo on her face (so risqué), and her best friend was an unicorn! Okay, so now Rainbow and her friends look like they have spent all night at a Rave doing copious amounts of acid, but back then, she was cool.

Strawberry Shortcake did allow me to remember one important bit of information: dessert has two “s” like Strawberry Shortcake, while desert, cannot be a cake—or doll.

While I have pretty much gotten over my loathsome tendencies toward Shortcake (the doll) I must say the dessert is pretty darn good. And really, there is nothing better to usher in the warmer months than strawberries—Just do a Google search for ”strawberry festival” and you can see over 3 million people agree.

Unfortunately, it is the one fruit (or vegetable) I do not particularly enjoy picking for myself. I picked blueberries, corn, nectarines and peaches in heat that topped 100 degrees last summer. The strawberry fields… I stayed away from. It is just too laborious of a task to bend so low and rummage for the ruby in the haystack. (Note to self: borrow young child who does not mind stooping over for 1 hour to pick self fresh strawberries.) But humans do crazy things for love and this is why strawberries hold the status they do.

This dessert is no shortcake. It is a little bit classier, looks spectacular, tastes sophisticated enough to hold its own at dinner party, and yet is festive enough to highlight a BBQ. Made only yesterday, it has almost vanished, smacking a smile on D’s face with each bite.

*This recipe is adapted from an April 2005 Gourmet magazine. In mine, the cream cheese filling has been altered, as well as the topping. I also made a quick crust found in The Joy of Cooking. The original used kiwis, a store-bought pre-made crust, and incorporated no herb.

STRAWBERRY TART
Makes: 8-10 servings. Active Time= 30 minutes. Inactive Time=15 minutes
The Crust
*This is the recipe as it appears in the The Joy of Cooking.
For a double-crust 9-inch, or a single-crust pie with a generous lattice, use the following amounts. For a one-crust 9-inch pie, use half the recipe.
Sift Together:
* 2 cups all-purpose flour
* 1 tsp salt
Measure and combine:
* 2/3 cup chilled leaf lard or shortening
* 2 Tbl chilled butter
Cut half the shortening into the flour mixture with a pastry blender, or work it in lightly with the tips of your fingers until it has the grain of cornmeal. Cut the remaining half coarsely into the dough until it is pea size. Sprinkle the dough with:
* 4 Tbl water
Blend the water lightly into the dough. You may lift the ingredients with a fork, allowing moisture to spread. If needed to hold the ingredients together, add:
* 1 tsp to 1 Tbl water
When you can gather the dough up into a tidy ball, stop handling it.
-------------
1) Preheat oven to 450F. Roll out the dough and place it into your pie tin or tart mold. Bring the dough about ¼ inch over the edge of the tin; fold back to reinforce the edge.
2) Poke dough several times with fork. Cover bottom with tinfoil, add pie weights or dry beans or rice. Bake for 6 minutes. Carefully remove the foil and weight. Bake for 7-10 minutes more; until crust is golden.
3) Place on rack to cool. While cooling, make the filling (below).


The Filling
*Adapted from Gourmet, April 2005. Use a pie tin with removable bottom for easy serving.
* 6 oz cream cheese, room temperature
* 2 Tbl sugar
* 2 Tbl milk
* 2 tsp finely grated fresh orange zest
* 1 tsp vanilla
* 2 tsp fresh mint, chopped
* 10-12 ripe strawberries, tops removed, sliced in half
1) While crust (above) is cooling, in a bowl, beat cream cheese, sugar, milk, zest, and vanilla with a mixer until smooth, 2 to 3 minutes.
2) Add chopped mint; mix with spatula to incorporate.
3) Spread cream cheese filling evenly in cooled shell; top with strawberry slices.
NOTE: Can be made ahead and chilled. Tart should be brought to room temperature before serving.


Head on over to Sweetnick's for today's ARF round up!


View Stats
Rankingblogs.com: Defining your blogs worth..