Monday, December 18, 2006

Birthday Celebrations


I know, it’s been a while. This December has been unusually stress filled and crazed but the New Year promises to offer some clarity.

The craziness peaked with D’s birthday. Like last year, D decided to have some friends over for eats and drinks. Unlike last year, we decided to step the food preparations down a notch and enjoy our time with friends. We made pizza. Two nights before the birthday I bought, chopped and cooked all the pizza toppings (the food processor is my best friend). The day before the cake was started and the morning of, pizza dough was prepared and meringue was added to the cake-- Much less crazy than it sounds.

The day’s events brought pizza of choice to all who attended. The ingredients were on the table and as guests arrived we rolled out dough and people created pies. Everyone (seemed) to enjoy it and really, there is little better than fresh, warm, homemade pizza. The smell alone will drive you to drooling.

The highlight of the evening was by far the birthday cake. While D insisted on Red Velvet, I decided if I was making the cake, I was making something even more special.

Many foodies (and even some non-foodies) have realized that cupcakes have been all the rage in the past two years or so. There are multiple cookbooks devoted solely to cupcakes, a blog and in New York City, there is even a restaurant called Cupcakes and Burgers. Why do we love cupcakes? Who knows, but here is some possible insight: They are small, and we all know small food is cute food. They are individually sized (so it’s all equally me, me, me!)—or just the perfect serving, and they are easy to decorate (and if you mess up you have plenty more to try again).

Here in New York, I am fortunate (or not) to work in a foodie-friendly environment. We swap foodie tales and foodie destinations and sometimes we even take an extended lunch to head on down to Billy’s Bakery for a Red Velvet cupcake for a late afternoon pick-me-up. The favorite is by far the Red Velvet.

I brought one home to D one day and he was hooked. The striking red of the cake is beautiful against the pristine white of the cream cheese frosting (it would even make a fabulous Christmas cake for next year!). With a hint of cocoa they are perfect for the chocolate cake-vanilla frosting set as well as the vanilla cake-vanilla frosting set (sorry chocolate frosting lovers).

Skip ahead a few months and one of D’s office mates brought Red Velvet cupcakes into for all, proclaiming they were Billy’s Red Velvet and no red food coloring is used to make the cake brilliantly red. That in fact, it is the reaction of baking soda with cocoa powder that turns the cake it’s ruddy hue.

D ran home with the news to which I skeptically stated I was sure there was red food coloring in nearly every recipe of Red Velvet I had looked at. Further investigation revealed that this was once the cake. Today’s cocoa is processed in such a way that the red reaction no longer occurs but it is where we receive the term “Devil’s Food Cake”—or as we know it, delicious chocolate cake. So, today, in order to keep its bright hue, we add a good 1-2 tablespoons of red food coloring to our Red Velvet Cakes to ensure their brilliance is wowing.

So D was pushing for Red Velvet but I pushed (and ultimately won since I was baking) for the above pictured cake: Blackberry Chocolate Cake with Blackberry Meringue Frosting. It also helped that I found an amazing deal on blackberries that week ($1 per pint!). To make it extra special I purchased100% cocoa powder from La Maison du Chocolat for a hefty price. The cake tasted better than it looked and everyone especially loved the fresh blackberries inserted between each layer (4 layers to be exact).

While it all sounds complex the most involved part was sieving fresh blackberries for the cake batter. All else was a breeze—even assembly. My boss passed this recipe on to me with the warning “it’s a very special cake.” Well, the cake is amazing with a rich chocolate cake and surprisingly thick, yet light and fruity frosting. The recipe, I believe, is from Saveur Magazine. It is claimed to [gluttonously] serve 10 but is more like 15. This is the recipe as it was given to me.

BLACKBERRY CHOCOLATE CAKE w/ BLACKBERRY MERINGUE FROSTING
Serves 10. Active time= about 2 hours. Inactive time= about 1 hour.
BLACKBERRY CHOCOLATE CAKE
Can be made the day ahead and kept at room temperature.
* Vegetable oil spray
* 3 cups all-purpose flour
* 2 cups granulated sugar
* ¾ cup unsweetened Dutch-process cocoa powder
* 2 teaspoons baking soda
* 1 teaspoon salt
* 2-½ cups fresh or thawed frozen blackberries
* 1 cup low-fat (1.5%) buttermilk
* 2/3 cup vegetable oil
* 2 tablespoons distilled white vinegar
* 2 teaspoons pure vanilla extract

BLACKBERRY FILLING
* ¾ cup egg whites (about 6 cups)
* 1-½ cups granulated sugar
* ½ teaspoon cream of tartar
* 1-½ cups seedless blackberry preserves, at room temperature
* 1 pint fresh or thawed blackberries, plus additional berries for garnish
* 2 tablespoons confectioners’ sugar

1. Make the chocolate cake: Preheat oven to 350F. Coat two 9-by-2-inch round cake pans with vegetable oil spray and line the bottoms with parchment paper. Lightly spray the paper. In a large bowl, sift together the flour, sugar, cocoa, baking soda and salt.
2. Pass the blackberries through a fine strainer set over a bowl; you should have about 1 cup of puree. Whisk in the buttermilk, oil, vinegar and vanilla to the puree. Pour the blackberry mixture into the dry ingredients and mix until just combined.
3. Divide the batter evenly between the prepared pans and bake for about 40 minutes, or until the cakes pull away from the sides and the tops spring back when pressed. Let cool on a rack for 10 minutes, then unmold and cool completely.
4. Make the blackberry filling: In a large heatproof bowl set over a saucepan of simmering water, whisk the egg whites with granulated sugar and cream of tartar until the sugar dissolves and the whites are hot to the touch, about 5 minutes. Transfer to a standing mixer and beat at high speed until the meringue cools to room temperature and is very thick, about 15 minutes. Stir the blackberry preserves until smooth, then gently fold 1 cup into the meringue.
5. Using a serrated knife, split the cakes in half horizontally. Thinly spread the remaining ½ cup of preserves on 3 of the cut cakes layers. Set one of the layers on a large plate, preserve side up. *Spread one-third of the meringue on top and press one-third of the blackberries into the meringue. Repeat with the remaining preserve-spread layers and the remaining meringue and blackberries. Top the final cake layer and let stand at room temperature for 1 to 3 hours. Just before serving, sift the confectioners’ sugar over the top of the cake and garnish with additional blackberries.

*The amount of meringue created in this recipe was astounding. Instead of dividing it into thirds, I essentially divided it into fifths. Each layer received one-fifth and the remaining fifth covered the outside of the cake. I then topped the meringue with a final blackberry layer and sprinkled with confectioners’ sugar. I felt the cake looked more finished this way too—though you don’t see the layers until sliced.

Tuesday, December 12, 2006

Peppermint Rocky Road Cookies


The short and simple of it is that I was craving some Rocky Road Ice Cream the other day. Surprisingly, it's never been a favorite and I more often lean towards a mint based creation or black and white milk shake when it comes to ice cream indulgences. The other night, it was Rocky Road. The craving quite possibly was ignited by the need to use up some marshmallows left over from a late fall camping trip. They have been staring me down, mocking me with their fluffiness for a few months now.

"How about sweet potatoes?!" You say. As sweet potatoes go, I like them mashed or in a plain pie, no added marshmallows as I believe sweet potatoes are strongly sweet on their own.

So I thought brownies or Rocky Road Cookies. I knew I had all ingredients for cookies, so cookies it was.

But wait, there is no peppermint in Rocky Road. Well, in holiday Rocky Road there is. Or more likely, I was needing to rid myself of a stagnant pile of peppermints (a la the dark chocolate peppermint bark) that have been sitting around longer than I care to mention.

This recipe is (very slightly) based on those delicious Cranberry Macadamia White Chocolate Chip Cookies. I added cocoa powder to the batter to give them a chocolate base. More should have been added to really pump up the chocolate in this (which is why chocolate chips were added). When baked, the marshmallow oozes out of the cookies and provides a sweet crisp crunch along the edges which was a pleasant surprise. These cookies are chewy and a sweet meal in themselves!

PEPPERMINT ROCKY ROAD COOKIES"
Makes about 25 2-inch cookie drops
1-1/2 cups all purpose flour
1/2 tsp baking soda
1/4 tsp baking powder
1 tablespoon good cocoa powder
1/2 tsp salt
1-1/2 sticks butter, softened
3/4 cup firmly packed light brown sugar
1/2 cup granulated sugar
2 eggs
1 tsp vanilla
2 cups oatmeal
1 cup chocolate chips (your pick: dark, white, milk)
1/2 cup crushed peppermint
1/2 cup chopped pecans or walnuts
2 cups roughly chopped (or cut) marshmellows, in about 1/2 inch pieces. Plus extra for tops of cookies

1) Preheat oven to 350F
2) In a mixing bowl, whisk together flour, baking soda, baking powder, salt and cocoa.
3) With an electric mixer in another bowl, add butter and sugar, mixing until fluffy. Add the egg and vanilla, mix until well combined.
4) Beat in flour mixture until well combined.
5) Add remaining ingredients and stir until evenly combined.
6) With a spoon, drop dough about 2 inch apart. Top with an extra piece of marshmallow. Bake in batches in middle of the oven 10-12 min (or lightly golden) for soft cookies. Cool on racks.

Wednesday, December 06, 2006

Holiday Art Sale!


I rarely to never steer you from foodie love but I've been quiet and for good reason (besides, there will be food if you come). And... ti's the season for gift giving to yourself and others-- you need beautiful things to serve your delicious creations on, yes?

If you live in or around NYC come on down to my studio's Holiday Art Sale!!

pLeAse spREaD tHe WOrd!

Join us! Eleven ceramic artists gather for one last show (our studio is closing to make way for luxury condos).

ThursdAy, dec 7: 4-8 pM
fRIday, DeC 8: 4-8 Pm
SaturdAy, Dec 9: 12-5 pm (live Music 2-5 pm)
SuNday, dec 10: 12-5 Pm

And by Appointment. 718.729.4882.

42-26 28th St, Ste 2E
Long Island City, NY 11101 map

mapquest directions for car (there is a cheap parking garage across the street and plenty of empty streets)

by subway (if you come after work and live in Brooklyn buses and the G are just outside. Or catch the LIRR in Queens!):

N,W or 7 to Queensboro Plaza. Use Queens Plaza South exit to street. Walk straight ahead to 28th St and turn right. The building is at the end of the block on the corner of 28th St and 42nd Rd.

E,R or V to Queens Plaza. Use Queens Plaza South exit to street (the middle of the train is nearest this exit). Walk straight to 28th St. and turn left. The building is on the right at the end of the block on the corner of 28th St and 42nd Rd.

G to Court House Square. Walk north on Jackson Ave and turn left onto 42nd Rd. The building is straight ahead on the corner of 28th St. and 42nd Rd.

Monday, December 04, 2006

Dark Peppermint Bark


Last Thanksgiving I was in Chicago when some family friends gifted us a tin of Williams Sonoma Peppermint Bark. It was so frighteningly addictive that I was eating sheets of it a day. My mother forced me to take it home to New York City and it was gone in a matter of days.

Little did I know that this might just be the easiest dessert to put together. I'll be making it again in white chocolate/ dark chocolate layers (a la Williams Sonoma for a fraction of the cost) for my ceramic studio's holiday sale, but just had to get this out to you now to create and be swayed by paying $25 for a box at the store! If you have some chocolate lying around and some peppermints piled up nabbed from restaurants, this is perfect use for them.

It is one of those recipes people will think you bought or spent all day laboring over and you will tell them you did and laugh to yourself. It would make a perfect holiday gift for friends—just buy a nice tin at the dollar store!

I will not even put quantities down because however much chocolate you have can be used and the peppermint quantity will depend on how strong you want the final product.

DARK PEPPERMINT BARK
Qty Depends on amount of chocolate used. Active time= 10 minutes. Inactive time= 6 hours-overnight.
* 1 bar dark chocolate
* peppermint canes or candy, crushed
* 1 teaspoon peppermint extract (optional)

1) Lay parchment paper on a cookie sheet.
2) Put peppermint in a paper bag and wrap with a clean dish towel. Use a hammer to crush the peppermint into pieces from dust to chunks.
3) Melt the chocolate in a double boiler*, add the peppermint extract and mix as it melts.
4) Once melted, pour onto parchment paper and use a spatula to spread chocolate about ¼ inch thick. Sprinkle with peppermint and allow to dry 6 hours to overnight.
5) Once dry, break chocolate apart into uneven chunks, store covered.
* If a double boiler is not available use two non-stick sauté pans. One should be larger and filled half way with water, brought to a boil. Place the smaller pan on top of the water, without it touching the other pan and melt chocolate in the smaller pan.

Saturday, December 02, 2006

Thyme Cornbread


I was never a very big fan of cornbread. I had it at restaurants slathered in butter, sure. More often than not though, I preferred filling up with a heaping spoonful of mashed potatoes or thick creamed spinach. Delicious. Cornbread was too often dry and overly crumbly and needed too much butter to be palatable. That, or an attempt to moisten it with jalapeno peppers just made it soggy instead of giving it a due kick.

Well, D is a southern boy who likes his cornbread. Come to think of it, because of his Indiana roots, it’s really corn that he loves-- In any form, preferably fresh. Well, we’re out of fresh corn. The junk the markets are hawking as “late summer” corn is limp, withered and disgusting. So we turn to cornmeal for our corny fixings.

Since D has been around, I have been quite surprised to see just how far cornmeal can go. It appears in our mainstay breakfast pancakes and pops up in light fries like battered calamari. Over time I have begun to think highly of cornmeal and thought maybe cornbread should be given another try.

And so, with a little leftover thyme and a new cast iron pan c/o my mother, some “I  Cornbread” was created. When warm and fresh with a dab of butter this cornbread is moist and delicious. The thyme imparts the perfect herby sweetness to the final product making you think you might just be eating healthy—although even better with a side of cracklings.

THYME CORNBREAD
Makes about 12 sticks or small muffins. Active time= 10 minutes. Bake time= 15-20 minutes.
Have all ingredients at 70F
*3/4 cup sifted all-purpose flour
* 2-½ teaspoons double acting baking powder
* 1 to 2 tablespoons sugar
* 3/4 teaspoon salt
* 1-¼ cups yellow or white stone-ground cornmeal
* 1 egg
* 2 to 3 tablespoons melted butter or drippings
* 1 cup milk

1) Preheat oven to 425F. Grease cornbread pan with butter (cast iron is best) and place in oven while prepping ingredients
2) Sift flour, baking powder, sugar and salt together in a medium bowl.
3) Add cornmeal and stir until evenly combined (I recommend Sunny Slopes Farms Cornmeal in Indiana, email me for their phone number)
4) In a separate bowl beat the egg. Beat into it the butter and milk.
5) Combine all ingredients with a few quick rapid strokes until evenly combined.
6) Carefully remove pan from oven and place batter in hot pan about ¾ of the way full. Bake 15-20 minutes until just golden on top. Serve immediately.

Tuesday, November 28, 2006

Mysteries of Jamba Juice

Head over to Just Praise for some mysterious news...

Friday, November 24, 2006

Shrimp Bisque


It has been so long… I have a holiday sale coming up at my studio and made a mad push to fire one last kiln load before the big day. If you’re in the New York City area and think handmade ceramics might be up your gift giving alley (or for you personally), all are welcome. Eleven ceramic artists all with very different styles will have pieces on sale. Food, drinks and even some live music--music on Saturday only--will be part of the celebrations. The sale is Dec 7-10 in Long Island City, Queens (first stop into Queens from Manhattan, 15 minutes from midtown). Email me if you would like more details-- the bad news: this is our last sale, the building that houses our studio will be turned into luxury condos!

So are you already tired of all that turkey? Or maybe it’s the turkey that is making you tired. I’ve already turned my leftovers into my grandmother’s savory Latvian Pancakes and stashed them in the freezer for a rainy day. Okay, I popped a few along the way. But I learned that making these time consuming treasures is much easier taken in steps: day 1 make crepe batter and filling; day 2 make crepes, fill and finish. Mmm, I might go grab another one…

But really, the shrimp bisque already. If you have fish stock on hand this recipe is a cinch. It is quick, filling and warming on a cold, rainy day. With some warm bread (or in a bread bowl) this makes a fantastic meal.

My mother sent me Ina Garten’s new book Barefoot Contessa at Home: Everyday Recipes You'll Make Over and Over Again. Most recipes are pretty basic with ingredients that can easily be substituted for what you have on hand. I’ve heard the writing matches Ina’s personality, and if you don’t like her show, you won’t like the book. I don’t have cable (so I have never seen the show) and I haven't really taken the time to read her stories, so the recipes suit me well enough as a jumping off point.

I saw this shrimp bisque recipe and while I was really craving clam chowder, this recipe seemed a little less labor intensive (and I had clam chowder at a restaurant the previous night so why over due it?). With my old lean to, the handheld blender, I was able to whip this one up in just about 30 minutes. I had fish stock frozen and waiting for use from the seafood paella and today was its day!

SHRIMP BISQUE
Adapted from The Barefoot’s Contessa at Home cookbook
Makes about 6 servings. Active time= 20 minutes. Inactive time= about 10 minutes.
*1 pound shrimp, shells removed and set aside
* 1 tablespoon butter (or olive oil)
* 1 onion, chopped
* 3-4 cloves garlic, crushed
* 2 celery stalks, chopped
* 1 rosemary branch, 4-6 inches
* 2 teaspoons paprkia
* ½ cup brandy
* 5 cups fish stock (see my paella for a recipe if you cannot find it at the store)
* 1 8oz can tomato paste (get one with no salt/ no flavors added)
* 1 pint heavy cream or half and half

1) In a small pot on medium heat, bring fish stock and shrimp shells to a simmer, about 15 minutes. Do not boil.
2) While stock is warming, in your main stock pot over medium heat, warm 1 tablespoon butter. Add onions, garlic, celery and rosemary. Sauté 8-10 minutes, until onions turn translucent.
3) Add paprika and shrimp, cook for 3 minutes until shrimp begin to turn pink and curl.
4) Add brandy and cook for 3 minutes more.
5) Remove the rosemary branch (okay if some leaves remain). Strain the fish stock to remove the shrimp shells and add to the main pot.
6) Add tomato paste and stir until dissolved.
7) Using a handheld blender (or carefully in batches with a regular blender) pulse the soup. Break down most of the shrimp, but overall, leave the soup chunky. Add cream, bring to a simmer and serve.

Thursday, November 23, 2006

Friday, November 17, 2006

Thanksgiving Feasting, Part II

I will be making no Thanksgiving meal this year, nor will I be helping with preparations other than eating appetizing bits. There are so many clever little hints I've been picking up along the way that I would have loved to dish out, ways to spice up presentation, etc. Maybe next year. Until then... I will contemplate what I would have made (and make your searching a little easier in the days to come):

For munching, I would definitely have a cheese platter set out with dried fruit (apricot, plum, figs), assorted nuts (cashews, walnuts, roasted chestnuts) and some olives. A few cheeses I would absolutely have? Some of my old and new favorites: Bayley Hazen Blue, a stinky Epoisses, a butterscotched Gouda and the rich Monte Enebro. [Okay, not too difficult to figure out the key to my heart lies in cheese.] Serve it with a bold Zinfandel (the only wine pairing I will make).

If people really needed an afternoon snack I might whip up a batch of the recent cranberry bread. Fabulous with tea or coffee.

That should be enough to tide people over until a nice warming bowl of soup. How to choose since I love soup. A quick and easy one is Curried Butternut Squash or a zesty Carrot Ginger, a sweetly spiced new one is Winter Squash, and a decadent one, yet to be posted (but if you would like a recipe, let me know, it’s delicious) is a rich Chestnut Soup with Thick Bacon Bits.

A salad would follow. Probably endive, pear and walnut. Possibly with pomegranate. Much like the one here. Cleansing and delicious.

Turkey, of course. Broiled Brussels sprouts, sweet potato chips with an elegant balsamic reduction, garlic mashed potatoes topped with caramelized onions, braised beets and other root veggies for color, and maybe some sweet asparagus with a splash of truffle oil (and shavings if the budget allows). I’m not really a stuffing person, but I made this oyster stuffing, last year that was rich and delicious and scavenged to be taken home.

A pause for dessert. Maybe a walk around the block. Then dessert.

Hands down holiday favorite is the pumpkin cheesecake-- though this chocoalte espresso tart is luxurious. For the cookie lovers, pumpkin gingersnap cookies, gorgeous cranberry macadamia white chocolate chip cookies and rum raisin oatmeal cookies.

The following morning would be full of succulent Latvian Pancakes, with plenty to freeze for later snacking—the perfect way to get rid of those turkey day leftovers!

Enjoy your Turkey Day wherever you may be.

Monday, November 13, 2006

Announcing New Site: Just Praise

I have a new site up and running: Just Praise. Just Braise's sister site will showcase restaurants, books and food events. They shall be praised or panned. Either way, the verdict will be Just. The first few posts have gone up and you can find them at Just Praise. If you enjoy reading Just Braise, please give JP a visit.

In the meantime, a few things have gone up around the blogsphere that will soon be added to Just Praise:
Food Art @ The Plant
David Kamp's United States of Arugula

Saturday, November 11, 2006

Cranberry Sweet Bread


The other week I was at the grocery store and noticed the bags of cranberries were finally set out. Mmmm, cranberry juice I mumbled, and in a trance walked over and placed them in the basket D was carrying.

“What are you going to do with those?”
“I dunno, they’re pretty.”

And so the pretty little rubies sat in the fridge for the better part of a week while I researched some recipes. I was looking for something fast and easy that would still look and taste delicious. I finally found it on a Chowhound forum-- a one bowl, just add, stir and bake recipe. I checked the comments and someone had already made it with wowed reaction so I decided to dig in as well.

This cake-like bread was delicious warm right out of the oven. The recipe recommends a caramel sauce, but I think whipped cream would be great too. I had it plain with coffee and it made a great mid-afternoon pick-me-up or breakfast.

This is the recipe list as it appears in Chowhound. There are other fabulous cranberry recipes listed there too so check it out.

*Note: This is not my mother listed below. Also, I cannot vouch for the caramel sauce because I did not make it. The changes I made are as follows: I used 2% milk instead of whole milk and increased the cranberries to one whole 16 ounce bag (from 2 cups). Lastly, I used a 7x11 pan as I wanted a thicker bread. I had to bake mine about 10 min more.

MOM’S CRANBERRY CAKE W/ CARAMEL SAUCE
Makes 1- 9x13 loaf. Active time= 10 minutes. Inactive time= about 30 minutes.
* 2 cups unsifted flour
* 1-½ cups sugar
* ½ teaspoon salt
* 2 teaspoons baking powder
* 4 tablespoons unsalted butter, soft
* 1 cup whole milk [2% works well too]
* 2 cups whole fresh cranberries [or 1-16 ounce bag]

1) Preheat the oven to 350F
2) Mix the flour, sugar, salt, baking powder and butter together until it resembles coarse crumbs.
3) Add milk and stir until evenly distributed. Fold in cranberries.
4) Pour batter into a buttered 9x13 pan. Bake for 30 minutes or until golden. Pour caramel sauce (below) over individual servings and serve.


CARAMEL SAUCE
* ½ cup butter
* ½ cup sugar
* ½ cup brown sugar
* ½ cup half and half

1) Combine all ingredients on stovetop and heat until thickened; do not boil.


Head over to Sweetnicks for the ARF roundup

Thursday, November 02, 2006

Asian Inspired Beef Braise


I know it’s a little vague to use the term “Asian Inspired” when describing this, or any, dish. Possibly Asian fusion works better, or simply, fusion braise (to go along with all the fusion restaurants we have these days).

For a few weeks now, D has been eyeing the 4-inch thick cuts of beef chuck at the butcher. They called out meat-protein overload to him, so when I finally okayed the purchase he was in heaven. As we headed next door to the vegetable stand and D picked out a few potatoes for the braise, he eyed me warily as I bagged up chestnuts and shiitake mushrooms. More than once I was told not to “ruin” his beef.

Last summer I was in China finishing up a Masters degree. Between tastings of dehydrated “rope” pork, emperor banquets of delicately crafted dim sum, ogling beetles and snakes on a stick and falling in love with the velvety sweet pulp of mangosteens, I became enthralled by the vibrant offerings of vegetables. Each dish was a still life: Broccoli was reshaped into flowering blossoms, mushrooms became lotus roots and lotus roots became dragon scales. I was constantly amazed by the care that was put into presentation, regardless of the establishment.

It was in these dishes that I came to re-appreciate the texture and versatility of the shiitake mushroom, amazed how it holds up in cooking. And it was here that I learned to love the chestnut-- popping up to add a rich flavor and thick creaminess to dishes I hadn’t known before. Used sparingly, mostly as a holiday embellishment (accordingly with their season), I don’t think the chestnut receives its fair exposure.

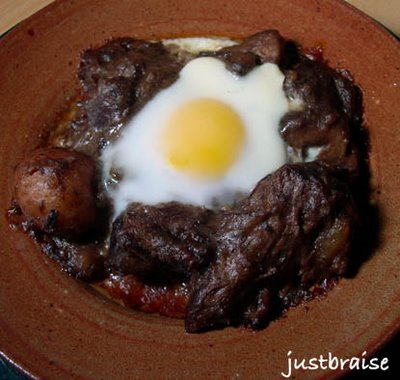
This dish is in some ways a remembrance of China, but more so, a way to incorporate the ingredients I came to appreciate in a succulent braise. We ate the braise bare at first and on the second and third day cracked an egg on top and enjoyed it baked. The egg adds another wonderful depth of texture and fabulous richness once the yolk is broken. And those little potatoes D gathered for the braise? Perfect for sopping all the juices up.

ASIAN INSPIRED BEEF BRAISE
Serves 6 persons. Active time= 20 minutes. Inactive time= 3-½ hours (depending on thickness of meat).
* 1 pound chestnuts, roasted and shelled
*5-6 pound cut of beef chuck (or other inexpensive cut)
* ½ pound shiitake mushrooms, cut into quarters
* 1 medium onion, sliced (or 2 bunches scallions)
* 3 tablespoons soy sauce
* 1 tablespoon sesame oil
* 1 teaspoon dried chili flakes
* ½ bottle red wine
* water
* ¾-1 pound (small) new potatoes, red or white, left whole

1) Roast the chestnuts before beginning. I apparently did not slice into the shells deep enough and a few exploded in the oven. Preheat oven to 350F. Carefully slice an “x” into the bottom flat nub of the chestnut. Place on a pan and roast for 30 minutes, until shells begin to peel away (or blow up in my case). Allow to cool and remove shells. Place meat aside in a bowl (okay if meat breaks apart).
2) Warm a dutch oven over medium high heat with a 1 tablespoon butter-1 tablespoon olive oil combination. Once warm, rinse off beef and pat dry. Salt and pepper both sides of the beef. Once pot of hot, add beef and brown on all sides, about 4-5 minutes each side. Remove meat from pot, set aside.
3) Add mushrooms, chestnuts and onion to pot. Sauté until onions turn translucent, mushrooms brown and chestnuts break down slightly; about 8 minutes.
4) Add soy sauce, chili flakes and sesame oil, stir to incorporate.
5) Push contents of pot to the sides and replace meat in the pot. Add red wine and enough water to come just below the top edge of the beef (depending on how thick your meat is, you might not need any).
6) Place potatoes around the top, but not in the liquid. Cover tightly, turn heat to low and allow to braise (slow cook) for 3-½-4 hours. Check on the pot once an hour. Turn heat down if liquid is boiling. Add more water if all liquid evaporates out. The dish is done when meat easily falls apart and sauce has thickened.
7) Enjoy warm as is or with a baked egg on top (see below).
8) With baked egg: Preheat oven to 350F. Dish up a portion in an oven safe bowl. Create a small divot and crack egg into the space. Place dish on cookie sheet for easy transport and place on middle rack in oven. For a runny yolk, bake for about 10 minutes, until yolk just begins to form a white covering.


Tags: , , , , , , .

Sunday, October 29, 2006

The Bride of Frankenstein Madeleines


The real deal:

I’m not really so much into Halloween lately. It might be because here in the City, people are so terrified to let their children go door to door that instead they go store to store collecting candy. It takes the fun out when you can’t see kids all dressed up and excited coming and going.

When I first moved into my current apartment, my roommate at the time overloaded on candy, we received a solo trick-or-treater and were still eating through the bounty into the New Year. Today, D brought home a bag of Dove Dark Chocolate. “What’s that?” I asked. “For the trick-or-treaters.” “Mmm, kids really love dark chocolate.” “I don’t care, it’s for me.”

Which tends to be the attitude when we go collecting candy anyway, right? I remember my mother bought king-sized bars since we at most received 5 kids on Halloween and she wanted to award them for coming out of their way. Before Halloween she would remove some of the handout candy before kids came around and squirrel it away. The candy ended up being ours for the taking eventually. It's the same role my brothers and I took. We would arrive home from a night of Halloween, post egg and shaving cream fights, fears of local cats being skinned and bigger kids driving around with BB guns, and trade our candy between the three of us. We then stealthily (or so we thought) hid our candy in different areas of the house, taking a few pieces out for a daily (or hourly) sugar high, saving the prized pieces, those elusive king sized bars, for last. Some years, we were still eating through our stash into April.

There is also the added pressure of coming up with the “best” costume around Halloween. All those cops, slut angels and naughty doctors are tiresome. I could never think of a fabulously original idea I was happy with and inevitably went as “evil Stacey.” She looks just like normal Stacey but is certifiably evil. [It reminds me of pub/ bar quiz nights—where the cleverness of your team name can make or break your fame (at a recent quiz night our team name was Kim Jon Illin’, pretty good I think).]

Here are some good costume ideas from friends of mine I will share if you are still in need for tomorrow night:
Avian Bird Flu (bird feather, surgical mask and a few added funnies)
Ms. Scarlet and Professor Plum (a la Clue: carry a candlestick, library book, or other Clue-centric items. I think this would also be great for groups to go as all the Clue characters).

Will report if I see anything clever around the City tomorrow, so far just the standard Goth Pirate, “sexy” Kitty and red sweat suit wearing devil. As for the Madeleines below…

A few months ago my mother gave D a Madeleine pan. In the meantime we have been searching for the perfect recipe. After much contemplation, we went with one from Gourmet’s Best of Paris cookbook. They turned out fabulously puffy and moist with a great aroma and buttery flavor. I thought they had a slight resemblance to The Bride of Frankenstein so I doctored them up with a little cocoa powder.

MADELEINES
Makes 2-3 dozen cookies depending on cookie sheet size . Active time= 20 minutes. Inactive time= 40 minutes.
Special equipment: 3 madeleine pans
* 1-½ sticks (¾ cup) unsalted butter, melted and cooled, plus additional for brushing
* 1-¼ cups sifted cake flour (not self-rising; sift before measuring)
* ½ teaspoon baking powder
* ¼ teaspoon salt
* 3 large eggs
* 1 teaspoon vanilla
* 2/3 cup granulated sugar
* 2 teaspoons finely grated fresh lemon zest
Confectioners sugar for dusting (in this case, cocoa powder)

1) Set oven racks in upper and lower thirds of oven and preheat to 350F. Brush molds with melted butter.
2) Sift together flour, baking powder, and salt. Beat eggs in a large bowl with an electric mixer at high speed until light and foamy, about 30 seconds with a standing mixer or 1 minute with a handheld, then beat in vanilla.
3) Gradually add granulated sugar, beating constantly at high speed, and continue to beat until mixture is tripled in volume, about 3 minutes with a standing mixer or 5 minutes with a handheld.
4) Sift flour mixture in 3 or 4 batches over eggs, folding (with a spatula) in each batch until just combined. Then fold in zest and melted butter.
5) Spoon a rounded tablespoon of batter into each mold (about two-thirds full) and bake in upper and lower thirds of oven, switching position of pans halfway through baking, until golden around edges and a tester inserted comes out clean, 10 to 12 minutes total.
6) Invert madeleines onto a rack and dust scalloped sides with confectioners sugar.
NOTE: to get the Bride of Frankenstein effect cut out a piece of paper the size of a finished cookie. Use a pencil to outline The Bride’s hairline, noting that where you cut out will be darkened and where the paper is left behind will remain cookie-colored. Place cut-out over cookies and dust with cocoa powder. Use red food coloring, red hots or other small candies for eyes.


Tags: , , .

Saturday, October 28, 2006

Winter Squash Soup


For some, the crisp fall weather is fearsome. It means cold weather, leafless trees, heavy jackets, and buckets of snow are on the way. Too worried about the future, they fail to appreciate the present and all the greatness this time of year has to offer. To them I say, be away with you-- move south!

Whatever happened to your love of sledding, apple picking, snowball fights, pumpkin carving, and snow angels? Jumping through billows of fresh fallen leaves or mounds of fresh pure snow? Waking up on a cold morning to icicles covering the windows and pole licking dares (à la A Christmas Story)?

Personally, fall is my favorite time of year. I love the brisk weather, the changing of the trees, and bundling up in sweaters and mittens. I especially love the food of the season: hot cocoa, soups, stews, the spices that emerge (nutmeg, cinnamon, peppermint) and the general hearty warming these things have on the state of mind.

I go into ration mode. I have the summer fruits I bought overripe and cheap, frozen away to be used in the dead of winter for a Caribbean-like fruit smoothie when its bitterly unbearable outside and reminders of warm weather are necessary. I also have my stockpile of soups that begin to accumulate in single serving sized containers, ready to accompany me to the office for a little internal snuggle or a fast dinner when the need arises.

This soup is an exception. Naturally sweet, creamy and delicious, it is hard to put any aside for a later date. A perfect seasonal soup, this dish would look fabulous for a Halloween treat, Thanksgiving feast, or anything in between and beyond. Make this soup, and you may never make another again.

WINTER SQUASH SOUP
Serving Size= 8-10. Active time= about 40 minutes. Inactive time= about 1 hours.
* 1 White Acorn Squash (or regular Acorn Squash)
* 1 small Butternut Squash
* 1 small Golden Nugget Squash*
* 1 large sweet onion, chopped
* 1 stalk celery, chopped
* 2 carrots, chopped
* 8 cups chicken stock (or vegetable)
* 2 long sticks of fresh Rosemary
* 2 whole cinnamon sticks, about 3 inches long
* 1 teaspoon nutmeg

1) Preheat oven to 350F. Using a heavy sharp knife, slice the three squash down the middle vertically. Gut the seeds (set aside if you want to bake them for eating later, otherwise; discard).
2) Place the squash skin side down on a large cookie sheet and place in middle rack of oven. Bake for 40 minutes, or until soft when poked with a fork.
3) While squash are baking, prepare the other ingredients and begin the soup.
4) In a large stock pot on medium-high heat, warm 2 Tablespoons olive oil or butter (or combination of both). Add onion and sauté until translucent; about 8 minutes.
5) Add celery, carrots, chicken broth, rosemary and cinnamon sticks. Cover and bring to a boil. Reduce heat to medium and uncover slightly. The squash should be about done at this time.
6) Remove squash from oven when soft when touched with fork. Using a towel around your hand, or a fork and knife, either peel the skin off the squash, or slice it away, keeping as much meat as possible. Cut squash into 2-3 inch chunks and add to stock pot.
7) Cover and bring to a boil then reduce heat and remove cover.
8) Remove cinnamon sticks and rosemary twigs (leaves will have fallen off). Add nutmeg. Using a handheld blender, or carefully in batches with a regular blender, purée the soup until smooth.
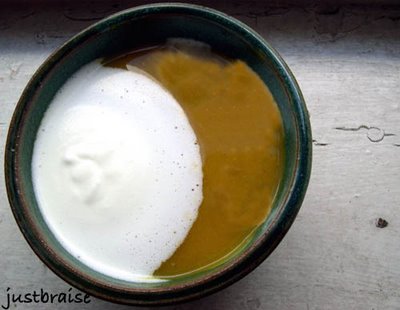
9) Serve plain or with a little heavy cream.
*Note: If you are unable to find these squash in your local market, almost any combination of squash will work. Just Acorn and Butternut would work well, or Acorn, Butternut and pumpkin, etc.


Tags: , , , , , , , , .

Wednesday, October 25, 2006

Foodie posts around...

Have a few things up around the blogosphere...

New Orleans Table Event and a Char-Broil Event.

More recipes to come shortly....

Tags: , , , .

Thursday, October 19, 2006

Applesauce


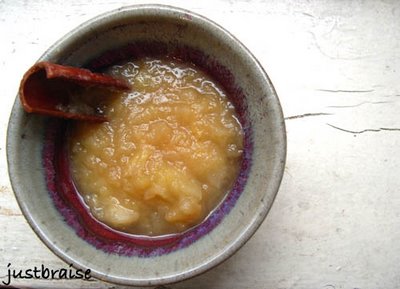
I almost forgot how much I enjoy applesauce as a snack on its own. Sweet, spiced and best of all, warm and fresh.

As noted, applesauce makes a great side to pork chops and is great as a side to almost any sandwich. I sometimes throw some applesauce into brownies and cake or pancake batters for some extra flavor and moistness.

Applesauce is incredibly easy to make so if you have the dregs of your picked apples lying around, just beginning to turn (or not), throw this on the stove, sit back and enjoy the fruits of your minimal labor in just about 20 minutes. I made mine with apple cider to give it extra sweetness and spices, but you can just as easily use water, some brown sugar and spices like nutmeg and cinnamon.

APPLESAUCE
Serving Size= 6. Active time= about 8 minutes. Cook time= 20 minutes.
* 8-10 small to medium sized apples, peeled, cored and chopped
* ½ cup apple cider
* 1 cinnamon stick, about 3 inches

1) Peel, core and loosely chop the apples into about ½ inch pieces. If you want smooth applesauce, chop all pieces uniform size. If chunky applesauce is desired, chop ¼ of the apples in larger chunks (1 inch or larger).
2) Place apple pieces, cider and cinnamon stick into a small stock pot over medium high heat. Bring to a boil then lower heat to medium. Simmer, slightly uncovered 15-20 minutes until applesauce is at desired consistency. Enjoy warm or cooled.


Check out other Fall Feast-ival items over at WellFed's FitFare!

Tags: , , , .

Sunday, October 15, 2006

Braised Pork Chops w/ Apples


*Just Braise has moved. Please visit me at www.justbraise.com!*

There are few things that complement pork chops as well as apples. Pork chops with applesauce is standard fare. And after years of this mundane preparation, I had essentially sworn off pork chops. It was not until I met D, with his penchant for pork that I began to eat “the other white meat” and truly appreciate it.

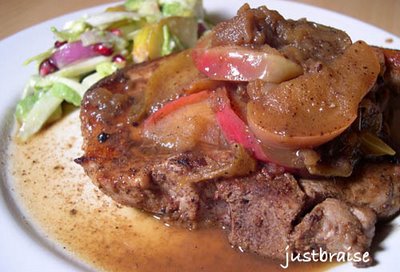
Over the years we have worked on our now standard pork chop recipe. Believe it or not, I clamor for it more often that D does these days. No sauce is used, but fresh apples-- All the better while they are in season and abundant. This fall, the recipe has truly reached perfection, braised in cider and rum, the result is sweet, moist meat with a sauce that deserves sopping.

Pork chops are easy to ruin. Overcooking creates dry, gristly meat and is all too common. To braise a pork chop then, is to eradicate the fear of overcooking while providing a savory sauce to accompany your meat.

This is a recipe I discussed previously. When D first made these chops, they were devoured in seconds. Again, D was in charge of the meat and I was happy sous chef to the operation. And again, I dare you not to devour these in seconds.

I think to truly make this dish perfect would be to serve it on top a bed of polenta. This way, all juices can be appreciated and none lost. This dish is a fabulous seasonal dish, so make it post haste.

BRAISED PORK CHOPS W/ APPLES
Serving Size= 2. Active time= about 10 minutes. Braise time= 15 minutes.
* ½ tablespoon unsalted butter
* olive oil
* 2 thick cut pork chops on the bone
* ½ teaspoon cinnamon
* 1 teaspoon cumin powder
* 1 teaspoon coriander powder
* salt/ pepper
* 2 good cooking apples (Granny Smith, Empire, Rome, Courtland), sliced into 16 wedges
* ¾ cup dark rum
* ¼ cup spiced apple cider

1) Preheat oven to 350F.
2) In a deep oven-safe pan (or dutch oven) over high heat, warm butter and olive oil (to barely coat bottom of pan).
3) While pan is warming, prepare the pork chops: Wash and fully dry the meat. Coat evenly on both sides with cinnamon, cumin, coriander, salt and pepper. Carefully place meat in pan and sear both sides until thoroughly browned; about 4 minutes each side. This seals in the pork chop juices and allows you to properly continue the braising. Do not be afraid to really brown the chops in this step.
4) Remove the pork chops from pan and reduce heat to medium. Deglaze by adding rum and scraping bits that have stuck to the pan up and into the rum. Add cider and apples. Braise the apple wedges in the juices until they are limp and have absorbed some juice; about 4 minutes.
5) Return pork chops to pan and move apples around the meat to cover sides and top (some may remain under the chops).
6) Cover pan and place in oven for 10-15 minutes until pork chops are juicy and succulent and liquid has reduced and holds a sweet, thick aroma. Serve with the apples crowing the meat and the sauce all around. Delicious.


Head on over to Sweetnick's for Tuesday's ARF round up!

Check out other Fall Feast-ival items over at WellFed's FitFare!

Tags: , , , , , .

Sunday, October 08, 2006

This Ain't Johnny's Grilled Cheese


*Just Braise has moved. Please visit me at www.justbraise.com!*

Sweet, gooey, warm and crisp, there are few things that totally satisfy our child desires of yesteryear like a perfect butter-laced grilled cheese.

I think the French understand this desire best—the croque monsieur and croque madame are practically the national foodstuffs. [And believe you me, any time I find myself in this tasty country (which is definitely not enough) I am always sure to pick up this café treat.] When I first came across the croque pair in my elementary French textbook I thought it was surely a mistake—that or the authors were pandering to the young masses that were learning the placement of all those accent egus. Why were we learning how to order a grilled cheese sandwich, a seemingly typical American food?!

How wrong we were, not just in the fact that we all thought the grilled cheese as typical American, but our base preparation methods (on a dare might you use Swiss cheese over a cheddar or [gasp] American cheese!).

So while it is hard to believe our fresh picked apple supply is barely beginning to dwindle (I won’t even go into how many batches of apple chips, have been produced), a gooey cheese sandwich seemed like a perfect pairing with some crisp juicy apples on a fall morning, mais non? And for the dear reader, yet another recipe to put those fall apples to good use.

GRUYERE APPLE GRILLED CHEESE
Serving Size= 2 sandwiches. Active time= about 15 minutes (less if bacon and mushrooms are already prepared).
* 2-4 slices thick cut bacon (have your butcher custom cut thickness to any size you like)
* small handful mushrooms like baby bella or button, sliced into quarters
* 1 tablespoon sliced onions
* gruyere (or like) cheese, sliced; enough to cover 1 slice of bread
* 1 small Rome, Empire or Granny Smith apple, sliced into 16 wedges
* roasted garlic paste (optional; if available)*
* 4 slices good white bread
* 1 tablespoons unsalted butter

1) In a hot frying pan, cook the bacon until desired crispness is reached. While bacon is frying, keep an eye on it and slice the mushrooms, onions and apples.
2) Once bacon is complete, transfer to paper towels, drain fat from pan, return the pan to the stovetop and on medium-high heat, sauté mushrooms and onions. While mushrooms and onions cook, prepare the bread.
3) On 2 slices of bread, spread an ample amount of roasted garlic paste (optional). Cover bread with a layer of gruyere, a layer of sliced apples and 1-2 slices of bacon. Set aside.
4) Once mushrooms are browned and onions are translucent (about 8 minutes) transfer to a bowl and carefully wipe pan dry.
5) Turn heat to medium, melt ½ tablespoon of butter in the pan. Transfer prepared bread halves (with cheese, apples and bacon) onto the pan, top with mushroom-onion mixture, place second slice of bread over top and allow bread to brown and cheese to melt; about 4 minutes. Flip carefully, add ½ tablespoon butter to pan and move sandwiches around to pick up butter (allowing the butter to brown, not the bread to burn). Let sit about 3 minutes, remove from pan and eat hot and delicious.


* roasted garlic paste is a cinch make (and cost effective if you’ll be roasting something else in the oven). Simply take a whole head of garlic and slice the top off clean (to barely give you access to the cloves). Wrap in tin foil and place in the oven (around 350F) for 30-45 minutes. Remove and let cool. Once cool, pop the garlic cloves from their shells and transfer to a small dish. Add about 3 tablespoons olive oil and stir to breakdown garlic and incorporate olive oil into a uniform paste. Great on sandwiches, over meat, in potatoes or mixed into a salad dressing.

Check out other Fall Feast-ival items over at WellFed's FitFare!

Tags: , , , , , .

Friday, October 06, 2006

Apple Spice Cake


Many may think we leave it to the wisdom and foresight of Johnny Appleseed to spread the goodness of apple orchards throughout the United States. While Johnny can be accredited to spreading the seeds, few of the apples that came to be would ever be worthy of eating fresh picked.

Edible apples, rather those sweet enough to make it into our lunch sacks or slathered with peanut butter, need splicing to reproduce. Meaning the Red Delicious we eat today is very much a piece of the original Red Delicious tree first produced (not a seed descendent). Planting seeds of apples produce 10 very different fruit trees, more than likely none of which will be as sweet as the original.

The short of the long of it, our dear Johnny enjoyed knocking back a few in his day and thought it best to spread the good cheer throughout the land. Spreading seeds of apples, and therefore many a tart variety, led to a massive production of cider (the hard kind). Unfortunately, due to Prohibition, many of the orchards that Johnny is accredited with helping along were chopped down. On the flipside, clearing the bitter orchards very well may have led to space for the cherished sweet varietals we know and love today (my current favorite is the new Honeycrisp-- crisp, juicy and tastes like honey mixed into apple cider).

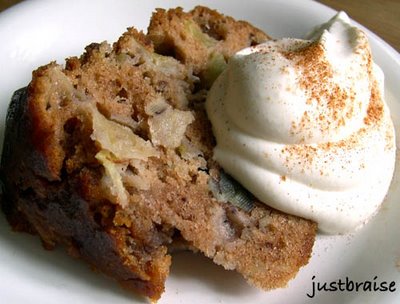
Any way you slice it, and any way you consume them, apples are delicious and deserve eating this time of year. Yet another tasty apple treat... (c/o D's favorite cake lady, Martha Stewart.)

APPLE SPICE CAKE
Serving Size= 10-12 servings. Active time= about 15 minutes. Cook time= 1-¼ hours.
*1-1/3 cups vegetable oil
* 3 cups all-purpose flour
* 1 tablespoon ground cinnamon
* 1 teaspoon baking soda
* 1 teaspoon salt
* 2 cups sugar
* 3 large eggs
* 3 to 4 Granny Smith apples [or other tart apple], cored and cut into 1/2-inch pieces (3 cups)
* 1 cup chopped assorted nuts, such as pecans and walnuts (optional)
* 1 teaspoon pure vanilla extract
* Nonstick cooking spray with flour
[* I also added a 1/2 tsp of ground ginger and 1/2 tsp of allspice]

1) Preheat oven to 350°. Spray a 12-cup bundt pan with cooking spray [or butter]; set aside.
2) Working over a large sheet of parchment paper, sift together flour, cinnamon,[allspice and ground ginger] baking soda, and salt; gather sifted ingredients into center of sheet; set aside.
3) In the bowl of an electric mixer fitted with the paddle attachment, combine vegetable oil, sugar, and eggs; mix on high speed until lemon yellow.
4) Fold reserved parchment in half lengthwise; with mixer on medium speed, gradually shake in dry ingredients until just incorporated.
5) Add apples and, if desired, nuts, to batter; mix to combine [using the electric beater. The juice from the apples will escape a little as they break down and loosen the batter]. Add vanilla, mixing until incorporated.
6) Pour batter into prepared pan, and bake until a cake tester inserted in the center comes out clean, 75 to 90 minutes.
7) Remove from oven, and cool slightly on a wire rack.
8) Invert cake onto rack; turn cake right-side up to cool completely on rack; serve with whipped cream, ice cream or plain.


Check out other Fall Feast-ival items over at WellFed's FitFare!

Tags: , , , ,

Monday, October 02, 2006

Apple Chips


*Just Braise has moved. Please visit me at www.justbraise.com!*

This past weekend, surrounded by mountains screaming color, D and I headed upstate with some friends to camp. As we have learned from past fall foliage camping years, no trip in the creeping fall days is complete without some apple picking (as well as apple cider and apple donuts).

We ate more than our fill, testing the varietal that would win our hearts and make it into our oversized ½ peck to return to the city. We picked rotten ones from the ground and threw them into the high reaches of trees, attempting to knock loose a prized specimen. We made running high jumps into the branches grasping a seemingly perfect morsel—only to have hopes dashed and eyes splashed with rotten juices. And in the over exuberance of finding a tree of Red Delicious full of fruit, we even came branch to arm with a healthy dose of poison ivy (though none has broken through yet, fingers crossed).

There are few things that feel more fall or are as delicious as a freshly picked apple. And there are few things more rewarding than admiring one’s gathering skills with a bushel of rubies stacked high in the kitchen.

But the bushel sits and the mind must wander into what to do with so many apples. Last night it was braised pork chops in rum cider with apple slices (made too late and eaten too hungerly for a picture). This morning I called upon my days in the third grade for inspiration...

My third grade teacher is what we used to refer to as a “nature freak.” Strange for us suburban kids to find someone so caught up in nature— she once yelled at a classmate of mine because the girl stepped on an ant—“how would you like to be that ant?!” Well, it’s dead now, so we wouldn’t thank you.

But there were some great teachings, most now forgotten, that lay between Pioneer Days (where we dressed like Little House in the Prairie, went to a neighboring school, “hunted” and ate venison stew, churned butter and home schooled our “children”), candle making and Apple Days (where we went apple picking and sat for 2 days peeling, chopping and slicing apples for apple sauce and strung ribbons of apple slices that dried into apple chips in our windows).

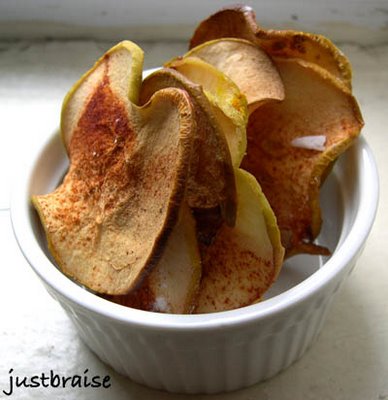
So this morning as I looked to our fresh apples I remembered the apple chips. And even faster than stringing them into the window waiting two weeks for them to dry, is the almost instant gratification of drying them in the oven, low and slow until crisp and delicious.

APPLE CHIPS
Serving Size= about 60 chips. Active time= about 20 minutes w/ a Cuisinart or other slicer, more if slicing by hand. Cook time= 2 to 2-¼ hours.
* 5 Granny Smith, Rome or Golden Delicious apples, sliced into even 1/8-1/4 inch discs
* 2 Tbl powdered sugar per baking sheet
* assorted spices depending on flavor desired (lime juice-cumin-curry, cinnamon-sugar, salted or plain are all delicious).

1) Set oven racks on bottom and top quarter of the oven. Preheat to 225F. Line baking sheets with parchment paper and dust each with powdered sugar.
2) Line sheets with apples, do not overlap apples or they will stick together.
3) Dust top of apples with selected spice combination.
4) Place one sheet on top rack, one on bottom and back for 2- 2-¼ hours, until apples are golden. Rotate bake sheets half way through cooking and remove apples immediately from sheets onto a cooling rack once out of the oven.
NOTE: Serve as a snack (like regular potato chips) or as a side to sadwiches, on top of ice cream or other creamy fall dessert, in a salad, with pork chops or whatever else you can imagine.


Head over to Sweetnick's for today's ARF round up!

Check out other Fall Feast-ival items over at WellFed's FitFare!

Tags: , , , ,

Reviews...

Been quietly publishing elsewhere and working on writing...

You can catch some book reviews here, here and here*.

And one more... here.

Was just apple picking this weekend so there is plenty of seasonal goodness tk shortly...


*Note: These reviews have all appeared previously on the WellFed Network.

Tags: , ,

Thursday, September 21, 2006

Soba Seafood Pasta


While in Indiana at the State Fair, D and I made our way into the 4-H barn “after hours”. Okay, it was really about 5pm, but this was when the real deal started: Well after top-notch vegetables had been judged, local wines swirled and alfalfa blocks adorned, the local apiaries took the stage for a little bee demonstration and hints of the trade.

We seemed to be the only ones fascinated by the discussion, complete with a live demonstration behind the speaker (a man relating the talk with live bees and hive). We asked our questions then dove into samples of over one dozen honey varieties as well as honey butter, honey laced yogurts, honey sticks, honeycomb, beeswax blocks and more.

Slightly stunned when we asked for a good contrasting honey for the soon-to-be-purchased molasses-hued buckwheat honey, we were given a deep shrug: “it’s honey.” Obviously not one of their top salespersons. Buckwheat honey and an amber toned wildflower honey made it into our bags and to New York in one piece-- along with sorghum, whole wheat flour and cracklin’s still fresh on the mind.

Back in New York, worlds away from Indiana, I was avoiding tourists in Chinatown. Ducking into one of the hundreds of food stalls that line the narrow streets, I found myself confronted with noodles. Hundreds of noodles: cellophane, egg, rice, ramen and soba (or buckwheat). The honey must have been on my mind because I grabbed a pack of soba noodles before heading home.

The excitement ended there and for weeks the noodles sat in the cupboard. The honey on the other hand, made excellent hot toddies-- a quick fix-me-up for a recent sick spell. Yet still the noodles sat.

But as the fridge progressed to barrenness (with a half bag of arugula) and the shelves held a few cloves of mighty garlic as well as my sweet looking noodles, I took the initiative and headed for the fish monger…

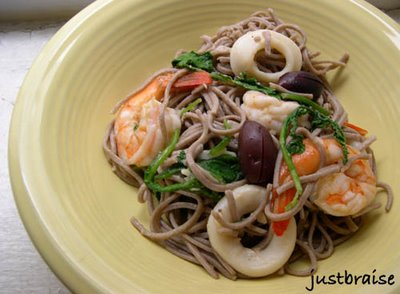
This dish is beyond simple to make. The rich buttery taste these noodles provide is a luxurious accompaniment to seafood. And because buckwheat is actually a fruit (a relative of rhubarb), not a wheat, it is safe for all those non-gluten folks, full of fiber, potassium, manganese and helps keep blood pressure and cholesterol levels down—how is that for tricking someone into eating pasta? Even better (I’m a visual person), the purplish hue of these noodles look amazing against bright vegetables and seafood.

SOBA SEAFOOD PASTA
Serving Size= 6 persons. Active time= about 20 minutes (less with pre-cleaned shrimp)
* 1 handful dry soba noodles (about 16 ounces)
* 2 tablespoons olive oil
* 4-5 cloves garlic, crushed
* 1 lb large shrimp, peeled and deveined
* 1 lb calamari rings, rinsed
* 1 large handful arugula, rinsed well
* ¼ cup Parmesan shavings (optional)
* 6-12 Kalamata olives

1) Peel and devein the shrimp, rinse calamari; set aside.
2) Bring water to a rapid boil in a medium pot. Add noodles, stir to separate and cook about 5 minutes, until done.
3) Drain water, rinse noodles with cold water and place in serving bowl. Return pot to stovetop over medium-high heat; add olive oil.
4) Add garlic and bring to a sizzle; about 3 minutes.
5) Add shrimp, calamari and arugula, cook until shrimp turn pink and curl; about 4 minutes.
6) Add shrimp, calamari, arugula, Parmesan and olives to soba noodles. Toss to incorporate. Add more olive oil if desired. Serve warm or cold.


Tags: , , , , ,

Tuesday, September 19, 2006

Zucchini Pancakes


I can remember the moist zucchini-walnut bread my mother used to make when I was growing up. That, coupled with her infamous carrot bread, were worthy treats in the house and always much appreciated. In my years away from home I craved the breads (mind you, not cakes) and often called, requesting a loaf to be air-mailed to me without haste. Lucky for me, my mother usually obliged.

These days she has misplaced the treasured zucchini bread recipe. Sure it came from the depths of Joy of Cooking, we have failed to find the true source of the recipe; unable to replicate its sweet and wholesome moistness.

I bought these zucchinis craving that loved bread. Knowing D has a (vocal) aversion to squash—though once confronted with it will often happily eat it—I was sure I would be dining on these fruits alone. (And yes, zucchinis are in fact, a fruit.)

Knowing the bread eluded me, I began preparing these zucchinis much the same way my mother would have: by grating them into a tall pile. I continued on the fly: Throwing in a few more ingredients and sticking these on a hot buttered skillet. These might just be the next best thing—even better, D played a vanishing act finishing his in no time flat-- allowing me to dine with company.

Though I still crave that bread, I can happily buy zucchinis for the remainder of its soon-to-be-over season. We enjoyed these cakes so much, I’m thinking of attempting them in the bucket garden next year (even better, we would then have fresh squash flowers for frying!)

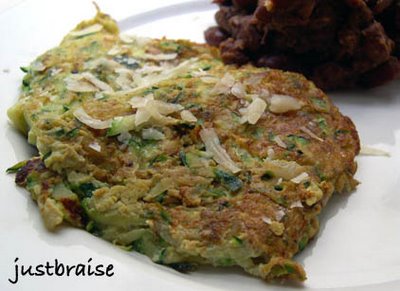
Oh, and that menacing darkness that hovers closely behind the zucchini cakes in this picture? Some leftover Louisiana-style beans made with a leftover ham shoulder—the combination was delicious! These pancakes are great for breakfast with a poached egg or as a dinner with beans (as pictured here). They can be added to a sandwich (a sort of veggie burger), had with a sour cream based dipping sauce, or simply snacked on the go. They are also quick and easy to make.

ZUCCHINI PANCAKES
Makes about 12 4-inch pancakes. Active time= about 30 minutes.
* 2 large zucchinis
* 2 eggs
* 2 teaspoons cumin
* 2 dashes Worcestershire sauce
* ¼ cup Parmesan cheese, grated
* 1 teaspoon chili pepper
* 2 dashes Tabasco sauce
* 1 teaspoon salt
* fresh ground pepper to taste
* 1 tablespoon butter or olive oil

1) Grate zucchinis. Grab up a small handful of grated zucchini and wring out the excess water over the sink. Set drained zucchini in a medium bowl, set aside. Continue until all zucchini is drained then dab with a paper towel to get remaining moisture out.
2) Add eggs, cumin, Worcestershire sauce, Parmesan, chili pepper, Tabasco sauce, salt and pepper to the bowl.
3) Use hands to incorporate all ingredients evenly.
4) Place butter on a medium sauté pan over medium-high heat. Once pan and butter are hot (butter will subside its bubbling and smell nutty), place small even handfuls of the zucchini mixture around the pan, use a spatula to gently press the pancakes flat. Allow to cook about 5 minutes each side, until golden brown. Serve warm, topped with fresh grated Parmesan.


Hop on over to Sweetnick's for ARF Tuesday!

Tags: , , , .

Tuesday, September 12, 2006

Roasted Red Pepper & Mushroom Soup


The recent spell of cool, wet weather along the east coast was nothing but pleasant for me. Fall foods are some of my favorite, full of hearty warmth. The passing storms sought to bring out the culinary colors of the season and my own penchant for soups.

In gloomy weather, reds are a bright choice for foods. Red makes us think of warmth, be it the heat of a hot pepper or an August sunset. The color brings us memories of the summer; think warm vine ripe tomatoes, raspberries or strawberries. When the dreary grey days of fall and winter have us down, there is nothing like a bright bowl of soup to cheer us up.

In the past, I have made brilliantly hued and high flavored roasted red pepper and tomato soup, as well as roasted tomato soup. Both delicious: the sweetness of pepper and tomato are enhanced in the roasting process; adding a pleasant finish to any soup.

In addition to the glorious red bell pepper, I adore mushrooms. Their earthy aroma and buttery flavor can compete with most anything delectable. So how to combine the sweetness of a pepper and the robustness of the mushroom? A soup of course-- Full of sweetness and heavy undertones. Perfect for these the days when fall looms ahead, yet light and colorful enough to remind us that summer still holds.

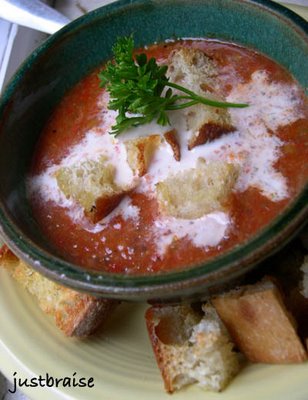
I topped this soup off with some heavy cream and homemade croutes (as Julia Child would say)—- or croutons. (These croutes were made weeks ago from stale bread, cut into 1-inch cubes and frozen. Once the soup was ready, the croutes were drizzled with 1 Tbl olive oil, fresh ground pepper, salt, a pinch of garlic powder and placed in a toaster oven until browned.)

ROASTED RED PEPPER & MUSHROOM SOUP
Serving Size= 6-8 persons. Active time= about 30 minutes. Inactive time= about 30 minutes.
* 2 red bell peppers, whole
* 1 large onion, chopped loose
* 4 cloves garlic, chopped
* 2 stalks celery, chopped loose
* 1 quart button mushrooms (or two large handfuls), chopped loose
* 2 Tbl non-salted butter (or olive oil)
* 6 cups chicken (or vegetable) broth (boxed or homemade)
* 1 small bunch parsley, washed well
* salt/ pepper to taste

1) The easiest way to roast a red pepper is in the broiler by following step one of this previous soup post. Alternatively, I prefer to use the “baba ganoush method:” rotate over an open flame (using tongs) until the pepper turns black, throw it into a paper bag for 15-20 minutes, peel off black char, discard innards, add to soup just before broth.
2) Place onion, garlic, celery and mushrooms into a large stock pot with 2 Tbl butter or olive oil. Sauté for about 10 minutes; until onions turn translucent and limp and mushrooms begin to brown and release juices.
3) Add roasted red peppers.
4) Add chicken broth and parsley. Cover, bring to a boil, then reduce heat and allow to simmer for 10 minutes.
5) Using a handheld blender or carefully in batches with a regular blender, puree the contents until smooth and even. If thicker than desired, cut soup with a little water. Taste for flavor, add salt/ pepper to taste.
6) Garnish with cream and parsley and serve with grilled cheese, peanut butter and jelly, cucumber onion (or any other preferred sandwich), a hunk of crusty bread, croutes, good cheese, a salad, or on its own.


Tags: , , , .

Thursday, September 07, 2006

Top 5 Before You Die


*Just Braise has moved. Please visit me at www.justbraise.com!*

Pascal, over at Home Recipes, tagged me for the meme created by Traveler’s Lunchbox. Exciting, as this is my first meme. You can check out all the progress of this project in TL’s comments.

The subject is “Top 5 to Eat Before You Die” inspired by the BBC’s 50 things to eat before you die. Personally, many of the items on the BBC list appear to be more challenges than must-have food items. Leave it to the food bloggers of the world to create a more proper list. The “Top 5 Before You Die” is an attempt to highlight the delicacies of World cuisine, which seems to be getting more difficult (in a “pure” form) with the expansion of fusion foods.

I usually shy away from Top 5/ Top 10 lists because I have a hard time remembering enough of my “all time favorites” to assemble. This top 5 list almost seemed too easy, maybe my memories of food are greater than media. I am sure if I give myself more time to think this over the list would change [go on forever] so I’ll end it here. Everyone please feel free to add your own Top 5 in the comments, it would be interesting to keep this growing.

TOP 5 BEFORE YOU DIE
5) Something you have grown yourself.

4) Arabic Coffee from a street vendor in Beirut, preferably along the corniche.

3) Fresh Norwegian Shrimp caught that morning and eaten while boat watching along the Bergen harbor.

2) Warm Fresh-Plucked Peach seconds after it is pulled from the tree.

1) Latvian Pancakes. Preferably made with a grandmother’s delicate care. Chicken or beef-filled and served with sour cream and apple sauce

The last 5 on the list:
6) Alsacian ham “Pizza”
7) Kopp’s Custard in Milwaukee, WI. You can order it online and I have been daring myself to order the 10 pint minimum for years now.
8) Vienna Chicago-style Hot Dog at a Cubs game
9) Real Good (unpasteurized) Cheese
10) Fresh Crepe from a Parisian vendor, preferably lemon-sugar.

I am tagging the following bloggers for this meme:
Riana in southern France
Cate in New Jersey
Dylan in LA, CA
Boo Licious in Malaysia
Jennifer in Spokane

Tags: , , .

Wednesday, September 06, 2006

Mini Fruit Tart


I knowingly had lemon curd for the first time this past summer. I know, a late bloomer for all things delectable. The truth is, the stuff is not in my blood and I am sure my parents thought better than to get me started on another sugar addiction (I already had ice cream and cookies and found Nutella on my own).

D, on the other hand, has curd running through his veins: From his southern pull to his British blood, the boy is practically dripping the goop— and while we’re on it, clotted cream as well. It was when the two of us spent some time in London and around Scotland this summer that D ordered it with gusto and the stuff popped onto my radar. It did not take long for my cravings to begin.

The first tasting was at high tea: scones, clotted cream and lemon curd—oh awake from the dreaming-- the sweetest of combinations! How the Brits avoid title as World’s Fattest is beyond me. Upon arrival in Scotland we glutted ourselves on the substance and bought it in gift form for our return (I was informed it’s quite expensive in the U.S., which upon recent investigation found it is in fact, expensive).

We returned with our own little curd booty. Despite attempts of opening the sacred jar, it remains, stashed in the cupboard for a rainy day when the scent of scones fills the apartment.

A few weeks back when a whopping lemon meringue pie graced the table, I hadn’t the slightest notion that the filling I produced was, more or less, a curd. Sure, it was custardy, but when I think “curd” images of cottage cheese and sour milk fill the void.

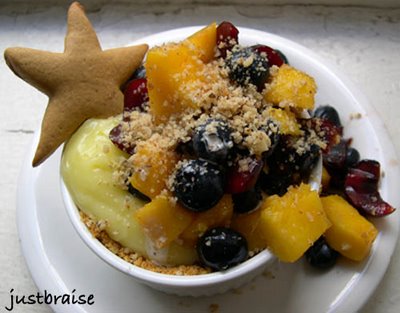
In the attempt to work through an over zealous fruit purchase, images of vanilla custard clouds with mountains of fruit undulated through the sky. But as I searched for recipes, none caught my fancy. Instead I found this recipe for lime curd on epicurious.com and was shocked back to Britain. I prepared this little concoction. Let’s just pretend this is a healthy way to enjoy this stuff.

FRESH FRUIT TART
Serving Size= 6 persons. Active time= about 30 minutes. Inactive time= about 2 hours.
* walnut-graham cracker crusts (below)
* lime curd (below)
* fresh fruit topping (below)
* fresh mashed walnuts for topping (optional)

1) Just before serving, fill each walnut-graham cracker crust ramekin with lime curd (this will prevent the crust from becoming soggy).
2) Top with 2-3 large spoonfuls of fresh fruit mixture.
3) Can be served with a dusting of freshly ground walnuts, a splattering of heavy cream, fresh whipped cream, a scoop of ice cream or a light cookie.


THE CRUST
* 5 graham crackers
* 1/3 cup walnuts
* ½ stick butter, melted

1) Preheat oven to 350F.
2) Combine graham crackers and walnuts in food processor or blender. Process until grainy. Add melted butter, process until well combined.
3) Press graham cracker mixture around the edges and bottom of 6 ramekins. Arrange on a cookie sheet and bake 10 minutes, until edges turn golden.
4) While crusts bake, begin the lime curd (below).


THE LIME CURD
* ½ cup sugar
* 1/3 cup fresh lime juice
* 4 large egg yolks
* 5 tablespoons unsalted butter, cut into 1/2-inch cubes
* 1-½ teaspoons grated lime peel

1) Add sugar, lime juice, egg yolks and butter to a heavy saucepan over medium-high heat. Whisk to combine. Set lime peel in a heat-proof bowl aside.
2) Cook over medium-low heat until thick, smooth, and just beginning to bubble, stirring constantly, about 10 minutes.
3) Remove from heat and strain into bowl with lime peel. Stir to combine. Cover with plastic over the surface of the curd and refrigerate until cold; about two hours. (Can keep up to 1 week.)


FRESH FRUIT TOPPING
* ½ cup fresh blueberries
* 1 cup fresh Bing cherries, quartered and pits removed
* 1 mango, sliced into chunks
* 1 Tbl lime juice
* 1 Tbl sugar

1) Add all ingredients to a bowl and stir to combine. Let set for at least 10 minutes before assembling tart.


Tags: , , , , , , .

Friday, September 01, 2006

The City Gardener #11


The chicken wire that surrounded my bucket garden may have been stolen, the tomatoes have passed their prime-- no longer providing fruit, the remaining Swiss chard (now unprotected) was torn apart by critters and the last of the lettuce was fried by the last heat wave. But I still got it.

If there is one thing that many humans are too stupid to steal it is a short green, fairly plain looking plant.

If there is one thing that animals cannot stand to eat it is a bitter treat.

A whole bucket of arugula is the lone survivor of my summer city gardening experiment. Without roof, without balcony, without anything more than chicken wire and two feet of semi-sunny pavement between the outside world and five buckets, I did quite well for myself: (tango and lollo) lettuce and tomatoes, White Hailstone Radish, and some Swiss chard (back in the chicken wire protection days).

In hopes of a possible garden resurgence I sprinkled the remaining arugula and radish seeds over the cleared buckets. Both vegetables prefer cooler days so hopefully the turn of weather will keep the growth alive. Until then, I’ll be dreaming about this sweet and bitter late-season salad.

ARUGULA PEACH SALAD
Serving Size= 2 persons. Active time= about 10 minutes.
* 2 handfuls fresh arugula
* 1 ear fresh corn, kernels cut off ear
* 1 fresh peach, cut into 8 wedges
* 1 handful green beans
* 2 Kalamata olives
* fresh Parmesan shavings
* apple cider vinegar
* juice of 1 lime
* salt/ pepper to taste

1) In a medium pan on medium heat, warm 2 tsp olive oil. Once warm, add shaved corn kernels and green beans. Sauté about 4 minutes; until corn and green beans darken.
2) Add beans and corn over bed of arugula.
3) Toss peach wedges over top, add olives and Parmesan shavings.
4) Just before serving, whisk together apple cider vinegar and lime juice. Pour over top and top with fresh pepper and salt to taste.


The City Gardener #10
The City Gardener #9
The City Gardener #8
The City Gardener #7
The City Gardener #6
The City Gardener #5
The City Gardener #4
The City Gardener #3
The City Gardener #2
The City Gardener

Tags:


View Stats
Rankingblogs.com: Defining your blogs worth..