Showing posts with label bread. Show all posts

Sunday, February 25, 2007

Cinnamon Date Coffee Bread


*Just Braise has moved. Please visit me at www.justbraise.com!*


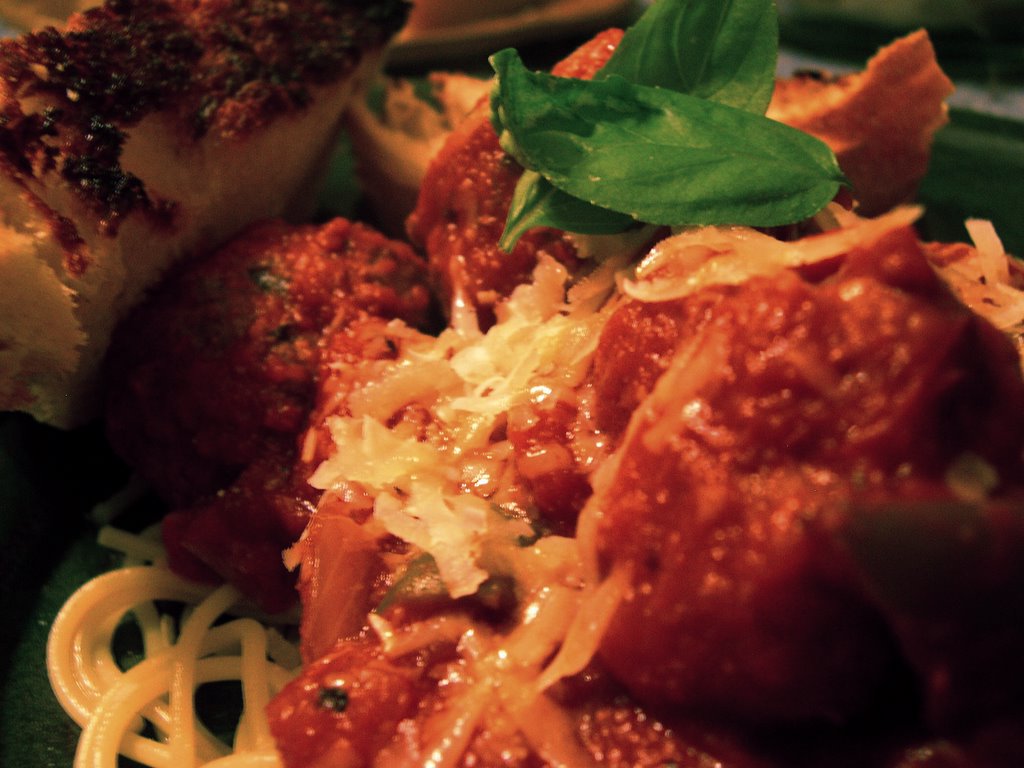
Pictured above is a little piece of a hopefully sweet weekend (now if I win my office Oscar pool jackpot…).

Like most people, I presume, weekends are the time for me when some good cooking/baking can get under the belt. I have the leisure to wander the fruit/ veggie stands, fight for a spot at the butcher and joke with the fish monger about freshness. If it’s really cold outside a soup will be made and stored away for the week to come. If it’s mild enough to take my time shopping (no car), I have the opportunity to really let my mind wander, without worrying about exposed fingers falling off from the cold.

It is some of the worst days though, when the last thing I desire is to step outside. Not even my thick flannel pants I wear camping in the fall or my warmest sweater and thick mittens can convince me into the icy voyage. It is these days where the cookbook is a dear friend and a minimalist “whatever’s in the cabinet” recipe comes to the rescue.

It was on one of these bitter days that I picked up one of my new cookbooks and gave it a go.

I recently received a copy of The Cook’s Book from the publisher for review. An initial flip through offers some amazing color photos, many step-by-step, of recipes. It’s a great overall technique book that is easy to follow for a more experienced chef (I would not recommend it to a beginner). Much of what is inside is basics, how to’s and general tips and tricks of the trade—like how many minutes is a medium rare steak again? How do you fillet that fish? Yet many of the recipes can get very challenging, be it time consuming, a difficult step here or there, or a hard-to-find ingredient. (A more involved review in the weeks to come.)

That being said, my initial plunge into this book’s recipes have been extremely rewarding with many more to come. The first challenge was honey-lime truffles. These truffles were an absolute surprise-- who knew I could make such delicious truffles? They were silken and luxurious, sweet and sour and a true Valentine treat.

The above pictured specimen was the next step with this book. I was looking more for a bread, but as I said, it was cold outside. I had to stick with what I had in the cabinets. The dates were a recent birthday gift, I was good to go.

D is a huge fan of cinnamon rolls. Mind you, not the ones that drip with a sugary white glaze, but straight up cinnamon rolls, raisins optional. They are the ones where the deep twisted chasms are filled with gooey spice and the bread is dense, yet sponge-like in a perfect marriage. In fact, D considers me quite the curmudgeon because I refuse to let him have one every day. If I delight him with a purchase there is usually a portion of a follow up conversation that goes something like: “you never let me have the things that I love,” while cinnamon-sugar oozes between his fingers and sticks to his beard he’ll claim “I’m just saving some for later,” instead of wiping himself clean. I am a cruel person.

When I saw this recipe for cinnamon date bread I knew it was the perfect merge of D’s love (cinnamon rolls), ingredients (all on hand in the cabinet) and my favorite (the use of liquor in cooking). The perfect breakfast. While my final version is not nearly as clean looking as the version pictured in The Cook’s Book, I can only assume that it is far better in sweet gooey purity. Below is the recipe as it appears in the book.

CINNAMON & DATE COFFEE CAKE
Serving Size= 1 bread; 4 people. Active time= about 30 minutes. Cook time= 30 minutes.
Makes 1 Bread
* 2-½ tablespoon unsalted butter, softened, plus extra for the mold
* 1-2/3 cups all purpose flour
* 2 tablespoons granulated sugar
* 2 teaspoons baking powder
* 1 extra large egg
* 5 tablespoons milk

For layering the dough
* 6 tablespoons brown sugar
* ½ heaped cup roughly chopped dates
* 3-½ tablespoons unsalted butter, softened
* 1 teaspoon ground cinnamon
* 1-½ tablespoons dark rum [brandy works well too]

1) Preheat oven to 400F. Thickly butter an 8-½ in ring mold that is 2 in deep, or a cake pan of the same diameter. Line the bottom of the mold or pan with parchment paper.
2) Sift the flour, sugar, and baking powder into a bowl. Rub in the butter using your fingertips. Whisk the eggs with the milk in a cup until well combined, then stir this into the dry ingredients in the bowl. Work the mixture together well with your hands until you have an evenly mixed, soft dough. Scrape the dough out onto a floured work surface and lightly knead it for 10-15 seconds.
3) Mix together the brown sugar, dates butter and cinnamon and rum in a small bowl; keep to one side. Roll out the dough to a rectangle that is roughly ¼ in thick, 14 in long and 8 in wide.
4) Spread the date mixture evenly over the surface of the dough, then roll it up tightly like a jelly roll. With a sharp knife, cut the rolled dough in half lengthwise.
5) Twist the two pieces together, keeping the cut surfaces facing up, then curl into the mold. Bake in the middle of the oven for about 30 minutes. Let the coffee cake cool in the mold for 5 minutes, then unmold onto a wire rack. This is best served still warm.

Saturday, December 02, 2006

Thyme Cornbread


I was never a very big fan of cornbread. I had it at restaurants slathered in butter, sure. More often than not though, I preferred filling up with a heaping spoonful of mashed potatoes or thick creamed spinach. Delicious. Cornbread was too often dry and overly crumbly and needed too much butter to be palatable. That, or an attempt to moisten it with jalapeno peppers just made it soggy instead of giving it a due kick.

Well, D is a southern boy who likes his cornbread. Come to think of it, because of his Indiana roots, it’s really corn that he loves-- In any form, preferably fresh. Well, we’re out of fresh corn. The junk the markets are hawking as “late summer” corn is limp, withered and disgusting. So we turn to cornmeal for our corny fixings.

Since D has been around, I have been quite surprised to see just how far cornmeal can go. It appears in our mainstay breakfast pancakes and pops up in light fries like battered calamari. Over time I have begun to think highly of cornmeal and thought maybe cornbread should be given another try.

And so, with a little leftover thyme and a new cast iron pan c/o my mother, some “I  Cornbread” was created. When warm and fresh with a dab of butter this cornbread is moist and delicious. The thyme imparts the perfect herby sweetness to the final product making you think you might just be eating healthy—although even better with a side of cracklings.

THYME CORNBREAD
Makes about 12 sticks or small muffins. Active time= 10 minutes. Bake time= 15-20 minutes.
Have all ingredients at 70F
*3/4 cup sifted all-purpose flour
* 2-½ teaspoons double acting baking powder
* 1 to 2 tablespoons sugar
* 3/4 teaspoon salt
* 1-¼ cups yellow or white stone-ground cornmeal
* 1 egg
* 2 to 3 tablespoons melted butter or drippings
* 1 cup milk

1) Preheat oven to 425F. Grease cornbread pan with butter (cast iron is best) and place in oven while prepping ingredients
2) Sift flour, baking powder, sugar and salt together in a medium bowl.
3) Add cornmeal and stir until evenly combined (I recommend Sunny Slopes Farms Cornmeal in Indiana, email me for their phone number)
4) In a separate bowl beat the egg. Beat into it the butter and milk.
5) Combine all ingredients with a few quick rapid strokes until evenly combined.
6) Carefully remove pan from oven and place batter in hot pan about ¾ of the way full. Bake 15-20 minutes until just golden on top. Serve immediately.

Saturday, November 11, 2006

Cranberry Sweet Bread


The other week I was at the grocery store and noticed the bags of cranberries were finally set out. Mmmm, cranberry juice I mumbled, and in a trance walked over and placed them in the basket D was carrying.

“What are you going to do with those?”
“I dunno, they’re pretty.”

And so the pretty little rubies sat in the fridge for the better part of a week while I researched some recipes. I was looking for something fast and easy that would still look and taste delicious. I finally found it on a Chowhound forum-- a one bowl, just add, stir and bake recipe. I checked the comments and someone had already made it with wowed reaction so I decided to dig in as well.

This cake-like bread was delicious warm right out of the oven. The recipe recommends a caramel sauce, but I think whipped cream would be great too. I had it plain with coffee and it made a great mid-afternoon pick-me-up or breakfast.

This is the recipe list as it appears in Chowhound. There are other fabulous cranberry recipes listed there too so check it out.

*Note: This is not my mother listed below. Also, I cannot vouch for the caramel sauce because I did not make it. The changes I made are as follows: I used 2% milk instead of whole milk and increased the cranberries to one whole 16 ounce bag (from 2 cups). Lastly, I used a 7x11 pan as I wanted a thicker bread. I had to bake mine about 10 min more.

MOM’S CRANBERRY CAKE W/ CARAMEL SAUCE
Makes 1- 9x13 loaf. Active time= 10 minutes. Inactive time= about 30 minutes.
* 2 cups unsifted flour
* 1-½ cups sugar
* ½ teaspoon salt
* 2 teaspoons baking powder
* 4 tablespoons unsalted butter, soft
* 1 cup whole milk [2% works well too]
* 2 cups whole fresh cranberries [or 1-16 ounce bag]

1) Preheat the oven to 350F
2) Mix the flour, sugar, salt, baking powder and butter together until it resembles coarse crumbs.
3) Add milk and stir until evenly distributed. Fold in cranberries.
4) Pour batter into a buttered 9x13 pan. Bake for 30 minutes or until golden. Pour caramel sauce (below) over individual servings and serve.


CARAMEL SAUCE
* ½ cup butter
* ½ cup sugar
* ½ cup brown sugar
* ½ cup half and half

1) Combine all ingredients on stovetop and heat until thickened; do not boil.


Head over to Sweetnicks for the ARF roundup

Thursday, March 16, 2006

Irish Soda Bread


I am not Irish. I never claim to be Irish or wear a “Kiss me I’m Irish” pin on Saint Patrick’s Day. My mother occasionally dyed things green: toast, eggs, mashed potatoes, and Chicago, where I grew up, still dyes the River green for the occasion. Once, in junior high school, for a bake sale on St. Patrick’s Day, I made Rice Krispie Treats. I had perfected the recipe, adding extra marshmallows, creating extremely gooey, delightful snacks and as a special Saint Patrick’s Day festive spike, I dyed the marshmallows green. My fellow students selling them during the lunch period tried one, loved them, and proceeded to tell everyone they had molded, hording them for themselves-- unpaid, I might add.

I do have many Irish friends: Lisa thrives on Saint Patrick’s Day. She celebrates it with more gusto than her own birthday, getting well scuttered, snogging anything that moves. Some attempt to dismiss their Irish-ness, even on their day of celebration. The others I know actually live in Ireland. They are Irish through and through and the three months I lived with them in Scotland they never let me (or any of the Scots) forget it. And I didn’t—in the end I was speaking with more Irish slang than even I could understand.

I do love Irish food. Bangers and rashers are a perfect start to yer mornin’—easy enough even when good and knackered and you can hardly be bothered to lift a finger. I love spuds and cabbage and an Irish cheddar melted over toast is delicious. Guinness is godly, especially if the barkeep has enough dexterity to “paint” a shamrock in the foam. More than anything, I love tea accompanied by a tasty teacake. And soda bread, a Saint Patrick’s Day "tradition", cannot be beat.

One interesting item to note is that the tradition of Soda Bread is not that old. Baking soda made its way to Ireland in the early 1800’s (it wasn’t produced in the United States until the mid-1800’s). Baking soda was found to be a great leavening agent when used in baking and quickly replaced yeast. Traditional Irish Soda Bread is a dry, unsweetened bread made with only four ingredients. Today, many prefer a sweetened Soda “Cake,” adding raisins or even chocolate chips, making it disappear even faster. Any way you cut it, a good Irish treat should be had on this Saint Patrick’s Day.

These recipes come from The Boston Globe’s Andrea Pyenson. I desired a sweeter cake version of the soda bread and made Mary Burke’s recipe. It is full of raisins and includes a little more sugar than Helen Mahoney’s recipe. (I also bulked up the raisins, adding 1-½ cups, soaked in orange juice overnight.) The two recipes are below to satiate two tastes. Chose one, have it with some tea (or a pint) and slainte!

MARY BURKE’S IRISH SODA BREAD
Serving Size= 2 loaves. Active Time= 10 minutes. Inactive time= 40 minutes.
This fine-crumbed bread has a beautifully crunchy crust and just a hint of sweetness.
* 8 Tbl (1 stick) unsalted butter, at room temperature
* 4 cups flour
* 1 cup sugar, plus 1 Tbl for sprinkling
* 4 tsp baking powder
* ¾ tsp baking soda
* pinch of salt
* 1 egg
* 1-½ cups buttermilk
* 1 cup raisins

1) Set the oven at 350 degrees. Butter and flour two 9-by-5-inch loaf pans.
2) In a large bowl, cream the butter with a pastry blender or fork. Add the flour, 1 cup of sugar, baking powder, baking soda, and salt. Mix well with the blender or fork.
3) In another bowl, stir together the egg and buttermilk.
4) Make a well in the flour-butter mixture. Pour in the egg mixture. Mix gently but thoroughly. Stir in raisins.
5) Transfer the dough to the pans, dividing it evenly. Sprinkle the tops with the remaining 1 tablespoon of sugar.
6) Bake for 40 minutes or until the tops are golden and a skewer inserted into the center of the loaves comes out clean.
7) Cool the loaves in the pans on a wire rack for 10 minutes. Turn out of the pans and leave to cool completely.


HELEN MAHONEY’S IRISH SODA BREAD
Serving Size= 1 10-inch loaf. Active Time= 15 minutes. Inactive time= 1 hour
This loaf is slightly drier than Mary Burke's, and not quite as sweet.
* 2 Tbl vinegar
* 2 cups milk
* 4 cups flour
* ½ cup sugar, plus 1 Tbl for sprinkling
* 2 tsp baking powder
* ½ tsp salt
* 2 Tbl unsalted butter, at room temperature
* 1 cup raisins
* 2 tsp caraway seeds (optional)
* 2 Tbl butter, melted

1) Set the oven at 375 degrees. Butter a 10-inch round cake or springform pan.
2) In a small bowl, stir the vinegar into the milk and set aside.
3) In a large bowl, combine the flour, 1/2 cup of sugar, baking powder, baking soda, and salt. Using a pastry blender, cut in the softened butter. Stir in the raisins and caraway seeds, if using.
4) Stir in the milk with a fork just until combined.
5) Transfer the dough to the pan. Using a sharp knife, cut a cross in the middle of the bread. Brush melted butter over the top and sprinkle with the remaining 1 tablespoon sugar.
6) Bake the bread for 10 minutes. Lower the oven temperature to 350 and continue baking for 45 to 50 minutes, or until the top is golden and a skewer inserted in the center of the bread comes out clean.
7) Cool the bread in the pan on a wire rack for 10 minutes. Turn the bread out of the pan and leave to cool completely.

Sunday, March 05, 2006

Coconut Banana Bread w/ Lime Glaze


I do not make my own bread. I have in the past, but now that I live less than 1 block away from my favorite neighborhood bakery (I assure you my habitat’s location is pure coincidence) I find no need to make my own. In the summer, when I leave my windows open in the bedroom, if I go to sleep late enough (around 2 am), the smell of fresh baking bread comes wafting down the shared alleyway. Every so often, I drag myself from bed, pull on clothes, and go to the bakery at this time. The front door is left open for ventilation and one is allowed to buy tomorrow’s bread, still warm—right off the racks. Why bake bread with a setup like this?

This is why: while my neighborhood bakery has succulent olive breads, ciabatta, sourdoughs, wheat and ryes, there are no sweet breads. No carrot bread or zucchini bread. More importantly, no banana bread! Which I feel should really be a staple in any bakery.

When I was younger, it was almost weekly that my mother would produce one of the above three mentioned sweet breads. While my favorite (surprise to myself) was the zucchini bread, banana to this day, takes a close second.

A few years ago while working in publishing, my mother used to ship (bribes for books) of fresh baked goods for my fellow workers and me. The best shipment we ever acquired was shortly after my mother received Cooking Light, September 2003. I went to the mailroom to retrieve my package—the entire room smelled like banana. A new screening process had recently been implemented for incoming packages and I am sure the mailroom staff had a good laugh when the pungent package of baked products came through. The package was released to me under one condition: it had to be opened right then, and all present were to receive a piece of whatever was inside.

Inside were three of Cooking Light’s seven best banana breads: Marbled Chocolate Banana Bread, Coconut Banana Bread with Lime Glaze and Classic Banana Bread. Needless to say Cooking Light completed all research to ensure that each recipe was pungent with banana and mouthwateringly delicious. They were even able to survive the two-day shipping process, keeping moist.

With three bananas awaiting me in the freezer and a fresh coconut in the refrigerator, re-creating the coconut with lime glaze was a natural choice (even though fresh coconut is not necessary. This bread is moist and delicious with the perfect blend of coconut and banana. It remains fresh days later and the coconut-lime combination is the perfect compliment to the banana. All seven Cooking Light recipes can be found here along with nutrition information for each. The Coconut Banana Bread with Lime Glaze is below.

COCONUT BANANA BREAD w/ LIME GLAZE
Serving Size= 12-16 slices. Active Time= 20 minutes. Inactive Time= 1 hour.
* 2 cups all-purpose flour
* ¾ teaspoon baking soda
* ½ teaspoon salt
* 1 cup granulated sugar
* ¼ cup butter, softened
* 2 large eggs
* 1-½ cups mashed ripe banana (about 3 bananas)
* ¼ cup plain low-fat yogurt
* 3 tablespoons dark rum
* ½ teaspoon vanilla extract
* ½ cup flaked sweetened coconut
* Cooking spray
* 1 tablespoon flaked sweetened coconut
* ½ cup powdered sugar
* 1-½ tablespoons fresh lime or lemon juice

1) Preheat oven to 350°.
2) Lightly spoon the flour into dry measuring cups, and level with a knife. Combine the flour, baking soda, and salt, stirring with a whisk to combine.
3) Place granulated sugar and butter in a large bowl; beat with a mixer at medium speed until well blended (about 1 minute).
4) Add the eggs, 1 at a time, beating well after each addition. Add banana, yogurt, rum, and vanilla; beat until blended. Add flour mixture; beat at low speed just until moist. Stir in ½ cup coconut.
5) Spoon batter into a 9 x 5-inch loaf pan coated with cooking spray; sprinkle with 1 tablespoon coconut. Bake at 350° for 1 hour or until a wooden pick inserted in center comes out clean.
6) Cool 10 minutes in pan on a wire rack; remove from pan. Combine powdered sugar and juice, stirring with a whisk; drizzle over warm bread. Cool bread completely on wire rack.


COOKING NOTES: 1) Although the rum smells excellent in the batter, I do not know if it is necessary in the final product. To really utilize the rum flavor I think mixing it in with the glaze for more of a kick. 2) In the final batter I added about ¾ cup coconut (an extra ¼ cup). The final bread is saturated in delicious coconut bits. 3) I used a 8 x 4-¼ inch bread pan coated in butter instead of cooking spray. The batter just fit the pan and really popped out during baking. 4) My bread baked for 1 hour and 20 minutes.

Sunday, December 11, 2005

Classic Spaghetti & Meatballs w/ Anchovy Garlic Bread


D’s friend Jeremy recently commented how easy it is to make cranberry sauce. The same goes for a good tomato sauce. If you are willing to chop a few vegetables, it is remarkable how delicious a homemade classic tomato sauce can be (and how easy it is to create variations on the original).

Friends will eat your sauce and ask what brand it is. They will marvel at the chunks of vegetables they can actually taste. Most importantly, they will secretly love you for not killing them with the over abundance of salt that is found in most jar varieties. You will love them back because they will remain in your life longer—unless of course, you no longer desire this, I suggest any high-salt jar variety.

I will sometimes make this sauce with meat—otherwise known as Bolognese. But oh! To have giant meatballs doused in sauce looming on your plate! It makes you want to sing out—On top of spaghetti/ All covered with cheese/ I lost my poor meatball/ When I had to sneeze… But these meatballs, trust me, will be in the belly before anyone can sneeze. (I was eating leftovers today at lunch and was beyond stuffed. The glutton and greed in me pushed on, fighting to finish the last meatball before the plate was passed to D for completion. Who promptly asked, “where’d the meatballs go?!”)

To swank up this classic meal, aim was taken at the garlic bread. Tease peoples’ palates by adding anchovy to the butter/ olive oil mixture. There is no offensive taste that an anchovy can sometimes offer. For many, it is a salty afterthought that will leave them to wonder “what was that delicious spice?”. This bread is so good and easy to make I’ll sometimes prepare only this for lunch. My friend A loves it so much that whenever she comes over we make a big loaf of this as a snack. My vegetarian friend B loves it so much she breaks her will just for this occasion. And you didn’t garlic bread could get any better.

I will have to say the best part of the spaghetti dinner is the leftovers. I love warming spaghetti on the stovetop the next day. The sauce cooks into the noodles creating a single entity. Rather than sauce on noodles, the dish unites. What was once a delicious spaghetti and meatball becomes a hearty, home inducing memory…

SPAGHETTI & MEATBALLS w/ ANCHOVY GARLIC BREAD
Serves 6. Cook + Prep time= 40 min

THE SAUCE
1 cup button mushrooms, sliced
1 medium onion, chopped
1 bell pepper, chopped
4-5 garlic cloves
5-6 black olives, chopped
2 Tbl olive oil
1- 5oz can no salt added tomato paste
1-15oz can stewed (or diced) tomatoes, no salt added
1-28oz can crushed tomato, no salt added
2 Tbl brown sugar
2 bay leaves
10 leaves fresh basil, chopped
1 tsp oregano
fresh pepper/ salt to taste
1) In a saucepot on medium heat, warm the olive oil. Add onions, garlic and mushrooms. Sauté 10 min until onion is soft and mushrooms reduce and brown a little. Add olives and pepper, sauté 5 min. Add basil, oregano and stir. Add 3 cans of no salt added tomato sauces. Add bay leaves, brown sugar, salt/ pepper to taste, stir. Reduce heat to medium-low and allow to simmer while you prep the meatballs and noodles. Allow to cook at least 20 min.

NOTE: mouthwatering plays on this simple recipe: option 1- Add ¼ cup chopped sun-dried tomatoes to the sauce. Option 2- Blacken some red peppers in the oven. Remove skin, chop and add to sauce. Option 3- Using 5-6 lbs Roma tomatoes, cut into quarters and place on a non-reactive bake dish. Preheat oven to 450F. Add ½ cup olive oil, ½ cup balsamic vinegar, 10 garlic cloves. Roast for 40 min until tomatoes begin to blacken. Use this in lieu of the canned tomatoes. Option 4- Add meat with the onion/ garlic/ mushrooms to create a Bolognese sauce. Option 5- Use 2 portabella mushrooms instead of the button (or meat). Option 6- Add 2 cups chopped basil to create a pesto-tomato sauce.


MEATBALLS
Makes about 15 balls
2 lb meatloaf meat (veal/ beef/ pork)
1 medium white onion, chopped
¼ cup fresh parsley, chopped
½ tsp sage
2 garlic cloves, crushed
1 egg
1) In a mixing bowl, combine all ingredients until evenly distributed. Warm a skillet on medium heat with 2 Tbl oil.
2) Form 2-3 inch balls. Add to skillet and allow to brown on all sides, about 10 min. Once done, add to tomato sauce to warm through and absorb some tomato flavor. Let sit for at least 5 min before serving. (You can make your noodles now according to the package)


ANCHOVY GARLIC BREAD
Makes one loaf.
1 loaf good Italian bread
2 Tbl unsalted butter
2 Tbl olive oil
2-3 anchovies
2-3 garlic cloves, crushed
1) Cut loaf in bread lengthwise (a la hamburger style per Kindergarten terms)
2) In a small sauce pan on medium heat add all ingredients. Using a fork, mash up the anchovy as butter melts and stir everything together. Once garlic starts to sizzle, remove from heat and brush onto both sides of bread. Close bread, cut into pieces (cut so the bottom of the bread still holds together but pieces can be easily torn off. Sit on a baking sheet and broil 5-8 min until lightly golden, sizzling and delicious.


ORDER OF PREP:
1) Start the sauce first. While the onion/ garlic/ mushrooms warm, mix the meatball ingredients and form balls.
2) Once you add the cans of tomato for the sauce, cook the meatballs.
3) While meatballs cook, prepare the anchovy garlic bread filling.
4) Transfer meatballs to sauce. Begin noodles (unless fresh then wait until last min to prepare). Brush filling on bread and cook.

Thursday, November 10, 2005

Pumpkin Head


When I was younger, I remember the mathematical theorems discussed regarding when to put our dear pumpkins on display. Too early and rot would attack before Halloween. Too late, and few could enjoy the artistic alterations. Then, neighborhood bullies and animals had to be added to the equation-- who would eat and who would squash my squash? Now, I'm more likely to leave my "pompon" whole, stick it in a window, and subject it to the knife when I'm good and ready to get slimy up to my elbows.

Pumpkins can be prepared in countless variations. From ravioli to soup to cakes to bread and even toasting the seeds for a good pick-me-up (although I think I prefer butternut squash seeds which are a little smaller and nuttier). My pumpkin this year is magnificent. It is, I think, the perfect pumpkin. It is the classic depressed oval with crescent dips running vertical and a knotty tuff at the top. It is a true specimen and though I dare consider embalming and preserving for children to learn and future generations to be amazed, one day, when I'm a little down, the knife will be drawn.

But now, Halloween has passed, and I still don't have the heart to put knife to beauty. Until then, my pumpkin recipes offered will consist of canned pumpkin. A poor, but easy substitute for the real thing. As per a recent request, a pumpkin bread recipe followed by pumpkin cheesecake-- pure Fall decadence. Make either of the two for your loved ones. It is appropriate with Thanksgiving and other assorted holidays up and coming. The bread makes a great breakfast with a cup of coffee, a mid-afternoon snack with some tea or milk, or a wholesome, comforting dessert. It also makes a great gift in place of those brick-like fruit cakes (I really hope no one actually still gifts those) and it keeps good and moist for days. The cheesecake on the other hand, is succulent. It is creamy, rich but fluffy and melts in the mouth.

PUMPKIN BREAD (c/o the Turner family w/ slight author alterations):
Makes 3 loaves (all the better for giving)
3- 8.5 x 4.5 x 3 loaf tins
--------------------
1) Preheat oven to 350 F, grease loaf tins.
2) In large mixing bowl, sift 3 cups flour, 3 cups sugar, 2 tsp baking soda, 1.5 tsp salt (or less), 3 tsp cinnamon, 3 tsp nutmeg
3) In a medium mixing bowl, beat together 4 eggs (at room temp), 1 can (15 oz/ 2 cups) pumpkin (NOT pumpkin pie filling just plain pumpkin), 2/3 cup water, 1 tsp. vanilla.
4) Add wet to dry, stir until well blended.
5) Add 2 cups walnuts or pecans, chopped
6) Add 1 cup Crisco (or veggie oil)
7) Bake 50 min on middle rack. Check with toothpick to see if done. If not, check every 5 min or so until toothpick comes out clean.
8) Pop from tin onto cooling rack and let cool 10 min.

PUMPKIN CHEESECAKE (c/o my dear friend Liana. Eaten before pictures could be taken)
Crust-
1 cup pecans
1 cup graham crackers
1/4 cup (1/2 stick) unsalted butter, melted

Filling-
4- 8oz packages cream cheese (low fat is fine) at room temperature
1- 15oz can pure pumpkin (again, NOT pumpkin pie filling)
1 cup sugar
1 tsp ground cinnamon
1/4 tsp ground ginger
1/2 tsp nutmeg
1/2 tsp allspice
3 eggs
1 Tbl vanilla
-----------
Prepare Crust
1) Preheat oven to 350 F. Wrap outside of springform pan with 2 layers aluminum foil. Process pecans and graham crackers until nuts are finely chopped. Add butter, pulse until crumbs hold lightly. Firmly press crumbs on bottom of pan. Bake 10 min, until lightly golden. Set aside and allow to cool.

Prepare Filling
1) Beat cream cheese and sugar in mixing bowl until smooth.
2) Add eggs, 1 at a time. Add remaining ingredients and beat until just blended.
3) Pour filling onto crust. Place springform pan in large roasting pan, add enough water to come halfway up sides of springform.
4) Bake about 1.5 hours, until cheesecake is slightly puffed and top is golden. Transfer to rack and cool. Cover, refrigerate overnight.


View Stats
Rankingblogs.com: Defining your blogs worth..