Saturday, December 31, 2005

A Sweet Cookie New Year


The big question this night is always: What will I do?! Are you lucky enough to have your mind at ease, already obtaining an invite to a party? Are you paying out of your teeth for a fancy hotel room for you and the honey? Are you heading to the swank clubs to pay $500 bottle service? Will you be caught on the N train at Union Square as the clock strikes midnight with your least favorite subway musician singing Marley tunes? I hope everyone finds the place where they want to be. This year, it seems the party never stops at my apartment: We will be hosting a “Sweet” New Year Party.

My high school friends were always together for New Year’s Eve. The two that stand out are: 1) “New Year’s 199-Fine” where we took over O’s house with 80 of our “closest” friends. The night ended with L crying, about how much she loved us. And 2) New Year’s 2000, spent in Jamaica, where the entire week leading up to The Night a local man ran around our hotel enlightening us in his thick Jamaican accent: “Everybody! The Millennium...! Is coming…!” Subsequently, at the bar on the Millennium, I took the waterslide from the second floor, into the ocean, where I was promptly stung by an extremely large jellyfish (which formed into an extensive rash up my arm). In college, I cannot remember very many memorable New Year’s. Many involved bars surrounded by a few friends and many people I did not know very well. Others were at apartments and The Night now blends into any other party (none had clever memorable names like the ones we came up with in high school or this year's). This year, I have also made sure I will not be caught on that N train again. I am keeping as far away as possible from trains as midnight approaches.

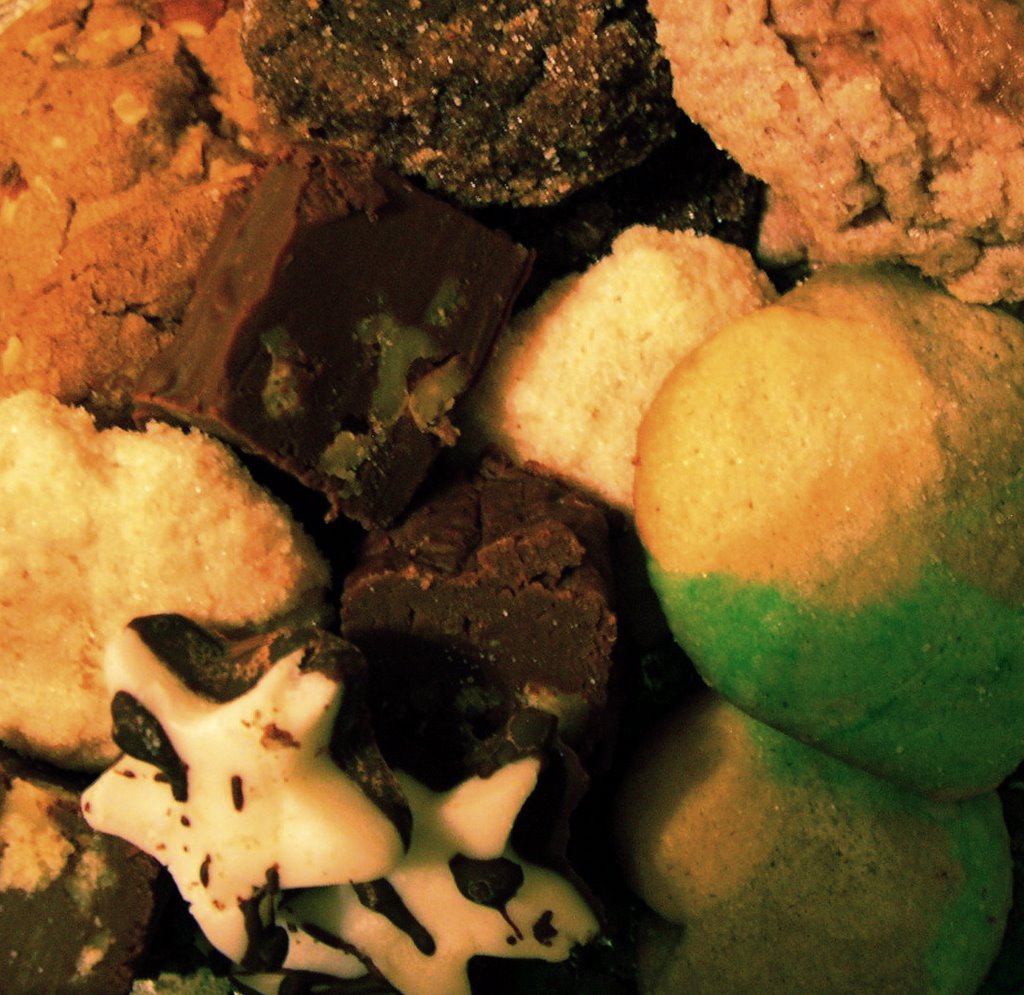
This year is “2006: A Sweet New Year”. To differentiate this night from all other nights we will eat cookies and other sweets. To usher in the sweetest of New Year’s, and to ensure our good health and humor in 2006, we will dine on nothing but gooey, delicious, mint, orange or champagne spiked treats. I spent all of yesterday baking up a storm. Some of these recipes (okay, the Champagne Cookies) I thought, "hmm, Champagne Cookies would be the perfect New Year cookie." But it was impossible to find a recipe, until finally luck struck. For others, I was flipping through some of my cookbooks until I found recipes that sounded so good it was hard to resist.

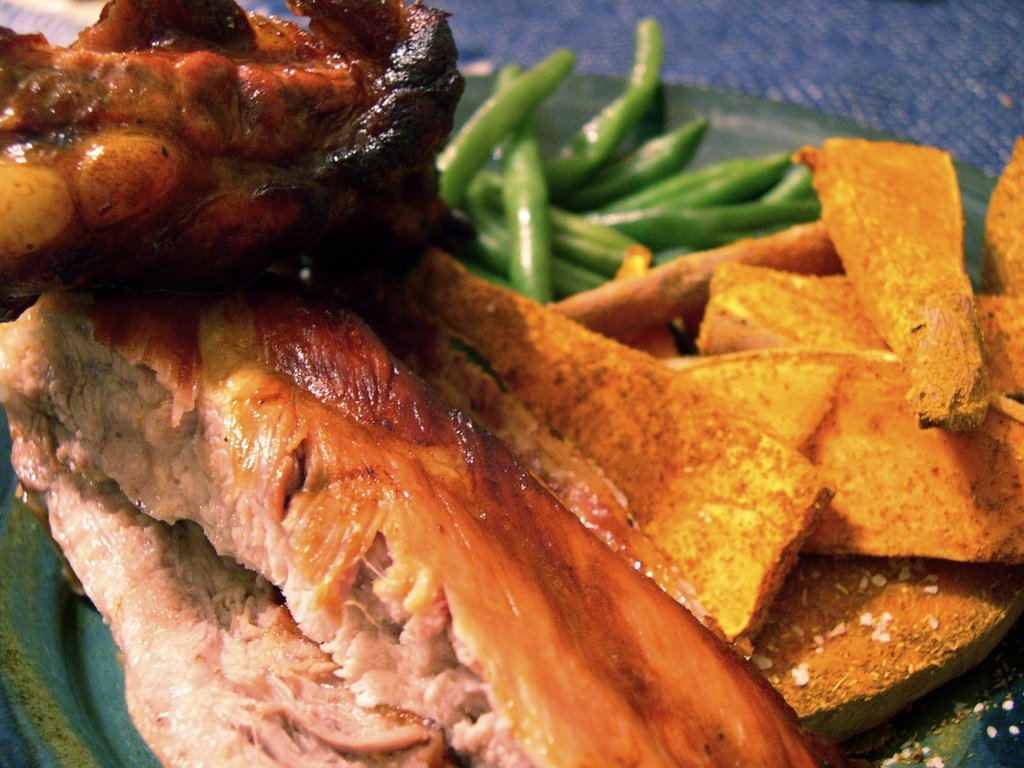
Last night, D and I were guests to a delicious New Orleans treat of rice and beans simmered with a ham hock. I will say this: our bellies were so full of the delicious meal and no one, especially our gracious hosts, could eat another bite. A few New Year cookie samples were brought out and voilà, what was once full was now empty and ready to receive. The cookies were happily plowed through. So I tease you with that as the night and recipes approach: A happy, healthy, and sweetest New Year yet.

CHAMPAGNE COOKIES

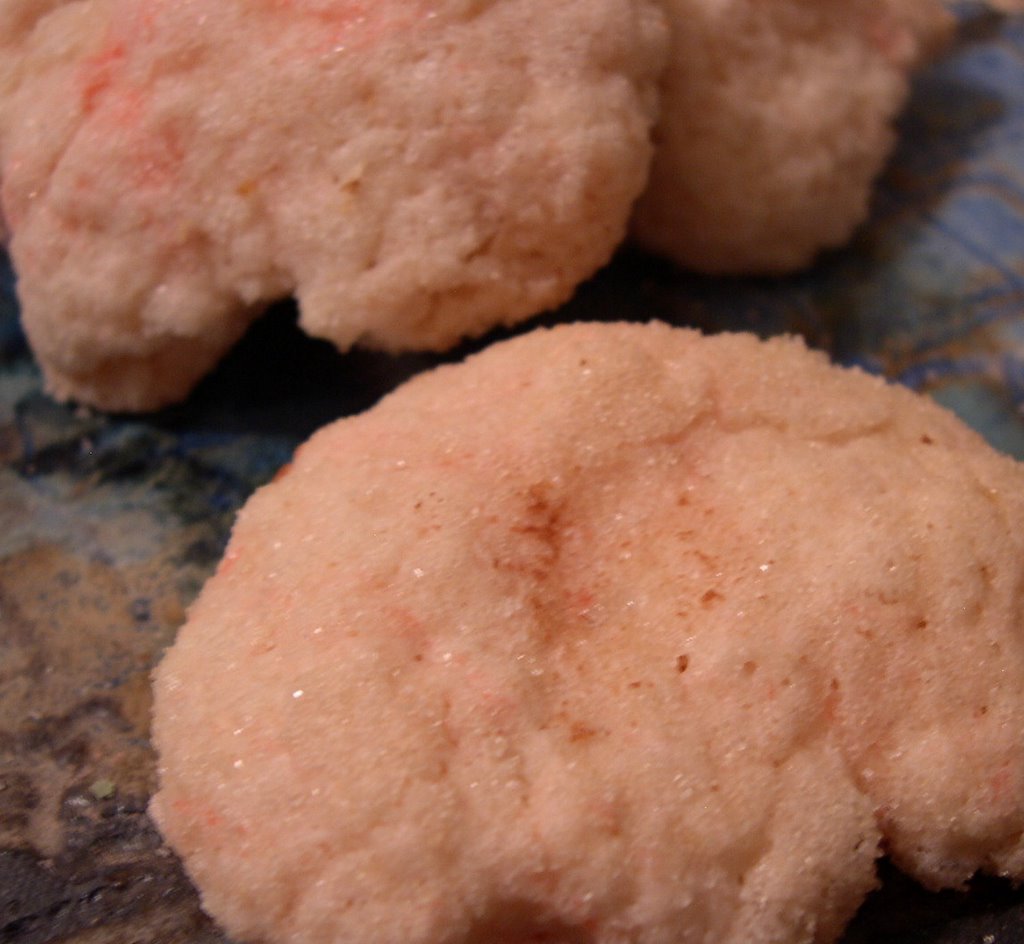
As stated above, this recipe hit me in a wave of inspiration. What is better than Champagne to usher in the New Year? And what better than Champagne Cookies as the sweetest of New Year treats? Low and behold my idea was so unique I found all of 2 recipes after an exhaustive search that lasted hours. One recipe is sealed away in a top secret $40 a year recipe vault I refused to pay for. The other I found on a blog with the posting dating about 3 years ago. Post-research and screened comments, I believe the top secret recipe is actually just butter cookies with a Pink Champagne frosting. The recipe I used (from the blog) actually has Pink Champagne in the cookies for a subtle Champagne flavor. I made these as drop cookies rolled in sugar for a sparkling effect (rather than the rolled out cookie cutter method called for in the recipe).

The result: The cookies were very festive in spirit. The Champagne flavor was not as intense as I would have liked-- Possibly the $3 Champagne? Next time, I believe I will follow the same recipe, since it is basically a sugar cookie, but add a Champagne frosting.
Makes about 24 cookies. Prep + Cook time= 20 min
1 cup flour
½ cup Pink Champagne
½ cup sugar
¼ cup shortening
1 tsp baking powder

1) Preheat oven to 375F. In a bowl, cream sugar, champagne, and shortening (will appear lumpy). Add baking powder. Blend again. Gradually add the flour.
2) In the bowl, gather dough into a ball. If too sticky, add more flour.
3) In a small bowl, pour about 1/2 cup sugar. Pull apart spoonfuls of dough and roll into a ball. Roll the ball in sugar and place on cookie sheet, about 2-inches apart. When cookie sheet is full, use fingers or bottom of glass to press cookies down.
4) Bake 12-15 minutes until cookies are lightly crisp.
NOTE: I added 1 drop of red food coloring because I did not receive the pink color I desired from the champagne.

OPTIONAL FROSTING
4 Tbl Pink Champagne
1-½ cup powdered sugar

1) Once cookies emerge from the oven, spoon a dollop of frosting onto the center. This will add a true champagne flavor.


CHOCOLATE DRIZZELED ORANGE CREAMS

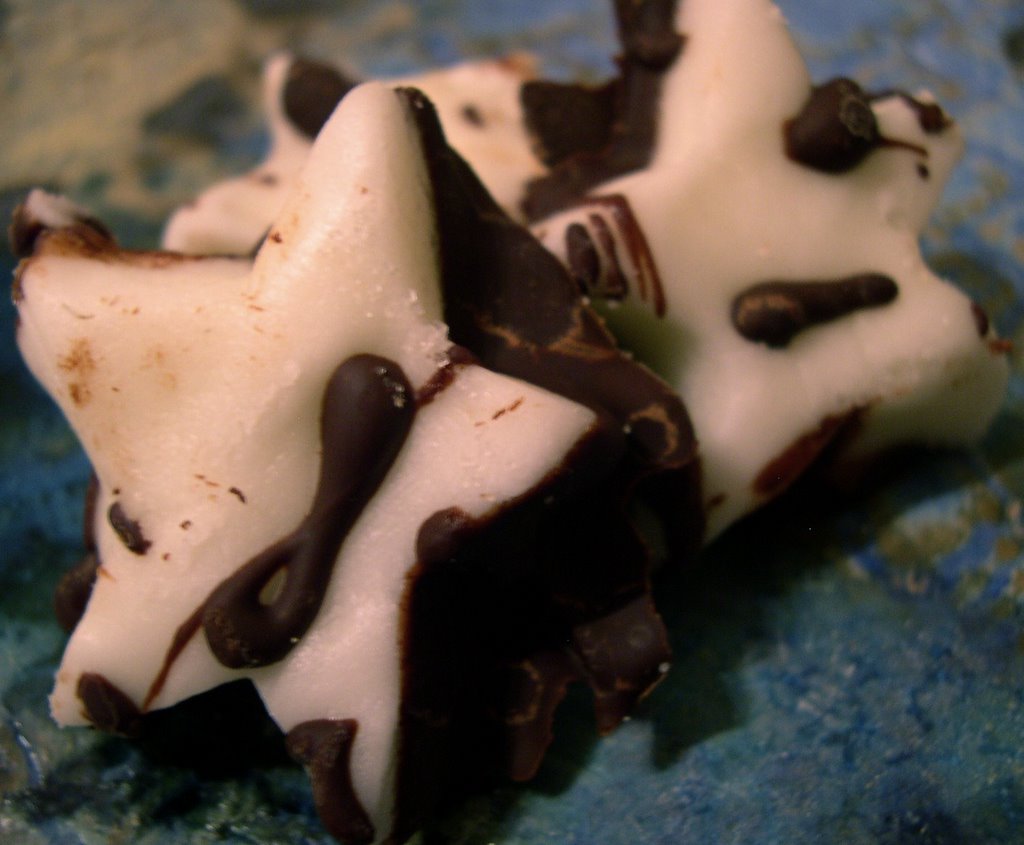
I found this recipe in my Spago Chocolate cookbook. This is a fabulously seductive cookbook to have, but the occasion to make some of the recipes listed is limited. I do not readily have the necessary hours some recipes require. What happens? It becomes a cookbook that more often sits on the shelf than ruined with buttery and crinkled pages. This recipe sounded quick and delicious so I gave it a try. It also requires no baking which eased the kitchen heat.
The result: A fabulous orange treat. I would make these again but in the future use a little orange rind mixed into the batter for a bit more of a citrus burst.
Makes about 40 candies. Prep time= 30 min. Inactive time= 30 min.
4 Tbl unsalted butter at room temperature, cut into small pieces.
1/3 cup light corn syrup
1-½ tsp orange oil or orange extract (I think 2 tsp would have been better)
4 cups confectioners' sugar (powdered sugar)
4 ounces bittersweet or milk chocolate

1) In a mixing bowl, with a mixer on medium, combine butter, corn syrup and orange oil until smooth and creamy.
2) Reduce mixer speed to low and gradually add the sugar, 2 cups at a time. Remove the mixture from the bowl and place on a work surface that has been lightly sprinkled with sifted confectioners' sugar. "Knead" the mixture until it is a smooth ball. If it is sticky, add a little more confectioners' sugar, a little at a time. Don't add too much at one time; you want the mixture to stay creamy, and not dry out. Roll the "dough" into a round, flat "ball" about 1/2-inch thick. Cover with a clean towel and allow to rest for 30 minutes. Do not refrigerate.
3) Place a sheet of wax paper on a baking tray. Using a 1-inch cookie cutter [I used a star-shapped cookie cutter], cut out as many pieces as possible and arrange on the wax paper. Combine scraps, create another 1/2-inch thick slab and continue to slice out shapes, continue until all the "dough" has been used.
4) In a double boiler [I do not have a double boiler and put an old pie tin over a small sauce pan filled with water. The pie tins handles rested nicely on the saucepan creating a perfect double boiler], melt the chocolate. Once chocolate is ready, placing each candy piece on a fork or or truffle dipper, dip the bottom half of each candy cream into the chocolate. Arrange on wax paper to set. Using a small amount of chocolate on the fork, drizzle remaining chocolate over the candies with a slight "splatter" motion. Do not remove candies until totally set (at least 2 hours depending on heat in the area).


WINE COOKIES

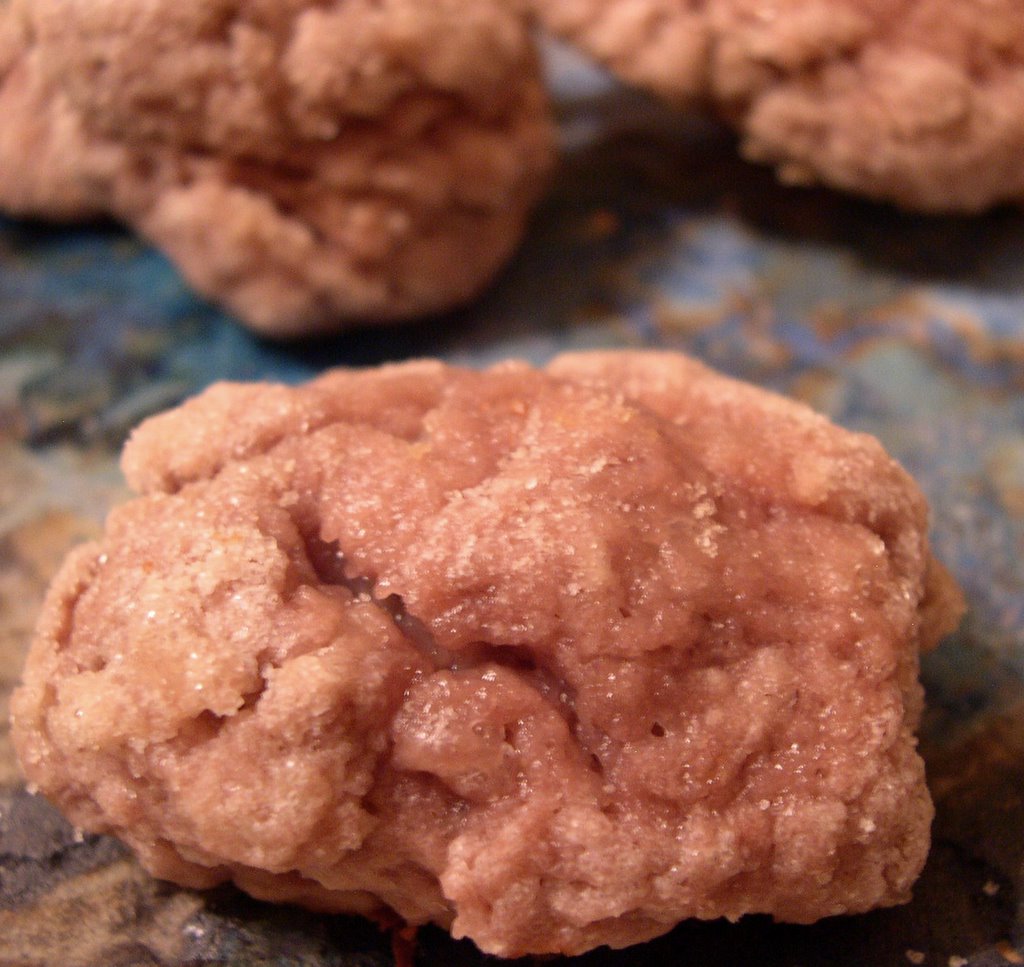
Perfect for the oenophile in us all. These cookies are too easy to make. The subtle wine odor and taste is a perfect combination with a glass of port. These cookies are a traditional Italian treat. They are not too sweet which made them a good pairing with the many sweet cookies I offered on The Night. My one problem when baking them is the recipe called for crisp cookies baked for 25 min. After 35 min my cookies were still not totally golden or crisp (I was thinking of a more biscotti-like cookie).
The Result: these were good, but I think would have been even better in the pre-conceived crunchy version. Was my wine not "dry" enough? Did I put too much in? I cannot say. These were still tasty and offered a light afterthought of vino.
Makes about 30 cookies
3 cups flour
1 tsp baking powder
1/3 cup + 3 Tbl sugar
1 cup dry red wine
½ cup vegetable oil

1) Preheat oven to 350F. Using a fork, blend flour, baking powder and 2 Tbl sugar until mixed. Add wine and oil and stir until blended. Add more flour if too moist.
2) In a bowl, place the 1/3 cup sugar. Roll spoonfulls of dough into a log shape and roll in sugar. Place on a baking sheet 2-inches apart. Gently push log shaped dough down to flaten a little.
3) Bake 25 min until golden and crispy. [As I said, mine were in the oven for 35 minutes and still were not totally crispy, but good.]


CAPPACCINO DELIGHTS

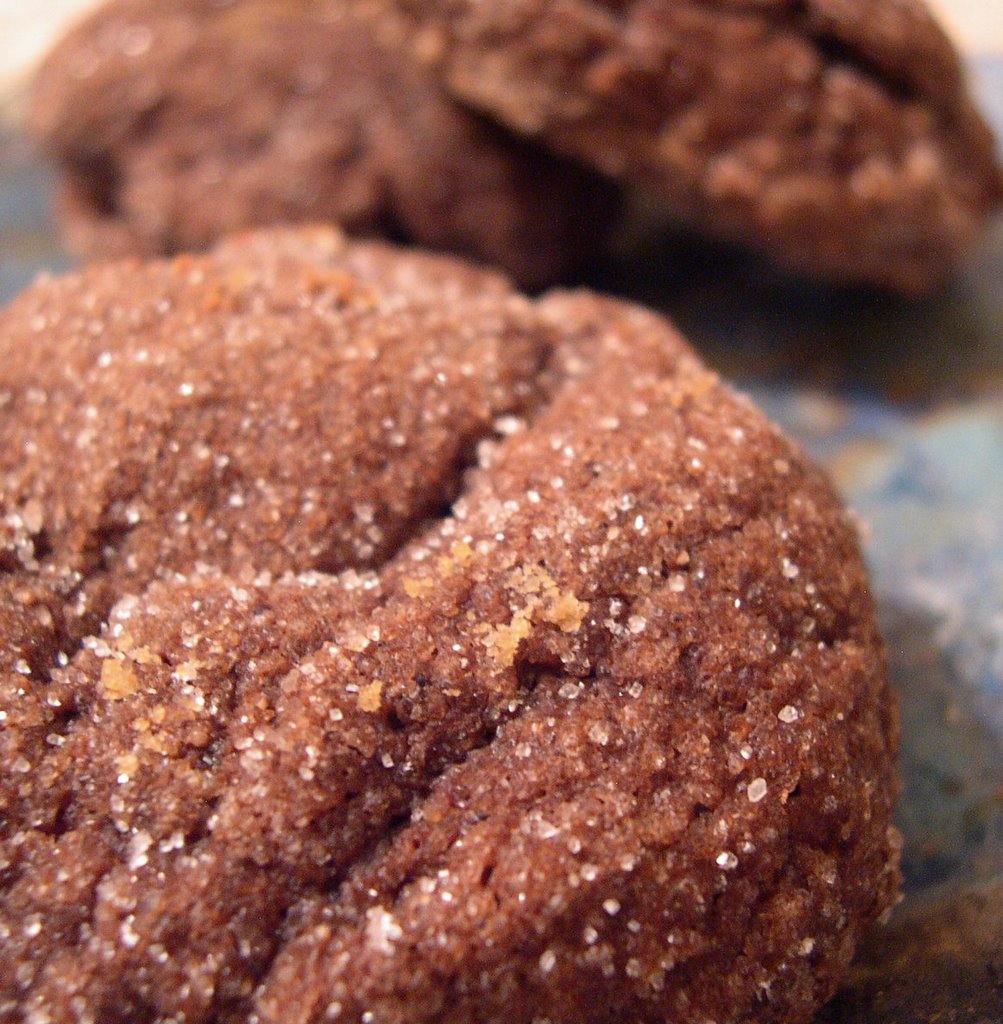
A note to cookbook publishers: Always include photos of the food that accompanies the recipe. I think this is so important. I will often dismiss a recipe because there is no photo evidence that the food will actually look good. And good-looking food is important. Grant it, many of my invented creations I would send back in a restaurant if I looked at it, but actually taste amazing.
I found this recipe on the Better Homes and Gardens website. The picture looked so good and I live with a coffee addict that I had to try them. Even better, they are quick and easy to make.
The Result: Delicious. There are just enough coffee beans in these cookies to give them a lightly roasted scent. Enough kick to keep one awake through midnight, and enough sugar to pack a punch in the moment.
Makes about 40 cookies. Prep time= 15 min. Bake time= 8 min.
1/3 cup unsalted butter, softened and cut into slices
1 cup brown sugar
2/3 cup unsweetened cocoa
1 Tbl coffee granules [I doubled this and used about 2-3 Tbl for a more powerful cookie]
1 tsp baking soda
1 tsp ground cinnamon
2 egg whites
1/3 cup vanilla yogurt
1-½ cup all purpose flour
¼ cup granulated sugar

1) Heat oven to 350F. In a mixing bowl, using an electric mixer, beat butter for 30 seconds until soft. Add brown sugar, cocoa, coffee, baking soda, and cinnamon. Mix until blended and creamy. Beat in egg whites and yogurt until well combined. Beat in as much flour as you can using the mixer, then use a spatula to mix the remainder in.
2) Place granulated sugar in a small bowl and drop heaping teaspoons into the bowl. Roll the dough in the sugar. Place on baking sheet 2-inches apart. Bake for 8-10 minutes until edges are firm.


FUDGE

Fudge is surprisingly easy to make, especially with a digital (or candy) thermometer. It is quick and so delicious and the scent of melting marshmallow allows me to reminisce about the summer and s'mores by the campfire. It also brings me back to my Girl Scout days and a trip we took to Mackinac Island, later known as Fudge Fest. Here, I followed the recipe on the back of a Marshmallow Fluff jar. For a first time fudge maker like myself, it is a great starter recipe. And just think of all the future variations: coffee liquer, cherries, mint, rocky road, vanillas swirl...
Makes 2-1/2 pounds or about 30 1-inch square pieces
2-½ cups sugar
¾ tsp salt
½ stick butter or margarine
1- 5 oz. can evaporated milk (3/4 c.)
1- 7 1/2-oz. jar Marshmallow Fluff
¾ tsp vanilla
1- 12-oz. package semisweet-chocolate pieces
½ cup chopped walnuts

1) Grease a 9-inch square baking pan; set aside [or line it with tin foil]. In large saucepan combine first 5 ingredients. Stir over low heat until blended. Heat to a full-rolling boil being careful not to mistake escaping air bubbles for boiling. Boil slowly, stirring constantly, 5 minutes. [Mixture should reach a softball stage. The softball stage is when temperatures reach 232-234 degrees F. Do not overheat or fudge will be over hard. Do not under-heat or fudge will turn into goop.]
2) Remove from heat, stir in vanilla and chocolate until chocolate is melted. Add nuts. Turn into greased [or tin foil lined] pan and cool [about 4 hours].


MINT TWISTS

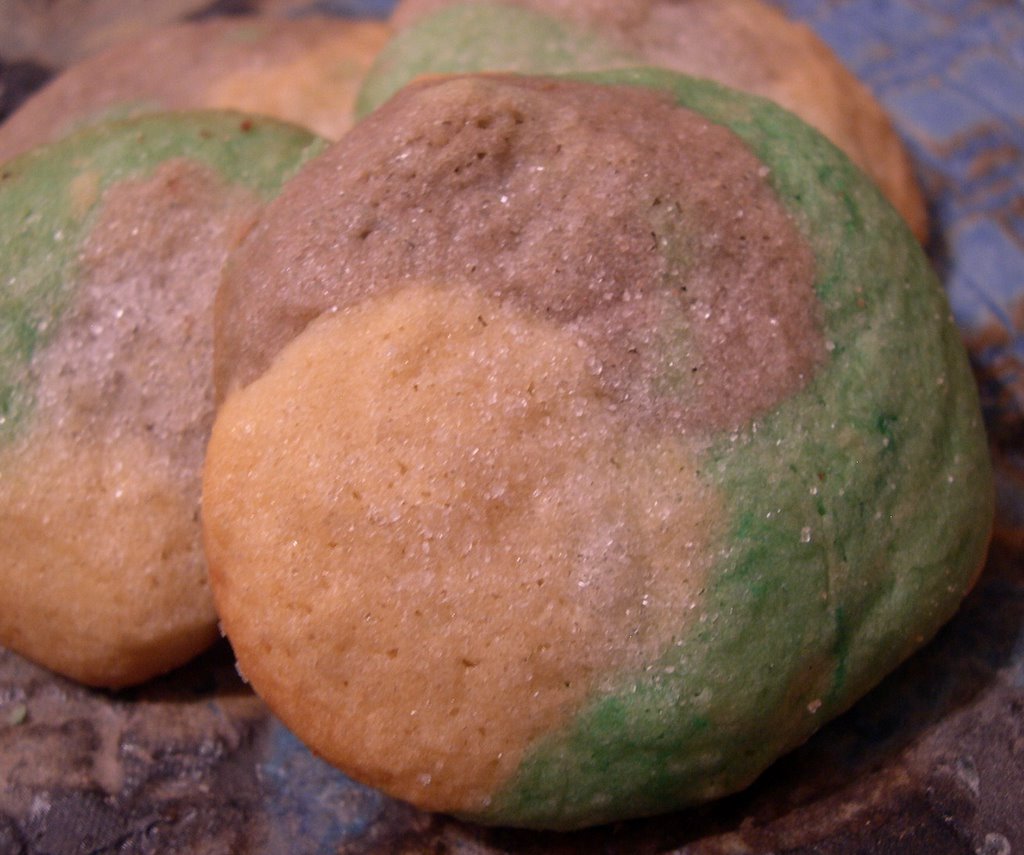
Another recipe found on Better Homes and Gardens. The picture of these again, looked so good and with mint being my favorite flavor, how could I pass up a mint cookie? The original recipe calls for peppermint extract. I could only find mint extract, which contains more spearmint flavors than peppermint. The cookies were still good and I think I would use more extract to heighten the taste next round of baking these.
The Result: The mention of these at the above mentioned dinner party sent my host on an eating frenzy. The translation: these cookies are so good you will not be able to stop eating them. The best part is you can mix and match colors to create your favorite color combinations (I made purple-green-plain swirls). I also made half the below recipe. This makes the dough a little more manageable.
Makes about 72 large (2-1/2-inch) cookies or 144 small (1-1/4-inch) cookies. Prep time= 30 minutes; Chill: 1-1/2 hours; Bake: 8 minutes
1 cup butter
1 cup sugar
½ tsp baking powder
1 egg
1 tsp vanilla
½ tsp peppermint extract
2 cups all-purpose flour
10 drops red food coloring [or other chosen color]
10 drops green food coloring [or other chosen color]
Sugar

1) In a large mixing bowl beat butter with an electric mixer on medium speed for 30 seconds. Add 1 cup sugar and baking powder. Beat until fluffy. Beat in egg, vanilla, and peppermint. Beat in as much of the flour as you can with the mixer. Stir in remaining flour.
2) Divide dough into 3 equal portions. Stir red {or chosen} food coloring into 1 portion, stir green [or chosen] food coloring into a second portion, and leave third portion plain. Cover each portion with foil or plastic wrap and chill in the refrigerator about 1 hour or until easy to handle.
3) Divide each color of dough into 4 equal portions. On a lightly floured surface, roll each portion into a 1/2-inch-diameter rope. Place a red, a green, and a plain rope side by side. Twist together. Repeat with remaining ropes. Chill twisted ropes for 20 minutes. Cut ropes into 1/2-inch-thick slices for larger cookies or 1/4-inch-thick slices for smaller ones. Carefully roll into balls, blending colors as little as possible. Place balls about 2 inch apart on ungreased cookie sheets. Using a glass dipped in sugar, flatten each ball to 1/4-inch thickness.
4) Bake cookies in a 375 degree F oven until edges are set (allow 8 to 10 minutes for larger cookies or 6 to 8 minutes for smaller ones). Transfer cookies to wire racks; cool.

PEANUT BUTTER-CHOCOLATE CHUNK COOKIES

This is another Spago Chocolate recipe I could not wait to try out. Peanut butter cookies are so buttery good I thought they would be a perfect (and more ordinary) cookie addition to the New Year banquet. I also made only half this recipe and it came to a perfect amount.
The Result: Pure melt in your mouth butter. These cookies are a true peanut butter triumph. Unlike most peanut butter cookies, these appear light and fluffy and look lovely crackled open (as seen in picture). They are like little peanut butter bombs just waiting to go off once in the mouth. And they are-- Pure decadence.
Makes about 5 dozen cookies. Prep time= 20 min. Inactive= 2-3 hours. Bake time= 14 minutes.
2-1/4 cup all purpose flour
1 tsp baking soda
1 tsp salt
8 ounces (2 sticks) unsalted butter, at room temperature, cut into small piece
2 cups dark brown sugar, firmly packed
2/3 cup creamy peanut butter [In my halved recipe I used about 1/3 cup creamy and 1/3 cup chunky peanut butter]
2 eggs
2 tsp vanilla extract
1 pound milk chocolate, coarsely chopped (pieces about the size of chocolate chips)
1-½ cups unsalted peanuts, toasted, cooled and coarsely chopped.

1) Sift together the flour, baking soda, and salt. Set aside.
2) In a large bowl with an electric mixer, on medium speed, beat the butter until fluffy. Add the sugar. Raise the speed to high, and beat until fluffy, scraping down the sides of the bowl. Add the peanut butter and beat until incorporated. Lower the speed and add the eggs, one at a time, and the vanilla, again scraping down the sides of the bowl as necessary. Turn the speed to low, gradually pour in the flour mixture, and beat until just combined. Add the chocolate and peanuts, and again, beat until just combined.
3) Scrape the dough out of the bowl, wrap in plastic, and refrigerate until firm, 2-3 hours. [I made the dough the night before I was to bake it.]
4) Position the rack in the center of the oven and preheat to 350F. Line one or two baking trays with parchment [wax] paper.
5) Remove the dough from the refrigerator and divide into mounds, about 1 ounce each [or about 1 Tbl]. Roll into balls and place 2-inches apart on the cookie sheets. Bake until slightly firm to the touch, 14-15 min, reversing trays back to front after 7 minutes to ensure even baking. Place the trays on racks to cool and after a few minutes, remove the cookies with a wide metal spatula and place on racks to cool.

Wednesday, December 28, 2005

The Gourmand's Cheeseburger


Since leaving home to attend college—and remaining away—each visit back holds significance: My mother moved out the home I grew up in and into the city; My friends (now also in the city) have other friends outside of “the group” I am obliged to be with; In the spring, I returned with D in tow, to attend the wedding of one of my childhood friends-- When did we get so old? This recent trip home was marked by the holidays and upon further scrutiny, noticing how much my group of friends has matured-- in some ways.

I say “in some ways” because when we get together, really, we are the only ones that understand the jokes that make us laugh until we cry. We will beat a saying (or even a word) into the ground, and continue until it comes back to life. We recently gathered to create some pathetic looking sugar cookies (see picture at right). They tasted great, don’t get me wrong, but 5 bottles of wine down the line, well… we were decorating like we were 5 years old. We also will make it a point to travel to the suburbs for our old favorite restaurants and scoff in amazement (and hide) when we see people we know from high school (why is she at my restaurant?!). Then proceed to the local beach to run around the playground, even if our hands are freezing. But now, even though our gatherings are far and too few between, we also discuss our real fears, have real arguments, and no Di, I am not next on your marriage train.

My dear city is home to a lot that makes me proud (other than my own brat pack of friends). I used to (and often still do) spout all the films and actors that graced “my” doorstep rather matter-of-factly: Home Alone was filmed 10 blocks from me. Bobbie Brown (the makeup artist) went to my high school, as did Moses—oh, I mean, Charlton Heston. Uncle Buck picked his niece up around the corner. Chris O’Donnell bought Robin figurines “for my nephew” at the toy store I worked at in high school. The Breakfast Club was based on my high school. And these are just my own suburban town’s claim to fame. The city itself is a jackpot for culture: Home of the blues, deep-dish pizza, the tallest building in North America, a thriving standup comedy/ improv scene, Chicago-style ‘dogs, the dear Cubbies with their ivy-laden walls, a breathtaking waterfront…. Chicago is the fabulous hub of the Midwest.

Indian for “field of onion,” or as I knew it growing up, “The Smelly Onion.” The city received its more recent nickname of The Windy City in the 1800’s. I have heard this phrase defined two ways: 1) Chicago is a very windy city (I have actually, literally, been stopped in my tracks by the wind of a late fall storm) and 2) because of all the politicians who blow their hot air through the city. I think it can go both ways.

But if you are in Chicago, onions should definitely be had, at least on a proper Chicago hot dog. And probably the best place to quench the ‘dog thirst is at Wrigley Field enjoying a Cubs game. Though it is a little cold for that now, and the ivy walls of one of the oldest ballparks in this country must be missed, head to any number of ‘dog joints that surround Wrigley (or nearby bars). My favorite is Demon Dogs, located conveniently close to my mother’s apartment, under the Fullerton El stop (others claim The Wiener’s Circle on Clark is top dog).

This time of year, I think it is more pleasing to snuggle up with a juicy burger and cold beer in front of a fireplace (also with onions, but caramelized) on some good pumpernickel or rye bread. Which brings to mind Chicago’s seedy past. I am not talking about Al Capone and his gangsters, booze and girls. I am talking about the meat industry highlighted in Upton Sinclair’s The Jungle. It has worked its way out thankfully, and a great piece of meat can now be found in this city. From steaks to ribs to burgers, some of my favorite memories include the smell of BBQ emanating from peoples’ backyards and balconies all over the city, regardless of the temperature.

Below, my recipe for the cheeseburger all of us love, with the necessary (hidden) gourmand flare. These burgers are amazing on a grill, but can still be made inside on the stovetop. I produced this recipe a few years ago one humid summer’s night in New York. We were grilling at my friend A’s place and I took over the grill. I like to think it was not just the beer in people, but man and woman alike returned for seconds and thirds. They spouted their accolades: I should sell the recipe and retire off the wealth it would bring. But here, gratis, I offer you this fabulous burger that reminds me of my sweet home, Chicago:

THE GOURMAND’S CHEESE BURGER
Makes 4 burgers
1 lb freshly ground beef
½ cup red wine
2 cloves garlic, crushed
1 medium white onion, (1/2 chopped, 1/2 sliced)
¼ cup loosely packed fresh basil, chopped
½ tsp. cayenne pepper
4 dashes Worchester sauce
fresh pepper (to taste)
fresh goat cheese (I prefer this recipe with plain goat cheese. It can also be made with mozzarella or plain)
Honey
Spicy mustard
Fresh tomato
8 slices dark rye or pumpernickel bread

1) In a small pan on the stove, carmelize the sliced onion. To carmelize, keep the pan on medium-low heat. Add about 1 Tbl butter and cook the onions SLOWLY until they brown, sweetened to carmelized to goodness. Watch the cooking while you proceed with the burgers and stir periodically. Total cook time for the onions is about 20 min.
2) Mix the first 8 ingredients by hand (use only the chopped onion). Folding until evenly distributed.
3) (If using a stovetop, heat a sauté pan on medium high.) Break apart the mixture and form 4 thick patties.
4) Make an indentation with your thumb in the middle of each patty, about a 1inch diameter hole, halfway through the patty.
5) Place a spoonful of goat cheese into each hole. Using your fingertips, pinch the patties up and around to close the hole, hiding the goat cheese inside.
6) Place on hot grill or stovetop pan, cook until desired doneness (I cooked mine about 4 min each side on medium high heat).
7) While these are cooking, prepare the “buns”: lay out the 8 slices of dark rye or pumpernickel. Brush all 8 pieces of bread with about 2 tsp honey, spread mustard on 4 slices, place tomato on top of the mustard (you can also top this with 1-2 large basil leaves).
8) When meat is ready, place on “bun” and enjoy.

Note: The honey and goat cheese are a great sweet combination and delight playing upon the saltiness of the meat. When I recently made these, I had no honey. I substituted a small amount of maple syrup on the bread instead. It was a little sweeter, but worked well. I also ran out of onion and was unable to carmelize any. The burgers were still delicious without.

Sunday, December 25, 2005

Red Wine Infused Filet Mignon w/ Wasabi-Caviar Laced Baked Potatoes


Pure decadence in food is breathtaking. I find many of my meals very delicious and succulent, but I will often forgo a splash of this here, or the addition of that there to make budget, and none are the wiser. (For example: My fish does not need a white wine sauce. Or: Saffron? Eh, I’ll just work around that one.) But it is holiday time breeching on New Year's so one must eat as if dining at 4-5 star restaurants is the norm, no? Especially if it is in your own home and you are the chef. Splurge on that extra this or that, it makes a difference, your tongue will thank you, your belly will flip in joy, your eyes will glimmer in delight, and your overall physique will shine.

My personal reason I usually dismiss the marinade: I cannot think of my menu far enough in advance to actually marinade for the proper length of time (unless of course it is a party or special event and that is a different story). But the usual dinner planning often consists of me (or D) walking home from work, craving one thing, making the purchase, and cooking it up using whatever items that are readily available. Steak is usually done au poîvre, chickens are done with a rosemary-garlic-pomegranate molasses rub, and vegetables are simply broiled or steamed with some garlic and olive oil. It is amazing how delicious and quick simple meals can be. But as I stated, holidays are a special occasion and a meal you would not normally consume is an excellent substitute for the monotony of the norm.

My mother has been taking the odd cooking class at Whole Foods. Each time she leaves one, she calls me to rave about Chef Daniel: “Oh, he did this! And that! It was so easy! It just melted in your mouth! Oh we must try it!” Now, I had wanted to do a peppermint-encrusted rack of lamb for a holiday dinner, but my mother was so exuberant about Chef Daniel’s meal, I allowed her to choose the menu (peppermint-encrusted rack of lamb is sure to come shortly). This red wine infused filet is actually listed as a New Year’s menu with a side of butternut squash risotto. Although my mother raved to no end about the nutty-buttery risotto, she also mailed me the remaining grains, so we opted for baked potatoes with sour cream and a wasabi-caviar accent. This meal was a more classic steak and potato fair, but with a definite and positively luxurious spin on the starch, resting in the wasabi-laced caviar.

This marinade is so simple, quick, and requires so few items I actually now wonder why I do not plan ahead and do marinades more often. The baked potatoes were an excellent accompaniment (though I think the wasabi-caviar in mashed potato form would have been even better). The filet was so thick and tender it melted in the mouth, and under the knife. (We were able to use blunt knives and easily cut through the meat.) The original recipe discards the marinade. Instead, I added mushrooms (at the start) and we sautéed the leftovers and spooned them on top the filet. Mushrooms quickly absorb whatever they are added to so the result was a wine-spiked mushroom to go with the light wine flavoring of the meat, excellent. As I said, the baked potatoes were good, but I think might have been even better as a mash. Still, the wasabi-caviar was a surprise with its slightly spicy flavor bursts that added a nice green sparkle to the potato.

A note on meats: No matter how you prefer to cook your meat, if on a stovetop, they should always be sautéed quickly at high heats. Whether it is pork chops or beef filet, neither needs the addition of oil or butter to the pan, just some salt and pepper patted onto the meat. Make sure your pan is HOT before you begin (water should evaporate almost instantaneously when dropped on). The meat will cause a lot of smoke so make sure the area is well ventilated and maybe open a window.

RED WINE INFUSED FILET OF BEEF W/ WASABI CAVIAR BAKED POTATO
Serves 2. Active time about 20 min.

THE FILET
1 pound center cut of beef filet
1 red onion, thinly sliced
3 garlic cloves, thinly sliced
3 sprigs of rosemary
1 cup red wine
1 Tbl red wine vinegar
10 white mushroom buttons, sliced (my personal addition)

1) In a bowl, combine all ingredients, except for the filet. Mix until well combined.
2) Transfer to a large plastic freezer bag (cuts down on clean up) and add the filet. Seal off the bag and place on a dish and place in the refrigerator for at least 4 hours, up to 3 days. Flip bag halfway through sitting.
3) When ready to cook, Preheat oven to 450F. Heat an oven-safe sauté pan until very hot. Remove beef from bag and pat it dry, season with salt and pepper. Sear the meat until very brown on both sides (about 3-5 minutes each side). Transfer to the oven for 12 minutes for a medium rare cut, longer for more well done.
4) While beef is baking, in a small sauce pan warm a little olive oil. Remove a hanful of the red onion, rosemary and mushrooms from the marinade bag and about 4 Tbl of the red wine liquid. Saute on medium until mushrooms cook down (this will be done about the time you remove the meat from the oven)
5) Carefully (beef may stick a little) transfer beef from pan to plates and serve.


WASABI-CAVIAR BAKED POTATOES
2 russet potatoes
2 Tbl sour cream
1- 2oz container wasabi whitefish caviar (fairly inexpensive for caviar at about $30 a bottle)

1) Place the potatoes in the oven about 30 min before you begin the filet. Preheat oven to 400F. Puncture potatoes with a fork about 4-5 times and wrap in tin foil. Bake for 40-45 min. (If you are making the filet, it is alright to turn the heat up to 450F in the last 10 min of baking the potato. Remove the potatoes and keep wrapped in foil while the filet is baking. They will retain their heat and still be hot when ready to serve.)
2) Once done, remove from foil and slice lengthwise with a knife. Holding the potato with a napkin, squeeze in the sides to create an opening at the top. Add a scoop of sour cream and a small spoonful of caviar.

Saturday, December 24, 2005

The Whatever Your Holiday, Holiday Cookie


** It is almost sundown and you have nothing to usher in the festival of lights?
** Santa’s sleigh bells are a’ jingling and you forgot to make cookies to put out?
** Your doorperson is leering at you because you forgot the holiday gift?
** Your kids ate all your cookies before company arrived?

No fear, the easiest All-Purpose and Holiday cookie is here (pictured above in religious harmony). Delicious, chocolaty cookie base and a sweet holiday appropriate topping. Six ingredients you can probably dig up in the house make up the cookie. The holiday additions are your choice be it a powdered sugar frosting with food coloring, pre-bought icing, a sprinkle of pecans, or a dust of edible gold. Quick, sweet, and mouth-watering scrumptious to eat. Without delay, after all; you are in a rush!

THE COOKIE
Prep Time= 10 min Cook time= 11 min. Makes about 25 cookies.
1-¾ cups all-purpose flour
½ cup unsweetened cocoa powder
¼ teaspoon salt
1 cup sugar
¾ cup (1 1/2 sticks) unsalted butter, room temperature
1 large egg
½ cup dark chocolate, broken into pieces (optional)

1) Preheat oven to 350F. In an electric blender, beat sugar and butter until blended. Beat in egg.
2) Add flour, cocoa, and salt; beat until blended.
3) Break apart the chocolate bar and pulse into the batter so it forms smaller pieces.
4) Refrigerate 1 hour (I neglected this step and they turned out fine).
5) Scoop out dough by level tablespoonfuls, then roll into smooth balls. Place balls on baking sheets (you will probably need 2), spacing about 2 inches apart.
6) Using the bottom of a glass or palm of your hand, flatten each ball to 2-inch rounds (edges will crack).
7) Bake 11 minutes (do not overbake). Cool on sheet 5 minutes. Transfer chocolate cookies to racks and cool completely.
NOTE: I snagged the cookie recipe from epicurious.com (the chocolate bar is my addition). The cookie base is the Chocolate Candy Cane Cookie from their December 2005 holiday cookie issue.


DECORATION:
I used pre-made icing from the grocery and crushed up peppermints in the electric mixer to form a peppermint dusting. I would have loved some edible gold flakes (“gelt”) to put on the Hannukah cookies but I did not have any. Some crushed pecans would have worked well, but I also had none. The Hannukah cookies are blue and white icing. The Christmas cookies are green or white icing with a sprinkle of peppermint dust.
For Christmas Cookies:
1) Place about 8 peppermint circles (or 1 candy cane) into an electric mixer and pulse to a chunky powder.
2) Squeeze a small dollop of green or white icing onto the center of the cookie. Add a pinch or two of the peppermint and push down to allow the peppermint to stick to the icing.

For Hannukah Cookies:

1) Place a small dollop of blue icing in the center of the cookie. Place a smaller dollop of white (or yellow) on top of the blue to act as a crown.
Other options:
1) White frosting with edible gold flakes sprinkled would have looked amazing for Christmas or Hannukah cookies.
2) Before baking, crushed pecans pressed lightly into the dough would be lovely.
3) A powdered sugar frosting, with or without food coloring would be nice to spread on top: 1 cup powdered sugar, 2 Tbl water, 1 tsp vanilla (or peppermint or rum flavoring) and 3-4 drops food coloring. Stir with fork. If too thick, add more water; too thin more powdered sugar.

Friday, December 23, 2005

Not So Classic Tuna Sandwich


*Just Braise has moved. Please visit me at www.justbraise.com!*


Tuna sandwiches and I were a love-hate affair when I was younger. I thought they tasted good, but then I would look in a can only to be repulsed by the resemblance to cat food. I also found it strange that I did not like regular (non-canned) fish, but could eat canned tuna. It seemed too close to Spam-- which is just repulsive. I also was unable to eat other canned fish-- like canned salmon. To this day my mother buys it and makes what she calls “salmon patties”. These truly are cat food and I am sure my current cats would engulf those patties.

I also remember being terrified of the possibility at the lunch table in junior high school to be the kid with a tuna sandwich. Kids can be cruel and there is nothing worse than the smell of tuna; too easy of a target to make fun of. The only thing I can think of that is worse is being the kid with the pickle in the lunch bag (I was also sometimes that kid). It is one thing to pull a fresh tuna sandwich (or pickle) from a nicely refrigerated space and eat it immediately, but I think parents fail to realize a child’s lunch sits in their dank locker or backpack until lunch. How many bugs crawl through there? How often is the sack smashed into place? How much food has rotted in their by previous occupants? If you have children just try not to think about this. I don’t but now shutter thinking back to my own home-brought lunches (which always far surpassed the grease-laden-grade-D-garbage they sell at almost every school across the country, even if it did sometimes smell).

Once, I think I was in high school, I attempted to make my own tuna and eat it out of the bowl one night. I dumped the drained canned tuna in, added mayonnaise, celery and pepper and proceeded to eat it. I thought it tasted too fishy and needed more mayonnaise, so I kept adding mayonnaise: 1 Tbl, 2 Tbl, 3… Now I had a bowl of mayonnaise that hinted at tuna. It went into the garbage. I had thought I wanted tuna, but turns out my taste buds were not having it.

On Sundays my mother would purchase bagels and lox from a bagel shop.in a neighboring town. This place has such good bagels there would be a line outside the door on Sundays. Since we would devour the lox in one day, she would also buy a quart of their tuna to put on the remaining bagels. That tuna was so good (and I would think still is) that it sometimes would also disappear in one day—I would often catch my little brother shoving spoonfuls of the tuna into his mouth, returning it to the fridge, then repeating 2 min later. (They pulse the tuna and ingredients into a tuna “paste” which allows it to keep the shape when on top one’s bagel.) We attempted to imitate it at home, but failed. I now believe there is an opiate in it to make it so addictive. I have never found any store-produced tuna tasting so good.

Today, when I make a tuna sandwich, I do not use any mayonnaise. In fact, there is not even a jar of mayonnaise in my refrigerator. I made it once (mayonnaise) and was totally repulsed by the amount of oil that went into it, I figured I could drink it straight for the same effect, and now try my hardest to avoid the white stuff.

This tuna is a super protein tuna (for all you carb-phobes). It is meaty, chunky, crispy, smooth, rich, spicy and indulgent. It is made with avocado (not mayonnaise) and tastes amazing on toasted bread, in a salad or plain out of the bowl. It is one of those sandwiches you cannot wait to eat. You will dream about it coming home and turn the key a little faster to get at it sooner. Your cats will paw at you over the intoxicating smell of freshly opened tuna. The best part is, it can be altered to suite your taste or with what you have available.

NOT SO CLASSIC TUNA SANDWICH
Makes 2 sandwiches. Prep time= 5-10 min.
1 can albacore chunky tuna, drained (give the juice to your cats if you have)
1 ripe Hass avocado
1 stalk celery, chopped (a chopped pickle, olives, chopped grapes or raisins or 1 Tbl relish are other options)
1 small white onion, chopped
1-2 Tbl spicy mustard (Dijon or Deli is good)
salt/ fresh pepper to taste
2 tsp lemon juice
1 vine ripe tomato, sliced (or chop sun-dried into the bowl)
8 fresh leaves of basil
4 slices good bread, toasted (I used an Irish Soda Bread, but hearty nut-based is good)
1) Peel and deseed the avocado. Place it in a bowl and mash, it can be left slightly chunky.
2) Begin toasting bread. Add tuna, celery, onion, mustard, salt/ pepper and lemon juice. Mix until well blended.
3) Place bread on plate once toasted, add a heaping spoonful of tuna, cover with sliced tomato and basil. The result is mouthwatering, healthy and delicious.

NOTE: Hass avocadoes are rough-skinned and smaller. They have a nutty, buttery flavor. The thin-skinned large, lighter variety is not as flavorful and more watery. I have found it is best to purchase avocadoes when they are hard. This avoids ones you believe to be ripe; when in fact they are bruised. Allow them to sit on your counter (or fruit bowl) to ripen (or in a paper bag for faster results). This process will probably take about 3-4 days and the avocado skin will darken as it matures. The avocado is ripe when the skin gives under a little pressure (the innards are soft). Once they are ready, they can remain for a few more days on the counter or be placed in the refrigerator for about 2 weeks. When ripe, the skin easily peels off (once started with a knife) and the seed is easy to remove. If you do not use an entire avocado, sprinkle with lime or lemon juice and wrap it air tight to prevent discoloration. Here are some fun avocado facts.

Here we see 2 cats post-tuna juice indulgence.

Wednesday, December 21, 2005

The Birthday


There comes a time in many peoples’ lives when heading to the bar is no longer very entertaining for the birthday. When I was in college at NYU, my good friends had a weekly beer spot. We were around 19-20 and found a dive bar in the East Village that did not card us. We loved that we were the youngest ones in there (or so we thought), we loved the faint smell of urine and puke, covered up by cigarettes (or so we thought). The found art objects installed on the wall were good conversation topics during the lax in our card games (we met for a round of Rummy 500 with a 1 pitcher purchase per person ruling). It was soon time for someone’s 21st birthday and we ordered a round of shots when our bartender, Rudy, came over to wish his congratulations: “How old are ye now?!” “21!” “But… you’ve been coming here for years?” “Thanks Rudy!”

2 years ago I paid $200 for an open beer bar for 2 hours. A great deal. There were so many beers stationed around the room one could leave a pint in one area, speak with a friend in another corner, and find beer interspersed throughout the trek for the taking.

But now, I like to be at least semi-conscious at the end of the night. I do not like waking up in the morning unable to do anything but mope. Yes, it is great fun to have a free night at the bar while your friend’s buy you drinks (really just seeing how drunk they can get you before you collapse into unconsciousness), but D and I both agree, a new kind of birthday should be celebrated this time around.

This past Saturday was D’s birthday. He called for a birthday dinner with his nearest and dearest. In his overzealous birthday glee, D set the hours of the night from 5pm to 4am—whether to come before one’s big night out, or end it at our place, was one’s prerogative. (Guests began arriving at 6pm and our last guest left around 3:30am.) Because of this time frame, I thought it best to provide the birthday goers with small nibbles of food to chat and eat the night away (and whoever would be there for the pumpkin cheesecake birthday cake would get to indulge). With this, we could also prepare just over half the food initially, and as others come, prepare the remainder. Without further ado, the menu for the curious:

• CHEESE PLATTER. Key to any gathering. Since there would be a lot of other food I only bought 3 varietals: one creamy and nutty cow’s milk (I think it was Thom), one salty cow’s milk (I forget the name, something like Paeve), and one super-aged, creamy, delicious goat’s milk (Humbolt Fog). Spectacular. Served with grapes.

• JALEPEÑO CHEESE POPPERS. These were on the initial menu I posted. They are really good and easy to make: egg whites, parmesan and jalapeños. They are best eaten warm, right off the oil. We decided to forgo these for…

• BRIE BITES. I originally called this dish Brie Bombs, but have changed it for sensitivity purposes. These tiny morsels are so rich and gooey. The last “Halloween” or “Autumnal” party we had I made one giant brie-spinach-flaky pastry bake. It was gone in seconds. I decided this time to make individual “brie bites”:
BRIE BITES
Makes about 18 pastries.
1 Medium wedge of brie, enough for 18 bite-sized pieces.
1 large handful (or 1 bunch) of fresh spinach, washed, drained and sautéed.
1 pre-made croissant dough roll.
1) Preheat the oven to 350F. In a saucepan over medium-low heat, sauté the spinach 2-3 min until wilted. While the spinach is going, cut the brie into about 20 bite-sized pieces.
2) The pre-made dough should be perforated into triangles. Pull apart the triangles carefully and tear or cut each triangle into two smaller triangles. Place each half-triangle into a mini cupcake liner or mini cupcake pan.
3) Place a small dollop of spinach onto the dough, then a chunk of brie. Assemble all bites. Using the tips of your fingers, gently pull the dough around the spinach and brie and pinch off at the top to close. They should look like dumplings.
4) Bake for about 15 min until tops are golden and brie begins to ooze out of the bites. Serve up hot (though people will eat them when they are cooled too).
NOTE: You can assemble the bites ahead of time and refrigerate. Bake them as guests start to arrive.


• VEGETARIAN THAI SPRING ROLLS. My mother recently sent me a package of rice noodle spring roll dough. I figured I would use them up for the party and whipped up a batch of spring rolls. Not so easy. These are fairly labor intensive, but everyone really enjoyed them, especially the peanut sauce accompaniment. I bought what I thought to be spring roll filling and combined ingredients that I thought would work for the sauce. It took a few trials to get these to hold together and work properly. Trial and error for the first time dish…
THAI SPRING ROLL W/ PEANUT DIPPING SAUCE
Makes 6-8 depending on your damage control
SPRING ROLLS
2 carrots, sliced julien (make these as thin as possible so as not to poke through the roll)
1 handful of Asian sprouts (the white-clear varietal)
1 large handful shiitake mushrooms, sliced julien
½ cucumber, sliced julien
1-2 Tbl soy sauce, depending on taste
2 Tbl sesame oil
1) In a saucepan, sauté all ingredients except for the cucumber about 5 min.
2) In luke-warm water, place the spring roll shells and allow to get soft and pliable.
3) Place a small helping of filling onto the center of the shell and add some cucumber strips, fold 2 opposite ends onto center, then roll dough tightly into a thick finger shape. Continue until all spring rolls are filled.
4) CAREFUL: In hot oil (I used vegetable), fry the spring rolls until shell hardens and hold together. This is where I had some casualties. Once done, place on a paper napkin to absorb some oil.


PEANUT DIPPING SAUCE
1/3 cup peanut butter (I used chunky)
1/3 cup soy sauce
4 Tbl sesame oil
2 tsp curry powder
1) Mix all ingredients well. I added more soy sauce or oil depending on the thickness to thin this sauce out so I stopped measuring.


• AVOCADO WRAPPED IN PROSCIUTTO. Thinking about these makes my mouth water. They are too easy to make and are so rich and decadent. I finished them off with a splash of lime juice. Everyone thought this a perfect hint of flavor to compliment and separate the flavors of the prosciutto from the avocado.
AVOCADO WRAPPED IN PROSCIUTTO
Makes 32 pieces.
2 avocados
½ lb prosciutto (I bought a fairly inexpensive variety I found at my local supermarket instead of the Italian deli)
½ lime, juiced
1) Slice avocadoes in half lengthwise and remove pit. Slice each half into 4 long spears, then each spear in half
2) Cut each sliced piece of prosciutto into half. Wrap around avocado and secure with a toothpick
3) Sprinkle with lime juice. (The lime juice also helps the avocado from aging and turning brown)


• MINI LATKES. It is just about Hanukah and for some reason I was craving latkes. I never really liked them growing up. It was the song I learned at temple: “Fry them in oil, wrap them in foil! L-l-l-l- latkes, golden brown! L-l-l-l latkes eat ‘um down…” Anyway, I could never eat them after that song—which I’m sure was created to help us young Jews remember tradition and food and eat it all down (and frying in oil allows us to remember the oil burning bright for the 8 long nights of Hanukah). I remember eating latkes that were slightly mushy (more like fried mashed potatoes). I think they are best fried crisp and flaky, or as D said, “why are we making flat, flaky fires?” These were tasty morsels. I really wanted to prepare them with some fresh chunky cranberry sauce, but I ran out of time (and had no cranberries). So if you make them, do the cranberry sauce and let me know how they turn out. I got this recipe from my newest gifted cookbook Jewish Cooking In America.
MINI LATKES
Makes Makes about 2 dozen latkes
2 lbs russet (or Yukon Gold) potatoes, peeled and grated
1 medium onion, grated
½ cup chopped scallions
1 large egg, beaten
salt/ fresh ground pepper to taste
1) Peel potatoes and put them in cold water. Using a grater, grate potatoes and onion. Place in a fine-mesh strainer or tea towel and squeeze out all the water over a bowl. The potato starch will settle to the bottom; reserve that after carefully pouring out water.
2) Mix potato and onion with the potato starch. Add scallions, eggs, and salt and pepper.
3) Heat a griddle or non-stick pan and coat with a thin film of vegetable oil. Take about 2 Tbl of the potato mixture in the palm of your hand and flatten [this is easily done by squeezing the potato mixture tightly between your two palms]. Place the potato mixture on the griddle, flatten with a large spatula, and fry for a few minutes until golden. Flip the pancake over and brown the other side. Remove to paper towels to drain. Serve immediately.


• WHITE BEAN BRUSCHETTA. This was my favorite. Salty, rosemary good. They were also tremendously easy to prepare. People were initially afraid of them. Yes, they do look slightly strange. But wow, delicious and savory. I had leftover anchovies from my anchovy garlic bread and thought to put it to use as a base for this bruschetta. The result was perfect.
WHITE BEAN BRUSCHETTA
Makes about 20 pieces
1 loaf good French or Italian bread, sliced thin and at an angle
4-6 anchovies, drained of oil
4 garlic cloves, crushed
5 Tbl olive oil
1 Tbl butter
1 can white (Northern) beans, drained
1 Tbl rosemary
1) Preheat oven to 325F. Slice the bread and place on a baking sheet.
2) In a small sauce pan, combine 3 Tbl olive oil, butter, garlic and anchovies. Smash the anchovies with a fork or spoon and swirl, creating a paste. Cook for 2-3 min. Using a cooking brush, spread the anchovy paste onto the bread. Bake for 8-10 min until bread dries out and turns slightly golden.
3) While bread is baking, prepare the beans: combine beans, 2 Tbl olive oil and the rosemary. Using a handheld blender (my old safety) or a food processor, pulse the mixture (like hummus), leaving slight chunks, but a mostly creamy consistency.
4) Top each piece of anchovy dusted bread with beans and sprinkle some rosemary on top.


• SOUR CREAM DIP W/ VEGETABLES. Very simple. This was a last minute thought as a quick and dirty dip for guests to munch on while things were cooking. No need for a real recipe: 1 packet dry soup mix (like an onion soup mix), 1 12-oz container of sour cream. Mix, refrigerate for 1-2 hours, serve with sliced veggies. It is very good and people will be amazed how easy it is.

• MINI CRAB CAKES. These were okay. In our pressed time chunk crab meat could not be found—go figure. So canned crab, which looked more like pink tuna was bought. They were also a little spicy (which some really enjoyed)—compliments of chef D and his zeal for Tabasco. This recipe is from the Joy of Cooking, 1975 ed.
MINI CRAB CAKES
Makes about 12 2-inch cakes
1 2 Tbl butter
2 Tbl onion, chopped
2 eggs, beaten
½ cup cream
½ cup bread crumbs
2 cups lump crab meat, chopped
½ cup celery, finely chopped
½ tsp dry mustard
2 Tbl parsley, chopped
½ tsp salt
½ tsp paprika
1) In skillet over medium heat warm butter. Sauté onions in the butter, about 5 min.
2) In a medium-sized mixing bowl, combine all ingredients (including the onion- butter mixture). Refrigerate for 1 hour.
3) Warm a skillet over medium heat with 1 Tbl butter. Form small patties and brown both sides, about 5 min each side.


• PUMPKIN CHEESECAKE. I know this recipe keeps coming up. It must be my recipe of the year. It is tremendously delicious, creamy, pumpkiny and good. I topped this off with a drizzle of maple syrup and walnuts. Recipe does not need repeating, it can be found here.

Tuesday, December 20, 2005

Decadence


It has been a long, tough day. Actually, a long week. A crazed ceramic marathon (my other real joy) produced a fabulous bounty this Monday with a kiln full of handmade gifts . In the middle of all this came a birthday dinner (menu to come). But I thought I should write about today…
Awaking and relieved to be done with all things hectic, what more of a surprise could arise than a transit strike? And what is worse than calling into one’s part-time job only to find you are desperately needed? Possibly realizing it is 20 degrees outside. So what is more invigorating than a 5-mile bike ride in 20 degree weather? Following it up with the most decadent of meals after the remaining 5-miles home.
Caviar, otherwise known as decadence to a mere mortal.
Bad caviar is a heartbreaker so be sure to eat it immediately post-purchase. After a 10-mile bike ride into, and back from, Manhattan, D and I deserved a treat. We bought a moderate Champagne, and indulged our jell-o legs.
The last time I had good caviar was in Latvia. My local family led us to a Russian restaurant. My grandmother complained the whole way there, wondering why it was necessary we eat at a Russian establishment (I have nothing against Russians, it is history that does. Besides, I am 1⁄4 Russian!). Upon our arrival, vodka was ordered for the table (mind you, I did not have one sober day in Latvia). I suppose when you are blessed with 50F summers and formidable winters you tend to be a bit of a lush to keep warm. Regardless, I could not have been happier to see crepes with Caspian caviar on the menu—for about $5! I promise you now reader, I will drink all the vodka in the world if I could continue to eat caviar and crepes for $5 a day, everyday.
Tonight brought me back to that bulging red Caspian caviar. Bursting with flavor and salt. We ate them with the provided smoked salmon, crackers, avocado and Champagne. Fabulous. Delicious. Decadent. Bring on the transit strike—as long as your bring on the caviar!
I cannot offer a recipe for this menu. Crackers, smoked salmon, avocado, caviar and Champagne. Mix at will.

Friday, December 16, 2005

Apologies for A Quickie


A short dinner, pausing 6 hours straight of ceramic holiday work:

Vine ripe tomatoes with fresh mozzarella, basil, fresh pepper and olive oil.

To come this weekend: D's birthday party. Prelim menu below, oh the excitement.

* Cheese platter
* Jalepeno cheese poppers
* Thai spring rolls w/ peanut dipping sauce
* Acovado wrapped in prociutto
* Mini latkes???
* Bruchetta w/ canelli beans (olive paste + rosemary + garlic)
* Sour cream onion dip
* Frui/ Veggies
* Mini crab cakes
* Pumpkin cheesecake
* Mulled wine, beer, mixed, etc.

Tuesday, December 13, 2005

Czech Carrot Ginger Soup


I spent the first semester of my senior undergraduate studies abroad. It is an experience I wish onto everyone. It was a fabulous semester where I met amazing people, learned a new language, ate things I never considered before, and truly grew wiser as a person-- as well as girth. Most people have heard of the freshman 15 (where one has the tendency to gain 15 lbs their first year of college). I lost it. I lost a lot more than 15. But I gained 15 back when I spent my semester abroad.

Throughout my first three years of school I knew I wanted to study abroad. But where? France would allow me to brush up what French I had forgotten from high school. London was... well, too easy, I could already speak the language. And then there was Prague: A mythical city that I knew little about. I had some Czech blood in me. I would be close to Latvia, an opportunity to visit some relatives I had never met. And well, it was an unknown.

Prague is a fairytale city built on a hill, complete with two castles to call home. A light mist encircles the city at most hours, cobblestone streets greet walkers, and architecture-- amazing architecture, from gothic to art nouveau to modern to rustic is everywhere. Art is everywhere. The city is breathtaking. The people are amazingly friendly (especially for a country that has had the short end of the stick for so long). The food is fabulous. The beer is the best. And there are hidden treasures for the right kind of explorer.

I met some of my best friends in Prague. It was with these new friends (some American and some local Czechs) that I explored the city. And Prague is a city for youth. It is friendly monetarily for the student (we were eating 4 course meals for $10 and drinking some of the best beer (ehem, pivo) we had ever had for $0.25!-—which might not be the best thing for a student to have access to and making it all the easier to gain 15lbs.) There is a current that hits the student, the traveler, the explorer, keeping one out on the prowl at all hour-- it can be more entrancing than New York.

It was in Prague that I broke my 6 years as a vegetarian. I arrived and was offered (more or less) to eat tomatoes, cucumber and fried cheese for 4 months, or dine on wild rosemary boar, cheese infused kielbasa, goulash with bread dumplings, chicken stuffed with ham and cheese… I thought I should take advantage of the situation. I happily broke my meat fast with bacon-crusted lamb (though my stomach did not forgive me for a while).

There were few restaurants that we could recall the actual name of. We were taking Czech language classes, could read signs, and understand what we ordered (most of the time). More often we called an establishment by the beer they served. Our local favorites included Velvet (mm their goulash!), Staropramen, Gambrinus, Rebel, Radegast, Kelt (with the above mentioned wild boar), Krušovice…

There were two restaurants we could recall the names of. One was U Homera or “At Homer’s”. Rather, “at Homer Simpson’s,” where one could order the Milhousova or Margini Syr and other foods based on characters from the popular television show. There was also Portabella Roads. Remembered because it had an English sign out front— and it was across the street from our favorite breakfast place: “Bernard”-- where we dined on “ghost fingers” and drank Bernard Dark).

It was here, at Portabella Roads that I had carrot soup. Amongst countless delicious items (we went there weekly) it was the carrot soup that was ordered religiously. Sweet, buttery, and succulent, it would have been perfect as a meal on its own (but we were gluttonous students amazed at how far our dollar traveled).

It was the fall semester I spent in Prague. It would have been around this time that I made my post-semester travel plans, packed my things and said naschledanou to my fellow students. And it is now that I miss that carrot soup. I long to descend into the hidden Portabella Roads and enjoy the warm buttery soup with a cold beer. I long to return to my fairyland and walk the cobblestone streets to visit Kafka’s house up at the castle, walk the Charles Bridge into the old section, back to the secret garden T and I found, visit Frank at the old castle, and gaze at Shiele’s originals. I would head out to the Bone Church in Cesky Krumluv to marvel at the structure or visit B’s family in the south. This country is a marvel to have been part of. To be there is to be touched by legend. Now, I am a little closer; though miss it all the more with this carrot ginger soup.

I came up with this recipe on my own, hoping to mimic the simplicity of what was had in the Czech Republic. To reach the original, I think less to no ginger would be appropriate (but it is pretty darn good with the ginger). Also, the original soup probably had more butter-- but I lost those 15lbs I gained and don’t really desire their return. So here is my version of my Czech favorite (best if served with an ice cold, 25 cent, Krušovice.

CARROT GINGER SOUP
Serves 4. Prep time= 10 min. Cook time= 30 min.
3 Tbl butter
2 lbs carrot, sliced
3 shallots, whites only, chopped
1 medium onion, chopped
3 Tbl fresh ginger, crushed
3 garlic cloves, crushed
1-1⁄2 Tbl thyme
1⁄4 cup fresh parsley
1 pint cup heavy cream
4 cup low sodium chicken or vegetable broth
salt/ pepper to taste

1) Melt the butter over medium heat in a soup pot. Add shallots, onions, garlic and ginger. Sauté for 5-10 min until onions soften and smell filters into home.
2) Add carrots, thyme, fresh pepper to taste, and broth. Cover and bring to a boil. Reduce heat and remove lid slightly. Cook until carrots are soft.
3) Once carrots are soft, remove from heat, add parsley. Using a handheld blender , puree the soup (or use a regular blender and puree in batches). Add cream and stir. Add salt to taste.

NOTE: You can add water to thin soup out to desired consistency. Also, be warned your new kitten may attempt to attack your soup. He thinks the ginger smell is alive.

Sunday, December 11, 2005

Classic Spaghetti & Meatballs w/ Anchovy Garlic Bread


D’s friend Jeremy recently commented how easy it is to make cranberry sauce. The same goes for a good tomato sauce. If you are willing to chop a few vegetables, it is remarkable how delicious a homemade classic tomato sauce can be (and how easy it is to create variations on the original).

Friends will eat your sauce and ask what brand it is. They will marvel at the chunks of vegetables they can actually taste. Most importantly, they will secretly love you for not killing them with the over abundance of salt that is found in most jar varieties. You will love them back because they will remain in your life longer—unless of course, you no longer desire this, I suggest any high-salt jar variety.

I will sometimes make this sauce with meat—otherwise known as Bolognese. But oh! To have giant meatballs doused in sauce looming on your plate! It makes you want to sing out—On top of spaghetti/ All covered with cheese/ I lost my poor meatball/ When I had to sneeze… But these meatballs, trust me, will be in the belly before anyone can sneeze. (I was eating leftovers today at lunch and was beyond stuffed. The glutton and greed in me pushed on, fighting to finish the last meatball before the plate was passed to D for completion. Who promptly asked, “where’d the meatballs go?!”)

To swank up this classic meal, aim was taken at the garlic bread. Tease peoples’ palates by adding anchovy to the butter/ olive oil mixture. There is no offensive taste that an anchovy can sometimes offer. For many, it is a salty afterthought that will leave them to wonder “what was that delicious spice?”. This bread is so good and easy to make I’ll sometimes prepare only this for lunch. My friend A loves it so much that whenever she comes over we make a big loaf of this as a snack. My vegetarian friend B loves it so much she breaks her will just for this occasion. And you didn’t garlic bread could get any better.

I will have to say the best part of the spaghetti dinner is the leftovers. I love warming spaghetti on the stovetop the next day. The sauce cooks into the noodles creating a single entity. Rather than sauce on noodles, the dish unites. What was once a delicious spaghetti and meatball becomes a hearty, home inducing memory…

SPAGHETTI & MEATBALLS w/ ANCHOVY GARLIC BREAD
Serves 6. Cook + Prep time= 40 min

THE SAUCE
1 cup button mushrooms, sliced
1 medium onion, chopped
1 bell pepper, chopped
4-5 garlic cloves
5-6 black olives, chopped
2 Tbl olive oil
1- 5oz can no salt added tomato paste
1-15oz can stewed (or diced) tomatoes, no salt added
1-28oz can crushed tomato, no salt added
2 Tbl brown sugar
2 bay leaves
10 leaves fresh basil, chopped
1 tsp oregano
fresh pepper/ salt to taste
1) In a saucepot on medium heat, warm the olive oil. Add onions, garlic and mushrooms. Sauté 10 min until onion is soft and mushrooms reduce and brown a little. Add olives and pepper, sauté 5 min. Add basil, oregano and stir. Add 3 cans of no salt added tomato sauces. Add bay leaves, brown sugar, salt/ pepper to taste, stir. Reduce heat to medium-low and allow to simmer while you prep the meatballs and noodles. Allow to cook at least 20 min.

NOTE: mouthwatering plays on this simple recipe: option 1- Add ¼ cup chopped sun-dried tomatoes to the sauce. Option 2- Blacken some red peppers in the oven. Remove skin, chop and add to sauce. Option 3- Using 5-6 lbs Roma tomatoes, cut into quarters and place on a non-reactive bake dish. Preheat oven to 450F. Add ½ cup olive oil, ½ cup balsamic vinegar, 10 garlic cloves. Roast for 40 min until tomatoes begin to blacken. Use this in lieu of the canned tomatoes. Option 4- Add meat with the onion/ garlic/ mushrooms to create a Bolognese sauce. Option 5- Use 2 portabella mushrooms instead of the button (or meat). Option 6- Add 2 cups chopped basil to create a pesto-tomato sauce.


MEATBALLS
Makes about 15 balls
2 lb meatloaf meat (veal/ beef/ pork)
1 medium white onion, chopped
¼ cup fresh parsley, chopped
½ tsp sage
2 garlic cloves, crushed
1 egg
1) In a mixing bowl, combine all ingredients until evenly distributed. Warm a skillet on medium heat with 2 Tbl oil.
2) Form 2-3 inch balls. Add to skillet and allow to brown on all sides, about 10 min. Once done, add to tomato sauce to warm through and absorb some tomato flavor. Let sit for at least 5 min before serving. (You can make your noodles now according to the package)


ANCHOVY GARLIC BREAD
Makes one loaf.
1 loaf good Italian bread
2 Tbl unsalted butter
2 Tbl olive oil
2-3 anchovies
2-3 garlic cloves, crushed
1) Cut loaf in bread lengthwise (a la hamburger style per Kindergarten terms)
2) In a small sauce pan on medium heat add all ingredients. Using a fork, mash up the anchovy as butter melts and stir everything together. Once garlic starts to sizzle, remove from heat and brush onto both sides of bread. Close bread, cut into pieces (cut so the bottom of the bread still holds together but pieces can be easily torn off. Sit on a baking sheet and broil 5-8 min until lightly golden, sizzling and delicious.


ORDER OF PREP:
1) Start the sauce first. While the onion/ garlic/ mushrooms warm, mix the meatball ingredients and form balls.
2) Once you add the cans of tomato for the sauce, cook the meatballs.
3) While meatballs cook, prepare the anchovy garlic bread filling.
4) Transfer meatballs to sauce. Begin noodles (unless fresh then wait until last min to prepare). Brush filling on bread and cook.

Thursday, December 08, 2005

Kumquat Glazed Pork w/ Artichokes


One great benefit of the fall is the bounty served up. By no means comparable to summer, but I must admit that some of my favorite fruits are in season this time of year: pomegranates and assorted oranges (oh Clementine!) to name two. Mother Nature outsmarts the best of us when she decides to make citrus, pumped up the vitamin C, in season as cold and flu weather hits full force. To make that which is available so sweet, juicy and appealing makes this frigid weather worth leaving the home for (if only to go to the grocer to get some).

Those at work joke about my clementine pyramid stacked high on my desk, quickly eaten through and replenished. But have I been sick yet this year? Nay. Do I have scurvy? Nay. And I owe it all to a very sweet addiction: citrus.

On a recent visit to one of my previously mentioned 24-hour fruit/ veggie stands, kumquats stared me down. Originally from China, this mini-orange, translated as gold orange from the Chinese, is the best of treats. In my younger days, I could not get enough Sour Patch Kids, the tart, sweet, succulent gummy candy. Kumquats are the adult version. Pucker your lips and be brought back to those sticky movie theater floor days when you easily went through an oversized bag of candy before the trailers ended.

Though this gold orange looks a lot like an orange, the kumquat was removed from the genus Citrus around 1915 and moved into Fortunella. The fruit began cultivation in Europe and the U.S. in the mid-19th century. The kumquat is high in fiber and vitamins A and C. Replace your grandmother’s prunes with this tart treat. The skin is thin, mildly tart, but sweet enough to eat. The seeds are unnoticeable, and the overall affect is, as stated, the best of treats. Just wash, pop and chew. When cooked up, the fruit loses the sweet-sour tinge transforming into pure sweetness. This fruit is great as chutney, preserves, raw in salads, as a garnish (in a martini even), ornamental, or, in my case, as a sweet glaze for some roasted pork.

KUMQUAT GLAZED PORK W/ ARTICHOKES
Serves 4-6. Prep time= 20 min. Cook time depends on the size of the pork (as does serving size)
½ cup kumquats
1 clementine, juice only (or ¼ cup orange juice)
2 shallots, whites only, chopped
1 bay leaf
½ cup dry white wine
1 artichoke per person
4 lb boneless pork center cut (a pork shoulder works cell too)


The Glaze
1) Combine kumquats and orange juice, purée to a medium pulp
2) (Preheat oven to 350F in prep for the pork.) In a saucepan, on medium heat, melt 1 Tbl butter. Add shallots, sauté for 5 min.
3) Reduce heat, add bay leaf and kumquat mixture, bring to a boil. Add wine and return to a boil. Reduce glaze until desired thickness is reached (5-10 min).


Preparation of the Pork
1) Preheat oven (as noted above) to 350F. Use half the kumquat glaze and cover both sides of the pork. Insert meat thermometer. Place on non-reactive baking dish. And put on the middle rack in the over. Pork should cook 15-20 min per lb, until it reaches 170F.
2) After 1 hour, check on pork and cover with remaining glaze.


Artichokes
1) When pork reaches about 140F, boil water in a saucepot. Clean the artichoke under water and pluck any darkened outter leafs off. Cut off the stem so about 1 inch remains. Add artichokes and cook about 45 min until stem is soft. Artichokes are in season now. They are so meaty and perfect this time of year there is no need for butter or a goat cheese sauce (which, actually, makes a fabulous dipper and really impresses a party).

Wednesday, December 07, 2005

Sweet Sauerkraut

*Just Braise has moved. Please visit me at www.justbraise.com!*

This is really a "sweet"kraut and not sauer- or "sour"kraut because in the end, that is what it is: sweet. It is not the traditional sauerkraut that many think of-- the kind that comes piled high on hot dogs, a classic Chicago topping-- or on the side of a plate at a BBQ. This is Sweet Latvian Sauerkraut.

This is a 'kraut that is spiked with brown sugar and slow cooked with fruit and vegetables so the natural sugars escape in the cooking. It is the kind of 'kraut that even if the bag or jar you extrude it from states "ready-to-eat" or “warm and serve” you dare not sit and eat it until it has been subjected to your love for a good few hours.

This is the kind of 'kraut that stinks up your whole house for days (and eventually your mother will move the cooking process to a portable stovetop in the garage, leaving you craving the smell that usually accompanies the dish). When you are younger still, you will think this dish to be a little too bitter, but you know you must love it, and will always force a little down your throat because it is the dish that your grandmother makes for every family meal, no matter the season. It is a dish that is soul warming, and smells like home. It is the dish your boyfriend will take to work, and when reheated, he will have people salivating around him, begging for a bite, praying for the recipe.

The recipe below is made with kielbasa. It is also a sweet accompaniment to my grandma’s perfect Latvian Pancake. It can be eaten on hotdogs, or hamburgers (in place of carmelized onions possibly). Or, in the preferred method of many in my family: slathered on top of real, good, Latvian bread (or the next best substitute). It is also good with a cold beer.

SWEET LATVIAN SAUERKRAUT
Serves 4. Prep time= 30 min. Cook time= at least 2 hours.
1- 32 oz bag sauerkraut (or equivalent jar)
2 medium-sized carrots, shredded
1 apple or pear (sweet and juicy apple or slightly sour: from fuji to grannysmith), chopped
1 medium white onion, chopped
3 Tbl brown sugar
1 Tbl paprika
½ cup apple cider, apple juice, or beer
1 package (2 12-inch) kielbasa (I used turkey kielbasa for this one)

1) Turn on the broiler and begin to warm a saucepot on the stovetop, medium heat.
2) Put the kielbasa on a pan with juices. Slice down the center. Broil about 10 min or until the top opens, juices bubble, and the skin darkens.
3) While kielbasa is cooking, add 1 Tbl butter to the saucepot. Add onions and sauté 5 min. Add carrots and apple. Sauté 10 min. (Remove kielbasa from oven while this is warming.) Add sauerkraut, brown sugar, paprika. Stir well.
4) Cut kielbasa into bite-sized pieces. Add to pot, stir. Turn heat to medium-low, leave slightly uncovered, allow to cook at least 2 hours. The longer you can stand, the better, allowing the aroma fill the home. Stir periodically. Serve with true hearty and flavorful rye or pumperknickle bread, preferably from Latvia, buttered and toasted.
Note: If you will be cooking this more than two hours, check at least 1 time every half hour. Add more juice if 'kraut appears too dry.
NOTE: I have received many an angry phone call from uncles and grandma: "Where is the caraway???" Well, I don't really like caraway in my sauerkraut. But you may add 1-1/2-2 Tbl to your dish.

Monday, December 05, 2005

French Toast w/ Blackberry Syrup


French toast. One of the least solely French dishes we have in our American culinary lexicon (or maybe it is french fries). The origin of the dish is unknown but there are similar dishes dating back to Medieval Europe. It does not make it any less enjoyable. It is a great dish because it lets our old bread be put to good use. In fact, the French call french toast pain perdu or “lost bread,” because the old or almost “lost” bread is put to delicious use. It surpasses regular toast because it is soaked in eggy protein. And it can be dressed up in countless ways to make it a decadent luxury, nary a pain.

I love where I live because when I get off the train, I pass three 24-hour fruit & vegetable stands on my 5 block walk home. I also pass 3 bakeries, 4 fish shops, 2 butchers, and restaurants of every variety (and the fact that they are actually reasonable are just a few more reasons to live where I do). But it is the fruit and vegetable stands that are a blessing on a late night home (and a real bargain when they slash the prices to make way for new morning shipments). It is here that I found my 99 cent pint of blackberries to use as a sweet topping for the perfect pain perdu.

On the weekends when I was younger, my mother used to make breakfast: chocolate chip pancakes, toast w/ a hole and an egg inside, but it was the french toast that was my favorite. I loved the way the cinnamon-sugar smell combined with the cooking egg. The sweet-savory combination was always a pleasure to rise for. I would be upstairs in my bedroom and could smell whatever was brewing downstairs (my bedroom was above the kitchen and maybe this is why I have a slight fixation on smells). I would reluctantly open my eyes having been awakened by a banging pan maybe, but one breath and I quickly grew hungry and was drawn down the stairs (almost always before my brothers made it down-- their bedrooms were on the other side of the 2nd floor, they must never have been able to smell what was cooking from up there). I loved having first dibs at whatever was created and would happily be munching away when my younger brother, and much later, my older brother, made it to the table.

This recipe may bring out the kid in you. The deep crimson of the cooked berries against the golden yellow of the egg-soaked bread had me dancing in my seat. One smell and you'll be racing to finish cooking it. One taste and you will soon be licking your plate clean.


FRENCH TOAST W/ BLACKBERRY SYRUP
Serving Size= 2. Prep + cook time= 20 min.
4 slices old bread (I used Irish Soda Bread for these but any thick white bread or egg based bread is good)
4 eggs
2 Tbl milk
2 Tbl orange juice
3 tsp orange grating
1 pint blackberries
½ cup sugar
2 fresh mint leaves, chopped
1 Tbl water
cinnamon-sugar mixture (in a small container ahead of time combine 1 part cinnamon, 1 part sugar)

1) In a wide bowl combine and beat eggs, milk, orange juice, and 2 tsp orange gratings. Add bread slices one at a time, soaking them into the egg mixture well.
2) On the stovetop in a large skillet, melt a tab of butter on medium heat. While the skillet is heating, in a small saucepan on medium heat, add blackberries, sugar, water and 1 tsp orange grating. Allow this mixture to boil and reduce, keep an eye on it and stir frequently. Add egg-soaked toast (you may have to cook this in two rounds if your bread is too large) to the skillet and cook slowly until both sides are golden brown.
3) When bread is done, remove from heat one at a time, sprinkle with cinnamon-sugar mixture, and layer on top of each other so cinnamon-sugar can melt.
4) When you finish up the french toast, the blackberry syrup should be thick, warm and complete. Add on top of the french toast.

Sunday, December 04, 2005

BBQ Pork Short Ribs w/ Green Beans & Sweet Potato Fries


I love ribs. Actually, I love almost any typically southern cooking. When I was younger, I can only remember having ribs when we went to our family’s favorite restaurant, New China. As I grew older, I realized how delicious BBQ ribs could be in other (non-Chinese appetizer) forms. When my mother comes to NY for a visit, I always make sure to lead her to Blue Smoke, a great rib joint, but a little expensive for my everyday budget. When I first started dating D, he too felt the southern pull, more so than I, being from the south himself. At the time, he lived across the street from Soul Spot in Brooklyn. If you live nearby I highly suggest a visit. Their oxtail falls right off the bone and their jerk chicken is spicy and delicious—and even better, their portions are gluttonous for the price. Interestingly enough, the owners are from The Gambia. Who would have thought these men could nail the craving that many of us have for southern home cooking? Today, I was not craving BBQ ribs until I could smell them cooking…

Sometimes I have to bribe D to come to the store with me. This is when I know I want to buy too many things I can carry home alone. Usually, it’s something along the lines of, “If you come to the store, I’ll let you pick out some meat”. If I’m left to my own pickings, I’ll go for a quick and hearty beet salad-- and I know D cannot resist picking through whatever looks fresh in the meat department. Today it was pork short ribs. We have no grill and cooked them in the oven, doing a quick par-boil according to the Joy of Cooking. I finished off the meal with some steamed green beans and baked sweet potato fries. Our friend DR was over. Even though he had his own pork chops to go home to, he too could not resist trying some ribs (and our cats could not keep off the table).

PORK SHORT RIBS W/ GREEN BEANS & SWEET POTATO FRIES
Serves 2. Prep + Cook time= 1 hr 30 min
2 lb pork short ribs
4 Tbl BBQ sauce
2 sweet potatoes
handful of green beans

1) Preheat oven to 450F. On the stovetop, in a large pot, boil water. Add ribs to water and boil 2-3 min. Remove and place in baking dish. Place on middle rack in the oven for 15 min.
2) After 15 min, remove from oven, apply BBQ sauce and reduce heat to 350F. Bake for 1 hour more, basting frequently.
3) While the ribs are cooking, prepare sweet potato french fries according to previous recipe here(they require 30 min cook time and can be cooked with the pork on the next lower rack in the oven).
4) When 5 min remain on the baking, prepare green beans: In a medium saucepan, place 4 Tbl water over medium heat on the stovetop. Snip off ends and wash green beans. Add beans to pan and allow to simmer about 3 min. Remove from heat and drain any remaining water. Add a small tab of butter and mix into the beans until melted. Dish onto plates along with finished potatoes and ribs.

Saturday, December 03, 2005

Pumpkin-Gingersnap Cookies


My Girl Scout Troup did not mind cutting corners where it was valid to cut. For the holidays, all the girls would make individual gingerbread houses. I remember seeing massive gingerbread castles in the malls and re-creating them in my mind for the Girl Scout night: balconies for Repunzel, idle pools for carp, and canopy beds for myself. Instead of going through the process of making the gingerbread sheets, we used graham crackers. Instead of a massive castle, my house ended in a pathetic square with frosting oozing out of corners, a leaning door, and extra candy haphazardly stuck on to pick off and eat. I was still always proud of my creation, as everyone was of their own, but I always wondered what the real thing tasted like.
I have since tasted ginger in many forms: gingerbread, gingersnaps, ginger ice cream, raw ginger, candied ginger, ginger tea (my favorite is the ginger ice cream). All the different forms amaze me. The Chinese use ginger in much of their cooking, teas and as an herbal remedy. Strangely enough, I recently read that it is American ginger that is so prized and often imported to China (I now forget the source). Baked into breads and cookies, the flavor of ginger is superb. It looses much of the bitter-root taste and blends nicely with autumnal spices (which I would categorize as cinnamon, nutmeg, cloves, etc).
I recently had the hankering for some ginger cookies the other night. But I had also seen some pumpkin-ginger muffins that looked fabulous and wanted to combine this pumpkin-ginger fantasia into cookie form. The result: the hit of a recent birthday party. Sweet, tangy, and a great pick-me-up. The perfect calm for my desire. I now may try my hand at the real gingerbread house creation… (the original recipe is from epicurious which I altered to my own madness and advise you to do the same.)

PUMPKIN-GINGERSNAP COOKIES
Makes about 40- 4-inch cookies
4 cups all-purpose flour
½ tsp salt
2-¼ tsp baking soda
1-¼ tsp ground cloves
1-¼ tsp cinnamon
1 stick (1/2 cup) unsalted butter, softened
½ cup vegetable shortening
3 cups sugar
½ cup unsulfured molasses
2 large eggs
1- 15 oz can pumpkin puree (plain pumpkin, not pumpkin pie filling)
½ cup candied ginger, chopped into small bites


OPTIONAL FROSTING
3 oz bittersweet chocolate
1-½ cups powdered sugar
1-½ Tbl water
1 Tbl molasses

1) Preheat oven to 325F
2) In a mixing bowl, whisk together flour, salt, baking soda, cloves and cinnamon
3) In another large mixing bowl, with an electric mixer, beat together butter, shortening and sugar until fluffy. Beat in molasses and eggs, 1 at a time, beating well after each addition. Beat in pumpkin puree. Gradually beat in flour mixture and combine well, stir in candied ginger.
4) On a cookie sheet, lay out 2-inch dough balls. They will be gooey and sticky and will melt down significantly, so keep well apart (these will form 4-inch cookies)
5) Bake cookies in middle of the oven for 15 min, or until puffed and golden (cookies should be soft). Transfer with a metal spatula to a cookie rack to cool.
6) While cookies are baking, prepare the frosting. On the stovetop, low heat, slowly melt down the chocolate. In a mixing bowl, stir powdered sugar, water, molasses and chocolate until well combined and pasty (add more water as necessary). Once cookies are done, use the back of a spoon to gently spread onto the middle of a cookie. Top with a small piece of candied ginger.


View Stats
Rankingblogs.com: Defining your blogs worth..