Showing posts with label fall foods. Show all posts

Saturday, November 11, 2006

Cranberry Sweet Bread


The other week I was at the grocery store and noticed the bags of cranberries were finally set out. Mmmm, cranberry juice I mumbled, and in a trance walked over and placed them in the basket D was carrying.

“What are you going to do with those?”
“I dunno, they’re pretty.”

And so the pretty little rubies sat in the fridge for the better part of a week while I researched some recipes. I was looking for something fast and easy that would still look and taste delicious. I finally found it on a Chowhound forum-- a one bowl, just add, stir and bake recipe. I checked the comments and someone had already made it with wowed reaction so I decided to dig in as well.

This cake-like bread was delicious warm right out of the oven. The recipe recommends a caramel sauce, but I think whipped cream would be great too. I had it plain with coffee and it made a great mid-afternoon pick-me-up or breakfast.

This is the recipe list as it appears in Chowhound. There are other fabulous cranberry recipes listed there too so check it out.

*Note: This is not my mother listed below. Also, I cannot vouch for the caramel sauce because I did not make it. The changes I made are as follows: I used 2% milk instead of whole milk and increased the cranberries to one whole 16 ounce bag (from 2 cups). Lastly, I used a 7x11 pan as I wanted a thicker bread. I had to bake mine about 10 min more.

MOM’S CRANBERRY CAKE W/ CARAMEL SAUCE
Makes 1- 9x13 loaf. Active time= 10 minutes. Inactive time= about 30 minutes.
* 2 cups unsifted flour
* 1-½ cups sugar
* ½ teaspoon salt
* 2 teaspoons baking powder
* 4 tablespoons unsalted butter, soft
* 1 cup whole milk [2% works well too]
* 2 cups whole fresh cranberries [or 1-16 ounce bag]

1) Preheat the oven to 350F
2) Mix the flour, sugar, salt, baking powder and butter together until it resembles coarse crumbs.
3) Add milk and stir until evenly distributed. Fold in cranberries.
4) Pour batter into a buttered 9x13 pan. Bake for 30 minutes or until golden. Pour caramel sauce (below) over individual servings and serve.


CARAMEL SAUCE
* ½ cup butter
* ½ cup sugar
* ½ cup brown sugar
* ½ cup half and half

1) Combine all ingredients on stovetop and heat until thickened; do not boil.


Head over to Sweetnicks for the ARF roundup

Saturday, October 28, 2006

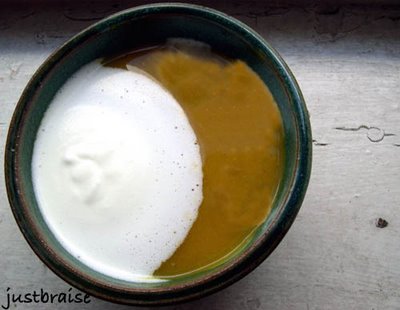
Winter Squash Soup


For some, the crisp fall weather is fearsome. It means cold weather, leafless trees, heavy jackets, and buckets of snow are on the way. Too worried about the future, they fail to appreciate the present and all the greatness this time of year has to offer. To them I say, be away with you-- move south!

Whatever happened to your love of sledding, apple picking, snowball fights, pumpkin carving, and snow angels? Jumping through billows of fresh fallen leaves or mounds of fresh pure snow? Waking up on a cold morning to icicles covering the windows and pole licking dares (à la A Christmas Story)?

Personally, fall is my favorite time of year. I love the brisk weather, the changing of the trees, and bundling up in sweaters and mittens. I especially love the food of the season: hot cocoa, soups, stews, the spices that emerge (nutmeg, cinnamon, peppermint) and the general hearty warming these things have on the state of mind.

I go into ration mode. I have the summer fruits I bought overripe and cheap, frozen away to be used in the dead of winter for a Caribbean-like fruit smoothie when its bitterly unbearable outside and reminders of warm weather are necessary. I also have my stockpile of soups that begin to accumulate in single serving sized containers, ready to accompany me to the office for a little internal snuggle or a fast dinner when the need arises.

This soup is an exception. Naturally sweet, creamy and delicious, it is hard to put any aside for a later date. A perfect seasonal soup, this dish would look fabulous for a Halloween treat, Thanksgiving feast, or anything in between and beyond. Make this soup, and you may never make another again.

WINTER SQUASH SOUP
Serving Size= 8-10. Active time= about 40 minutes. Inactive time= about 1 hours.
* 1 White Acorn Squash (or regular Acorn Squash)
* 1 small Butternut Squash
* 1 small Golden Nugget Squash*
* 1 large sweet onion, chopped
* 1 stalk celery, chopped
* 2 carrots, chopped
* 8 cups chicken stock (or vegetable)
* 2 long sticks of fresh Rosemary
* 2 whole cinnamon sticks, about 3 inches long
* 1 teaspoon nutmeg

1) Preheat oven to 350F. Using a heavy sharp knife, slice the three squash down the middle vertically. Gut the seeds (set aside if you want to bake them for eating later, otherwise; discard).
2) Place the squash skin side down on a large cookie sheet and place in middle rack of oven. Bake for 40 minutes, or until soft when poked with a fork.
3) While squash are baking, prepare the other ingredients and begin the soup.
4) In a large stock pot on medium-high heat, warm 2 Tablespoons olive oil or butter (or combination of both). Add onion and sauté until translucent; about 8 minutes.
5) Add celery, carrots, chicken broth, rosemary and cinnamon sticks. Cover and bring to a boil. Reduce heat to medium and uncover slightly. The squash should be about done at this time.
6) Remove squash from oven when soft when touched with fork. Using a towel around your hand, or a fork and knife, either peel the skin off the squash, or slice it away, keeping as much meat as possible. Cut squash into 2-3 inch chunks and add to stock pot.
7) Cover and bring to a boil then reduce heat and remove cover.
8) Remove cinnamon sticks and rosemary twigs (leaves will have fallen off). Add nutmeg. Using a handheld blender, or carefully in batches with a regular blender, purée the soup until smooth.
9) Serve plain or with a little heavy cream.
*Note: If you are unable to find these squash in your local market, almost any combination of squash will work. Just Acorn and Butternut would work well, or Acorn, Butternut and pumpkin, etc.


Tags: , , , , , , , , .

Thursday, October 19, 2006

Applesauce


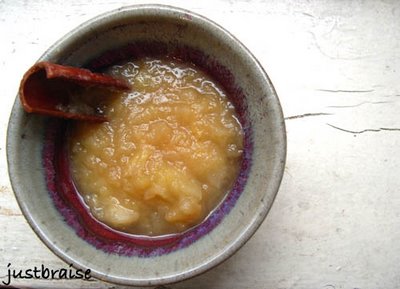
I almost forgot how much I enjoy applesauce as a snack on its own. Sweet, spiced and best of all, warm and fresh.

As noted, applesauce makes a great side to pork chops and is great as a side to almost any sandwich. I sometimes throw some applesauce into brownies and cake or pancake batters for some extra flavor and moistness.

Applesauce is incredibly easy to make so if you have the dregs of your picked apples lying around, just beginning to turn (or not), throw this on the stove, sit back and enjoy the fruits of your minimal labor in just about 20 minutes. I made mine with apple cider to give it extra sweetness and spices, but you can just as easily use water, some brown sugar and spices like nutmeg and cinnamon.

APPLESAUCE
Serving Size= 6. Active time= about 8 minutes. Cook time= 20 minutes.
* 8-10 small to medium sized apples, peeled, cored and chopped
* ½ cup apple cider
* 1 cinnamon stick, about 3 inches

1) Peel, core and loosely chop the apples into about ½ inch pieces. If you want smooth applesauce, chop all pieces uniform size. If chunky applesauce is desired, chop ¼ of the apples in larger chunks (1 inch or larger).
2) Place apple pieces, cider and cinnamon stick into a small stock pot over medium high heat. Bring to a boil then lower heat to medium. Simmer, slightly uncovered 15-20 minutes until applesauce is at desired consistency. Enjoy warm or cooled.


Check out other Fall Feast-ival items over at WellFed's FitFare!

Tags: , , , .

Sunday, October 08, 2006

This Ain't Johnny's Grilled Cheese


*Just Braise has moved. Please visit me at www.justbraise.com!*

Sweet, gooey, warm and crisp, there are few things that totally satisfy our child desires of yesteryear like a perfect butter-laced grilled cheese.

I think the French understand this desire best—the croque monsieur and croque madame are practically the national foodstuffs. [And believe you me, any time I find myself in this tasty country (which is definitely not enough) I am always sure to pick up this café treat.] When I first came across the croque pair in my elementary French textbook I thought it was surely a mistake—that or the authors were pandering to the young masses that were learning the placement of all those accent egus. Why were we learning how to order a grilled cheese sandwich, a seemingly typical American food?!

How wrong we were, not just in the fact that we all thought the grilled cheese as typical American, but our base preparation methods (on a dare might you use Swiss cheese over a cheddar or [gasp] American cheese!).

So while it is hard to believe our fresh picked apple supply is barely beginning to dwindle (I won’t even go into how many batches of apple chips, have been produced), a gooey cheese sandwich seemed like a perfect pairing with some crisp juicy apples on a fall morning, mais non? And for the dear reader, yet another recipe to put those fall apples to good use.

GRUYERE APPLE GRILLED CHEESE
Serving Size= 2 sandwiches. Active time= about 15 minutes (less if bacon and mushrooms are already prepared).
* 2-4 slices thick cut bacon (have your butcher custom cut thickness to any size you like)
* small handful mushrooms like baby bella or button, sliced into quarters
* 1 tablespoon sliced onions
* gruyere (or like) cheese, sliced; enough to cover 1 slice of bread
* 1 small Rome, Empire or Granny Smith apple, sliced into 16 wedges
* roasted garlic paste (optional; if available)*
* 4 slices good white bread
* 1 tablespoons unsalted butter

1) In a hot frying pan, cook the bacon until desired crispness is reached. While bacon is frying, keep an eye on it and slice the mushrooms, onions and apples.
2) Once bacon is complete, transfer to paper towels, drain fat from pan, return the pan to the stovetop and on medium-high heat, sauté mushrooms and onions. While mushrooms and onions cook, prepare the bread.
3) On 2 slices of bread, spread an ample amount of roasted garlic paste (optional). Cover bread with a layer of gruyere, a layer of sliced apples and 1-2 slices of bacon. Set aside.
4) Once mushrooms are browned and onions are translucent (about 8 minutes) transfer to a bowl and carefully wipe pan dry.
5) Turn heat to medium, melt ½ tablespoon of butter in the pan. Transfer prepared bread halves (with cheese, apples and bacon) onto the pan, top with mushroom-onion mixture, place second slice of bread over top and allow bread to brown and cheese to melt; about 4 minutes. Flip carefully, add ½ tablespoon butter to pan and move sandwiches around to pick up butter (allowing the butter to brown, not the bread to burn). Let sit about 3 minutes, remove from pan and eat hot and delicious.


* roasted garlic paste is a cinch make (and cost effective if you’ll be roasting something else in the oven). Simply take a whole head of garlic and slice the top off clean (to barely give you access to the cloves). Wrap in tin foil and place in the oven (around 350F) for 30-45 minutes. Remove and let cool. Once cool, pop the garlic cloves from their shells and transfer to a small dish. Add about 3 tablespoons olive oil and stir to breakdown garlic and incorporate olive oil into a uniform paste. Great on sandwiches, over meat, in potatoes or mixed into a salad dressing.

Check out other Fall Feast-ival items over at WellFed's FitFare!

Tags: , , , , , .

Friday, October 06, 2006

Apple Spice Cake


Many may think we leave it to the wisdom and foresight of Johnny Appleseed to spread the goodness of apple orchards throughout the United States. While Johnny can be accredited to spreading the seeds, few of the apples that came to be would ever be worthy of eating fresh picked.

Edible apples, rather those sweet enough to make it into our lunch sacks or slathered with peanut butter, need splicing to reproduce. Meaning the Red Delicious we eat today is very much a piece of the original Red Delicious tree first produced (not a seed descendent). Planting seeds of apples produce 10 very different fruit trees, more than likely none of which will be as sweet as the original.

The short of the long of it, our dear Johnny enjoyed knocking back a few in his day and thought it best to spread the good cheer throughout the land. Spreading seeds of apples, and therefore many a tart variety, led to a massive production of cider (the hard kind). Unfortunately, due to Prohibition, many of the orchards that Johnny is accredited with helping along were chopped down. On the flipside, clearing the bitter orchards very well may have led to space for the cherished sweet varietals we know and love today (my current favorite is the new Honeycrisp-- crisp, juicy and tastes like honey mixed into apple cider).

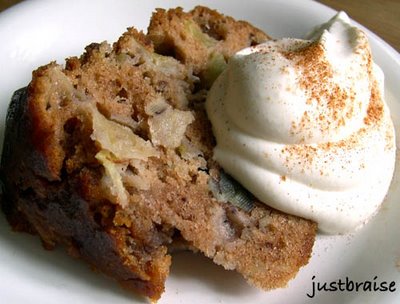
Any way you slice it, and any way you consume them, apples are delicious and deserve eating this time of year. Yet another tasty apple treat... (c/o D's favorite cake lady, Martha Stewart.)

APPLE SPICE CAKE
Serving Size= 10-12 servings. Active time= about 15 minutes. Cook time= 1-¼ hours.
*1-1/3 cups vegetable oil
* 3 cups all-purpose flour
* 1 tablespoon ground cinnamon
* 1 teaspoon baking soda
* 1 teaspoon salt
* 2 cups sugar
* 3 large eggs
* 3 to 4 Granny Smith apples [or other tart apple], cored and cut into 1/2-inch pieces (3 cups)
* 1 cup chopped assorted nuts, such as pecans and walnuts (optional)
* 1 teaspoon pure vanilla extract
* Nonstick cooking spray with flour
[* I also added a 1/2 tsp of ground ginger and 1/2 tsp of allspice]

1) Preheat oven to 350°. Spray a 12-cup bundt pan with cooking spray [or butter]; set aside.
2) Working over a large sheet of parchment paper, sift together flour, cinnamon,[allspice and ground ginger] baking soda, and salt; gather sifted ingredients into center of sheet; set aside.
3) In the bowl of an electric mixer fitted with the paddle attachment, combine vegetable oil, sugar, and eggs; mix on high speed until lemon yellow.
4) Fold reserved parchment in half lengthwise; with mixer on medium speed, gradually shake in dry ingredients until just incorporated.
5) Add apples and, if desired, nuts, to batter; mix to combine [using the electric beater. The juice from the apples will escape a little as they break down and loosen the batter]. Add vanilla, mixing until incorporated.
6) Pour batter into prepared pan, and bake until a cake tester inserted in the center comes out clean, 75 to 90 minutes.
7) Remove from oven, and cool slightly on a wire rack.
8) Invert cake onto rack; turn cake right-side up to cool completely on rack; serve with whipped cream, ice cream or plain.


Check out other Fall Feast-ival items over at WellFed's FitFare!

Tags: , , , ,

Monday, October 02, 2006

Apple Chips


*Just Braise has moved. Please visit me at www.justbraise.com!*

This past weekend, surrounded by mountains screaming color, D and I headed upstate with some friends to camp. As we have learned from past fall foliage camping years, no trip in the creeping fall days is complete without some apple picking (as well as apple cider and apple donuts).

We ate more than our fill, testing the varietal that would win our hearts and make it into our oversized ½ peck to return to the city. We picked rotten ones from the ground and threw them into the high reaches of trees, attempting to knock loose a prized specimen. We made running high jumps into the branches grasping a seemingly perfect morsel—only to have hopes dashed and eyes splashed with rotten juices. And in the over exuberance of finding a tree of Red Delicious full of fruit, we even came branch to arm with a healthy dose of poison ivy (though none has broken through yet, fingers crossed).

There are few things that feel more fall or are as delicious as a freshly picked apple. And there are few things more rewarding than admiring one’s gathering skills with a bushel of rubies stacked high in the kitchen.

But the bushel sits and the mind must wander into what to do with so many apples. Last night it was braised pork chops in rum cider with apple slices (made too late and eaten too hungerly for a picture). This morning I called upon my days in the third grade for inspiration...

My third grade teacher is what we used to refer to as a “nature freak.” Strange for us suburban kids to find someone so caught up in nature— she once yelled at a classmate of mine because the girl stepped on an ant—“how would you like to be that ant?!” Well, it’s dead now, so we wouldn’t thank you.

But there were some great teachings, most now forgotten, that lay between Pioneer Days (where we dressed like Little House in the Prairie, went to a neighboring school, “hunted” and ate venison stew, churned butter and home schooled our “children”), candle making and Apple Days (where we went apple picking and sat for 2 days peeling, chopping and slicing apples for apple sauce and strung ribbons of apple slices that dried into apple chips in our windows).

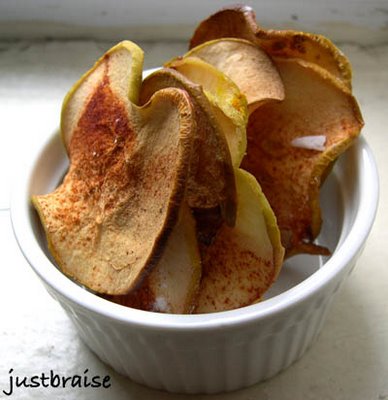
So this morning as I looked to our fresh apples I remembered the apple chips. And even faster than stringing them into the window waiting two weeks for them to dry, is the almost instant gratification of drying them in the oven, low and slow until crisp and delicious.

APPLE CHIPS
Serving Size= about 60 chips. Active time= about 20 minutes w/ a Cuisinart or other slicer, more if slicing by hand. Cook time= 2 to 2-¼ hours.
* 5 Granny Smith, Rome or Golden Delicious apples, sliced into even 1/8-1/4 inch discs
* 2 Tbl powdered sugar per baking sheet
* assorted spices depending on flavor desired (lime juice-cumin-curry, cinnamon-sugar, salted or plain are all delicious).

1) Set oven racks on bottom and top quarter of the oven. Preheat to 225F. Line baking sheets with parchment paper and dust each with powdered sugar.
2) Line sheets with apples, do not overlap apples or they will stick together.
3) Dust top of apples with selected spice combination.
4) Place one sheet on top rack, one on bottom and back for 2- 2-¼ hours, until apples are golden. Rotate bake sheets half way through cooking and remove apples immediately from sheets onto a cooling rack once out of the oven.
NOTE: Serve as a snack (like regular potato chips) or as a side to sadwiches, on top of ice cream or other creamy fall dessert, in a salad, with pork chops or whatever else you can imagine.


Head over to Sweetnick's for today's ARF round up!

Check out other Fall Feast-ival items over at WellFed's FitFare!

Tags: , , , ,

Thursday, June 29, 2006

Chorizo-Lime BBQ Ribs


*Just Braise has moved. Please visit me at www.justbraise.com!*

Summer brings a new culture onto the streets of New York City. It lives and breathes the pavement and it waits out the humid days for the cooling nights, begging for a release with rain. People move from their cramped apartments onto stoops, lawn chairs, handball courts, public pools, beaches, parks— even an air conditioned store to roam aimlessly for a cool down.

I walked home the other day and witnessed my neighborhood in a new light. Every winter we tightly latch ourselves into our undersized apartments, bundled under blankets and layers of clothing. I begin to forget the people that live in my neighborhood-- that I pass everyday on the streets-- that I ride the train with into Manhattan while we forget where we are and where we are going. As summer’s heat finally hits hard, the close quarters are too much and private life blends into public.

My neighborhood is a multicultural whirlwind of ethnicities and personalities. A perfect microcosm of New York City, I can walk two blocks in one direction to restock my sheesha; two blocks in the other for the best gyro in the City (or the best frappe according to the New York Times). I can go to the Mexican bodega for $1 tamales on the weekends, the Bangladesh deli for a fresh mango smoothie, or the Indian bakery for fresh gulab jaman. The list continues into the night.

But what emerges in the summer holds more than the variety of stores I relish. It is a look into the lives of others. Purple-haired women drink orange soda as their granddaughters regale their waning days of the school year. A group of kids playing soccer in the streets knock their ball too close to a passerby. A mother sits on the stoop as her son practices handball against their brick building. Young girls seek out the icy man for fresh coconut ices. Neighbors rehash old ties, friendly waves cross intersections, the weight of clothing is reduced, it is summertime and the people are happy.

The heat draws people out of their home physically and mentally. Each day I pass the local bargain shop and spy the cheap charcoal grills, waiting for the perfect time to purchase the one-season specialties. Spending time in the kitchen is cut short as the heat of the oven is viewed as sin. Hamburgers, quick chickens, easy seafood and of course, ribs, are easy on the mind because they lend us the notion of lazy-weekend-outdoor-eating with friends and loved ones.

With that said, I justify yet another round of ribs (pork this time)—perfect for a 4th of July BBQ. This one is dripping tangy citrus flavors off the chin with every bite. It is a thick and chunky sauce, loaded with freshness that screams homemade. It is something to impress friends with and all too easy to make. D believes the sauce recipe is too heavy on tomatoes, but I think it sits perfectly on the ribs— with that said, do what you will with the quantity.

CHORIZO-LIME BBQ RIBS
Serving size= 4 people. Active time= 35 minutes. Inactive time= 1 hour 20 minutes
CHORIZO-LIME BBQ RIBS
* 5 pounds pork ribs, have the butcher crack the bone but do not separate the ribs
* Chorizo-Lime BBQ sauce (recipe below)

1) Preheat oven to 400F. While oven is warming, begin to prep sauce ingredients below. Place rack of ribs on a large oven-proof baking sheet with a rim, cover with tinfoil. When oven is ready, place ribs on center rack for 15 minutes.
2) As ribs are baking, finish up the sauce on the stovetop. The sauce should be ready around the same time as the ribs in the first part of the baking process.
3) Remove the sauce from the heat and the ribs from the oven (once the 15 minutes are up). Lower oven temperature to 350F. Remove tinfoil and generously coat the ribs with the sauce. Cover with tinfoil and return to the oven for 1 hour.


CHORIZO-LIME BBQ SAUCE
Serving size= 4 people. Active time= 30 minutes.
* 7 ounces, about 4 chorizo links, diced small
* ½ bunch cilantro, chopped
* 2- 6 ounce cans tomato paste, no salt added
* juice of 3 limes
* 1 cup cider vinegar
* 2 Tbl molasses
* 2 Tbl spicy mustard
* 1 Tbl favorite hot sauce
* ¼ cup water
salt/ pepper to taste

1) In a sauce pan on medium heat, warm the chorizo and cilantro until the cilantro wilts and aromas escape, about 3 minutes.
2) Add remaining ingredients. Bring to a boil then remove from heat. Coat ribs and bake or enjoy as extra dipping sauce on the side.


Head on over to Kalyn's Kitchen to catch this week's WHB roundup!

Saturday, March 25, 2006

Sunchoke (Jerusalem Artichoke) Soup + WCB #42


For some reason, Sunchokes, otherwise known as Jerusalem Artichokes, were all the rage this season. They popped up on menus throughout the New York City area, from soups to sides to salads. I cannot remember how I came to know of them. Once I did, it was an impossibility to find them. I searched everywhere: green markets, my local produce stands, Whole Foods and other organic stores. It seemed that every restaurant had nabbed them up before I could touch them.

I went weekly into certain groceries, asking for sunchokes, more often than not, I was pointed to artichokes. “No! They look like potatoes crossed with gingerroot,” I would lament. But everyone just shrugged. Once I received: “we’ll be getting those in next week.” The next week, I was again pointed to artichokes.

With the sunchoke season quickly coming to a close (the best time to get fresh sunchokes is October through March) I came to accept that I would go through another season without my own bounty. Having stopped my search, low and behold, I finally found them! Doesn’t it always seem true that your desire is fulfilled when you stop searching for it?

I packed them up and brought them home, ready to make a soup as creamy and delicious as a potato soup. So why not use potatoes already? Well, simply put, sunchokes contain more health benefits than potatoes; diabetics often substitute sunchokes for potatoes.

Sunchokes are the root of a plant that resembles a sunflower and the name is derived from the Italian word sunflower: girasole. Sunchokes have a nutty and slightly sweet flavor, allowing them to pair nicely with almost everything from bacon to nutmeg.

Sunchokes store carbohydrates in a form of inulin, a starch that our bodies do not use. Because of this, they are filling, but are not absorbed by our bodies, and show indications of assisting in blood sugar control. Sunchoke flour is also available in some specialty stores, making a good substitute for people allergic to wheat. They are high in iron and potassium and low in fats. Sunchokes also contain a healthy bacteria, lactobacilli , which provide balance in the intestinal track and aid in digestion.

Don’t shy away next time you see this tasty tuber. It is delicious and good for you. If you make it in this soup recipe below, as D will tell you, it is the best soup yet, sweet, creamy and extremely filling on its own-- just don’t tell D you made it unless you want a dinner guest!

SUNCHOKE SOUP
Serving Size= about 12. Active Time= 25 minutes. Inactive Time= 45 minutes.
* 3 ham hocks, have your butcher cut them up
* 8-10 slabs of bacon
* 1-½ lbs sunchokes, scrubbed and cut into 1-inch chunks (no need to peel)
* 1 medium white onion, chopped
* 2 carrots, chopped
* 2 stalks celery + leaves, chopped + extra leaves if you have them
* 10 cups water or leftover vegetable juices
* 2 cups buttermilk

1) Turn the oven to 400F. Place the ham hocks on a roasting pan and place them in the oven while you prepare the soup. In a soup pot on medium-high heat, brown the bacon, about 8 minutes. Once complete, carefully using a paper towel, absorb about half of the bacon fat, leave the rest for the soup.
2) Add onions, carrots and celery. Sauté 8 minutes with the bacon and bacon fat.
3) Remove ham hocks and add them to the pot (turn the oven off). Add sunchokes and water (or vegetable juices). Bring to a boil then cover and reduce heat to medium-low. Cook until sunchokes are soft when pierced with a fork; 30-45 minutes.
4) Remove ham hocks and bacon, set aside to cool. While ham is cooling, carefully in batches, or with a handheld blender, purée the contents of the pot. Add buttermilk; stir.
5) Pick through the ham hocks and remove any meat, throw it back into the soup. Chop the bacon into bite size pieces, return to pot.
6) Garnish with parsley or 1 Tbl buttermilk.


In the non-food world of WCB, Eat Stuff is with us again. Last week Whiskey terrorized the nation. Today, we find sister Kitty BoJangles, avoiding the chaos in her favorite sunny window… caught red-handed eating my Aloe plant!

Monday, March 13, 2006

Berry Oatmeal (ARF/5 #11)


Today real Scottish Oatmeal has taken a backseat to the quick and easy approach of instant oats. It is all too common to hear that there is no time, even for a simple breakfast; cereal, granola bars or nothing at all have taken the place of a hearty, healthy meal. In the wanning days of cold, Scottish Oatmeal is a comforting treat.

My first taste of oatmeal was when I was a child. Like most kids, I had to add plenty of brown sugar to make it a palatable dish. This made it delicious and I happily devoured every bite. My mother bought plain oats and everyone spruced them up as he pleased.

Now I appreciate real oats. The aroma, texture and earthy, grainy flavor is comforting, especially on cold mornings, or when ill. I prefer to add little sugar, allowing true flavor to really shine through. My weakness is fruit though; I cannot go without its addition. When the oats are nearly done, I remove them from the stove, sprinkle with sugar and fruit, and place them in the broiler. The result is a dish with exceptional natural sweet flavors that is a compliment, not a competition, to the oats.

To truly experience oatmeal means using old fashion oats that must be prepared on the stovetop. It is simple, fast and the flavor and texture are far superior to quick oats. Further, quick oats often add flavorings and sugars, something you want to avoid, especially if you are eating oats as a health benefit!

If bananas are used, when placed under the broiler, they caramelize and form a crust with the brown sugar on top of the dish. It is a true joy to crack through. Berries, especially blueberries, melt down and the juices cover the oats. The result is an earthy, delicious dish with a fabulous fruit syrup. Any way you cut it: adding small amounts of sugar, fresh fruit, or nothing at all, fresh oatmeal is a fabulous fast treat.

SCOTTISH OATS w/ BLUEBERRIES
Serving Size= 2 persons. Active Time= 12 minutes.
* 3 cups water
* 1-½ cups Scottish Oats
* 15-20 blueberries
* 1 Tbl brown sugar

1) Bring the water to boil over medium heat. Add the oats, mix to break down then cover tightly; let cook 9 minutes
2) Turn on broiler. Divide oats into two oven-safe bowls, sprinkle brown sugar on top, add blueberries (or bananas or any other fruit)
3) Place under the broiler for 2-3 minutes until berries wilt and brown sugar carmelizes.


Head on over to Sweetnicks for the ARF/5 roundup!

Golden Beet Salad


I cannot recall when I ate my first beet. I know my grandmother often served them at family meals. It sat cold and wiggley in between the sauerkraut and Jell-o; the beltway of the table I despised. Often times, when the plate got away from my small hands “grandma’s specialties” were loaded on. I sat there shifting the food around, building monuments in the likeness of Jabba the Hut, until all was an indistinguishable mess. It was many years before I willingly placed a beet in my mouth.

The first time must have been in New York City. It might even have been as late as my college years. I want to say that my first beet experience was in a sweet crimson borscht. Delicious and full of vegetables, I am sure I pondered how the soup acquired its rosy hue—that is until beer was in front of me and all was forgotten.

At some point I remember watching (or possibly reading?) a segment about food and how certain vegetables alter a person’s urine. Disgusting, I know, but I have two brothers so this was cool to me. What I take away from that program today: Asparagus= yellow and pungent. Beets= bright pink. To me this was fascinating. I tried consuming bowls of borscht, but that just filled me up. Eventually, I turned to the beet.

I remember again being at my grandmother’s home (post new scientific knowledge). Behold the plate of beets! My grandmother was the only one eating them. Being the dutiful, and only granddaughter, I plunged my fork into the platter and filled my plate with beets. I consumed them faster than I could taste them for fear of ruining my experiment with a bad tasting vegetable. It was halfway through my plate when I paused for breath, tasted, and realized the sweet joy that is the beet.

Today it seems my refrigerator is never without beets. They are the best of additions to any salad, powerful enough to stand on their own, and their leftover juice (the water they are boiled in) makes a superb addition to soup stock. I often cook up more than D or I can consume in one night then hide them in sandwiches, replacing the too common tomato (highly recommended!).

So it was with great joy that I spied the golden beet my supermarket. I bought a bunch, boiled them up and served them simply as pictured: with fresh peppercorn goat cheese, sage and a sprinkle of balsamic vinegar. This salad is pleasant and refreshing. The golden beet is a beautiful vegetable on its own, or paired with the more common red beet. It has a sweeter and more subtle flavor, making it an ideal “starter” beet. It is also a beautiful royal shade, reminiscent of the upcoming spring we all long for.

Oh, and my experiment worked. I called my grandmother into the bathroom to witness my feat. She was not impressed and thought I might be ill.

GOLDEN BEET SALAD
Serving Size= 2 persons. Active Time= 10 minutes. Inactive time= 45 minutes.
* 4 small golden beets
* 6 fresh sage leaves, pineapple sage is ideal if available
* 4 Tbl plain, herbed or peppercorn goat cheese

1) In a small pot over medium-high heat, bring water to a boil. Wash beets well and trim stalks, leaving about 1 inch in tact. Add beets to water, cover; reduce heat to medium. Cook beets about 45 minutes, until a fork can easily pierce the beets.
2) Remove beets from heat and run cold water over them until they can be handled. Push skin off (once cooked, beet skin easily falls off with a little nudge). Trim off stalk and slice as desired. Arrange on plate.
3) Sprinkle goat cheese over beets, or place on side. Shred sage and sprinkle over. Add a dash of balsamic to taste.

Saturday, March 11, 2006

Braised Pheasant w/ Sauerkraut


A few years ago, I had an ideal roommate: she was an amazing baker while I was the meat and potatoes of the operation. Together we created some tantalizing meals that impressed all around us. We were an unstoppable duo, especially in the kitchen. She moved out, we move on, and now she lives half a continent away. On a recent visit, she imparted onto me the most precious gift of all: The Art of Eating by M.F.K. Fisher.

It is a hefty volume, almost 800 pages; a collection of Fisher’s best writings on food. But its cover was the most seductive image I had laid eyes on that I eventually cracked it, finishing it in one week’s time. Today I will not indulge the reader in a full review; that is for another time. I will say it is one of those books once picked up is impossible to put down. The writing is so voluptuous is calls to be read aloud to an audience.

With each sitting I grew hungry, not only for more of Fisher’s writing, but physically. Throughout the book, recipes wrapped in Fisher’s memories are found. Before I passed this book on to another friend, I copied a few of those recipes down to satiate my appetite another day. Many seem almost archaic today (in the United States at least)—roasted pigeon-- these are recipes that must be indulged at some point in one’s lifetime.

Today I unfurl one of those copied recipes with more to come. This one if found in the section “How to Cook A Wolf.” First published in 1937, this section is a guide for the housewife on how to scrimp and save in the bowels of wartime, as well as after. How does one continue to live a life of luxury when there is none to be found?

I must suppose pheasants were easier to come by in those days. A young boy could go on a hunt with his father and return with a sack of pheasant to feed the family for a week, nary a penny spent. Today, pheasant is a luxury (at least in New York City). I was determined to create this dish (and if I could not find pheasant, Cornish Hen or something of that sort would have to do). Low and behold today at the Green Market I found Game Dealers: Wild turkeys, chickens, geese, and of course, my dear pheasant! A little on the expensive side ($20 for a good sized bird!) but it was destiny to find and had to be bought. Add to that 1pound of fresh bacon (also from the Green Market) this meal is hardly a hungry wolf—it can now pass as a starving millionaire fare.

BRAISED PHEASANT (OR PARTRIDGE) IN SAUERKRAUT
Serving Size= 4 persons. Active Time= 45 minutes. Inactive time= 2½ - 3 hours.
This is the recipe as it appears in The Art of Eating.
* salt and pepper
* 2 small or 1 large bird (or 1 rabbit)
* bacon slices
* 3 tablespoons butter or good oil
* 1½ pounds sauerkraut
* 1 cup peeled and sliced apples
* 1 cup dry white wine (or half and half with water or vegetable stock)
* 1 tablespoon flour


Rub birds with cut lemon, and salt and pepper them. Wrap with the bacon and tie securely with twine. Heat the fat and brown the birds.
Wash the drained sauerkraut (unless it is very mild, [t]hen just drain it). Place a layer of it with the apple slices in the bottom of a casserole and imbed the birds. Cover with the rest of the kraut and apple, add the liquid, and cover closely. Let simmer very slowly for about 2 hours.
Put the birds on a hot plate, and thicken the kraut with the flour. Make nests in it, and replace the birds in them, ready to serve.


On non-food related musings, here is WCB # 40 over at Eat Stuff. Below we have Whiskey and Kitty BoJangles sitting at the first open window of the year...

Monday, January 30, 2006

Loose Ends Lentil Soup


Soups are an all too easy favorite of mine: they are inexpensive; require little prep; are hearty and healthy; involve few ingredients to make delicious; are easy to alter with a little cream or blender; and are a fabulous way to clean out the refrigerator/ cabinets before a grocery spree. They are a leftover-lover’s dream: make them in large batches and freeze in single-size servings easily to transport to work for a no-think lunch your co-workers will drool over; perfect with some fresh bread.

Once the basics of making a soup stock are understood, whether it is meat or vegetable, there is no limit to one’s soup making abilities: A little less of that here, more of this there, and voilà, a new creation with little effort.

Growing up, a favorite household food was turkey. A golden-roasted turkey my mother would prepare in the late afternoon and have ready for us kids upon our arrival home from school. Friends would join us and we would pass through the door attempting to guess what mom had made. The favorite of mine was always turkey because it meant a whole week of fresh turkey sandwiches. It meant warm turkey with smooth, buttery mashed potatoes. It eventually meant my all-time favorite: soup.

It is from my mother (and of course my grandmother) that I have come to understand the importance of a flavorful soup base. I rarely order soup at a restaurant because I am always terrified of soup stock low in flavor (not enough bones or vegetables as a base) or too salty (covering up for the tastelessness of low flavor).

The Stock:
Although it may seem overly thrifty at the time, you will be delighted with yourself (and your soup creations) if you keep leftover “broth” from vegetables: Boil some beats or potatoes, steam some artichokes, but whatever you do don’t throw that leftover water down the drain—freeze it! That water, no longer clear, but deep crimson, pale green or white, serves as a flavorful addition to your soups (and is full of vitamins). Instead of water, use this as the liquid addition to your soups and you will no longer need bouillon to flavor your base. If you desire a vegetable stock, sauté some onions, leeks, celery, carrots, potatoes, etc. then add the leftover vegetable juice. (A friend of mine has said she cannot stand onion in her soup, a shame because I think this is one of the best stock basics. If you fall into this dilemma I have found extra celery can add a lot of flavor.)

The Meat & Bones of the Situation:
Much of the flavor received in soup broth is derived from bones, more precisely, the marrow-- not the meat (though the meat is a tasty treat). Whether it is chicken, beef, pork or fish stock you seek, the bones are where it’s at. The essence received from marrow that comes into soup is full of flavor, protein and mono-saturated fats (the good stuff that decreases bad cholesterol levels and is thought to lower the chances of certain cancers). Using bones in your soup also produces a rich, thick broth. (Bonus: The butcher or fish market often sells miscellaneous soup stock for cheap.) The great part about using bones with meat on it is that it makes for easy cleaning: the soup is done when the meat falls right off the bone.

For this lentil soup, I cleared out everything that was left in my refrigerator and freezer: leftover oxtail bones, a few strips of bacon, some crimini mushrooms, ½ an onion, a few celery stalks, some carrots, 1 potato, dried lentils, 6 cups of frozen beet juice, 4 cups frozen artichoke-potato juice. The final result was excellent: Super hearty and loaded with flavor. You do not have to clear out your refrigerator, but do make this soup.

The picture is taken after about 1 hour on the stovetop (dried lentils were used, canned lentils will cut down cook time). Another hour later and this soup became thick and delightful: the lentils broke down into a light paste. This soup makes a fabulous meal with a fresh chunk of bread and a bite of sharp cheddar. The chunks of vegetables are full of flavor and the broth is so rich it is a taste from the fountain of youth. Dip your ladle, savor the goodness….

LOOSE ENDS LENTIL SOUP
Makes 8 servings. Prep time= 20 minutes. Cook time= 30 minutes- 2 hours (depending on canned or dried lentils)
* left over beef bones (or beef stock) (about 2 lbs, but whatever you have left is good)
* 5-8 strips of bacon (optional)
* ½- 1 lb crimini mushrooms, quartered
* 1 yellow onion, chopped
* 4 cloves garlic
* 3 stalks of celery, cut into 1-inch pieces. Retain leaves and add to the soup
* 3 carrots, cut into 1-inch pieces. Retain leaves and add to soup
* 2 russet potatoes, cut into 1-inch chunks
* 8-10 cups leftover vegetable “broth” or water
* 1- 5oz can tomato paste
* 2 cups lentils, washed and bad ones discarded
* 3 bay leaves
* 1 Tbl dried oregano
* 1 Tbl dried tarragon
* 5 Tbl hot sauce (optional for an extra kick)

1) In a large soup pot on medium-high heat, brown the bacon. Using a paper towel, pick up some of the fat (retail about 1 Tbl in the pot). Remove the bacon and set aside. Turn heat to medium. Add mushrooms, onion, garlic, celery (plus leaves), carrots (plus leaves), and potato into the pot with the bacon fat. Saute until onion begins to soften, 8-10 minutes. While the vegetables are cooking, slice the bacon into bite-size pieces. Return to pot.
2) Add bones, tomato paste, and vegetable broth (or water), bring to a boil. Add lentils, oregano, tarragon and hot sauce. Cover and allow to simmer (turn heat down if the soup continues to boil). If using canned lentils, cook time is about 30 minutes. If using dried lentils, cook time will be about 45 minutes- 1 hour. The longer the soup is left cooking the more the lentils will break down—cook this longer if a thicker soup is desired.


An interesting bone bite: Archeologists can determine how wealthy a civilization was (relatively) by looking at the bone byproducts. If bones were used as a source of food (cracking bones open and eating the marrow), it is likely meat was not plentiful or a famine occurred. Civilizations rich with food would discard animal byproducts (or use them as weapons or tools).

PS- Happy Birthday to me!.... and Jennifer.

Friday, January 27, 2006

Braised Oxtail w/ Baked Eggs & The Perfect Bloody Mary


*Just Braise has moved. Please visit me at www.justbraise.com!*

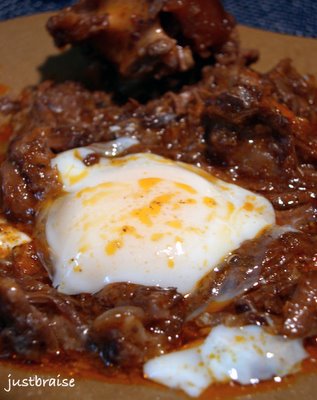
As stated earlier, on a recent B&N trip, I “picked up” a few recipes from the book I was perusing. This one struck my eye (even though the picture does it no justice) because it sounded exotic: oxtail and baked eggs. I never thought to bake an egg before, other than a frittata. D being a huge carnivore, I knew he would be down for oxtails. We invited two other meat-lovers over and planned our day.

First, I must admit that when eating certain foods that resemble animals a little too much, contain too many bones, or are a little too gamey, I regress back to my vegetarian days. For six years (much to my mother’s objections and sneaking meat into my food) I was essentially animal-less. I broke down when studying in the meatastic city of Prague and am now a mostly happy meat-eater. Like many others I have met, the word oxtail can give me the meat-willies, but this recipe sounded too good to pass up. So all ye who fear the tail I say go forth!

What is oxtail? And why? Back in the day when oxen actually pulled our wagons cross country and got all yoked up, the oxtail consumed actually was the meat from the tail of oxen. Being thrifty folk and not wanting any part of the animal go to waste, the oxtail was consumed, often in a soup or hearty stew. As oxen have gone out of style and the use of cattle has become widespread, we again refuse to let any meat go to waste. Oxtail as we know it today is the tail meat from cows (of both genders).

Like all things fashionable, there are highs and lows. It is only recently that oxtail has returned to fashion. I have read fewer than twenty years ago, oxtails were so unpopular the meat was practically given away. It was a secret joy for chefs to use oxtail because the cost was so low ($1-2 a pound). Today, though not outrageous, old fans of oxtail shutter in horror as they dish out up to $6 a pound for quality “unwanted” meat. Oxtail seems to be the new “it” meat, recently springing up in restaurants all over town.

The first time I took notice to oxtail I was with D at his favorite feel-good-food joint Soul Spot. Ran by two men from The Gambia, these boys have nailed the southern cooking New Yorkers crave. An easy-to-miss whole-in-the-wall favorite of bus drivers, police, and locals alike, the Spot serves up choice of meat and two sides for an easy $10. I would usually order the chicken: jerk or BBQ, while D would switch up between meatloaf and oxtail both dripping in savory sauces. With trepidation—come on, what’s in name?— I tried the oxtail. I was hooked.

Like short ribs the “oxtail” meat can be a little tough so slow cooking is advised. This is where the braise comes into play, allowing the meat to fall right off the bone and enter the succulence stage. Oxtail tastes like any other “less than ideal” cut of beef, most resembling brisket (although it depends how it is cooked), so it is not to be shied away from. It makes an interesting, exotic sounding, and delicious alternative to the usual purchases, and should definitely be tried.

As a brunch item, this dish reminds me of The Joy of Cooking’s “Hunter’s Breakfast” which consists of about 10 different courses, from quail to ostrich eggs. More closely, it is similar to D’s favorite menu item at Norma’s: The Hudson Valley Duck Confit Hash a Cheval, consisting of a full duck and 4 eggs. D orders this with a huge grin and sops up all the sauce with their fresh baked bread, dribbling juice and laughing at the rest of the patrons pick at their jazzed up eggs (I recommend the Zillion Dollar Lobster Frittata, with “we dare you to expense this” as the price—okay, I’ve never had it, but the Artychoke Benedict is darn good).

This recipe takes a little planning (I marinated the oxtail in wine overnight). If it is made for brunch, remember it needs 2-½ - 3 hours of cook time so prepare it well before guests arrive, or quench the appetite with the perfect Bloody Mary (recipe below). I planned ahead and bought double what I thought 4 people could consume so I would have plenty of leftovers (which is recommended since the cooking process is lengthy). Much to my surprise, the leftovers were few: enough for a smaller brunch the following day. This meal is well worth it and is so hearty it serves as the only necessary meal of the day (we were good and content until about 11pm when we had a small snack of fresh mozzarella and tomatoes).

I know the picture is not fantastic, but this meal is. Anyone that has had it can attest to it. When the egg’s sunshine breaks loose and the juices mix, this dish is divine—just have some good bread on hand for the sauce. A Bloody Mary is a perfect accompaniment to this dish: The tangy horseradish is an ideal palate cleanser. Be a man, enjoy this dish, call the dogs, sound the horns, and go hunting.

BRAISE OXTAIL W/ BAKED EGGS
Serves 5. Prep time= 20 minutes. Cook time= 2-½- 3 hours.
* 4 lbs oxtail
* 1 bottle red wine (I used the inexpensive, but quite tasty $5 Gato Negro)
* 2 celery stalks, cut into 1-inch pieces
* 2 carrots, cut into 1-inch pieces
* 1 small onion, cut into quarters
* 1-5 oz can tomato paste
* salt/ pepper
* 1 Tbl dry parsley
* 5 eggs

1) Place the oxtail in a wide bowl with 1 bottle red wine. Marinate at least overnight, up to 2 days. If the wine does not cover all the meat, rotate and flip pieces every so often.
2) Preheat the oven to 400F. Warm an oven-safe pot (dutch oven) over medium-high heat. Remove the oxtail from the wine (save the wine). Dry off the oxtail and rub well with salt and fresh ground pepper. Brown all sides of the meat in the (dry) pot. This can be done in 2 rounds, takes about 3 minutes on all sides. This locks the meat moisture in. Remove and set aside.
3) In the meat juices, sauté the celery, carrots and onion, about 8 minutes until onions begin to soften. Add the tomato paste, reserved wine and parsley; stir to blend evenly. Add the oxtail (liquid should come just to the top, but not covering the oxtail. Add a little water, about 1 cup, if this is not the case) and cover tightly. Bake in middle of the oven for 2-½- 3 hours. Meat is done when it falls off the bone with little effort. Check the braising process once every hour to ensure liquid is still present. Add a little water if too much liquid evaporates (some liquid will cook off, but you want some sauce for the meal).
4) When meat is ready, remove from the oven and de-bone (reserving the bones for a future soup or stew). Push the vegetables through a large sieve (or mash with a potato masher) to create a thick sauce. Return the meat to the pot. Using the back of a large ladle, create 5 divots and crack one egg in each divot. Bake 10 minutes so eggs are just white and still runny.
NOTE: To be served with a Perfect Bloody Mary, recipe below.


THE PERFECT BLOODY MARY
Serves 4. Prep time= 8 minutes. Inactive time= 1 hour.
* 1 liter quality tomato juice, with no additives (I think Looza makes an excellent line of juices and nectars and should definitely be purchased if available.)
* juice of 1 lemon
* juice of 1 lime
* 1 Tbl Worchester Sauce
* 1 Tbl hot sauce
* 5 Tbl quality fresh, plain white horseradish
* 1 Tbl celery seeds
* fresh pepper to taste
* 1 Tbl balsamic vinegar
* 8 ounces vodka
* celery stalk with leaves for garnish (olives or pickled green beans work well too)

1) In a pitcher, mix tomato juice, lemon juice, lime juice, Worcester sauce, hot sauce, horseradish, celery seeds and fresh pepper. Cover and place in refrigerator for 1 hour.
2) When ready to serve, remove from refrigerator and stir well. Pour 2 oz vodka into each glass (4), add tomato mixture (another tsp horseradish is optional). Add celery garnish. Gently pour the balsamic vinegar over the top of the tomato mixture so it floats. This provides an excellent visual and olfactory effect. Once served, mix and enjoy.

NOTE: A good Bloody Mary starts in the juice. If one uses a poor quality juice, the final product will taste off. I have had this happen. Do not attempt it at home. The taste of a dish depends on the quality of the products used.
ON HOT SAUCE: I am by no means a hot sauce expert, but I do like a little flame every once in a while. I have foodie friends from New Orleans that will add Tabasco to everything. I surprised them with some Dragon’s Fire Hot Sauce from Greene’s Gourmet in Vermont. (D and I picked some up during a camping trip.) This boutique sauce is made with ginger root which we were told makes the sauce extra hot because it opens the sinuses giving one full onslaught of the pepper—the Naw’lins boys were speechless.

Sunday, January 15, 2006

Bourbon-Pomegranate Molasses Beef Short Ribs w/ Broccoli Rabe


*Just Braise has moved. Please visit me at www.justbraise.com!*

To braise, or not to braise, that is the question. Whether ‘tis nobler in the mind to purchase expensive meat and suffer the slings and arrows of outrageous fortune,-- or to fool your audience with inexpensive meat that melts in the mouth and is pure succulence.

I choose to fool, and with rave reviews.

Braising is the frugal gourmet’s trick on the audience: It turns tough meat tender. This is a process where one can throw everything-but-the-kitchen-sink into the pot, walk away, and return a few hours later to remove spectacular meat with little effort (I have discussed the process and various techniques more in depth in my first post of this New Year. I will also make the promise that more braising will be discussed this year, than last.) For tonight, it is beef short ribs.

As a child, I cannot remember ever eating authentic southern BBQ ribs. Steaks, BBQ chicken, hamburgers, hot dogs—those were all covered. I cannot recall once stepping foot into a BBQ joint until I was in high school. This moment was bliss and I often requested return trips.

My family did eat ribs though. There was only one location we ever consumed ribs: at New China Restaurant. We walked in, summoned by the larger-than-life giggling gilded Buddha that rested above the host stand, and soon sat at our regular table. I always thought we were so special sitting at this corner booth right near the bustling kitchen. Looking back, I am sure three young rowdy children are not a restaurant favorite. Regardless, their ribs were amazing, dripping with a soy-BBQ sauce that my family always had to order at least 2 plates of to satiate all.

But I have aged, and with age I have come to enjoy ribs beyond the comforts of the local Chinese restaurant. I still crave authentic southern BBQ. This is good since D is a southern boy: Tonight we summoned the southern kitchen.

On short ribs:
There are two kinds of beef short ribs. One is the shoulder (or chuck). These pieces are cut into individual rectangular slices, 2 to 3 inches long. They are thick, have layers of fat and connective tissue, and a thick bone running along them. The second kind of short rib is the short plate (underside of the chest). This is typically what you receive in a BBQ restaurant when you ask for “short ribs”. It usually consists of five connected ribs (numbers 6 to 10). This section is meaty but also contains a lot of connective tissue. Both cuts are tough and require long cooking (in this case braising) to soften them up.

When purchased in the supermarket, this cut of meat is a bargain. For tonight’s meal I purchased a package of chuck (loose) short ribs. They were large, meaty and marbled. They arrived in a package of 4, totaling just under $4. The rest of the ingredients are staples I generally have at home so with the broccoli rabe (about $2.50) this meal for two was about $7. I was happy with this math and returned home to braise. (Okay, the bourbon is not a staple, but leftover from a New Year party. This girl loves her hot toddies.)

Other notes on this recipe:
I combined and adapted this recipe from two I found online (one from starchefs, the other from epicurious). The pomegranate molasses can be substituted for regular molasses. I just happen to enjoy the sweeter pomegranate molasses. It is available in Middle Eastern markets (for about $1.50) or is now showing up in many general supermarkets (for about $3.00) in the Mediterranean food section. Whichever molasses you use, make sure to add it at the end of the cooking process. The pomegranate seeds in the braise process are also optional. I had some leftover seeds from a recent heavenly dessert and threw them in (as I said, everything-but-the-kitchen-sink.)

Bourbon-Molasses Beef Short Ribs w/ Broccoli Rabe
Makes 2 servings. Prep time= 20 min. Cook time= 2.5 hours
Bourbon-Molasses Beef Short Ribs
4 short ribs (Find ones with a good fat-meat ratio)
1 Tbl butter
4 cloves garlic, chopped
1 carrot, chopped
1 celery stalk, chopped
1 medium onion, chopped
1 jalepeño pepper, chopped (if a little spice is desired)
3 bay leaves
¼ tsp thyme
¼ cup bourbon
1 Tbl tomato paste
1-½ cups water
1 Tbl soy sauce
2 anchovy filets
seeds of ½ a pomegranate (optional)
1/3 cup pomegranate molasses (or regular molasses)
fresh ground pepper

1) Preheat oven to 350F. In an oven safe pot, or dutch oven, melt the butter over medium heat. Cover both sides of the short ribs with an ample amount of pepper and brown the ribs (about 3 minutes each side). In the braise process this initial quick heat process locks the juices inside the meat. Remove the ribs and place on a separate plate.
2) Add the garlic, carrot, celery, onion, jalepeño and anchovies. Sauté for 5 minutes.
3) Add bay leaves, thyme, bourbon, tomato paste, water, soy sauce and (optional) pomegranate seeds. Return ribs to pot, cover tightly and place in oven on center rack. Cook for 2.5 hours.
4) Once removed from the oven the sauce will have thickened and the aroma will be overwhelmingly delicious. Add pomegranate or regular molasses, stir and serve.


Broccoli Rabe
1 bunch broccoli rabe
2 Tbl butter

1) When there is 10 minutes left of the braising process above, warm a medium sized saucepot over medium heat with the butter. Add broccoli rabe, cover tightly and allow to sit for 5 minutes. Stir, cover again, and cook until leaves are wilted (about 4 more minutes). Remove and serve.


Check out this recipe featured on Chef Michele!

Head on over to Lindy Toast for the Something For Nothing wrap up!

Friday, January 06, 2006

Tri-Bean & Beef Chili


My first and second grade teacher was a fabulous mentor for all things culinary. Mrs. G must have been an amazing cook and she encouraged our little hands at the same. At one point, we must have been learning about bivalves. Something very basic I am sure (there is only so much bivalve information a first grader can pick up). Later that day, we had 3 large batches of mussels steaming in the back of the class, “see how they open when they are ready to eat!” Mrs. G exclaimed. During the lesson, I can remember thinking why would anyone want to eat a “muscle”?! I could not imagine the muscles in my body resembling these hard-shelled critters and I was slightly repulsed by these midnight blue orbs cooking away at the back of the class.

A few minutes later, everyone was served up a small plate of mussels. I cannot imagine that I ate mine. Now that I think about it, this lesson must have done the teachers’ lounge much more good, because I am sure that is where the bulk of the mussels ended up. If I was in that classroom now, I would steal all mussels from all those grubby little hands, devouring them in great triumph. I would later marvel at how strong my own muscles were to steal such a quantity away!

The following year, second grade, still with Mrs. G, my elementary school hosted an all-school event. Every classroom chose a booth to host: Some made popcorn, some spun cotton candy, others ran a musical-pie-chair (the winner won a home-baked pie). Mrs. G signed us up for the chili booth. (I wonder if we were consulted on this because for a second grader the other booths sound much more appealing.) Mrs. G came to class one day and told us we were making chili. Mrs. G told us she was an award-winning chili chef, and we would be making her secret chili recipe. (I guess secret chili recipe sounds good enough for a second grader.)

Sure enough, event day was approaching. Some facts to know before we proceed:
1) There were about 500 students in my elementary school.
2) The event was held on the weekend so parents could attend and therefore, help raise money.
3) This equals about 1,500 heads to feed (figuring on some families only 1 parent will show, or there are multiple children + the staff)
4) My class had maybe 25 students in it.
5) A classroom full of second and third graders were to make chili for say, 1,000 people (my school had a 1-2 then a 2-3 grade split which is how I had Mrs. G for 1st and then 2nd grade)

So as event day approached our classroom was full of green peppers, onions, beans, tomato sauce and other assorted secret ingredients, enough to feed 1,000 people. I was lucky enough to be a green pepper chopper. I now feel sorry for any student that was given onion duty. Each of us were handed 5-10 of each vegetable and proceeded to chop. The last thing I remember of this process was a field of greenery covering my desk. The following day my classroom worked in shifts of 2 or 3 serving up cupfuls of chili to hungry event-goers, “That’s right! I made it!”

Last I heard Mrs. G was around the San Francisco area working as a principal in an elementary school. While visiting relatives in the area in 5th grade, my mother and I took a detour to Mrs. G’s new home. I remember groves of avocado, lemon and orange trees as we drank tea and reminisced.

Today’s chili is in honor of Mrs. G. I cannot remember any of her secret ingredients, but I still think it is pretty darn good. I was a vegetarian for six years and one think I take away from that is filling my chili with extra beans. A more colorful chili, this one is made with three different beans. I also tried something new, and threw in some hot Italian sausage, in addition to the standard ground chuck-- an excellent spice surprise. Next time I might add a third meat or other sausage variety (like chorizo). Do not be overwhelmed by the long list below. Many of these are items you may already have at home (or different varieties of the same food).

3-BEAN & MEAT CHILI
Use a 16-quart pot. Makes 12 servings (enough to freeze for future lunches). Prep time= 30 min. Cook time= 3+ hours (less if you used canned, not dried beans)
4 Tbl olive oil
6 garlic cloves, crushed
1 green pepper, cubed
1 yellow pepper, cubed
1 large onion, cubed
4 large links hot Italian sausage, removed from casings
1 lb ground chuck
10 sun-dried tomatoes, sliced (optional)
12-15 jalepeño peppers, sliced (optional)
1- 28 oz can tomato puree (no salt added)
1- 28 oz can diced tomatoes (no salt added)
2- 8 oz cans tomato sauce (no salt added)
1-½ cups red kidney beans, dry**
1-½ cups black beans, dry
1-½ cups white beans, dry
1- 28 oz can water (if you use canned beans this is not necessary)
2 Tbl Worchester sauce
2-3 Tbl Tabasco sauce
5 Tbl chili powder
3 Tbl cumin
2 Tbl oregano
1 Tbl cinnamon
4 bay leaves

1) In a 16-quart pot, over medium heat, warm the olive oil. Once warm, add the first 8 ingredients (garlic, (2) peppers, onion, sausage, meat, sun-dried tomatoes, jalepeño peppers). Stir occasionally, and allow meats to fully brown, about 15 minutes.
2) Add remaining ingredients, stir and cover leaving the lid slightly cracked. Bring to a boil then turn heat to medium-low. Simmer until beans are soft (about 3 hours), stirring occasionally. Add more chili pepper/ cumin to taste.

NOTE: 1) I try to buy tomato sauces with no salt added and then add my own salt. If I cannot find any no salt added cans, I will dismiss my own salt addition. 2) You can mix and match any form of tomato product you like for the base sauce. I like diced tomatoes because they add a nice texture. 3) **If you use canned beans cooking time is only about 30 minutes. I like the dried because I can throw this on the stove and forget about it while the smell fills the house.

OTHER OPTIONS: 1) Try roasting some red peppers and/ or tomatoes and add to the chili (roast a red pepper by placing it directly over flame. This is messing since some juices will drip. Once totally charred, place in paper bag to cool. Peel off blackened skin, chop and add to chili). 2) Use more sun-dried tomatoes. 3) Add brown sugar, honey, unsweetened, or very little semi-sweet chocolate to the batch. 4) Try other meats. I’m trying a second sausage next time. Bacon might do well too. Veal or shredded pork are other options. 5) Shrimp might do well in the above recipe, though it might create more of a gumbo flavor. 6) Add a can of beer or 2 cups red wine

Wednesday, January 04, 2006

Savory, Hearty, Chicken Soup


My mother was, and still is, a big soup maker. In the winter, I would come home from school and was hit with the smell of chicken soup (or fresh chili) wafting through the house. My friends loved to come over because of this. Who wouldn't want to trudge home through a cold Chicago winter, fending off the odd snowball, slipping on black ice, welcomed by a bowl of steaming soup?

At school, we would decide which house to go to afterward: "Well, what's your mother making for dinner?" I don't know, there is probably some soup, though. "Okay, let's go." Sure enough, the first question out of my mother's mouth was whether we wanted a bowl. Second question: with noodles, rice or both (and sometimes matzah balls were listed). We would scramble upstairs to the loft, enjoying our Saved By The Bell. Seconds later, a tray full of hot soup with oyster crackers and a cup of cold milk was served. If the soup was too hot, I would add the milk to my soup, creating creamy delight.

In my house, extra broth was always frozen and incorporated into later soups, or warmed when my brothers or I fell ill. I still follow this trend of always keeping frozen, serving size containers of soup around-- they are great to bring to work for lunch, in a pinch at mealtime, or to gift to a sick friend. And now, I have added to my own soup madness: I freeze vegetable juice, to incorporate into my soups. I know, this sounds strange, but it is a fabulous flavor booster for the soup maker. Consider this: when steaming artichokes or boiling beets you hold the remnants of a fabulous vegetable bouillon.

What do you do? Usually, it is thrown down the sink. Or perhaps incorporated into a salad dressing? I hate seeing that good juice go to waste. Instead of down the drain, my vegetable juice goes into a large container in the freezer, all mixed up: beets, artichokes, carrots... When I make soup, I toss 1-2 frozen juice containers into the mix, voilà: vegetable bouillon. Combine this with some succulent chicken and you have an amazingly tasty meaty soup broth that is extra hearty and full of otherwise wasted vitamins.

This soup is sure to keep you healthy for the remaining winter. The smell along will heal you with memories of youth. I made mine so hearty that rice, noodle or matzah ball has no place to fit. The secret in soup, like braising, is to let it cook as long as possible. It is done when the meat falls right off the bone (making cleaning a cinch).

Another hint to make soup-making easy: when I buy carrots and celery I cut it all into sticks when I bring it home and store it in tupperware, in water, in the refrigerator. I also save the leafy top of the celery stalk to throw into my soups. This makes snacking on these vegetables quick and easy, and further cutting a breeze.

SAVORY CHICKEN SOUP
Makes about 12 servings, 14 quarts. Prep time= 20 min. Cook time= 3+ hours
* 2 lbs whole chicken with bones, the bones hold the flavor in broth. You can buy whole and cut the chicken into pieces or purchase already separated.
* 2 Tbl butter or olive oil
* 1 large white onion
* 3 cloves garlic
* 5 celery stalks, cut into bite size pieces (include celery leaves and any extra if you have them)
* 5 carrots, cut into bite size pieces
* 1 turnip, cut into bite size pieces (a turnip provides soup with a slight sweetness)
* 2 parsnips, cut into bite size pieces
* 1 tomato, cut in half (my mother would always discard this before serving the soup, she said it collected the fat. I don’t know if this is true, but it must add flavor)
* 4-6 bay leaves
* 1 Tbl of any or all of the following: fresh ground pepper; thyme; oregano; basil; celery seeds; or any other tasty green herb
* 6 cups beet juice or leftover juices from other vegetables (if none is available substitute water)
* water (fill a 16 quart pot about 1-inch under the rim)

1) In a 16-quart pot, on medium heat, melt butter. Add onions, garlic and chicken. Brown the chicken about 8 minutes on both sides.
2) Add remaining vegetables, herbs and juice/ water. Cover and bring contents to a boil (will take about 20 minutes). Turn heat down slightly, crack the lid, allow to simmer for 3+ hours. The longer the soup simmers, the more flavor will escape from the bones.
3) Remove bones and celery leaves. Season with salt and fresh pepper per serving. Add rice, noodles, matzah balls, crackers, etc.

Thursday, December 08, 2005

Kumquat Glazed Pork w/ Artichokes


One great benefit of the fall is the bounty served up. By no means comparable to summer, but I must admit that some of my favorite fruits are in season this time of year: pomegranates and assorted oranges (oh Clementine!) to name two. Mother Nature outsmarts the best of us when she decides to make citrus, pumped up the vitamin C, in season as cold and flu weather hits full force. To make that which is available so sweet, juicy and appealing makes this frigid weather worth leaving the home for (if only to go to the grocer to get some).

Those at work joke about my clementine pyramid stacked high on my desk, quickly eaten through and replenished. But have I been sick yet this year? Nay. Do I have scurvy? Nay. And I owe it all to a very sweet addiction: citrus.

On a recent visit to one of my previously mentioned 24-hour fruit/ veggie stands, kumquats stared me down. Originally from China, this mini-orange, translated as gold orange from the Chinese, is the best of treats. In my younger days, I could not get enough Sour Patch Kids, the tart, sweet, succulent gummy candy. Kumquats are the adult version. Pucker your lips and be brought back to those sticky movie theater floor days when you easily went through an oversized bag of candy before the trailers ended.

Though this gold orange looks a lot like an orange, the kumquat was removed from the genus Citrus around 1915 and moved into Fortunella. The fruit began cultivation in Europe and the U.S. in the mid-19th century. The kumquat is high in fiber and vitamins A and C. Replace your grandmother’s prunes with this tart treat. The skin is thin, mildly tart, but sweet enough to eat. The seeds are unnoticeable, and the overall affect is, as stated, the best of treats. Just wash, pop and chew. When cooked up, the fruit loses the sweet-sour tinge transforming into pure sweetness. This fruit is great as chutney, preserves, raw in salads, as a garnish (in a martini even), ornamental, or, in my case, as a sweet glaze for some roasted pork.

KUMQUAT GLAZED PORK W/ ARTICHOKES
Serves 4-6. Prep time= 20 min. Cook time depends on the size of the pork (as does serving size)
½ cup kumquats
1 clementine, juice only (or ¼ cup orange juice)
2 shallots, whites only, chopped
1 bay leaf
½ cup dry white wine
1 artichoke per person
4 lb boneless pork center cut (a pork shoulder works cell too)


The Glaze
1) Combine kumquats and orange juice, purée to a medium pulp
2) (Preheat oven to 350F in prep for the pork.) In a saucepan, on medium heat, melt 1 Tbl butter. Add shallots, sauté for 5 min.
3) Reduce heat, add bay leaf and kumquat mixture, bring to a boil. Add wine and return to a boil. Reduce glaze until desired thickness is reached (5-10 min).


Preparation of the Pork
1) Preheat oven (as noted above) to 350F. Use half the kumquat glaze and cover both sides of the pork. Insert meat thermometer. Place on non-reactive baking dish. And put on the middle rack in the over. Pork should cook 15-20 min per lb, until it reaches 170F.
2) After 1 hour, check on pork and cover with remaining glaze.


Artichokes
1) When pork reaches about 140F, boil water in a saucepot. Clean the artichoke under water and pluck any darkened outter leafs off. Cut off the stem so about 1 inch remains. Add artichokes and cook about 45 min until stem is soft. Artichokes are in season now. They are so meaty and perfect this time of year there is no need for butter or a goat cheese sauce (which, actually, makes a fabulous dipper and really impresses a party).

Wednesday, November 30, 2005

Stuffed Eggplants w/ Pomegranate & Pine Nuts

In a previous post, I mentioned feasting under a whole moon on the beaches of Sinai. Even with the moon’s reflection off the water, stars were out in the millions and I gazed drunk with delight at the sky. My cohorts and I, sun-kissed and hungry after a day of swimming in perfectly clear, warm waters, were famished. We stumbled away from the beach to the bright bungalow for the meal that awaited us. Forever when I eat a pomegranate, I will think of this beach and our shared gluttony.

A, one of my closest college friends, was moving to Cairo for the year. I did what any selfless friend would do in the situation and sent her off properly, accompanying her with one week in Cairo and one in Lebanon. D, another friend of ours, is Egyptian. Even though she would be knee-deep in her studies (a blossoming PhD), D offered to take us to her beach hideaway for a weekend away from the craze that is Cairo. (D also introduced me to roasted pigeon on this trip, a succulent feast that should be eaten with your hands, courtside the main Cairo market.)

D’s mother is yet another food goddess incarnate I have met in the voyage of life. Upon our arrival, she fluttered about, pushing her homemade and fresh delights onto us: Stuffed grape leaves, stuffed eggplants, chicken, lamb, flatbreads, olives, fruits, and countless varieties of feta. At each meal we merrily plunged more and more food into our bellies, and D’s mother, in true Middle Eastern hospitality, kept pushing more onto us. In between bites I discussed recipes with her, especially for my favorite, the stuffed eggplants. We would finish each meal with fresh brewed Arabic coffee on the roof, smelling the salted air now tainted with cardamom, while D’s mother would hurry off to bed in preparation for her dawn beach appointment.

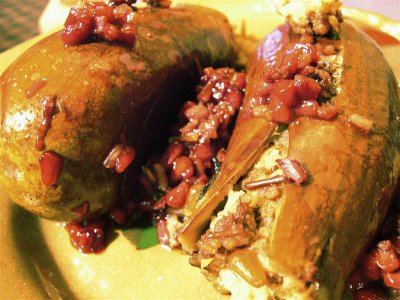
These eggplants are sweet, savory and delicious, but a poor imitation of perfection (they also look like a ruptured artery in the picture). If I could sweep D’s mother away from the beach to make these for me I gladly would. Even better, I prefer spending my days with her on the beaches of Sinai being stuffed to the gills with her home-cooked amusements.

STUFFED EGGPLANTS W/ POMEGRANATE & PINE NUTS
Serves 6. Prep time= 45 min. Cook time= 45 min.
8 small (4-5 inch in length) eggplants (if you can find smaller ones, by all means use them-- just purchase more. They are easier to clean and will be more flavorful.)
Filling
¾- 1 lb ground beef (or lamb)
1 cup wild rice
1 onion, chopped
4-5 garlic cloves, minced
5 Tbl pine nuts, toasted
5 Tbl pomegranate molasses (available at specialty, Asian and Middle Eastern stores)
8 fresh mint leaves, chopped
juice of ½ lemon
1 pomegranate, deseeded

1) In a saucepot, begin the rice according to the directions on the package
2) While rice is cooking, in a large saucepan, on medium heat, add meat, onion and garlic. Break apart meat and cook until meat is browned, stir occasionally.
3) While meat-onion-garlic is cooking, toast the pine nuts (in a toaster oven on medium or 5-10 min in the oven on broil) until lightly browned. Deseed the pomegranate.
4) Hollow out the eggplants: Clean and cut the tops off. Use a small knife to start the process then a spoon to scrape the remaining meat (and mostly seeds) out. Be careful not to puncture or tear the skin (eggplant skin is fairly tough pre-cooked so this should not be too much of a problem). Hollow out the eggplant as much as possible. It is okay to leave a small perimeter of meat along the edges. (To do this quickly takes a little practice so keep an eye on the meat and rice. If either are finished just turn the burners off).
5) At this point, the rice should have about 10-15 min cook time remaining. Preheat the oven to 350F. When meat is done, turn stovetop off, add pine nuts, pomegranate molasses, mint, lemon juice, and pomegranate seeds. When rice is complete, add rice to the meat mixture (or add the meat to the rice if the saucepan is not large enough). Stir until evenly blended.
6) Using a spoon, stuff the filling into the eggplants, packing it in well (as you see ice cream scoopers pack a fresh pint of ice cream). Once done, cover with aluminum foil and bake on middle rack for 35-45 min, until eggplants are soft.
7) Keep any remaining filling to stuff more eggplants, zucchini or bell peppers—or just eat it on the side.

Sunday, November 27, 2005

Thanksgiving Feasting


As I debarked the plane in Chicago this past Tuesday, my mother surprised me: "So I thought you can drop your things at home, create a menu for Thursday, and we can go shopping?"
"What? You haven't done anything yet?"
"No, I thought you could help out this year."
What she really meant was, "Oh, I thought I would enslave you to do pretty close to everything this year."

To answer Mr. Shinn, I think having a large feast for Thanksgiving is okay. Yes, you cannot eat everything, you will be bloated for days, have leftovers for weeks to come, but it is nice when everyone brings an item to share (no one did this in my family this year, instead they brought wine) you will also have all your favorites present. After all, it is the traditional vision of Thanksgiving many of us hold historically correct, no? Besides, the variety would be a spectacle in and of itself. But I will say, a small feast can also be a delicious one.

My family awaits the leftovers to make our Latvian Pancakes and turkey soup from the carcass (and whatever meat cannot be picked clean). My high school friends (who mostly live in Chicago) await the leftovers at my house for a tasting of what was missed-- even when they are "stuffed" from their meals and "cannot fit another bite in," somehow most of them manage to make room for what lies in my family's fridge.

This year, my mother reversed roles. While she checked my proceedings to "make sure they are not poisonous," prepared the turkey and two-day gravy (which she claims to be the most essential part of the meal), I cooked the remaining choice items for my aunts and cousins who would soon arrive. Without further ado...

The Thanksgiving Menu
Hors'doeuvres
** cheese platter with olives and fruit
** salad (much like the previous post of the "Play on the Mediterranean Classic"
** butternut squash soup

Entree
** mashed sweet potatoes
** garlic mashed potatoes (leaving some of the red skin on for color)
** steamed asparagus in a black truffle vinaigrette
** oyster stuffing (not very heavy, no fishy taste, pure decadence)
** (two-day) mushroom gravy (from www.cuisineathome.com, December 2004)
** turkey stuffed with orange, lemon and an herb bouquet

Dessert
** cranberry macadamia white chocolate chip cookies
** pumpkin cheesecake
** A good, inexpensive, Washington Reisling


If any recipes not posted are desired... please call out.

The Process:
Tuesday: Make cranberry-macadamia-white-chocolate chip cookies
Wednesday: Make butternut squash soup, pumpkin cheesecake, and gravy. Pre-cut and mix all salad items (except for the avocado)
Thursday: Prepare stuffing and bake before putting turkey in the oven. Stuff turkey and put in the oven. Put cheese out 1 hour before guests arrive (cheese should be served at room temperature). Cut avocado and add to salad before ready to serve. 45 min before eating start potatoes. Prepare vinaigrette for asparagus. 5 minutes before eating, lightly steam asparagus. Dessert is already complete.

Wednesday, November 23, 2005

Curried Butternut Squash Soup


I have found that many of my friends love food: They love to talk about it, they love to cook, they love to swap recipes, but mostly, they love to eat it. When we have nothing better to discuss, or when tempers brew, we turn to food to cool the flames (which inevitably leaves us arguing about the best way to prepare such and such). The great thing about his though, is that many a cookbook, many a recipe, and many a fabulous meal is passed between us.

A few winters back in December, the weather was cold and biting. I was invited to an intimate dinner by my good friend, A, who had a roommate that was trying a new soup recipe. Not one to turn down an invitation, especially one that involved soup, I jumped the subway for the 45 min commute to the cozy Brooklyn apt (this was when A and her roommates were saving money and found a great deal where they could also score amazingly cheap produce). When I arrived, there was a blast of warmth and the intoxicating smell of curry. E spouted off her newfound recipe and how easy it was, "so simple! Only four ingredients." It was not much later that we were breaking crusty bread and digging into this savory soup. The night continued and I cannot remember what else we ate-- possibly one of A's infamous salads? Regardless, it was the soup bowls that were literally wiped clean to indulge in every last sweet drop.

But soon it grew late and I had to make the trek back to Queens. I bundled my layers on, wrapped my head tight and copied the precious recipe soon to be had countless times in the future. Most recently I made it for D when I first saw butternut squash available at the market. D's reaction was much the same as mine upon first tasting: The bowl was licked clean. I brought leftovers into work the next day only to be hovered around while I ate the soup and "X" smelled the goodness, drooling for a bite she would not receive (sorry).

I am making this soup now, for a pre-feast whet of the Thanksgiving appetite. I offer advice: Please get yourself a handheld blender(cordless is optional). Especially if you enjoy soups that are blended (as I do) it makes the process worlds easier. Today I used a Cuisinart (I am in at my mother's for T-giv). Yes, classic Cuisinart, I love you, but you are the devil when I need to ladle hot soup into your bowl and I am forced to puree in 3 rounds. When I am home, I stick my lovely cordless handheld blender into my large vat of soup and voila, minutes later I have the perfect consistency with little hassle (it's also a great instrument to use when making smoothies). But with no further ado:

CURRIED BUTTERNUT SQUASH SOUP
Makes 6 servings. Active time= 30min. Total= 1.5 hr
1 good size butternut squash
1 Granny Smith, or other tart apple, peeled and chopped into cubes
1 medium white onion, chopped
2 tsp curry
1 Qt, 4 cups, low-salt chicken or vegetable broth

1) Preheat oven to 425F. Cut the squash in half lengthwise, deseed (keep the seeds in a small bowl). Place facedown on a baking sheet and bake for 40min.
2) Rinse the seeds and lay out on another baking sheet, sprinkle with salt and bake 10-15 min (while the squash bakes). Remove and set aside.
3) While squash is baking, in a saucepot on medium heat, sauté the onion and apple, 10-15 min with a dab of butter or oil. Add the curry and stir. Turn the heat down to keep warm.
4) Remove the squash from the oven when done. Carefully (it is hot) peel the skin off the squash-- it should come off easily. Cut into cubes and add to the pot.
5) Turn the heat back up to medium, add the broth and let simmer 20min.
6) Puree the soup in a blender (or with a fabulous handheld one). Dish out, sprinkle with seeds, serve with crusty bread and enjoy the sweet nutty flavor.


View Stats
Rankingblogs.com: Defining your blogs worth..