Sunday, July 30, 2006

Arepa con Salsa


Continuing with the southern theme mentioned here and here, I will dip further south with this entry. As previously mentioned, I do not make much Mexican (or South American) food. I love its spice and freshness, but hold a few restaurants close to my heart that have mastered it better than I ever could (although I have a promised empanada recipe eventually making its way towards me from a family friend). About 1 year ago, one of those restaurants closed.

Pollos y Mas was an amazing family-run Columbian hole-in-the-wall. Serving up steak or whole chickens with ginormous sides of beans, rice, plantains and whole sliced avocado (my favorite) for astonishingly low prices (around $8). My roommates at the time ordered from the restaurant weekly and as I entered the apartment the sweet savory smell of rotisserie chicken would get me salivating in no time.

D and I found the scent overpowering as we walked by one night and were pulled in for dinner. We started the meal with an arepa con queso. Ordered without knowing what we would get-- I knew that D liked his corn and I liked my cheese. A thick, bright yellow corn pancake was brought to us covered with a snow white cheese. Upon tasting, the cheese’s light-saltiness complemented the sweet corn arepa perfectly. No sooner were D and I hooked than Pollos y Mas closed down, our arepa lost forever-- Or so we thought.

A few months back as D and I meandered slowly over the refrigerated section of our local grocery, we noticed what seemed to be a cousin of the arepa once had. By no means freshly made like the Pollos y Mas one, it would do for our purpose. Settled in nearby were various packets of queso fresco. Grabbing up a pack of each, we attempted to replicate our first tasting of the arepa at home. We started simple, as it was at Pollos y Mas, a thick corn patty covered in cheese, toasted warm until the cheese produced hints of melting. How could something so simple taste so decadent?

In the months to come, D and I expanded our arepa tastings. Sometimes with fresh tomato or avocado sliced on top, other times with salsa, and when we were really hungry, a poached egg, would cap it—always with the queso fresco. The recent heat wave has kept us out of the kitchen and yearning for quick food solutions. The arepa with queso fresco and other accoutrements has been our go-to to the delight of us and others.

Today was no different as D attempted to hold back his excitement when he suggested the arepa for lunch. Because I knew we had a few other fresh ingredients to accompany the meal, I agreed. I must say, this was the best salsa accompaniment yet and why it was deserving of a picture.

Note: Arepa and queso fresco are available at many groceries where usual South American products are available. Look in the refrigerated section.

AREPA CON SALSA
Serving Size= 2 persons. Active time= 10 minutes.
* 2 corn Arepa
* ¼ cup queso fresco, sliced long to cover arepa
* 1 large vine-ripe tomato, diced
* 1 small Spanish onion, diced
* 1 ripe avocado, diced
* 1- 15oz can of black beans, rinsed and drained
* ¼ cup fresh cilantro, chopped
* 1 fresh red Serrano pepper, chopped
* juice of 1 lime

1) Arrange queso fresco over arepa and place in toaster oven on medium heat. (D likes to do 2 rounds of toasting on medium because the queso fresco just begins to lose form.)
2) While arepa toast, prepare the salsa. In a medium bowl place the tomato, onion, avocado, black beans, cilantro, pepper and lime juice. Mix and serve over arepa.
NOTE: A tasty addition to this is a poached egg.


Head on over to Sweetnick's for Tuesday's ARF roundup!

Saturday, July 29, 2006

Cayenne Shrimp & Fried Green Tomatoes


The sticky heat making its way through the east coast brings me memories of the south. Even though the most south I have been is the northern reaches (Kentucky, Tennessee, North Carolina, Virginia and Florida), I hold images of sweeping porches, ice cold lemonade, rocking chairs and the tales of my Georgia-living friend. Complementing these images is the lemon meringue pie recently whipped up and rounding off the stereotype, I’ll add today’s fried green tomatoes and cayenne shrimp.

This simple meal kept us out of the kitchen, with the longest moment being the wait for the oil to heat up. It has already been repeated this summer, and will be made many more times for sure—it’s too easy and delicious not to indulge. The heat of the shrimp is cooled by the sweet tomatoes and when served with a cold white wine, this meal is perfection. The combination would stun eaters into awed delight on a sandwich (with the addition of arugula, avocado or perhaps some spicy mayonnaise or mustard).

So while I anxiously await my own tomatoes to ripen on the vine (I spied them yellowing at the edges today), I’ll enjoy these greenmarket finds.

FRIED GREEN TOMATOES
Serving Size= 2 persons. Active time= 15 minutes. Inactive time= 8 minutes.
* 2 large green tomatoes
* 1 cup 2% or whole milk
* 1-½ cups flour
* ½ Tbl paprika
* 2 tsp salt
* 1 tsp pepper
* vegetable oil

1) With a sauce pot, or deep skillet, on high heat, fill oil 1-inch up the sides of the pan. Slice the tomatoes into ¼-inch thick discs.
2) Place milk in one shallow bowl and flour, paprika, salt and pepper in another.
3) Dredge the tomato slices in the milk. [At this time you can start the Cayenne Shrimp; below]
4) Once oil is hot, transfer tomatoes to the dry ingredients and coat both sides. Transfer to oil and cook until lightly browned, about 3 minutes each side.
5) Remove the tomatoes from the oil once done and transfer to a paper towel covered plate. Sprinkle with a little more salt/ pepper and serve.


CAYENNE SHRIMP
Serving Size= 2 persons. Active time= 8 minutes.
* 1 pound large fresh shrimp, cleaned and de-veined
* 1 Tbl butter
* ½ Tbl cayenne pepper
* 1 tsp celery seed
* juice of 1 lime
* hot sauce to taste
* salt/ pepper to taste

1) In a large skillet on medium-high heat, melt butter.
2) When nutty smell of butter comes out, add shrimp and toss in pan to coat
3) Add remaining ingredients and toss again to coat.
4) Cook shrimp about 3 minutes each side, until pink and curled.

Wednesday, July 26, 2006

(Re-Posted) Lebanon's Baba Ganoush

Below is a post I stuck up back in November 2005. It was one of my first posts. Two years ago, about this time, I went with a friend to Lebanon. Not to turn this into a political blog space or anything, but the events of the past two weeks have been on my mind (about 8 years ago I was in Israel and have a similar fondness for the country and people, Lebanon is just a little closer to memory now).

I guess because this has all been on my mind I made some baba ganoush tonight. It is a recipe a half-Lebanonese friend gave to me. This, along with her hummus, Lebanonese potatoes and Fol I make often. Maybe more will be made in the coming days...

Although I would like to make a few changes/ additions here and there, I think it's best to keep it unaltered. This is the Lebanon I remember two years ago. It will not be the same. Here is the original post:
--------------------------------------------------
November 2005

As the weather turns toward the worst, and gray days become a common thread, I cannot help but linger on the past, warm and fresh.

In the 1940's, France withdrew from Lebanon. To this day, it is in a summersault between old and new world-- reinventing and revamping its character. Walking down the streets, signs still read in French and Arabic (or Arabic and English). Fruit stands on every corner press fresh juice to order, and pistachio pastries laced with honey waft towards the nose. Out of the 
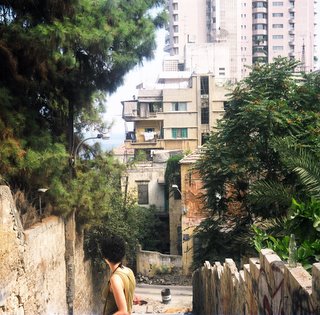
city, vineyards can be found on hillsides that neighbor crosses mounted high on a village church. It is a country that still understands hospitality, where no meeting between friends is able to last under two hours, and where you will always be offered a bottomless cup of fresh Arabic coffee, laden with cardamom.

Between 1975-1991, civil war tore through Beirut and its surrounds. From above, the city's white stone buildings are iridescent in the sun and the mountains roll away reflecting the cerulean Mediterranean. Salt is ripe in the air and mingles with trees as lizards dash through legs of a traveler to the safety of a forgotten bullet hole in a nearby structure. Roam the streets and notice wires crisscross overhead in a forgotten and haphazard desperation of gaining electricity during the war-- still in-use. Or suddenly come upon a blocked-off road, where the ground is yet to be re-stabilized. Inside bombed-out-building-carcasses, families create wall-less homes on top floors that overlook city lights. The new hottest club is constructed beneath sacred ground, and luxury high-rise buildings blossom around Roman and Phoenician ruins; barely visible and utter surprises to stumble upon amongst the ever –present cleansing and rebuilding. This is the crazy struggle between tradition and modernity.

The Muslim call for prayer rings out. It is a subtle undulation that flows off the salt air notifying the beach bums to rotate their tanning. Women walk the streets fully veiled or deeply bronzed in mini-skirts flaunting the latest fashions. Saudi oil heirs on vacation take to the corniche with their wives to find groups of men smoking nargeela, (Lebanese sheesha or flavored tobacco) lounging in home-brought plastic chairs while others fish in the sea where boys swim. Along this walk, the smell of cardamom is thick with Arabic coffee vendors hocking their product amidst others that grill and sell corn.

Food is fresh and fabulous. From cheeses, olives and fresh flat breads at breakfast, to the sweet fruits that complete every meal: fresh figs, dates, melons and mangoes. You dine on what is in season—not what is an able import. Flavors are intensified by this freshness of seasonality. The weather is perfect-- not too dry, and the peach-hued sunsets over the sea make up for any humidity that may linger.

Travel beyond the beach bum days and clubbing nights of Beirut. Hire a private driver and take the road to Balbaak and 
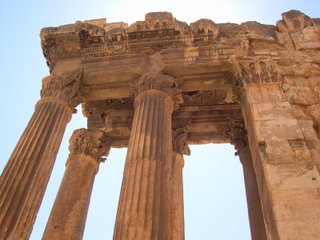
Ksara in the east, near Syria (easily done in one day). Some of the oldest ruins are found at Balbaak with an ancient population that continued to build upon what was already there, allowing centuries upon centuries of ruins almost indecipherable from the previous. In Ksara, cooling caves under a mountain vineyard, are host to wine tastings.

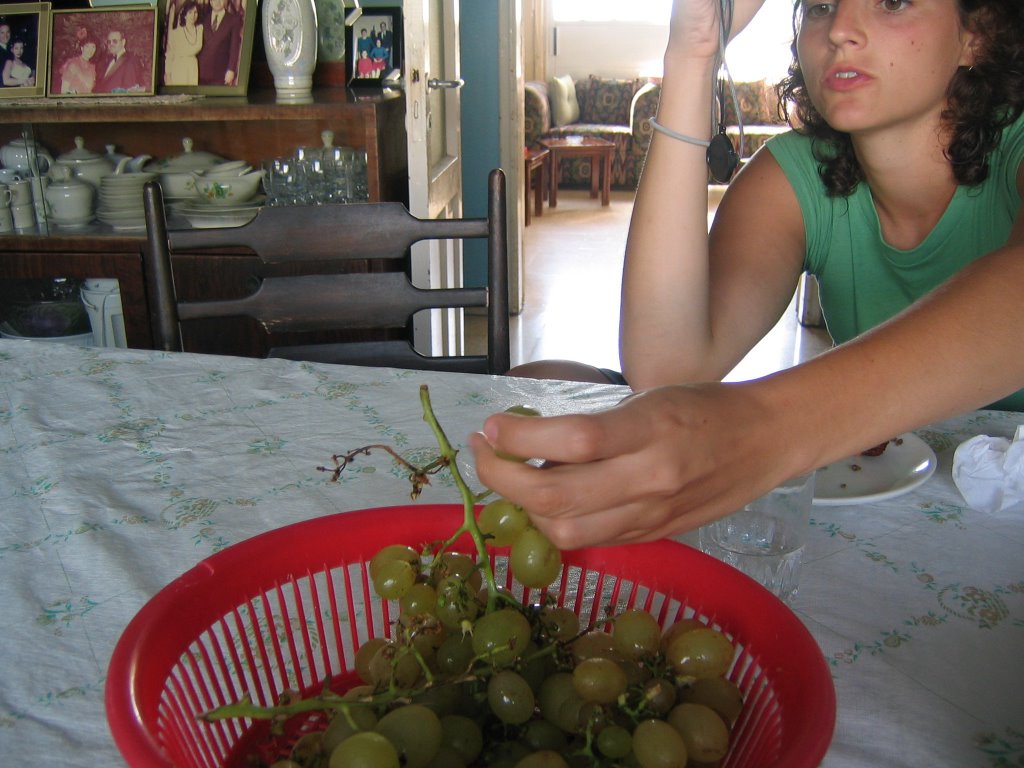
South near Saida, a soap factory is hidden in the old souq, where soap is still made “the ancient way”-- with boiled olive oil and ash. The juices and kebabs in the souq are the freshest I have tasted (fresh grapes taste like rose water, we are told “it’s the sea you taste”)—some of the best shwarma can be found here too. Continuing south, there are generations-old glass blowing studios on the way to the beaches and ruins of Tyre (a port town a stone’s throw from the Israeli border). This city, once a major trade route between Israel and Egypt, as well as the rest of the Mediterranean, has since been left in disrepair from civil war days, retaining its beauty.

North in Byblos we find where the written word began and paper spread throughout the world. Mountain peaks overtake the eyes where (surprise) temperatures dip low enough for skiing in the winter. It is difficult to leave such a paradise that is a true Eden.

If you cannot make it to this beautiful Garden, I beg of you to taste it in the home. These below recommendations are quick, easy, and require minimal cooking:

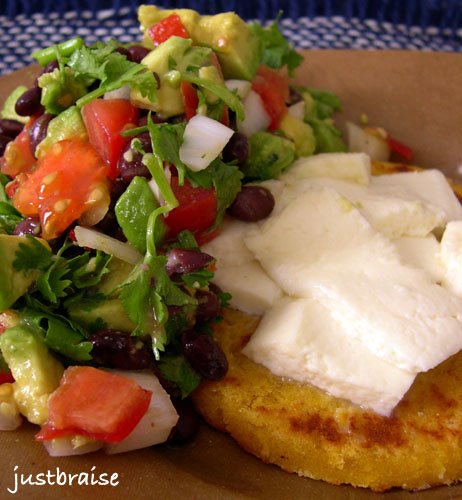
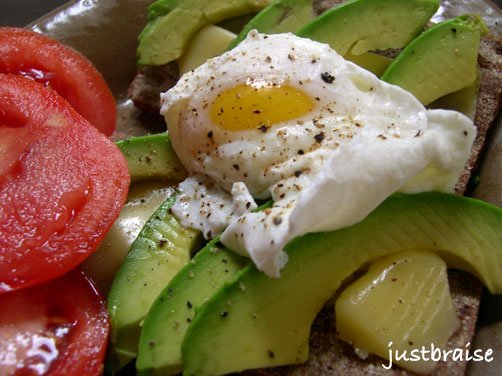
Gather some fresh Lebanese olives, feta, tahini (sesame seed paste) and flat bread (or pita) from a middle-eastern market 
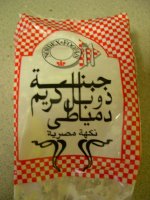
(most groceries will carry these products as well). Ask for zataar (a thyme-based herb mixture with oregano and sesame) and lebne (a yogurt-like cheese). You will also need 1 large eggplant, extra-virgin olive oil, a lemon, garlic, plain yogurt (optional) and a selection of your favorite seasonal fruits. (When I eat these meals, I like to use the feta pictured at right. It reminds me of what I bought in Lebanon)

Place the olives in a dish to eat as-is. Do the same for the feta. Put the lebne on a separate plate, sprinkle with zataar and pour about 1 Tbl ev olive oil over the lebne. Serve with baba ganoush (recipe below), flat bread, and your favorite salad. Use the flat bread as a spoon to scoop up the baba and cheeses. (A popular great-tasting snack is to brush olive oil on a piece of flat bread and dust with zataar; pictured. Toast until lighly browned in a toaster oven. It tastes great with the lebne and feta seasoned this way).

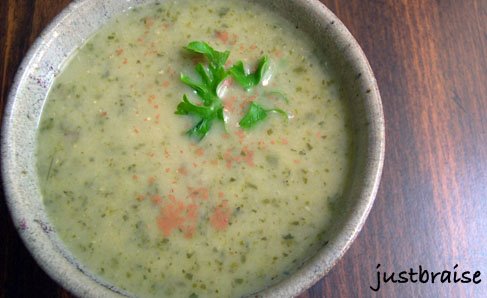
Below, a family recipe for Baba Ganoush (thank you A for your Lebanese wisdom):

BABA GANOUSH. (10 min cook,15 min setting time, 5 min prep). This recipe has a great smoky flavor. Recipe is the same for hummus (with only about 10 min prep-- minus the eggplant and flames, everything else is the same. Just buy a can of garbanzo beans (chickpeas), drain the liquid, and use a blender instead of a potato masher).
-----------------------
1 large eggplant
2 Tbl tahini
juice of 1 lemon
4 Tbl olive oil.
1-2 cloves garlic, crushed (or to taste)
1/2 cup plain yogurt (Optional, this gives the Baba a creamier consistency. Without it, you
may need a few more Tbl olive oil to cut the Baba’s thickness)
fresh pepper (to taste)
sea salt (to taste)
brown paper bag
potato masher
large bowl
----------------------
1. Brush the eggplant with olive oil. On a stove’s open flame, cook eggplant. Rotate periodically (easy with long tongs) until all sides are crisp from flame and eggplant wilts thoroughly. The eggplant will also become saturated and heavy with juices (some of which may leak onto stovetop). For a large eggplant, this process should take about 10 min. (This method gives the Baba its smoky flavor. Another option is to wrap in foil and bake the eggplant for about 30 min. I have never done it this way, and cannot guarantee the smoky flavor, but I assume it would cut back on juices flowing onto the stovetop).

2. Place eggplant in brown paper bag and sit the bag in the large bowl (eggplant will continue to leak juice). This continues the cooking process of the inside of the eggplant and begins to cool it. Leave in bag 15 min.

3. Open bag, peel and discard as much of the eggplant's purple skin as possible. Cut off and discard vine head. Place remaining meat (with seeds) into large bowl.

4. Mash with potato masher (you are left with a better consistency than using a blender which can destroy the seeds and turn the Baba pasty).

4. Add remainder of ingredients, mix.

5. Top off with another Tablespoon of olive oil and maybe some paprika or parsley for color.

NOTE: A Palestinian friend of mine dices and de-seeds a ripe vine-tomato and stirs it into the Baba. An Egyptian friend swears tomato is wrong and one can never have too much garlic in Baba adding at least 5 cloves to her recipe. Both these are optional, tasty additions.

Tuesday, July 25, 2006

Lemon Meringue Pie


When in history did the versatile lemon receive a bad rap? Akin to vanilla (as boring as vanilla ice cream; as plain as vanilla), negative lemon phrases pop up more than we might think: You’re being a sour lemon; When life gives you lemons, make lemonade; That car is a real lemon; You’re standing around like a lost lemon. What did this sun-bright fruit do to receive such sad associations? Why hasn’t the lime, an equally sour menace, gathered similar treatment? How did the sweet orange elude all the sour of its citrus brethren?

Many believe the first citrus the people of the Mediterranean tasted was the lemon-- Which makes sense since it pops up in many Middle Eastern dishes. But its origin probably stems further East than that (many suggest India is where the egg-shaped citrus first came into being). Today it’s grown in almost any climate warm enough to sustain it and almost everyone enjoys its sweeter sensibilities: from lemonade and limoncello to lemon oil and lemon curd. Life would have a lot less zest without it.

Imagine the world without mass transport and an excess of refined sweeteners. Where lemons weren't flown into the market willy nilly and that golden glow remained in flowers, not fruit. What was that first sip of pure summer like? Lemonade, with its sweet sourness. How much of a treat do you suppose the lemon once was to some? How much we take it all for granted, our availability of something so simple, once so foreign.

To pucker up to the lemon, try this (sweeter) dish: Lemon Meringue Pie. This pie’s cloud of meringue could barely fit into the oven—royal treatment considering the lemon’s often lowly placement as a mere garnish. D and I found this recipe in the epicurious.com archives as we searched for a perfectly light, refrigerated summer cake. This is the perfect treat with a hint of the tropics and much less painless than it sounds. (This is essentially the recipe from epicurious—the only difference being I used a graham cracker crust.)

LEMON MERINGUE PIE
Serving Size= 10 people. Active time= 40 minutes. Cook time= 1 hour 14 mintues. Inactive time= 4 hours
GRAHAM CRACKER CRUST
* 1 cup plain graham crackers (about 6 full crackers)
* ½ stick unsalted butter
* ¼ cup coconut


THE FILLING
* 1 cup sugar
* 2 tablespoons cornstarch
* 6 large egg yolks
* 4 large eggs
* ¾ cup fresh lemon juice
* Pinch of salt
* ¾ cup (1 1/2 sticks) unsalted butter, cut into 1/2-inch pieces


THE MERINGUE MOUNTAIN
* 6 large egg whites
* 1/4 teaspoon cream of tartar
* 1-1/3 cups powdered sugar
* 1 cup sweetened flaked coconut, lightly toasted

For crust:
1) Preheat oven to 350F. In a small saucepan (or in the microwave), melt the ½ stick of butter.
2) Using a food processor (or by hand crushing them with the back of a spoon), pulse the graham crackers into small crumbs. Once pulverized, add butter and ¼ cup coconut; mix until evenly distributed.
3) Put crumbs into 9 inch pie tin. Line the tin, pressing firmly against the bottom and sides.
4) Bake for 10 minutes. Once done, set aside to cool and continue on the filling:

For filling:
1) Preheat oven to 300°F.
2) Whisk sugar and cornstarch in heavy medium saucepan to blend.
3) Whisk in yolks, whole eggs, lemon juice, and salt. Whisk over medium heat until mixture thickens and just begins to boil around edges, about 6 minutes.
4) Add butter; whisk until smooth. Cool 10 minutes. Pour warm filling into crust.

For meringue:
1) Using electric mixer, beat egg whites in large bowl until foamy.
2) Add cream of tartar and 1 tablespoon powdered sugar and beat until soft peaks form.
3) Beat in remaining sugar, 1 tablespoon at a time, then beat until stiff glossy peaks form, about 7 minutes.
4) Gently fold ¾ cup toasted coconut into meringue.
5) Spread coconut meringue over warm filling, covering completely, sealing meringue to crust edges and mounding in center.
6) Bake pie 30 minutes. Reduce oven temperature to 275°F; bake 30 minutes longer.
7) Sprinkle remaining ¼ cup toasted coconut over pie; continue to bake until meringue is light golden brown and set when pie is shaken slightly, about 15 minutes longer. Transfer pie to rack and cool completely, about 4 hours. (Can be made 1 day ahead. Refrigerate uncovered.)


Head on over to Sweetnick's for the weekly ARF roundup!

Saturday, July 22, 2006

Women Who Eat ed. Leslie Miller

My review of Women Who Eat is posted here on the Well Fed Network.

Vichyssoise


There is no doubt the French can cook. Grant it, one can say this about most any people, but I take a special leaning towards French cuisine.

I began learning French in elementary school, in part, because I loved French food-- A food snob before I knew it, one of my favorite restaurants was La Boheme, an upscale bistro. To encourage my love of all things French, whenever my family traveled, my father stalked out the local French establishments (hotels, restaurants) even with his abhorrence to it all. I would walk in and grandly correct his forgotten Spanish-esque pronunciation of a French word so that all could hear me, the French-spewing-girl-wonder.

Finally my family went to Paris. I attempted to disassociate myself from my rambunctious brothers as they hollered and tumbled through parks, museums and grand avenues. I believed myself to be of more noble blood, I spoke French afterall. Appalling to the masses (mostly me), in broken Spanish my father would ask for directions: “Whatever, it’s close enough, just change an ‘e’ to an ‘a’!”. Of course, this did not help his love of the country, nor the Frenchman’s love of Americans and they promptly tuff-tuffed their way out of the situation.

“Um, moment!” I ran after countless groups. In what I believed to be perfect (though limited) French, I asked for and repeated directions that were offered with accolades for my fabulous accent.

In restaurants when my younger brother wanted butter I taught him the word and made him ask for it. I checked us into hotels. I owned France—I was a sixth-grade Francophile.

In junior high school I met a girl who’s father was French—and a chef. Worlds collided and I latched onto her. Our friendship survived but my desire to learn the language was extinguished when three horrible high school language teachers dissuaded me from fluency. I thought the girl could cook and might teach me some skills, but was soon disappointed when I found her greatest feats included boxed cakes and microwaves (still pretty good). Regardless, we remained friends.

In the end, I still love the French and the food and can mangle my once-perfect accent into a phrase or three. I tell myself I will take a language course, a French cooking course, move to Paris… In the meantime, having D’s fluency in the language helps my lack of it, knowing how to read a recipe fills the cooking course gap, and the desire to step on a plane and move to France at the moment can be filled by my local (and reasonable!) French restaurant.

This recipe is a play on the classic Vichyssoise (I have added Swiss Chard). It is traditionally served cold and is surprisingly easy to make- the perfect summer soup.

VICHYSSOISE
Active time= 20 minutes. Cook time= 40 minutes. Inactive time= 2 hours.
* 4 leeks, whites only
* 1 large bunch of Swiss chard
* ½ bunch of parsley (optional)
* 6 russet potatoes
* 6 cups chicken stock/ broth (or vegetable)
* 2 cups cream (or milk)
* 2 Tbl unsalted butter
* salt/ pepper to taste

1) Coarsely chop the leeks (whites only), Swiss chard and parsley. Chop the potatoes into 1-2 inch chunks.
2) In a stock pot on medium-high heat, melt the butter. Once warm, add leeks, Swiss chard and parsley. Cook until wilted, stirring occasionally; 8-10 minutes.
3) Add potatoes and chicken stock; cover. Bring to a boil then reduce heat to medium. Cook for 30 minutes; or until potatoes are soft.
4) Using a handheld blender (or carefully in a blender in batches) purée the soup. Add cream, salt and pepper. Refrigerate for 2 hours, or until cold. Serve garnished with parsley.
NOTE: The pink over the soup pictured is sea salt.


Don't forget to check out Kalyn's Kitchen for a little WHB action.

In non-food related news Eat Stuff is back with WCB! Below we have Whisky pictured with a stuffed dog. This could be wrong on many levels, none of which I want to investigate.

Wednesday, July 19, 2006

The City Gardener #9


With the last City Gardener I showed you the bounty of my radish. These delicious little roots offered a crisp delightfulness to the perfect summer sandwich as well as highlighted an odd salad. To date, there is new form in the garden:

1) Please notice the hideous fencing (above and below) that surrounds my wee buckets. My neighbor noticed: “No more people will steal your tomatoes now!” Well, hopefully not.

With today’s watering I did notice a “casual onlooker” (see sketch below). I held back as she eyed my vegetables and Kitty hissed from inside (what can I say, she likes her fresh vegetables). With a double take she noticed me, smiled, and continued her journey. (It is quite possible this woman is just an admirer of gardens but with my witnessed tomato snatcher from last year, caution and paranoia must be taken.)

If you have your own garden and live in the tri-State area, I bid you to keep an eye out for the Garden Offender (sketch taken minutes after encounter at left). Take notice of her unevenly applied magenta lipstick, soiled white hat that covers her eyes and off-white t-shirt. She may be armed with garden sheers and should be considered dangerous. Now that she is on my radar I have other pests, namely squirrels to watch for. Evidence?

2) With the addition of fencing, the lettuce is shooting for the stars. Where previously I had not taken account of the gnarled leafy stalks, they now are coming together quite nicely.

3) 3 buckets are without fencing. These buckets once contained radish. You might recall when starting my garden indoors I planted arugula, 3 kinds of lettuce and beets. Much of it died before it could be transferred outdoors. I transferred the survivors outside and awaited growth. Now that I have harvested radish, I threw some arugula, the last of the swiss chard seeds and the remaining lettuce seeds on the open buckets. Sprouts happen and fencing must be purchased.

4) A confession: I never put buckets on the roof. While my landlords gave me the go-ahead (probably because they knew I would have done it anyway), I eventually was too lazy to carry buckets, soil and seedlings to the roof. The realization that I would also have to carry gallons of water up a ladder to the roof cemented my decision that I should concentrate on the land buckets. Leaving for three weeks and knowing my mother would carry no ladders helped too—who could have predicted those three weeks would be the wettest of the season?


PHOTOS: The top photo is (left to right): Tango Lettuce, Rainbow Swiss Chard sprouts, full Rainbow Swiss Chard.
The bottom photo is (left to right): Tomato, Arugula, Lolla Lettuce, Swiss Chard sprouts.

The City Gardener #8
The City Gardener #7
The City Gardener #6
The City Gardener #5
The City Gardener #4
The City Gardener #3
The City Gardener #2
The City Gardener

Saturday, July 15, 2006

Light Poached Brunch


Behold the egg. There’s nothing like it. So versatile and perfect it can be added to a slew of dishes to create perfection (my favorite of the moment is frozen custard which I’m miffed there is only one NYC location it can be purchased at). Alone (or separated), it can be whipped into beautiful white mountain peaks, poached, hard-boiled, fried, scrambled, sunny-ied, soft-boiled or done over-easy.

My favorite is the poach. A fluffy exterior gives way to a rich and gooey interior that beckons to be soaked up and savored. Perfect over fresh bread, toast, coaxed into warm soup or at the peak of a salad (another favorite of the moment).

But low and behold, no bread was to be found in the home this morning. Instead, my reliable thick and hearty rye crackers would have to do, held together by some freshly melted Jarlsberg. A delicious way to enjoy season vegetables, this poach would crown a velvety avocado and sit beside a sugary-ripe tomato.

And while you enjoy this simple dish, don’t forget your morning paper. Whisky (below) likes to read his over breakfast. (For more cat antics head over to Eat Stuff).


Instead of a full recipe, because this one is fairly simple (melted cheese on crackers, sliced avocado and tomatoes, topped with a poached egg) I will give directions on how to poach, the most difficult part of the process and the part that befuddles most people.

TO POACH AN EGG
Active time= 4 minutes. Inactive time= 8 minutes
* 2 eggs
* 1 Tbl vinegar (I like to use Tarragon Vinegar, but any will do)**
* 2 tsp salt

1) In a deep sauce pan or small pot, fill water up sides about 2 inches. Add salt and vinegar. On high heat, bring to a rapid boil.
2) Crack eggs and gently, one at a time (careful so as not to burn yourself) usher the egg out of the shell and into the water. Do this close to the water; do not drop the egg in the water. (Alternatively, you can crack the egg into a small bowl and lightly guide the egg into the boiling water.)
3) Turn heat to medium, allow 2-3 minutes to boil and remove with slotted spoon.
** Vinegar binds the egg protein together

Tuesday, July 11, 2006

Cold Corn Soup


My mother loves buttermilk. When I was growing up, she would buy vats of it and sit happily curled up with a clear glass of thick creamy buttermilk. She tipped the glass and the milk receded, leaving its history in filthy chunky streaks. If the glass was rotated with each drink, the clear would turn white and there was no telling how much of the vile matter was left.

My dislike towards buttermilk probably began when my mother first brought it home: “Ew! Buttermilk?! Why would you drink butter?!” I obediently tasted it, confirming my suspicion of its disgusting nature, spat it back into the cup and thoroughly washed my mouth clean with water and crackers. My brothers held similar sentiments to the fraud milk.

Regardless of her children’s opinions, every few weeks my mother would buy a quart of it. Her prized purchase, she coddled the slim carton like a newborn, setting it gently between the two mammothly awkward gallons of milk and silhouettes of my father’s beer in the refrigerator. We sat down to dinner, places set, milk all around: 2% milk poured for the kids, buttermilk for my mother. I watched my mother’s clear glass turn progressively scum-covered, grimacing with the thought of its improperly heavy consistency.

Sometimes we ran out of 2% milk. My mother, thinking she was so clever, would pour our glasses full of buttermilk. My brothers and I saw the scam before we ever sat down: “I’m not drinking that.”
“What are you talking about? It’s just milk.”
“That’s not milk. That’s that… buttermilk.”
“No it’s not.”
“Yes it is. I can tell because it’s not white.”
White, pristine, pure, the color of half a cow. The color of milk. Real milk. The only milk my brothers and I consumed. We went to the refrigerator to confirm our suspicion: there was no gallon of 2%: “See, I told you. It’s buttermilk.”
“No, it’s the last of the 2%. I threw the container away.”
…Walking to the trash compactor.
“Oh, I already took the trash out…”
A lie. The trash was full. I fetched a glass of juice and sat slumped with crossed arms as my mother’s glass grew opaque throughout dinner. I pushed my buttermilk glass her way, she happily took seconds.

More often than not, a fresh gallon of milk would grace the shelves of the refrigerator after an episode like this. Sometimes, time passed too quickly and the buttermilk remained an intruder on the dinner table. The episode repeated itself with little variation:
“I’m not drinking that.”
“What are you talking about?”
“That’s not milk. That’s the buttermilk.”
“No it’s not. I bought regular milk, look:” My mother would lift a glass and slosh the milk around a bit, coating the sides and comparing it to her own glass, “see, mine’s thicker,” she would proudly proclaim.
I knew her trick: “That’s just because you watered ours down. I’m not drinking that.”

Life continued and sooner than later my mother stopped attempting to pass buttermilk off as regular milk. If it was spied in the refrigerator, I pushed it off to the back recesses, allowing real beverages to hold court.

Strangely enough, I love buttermilk. I now happily reach for it every few weeks in the grocery and pull it from my refrigerator. I love it in pancakes and as the base to decadently rich frostings. It is delicious-- Just not alone.

It must have been with a severe lapse in my childhood trauma memory bank that I read a M.F.K. Fisher recipe and thought Cold Buttermilk Soup actually sounded good. Surprisingly refreshing so I copied the recipe down. Adapting it a
bit to suit my own flavors (scallops instead of shrimp, the addition of corn and broth and no sugar).

This soup has become a summertime favorite, especially when corn hits peak season.

COLD CORN SOUP
Serving size= 6 people. Active time= 15 minutes. Inactive time= 1-2 hours
* 1 quart buttermilk
* 2 cups vegetable or chicken broth or stock
* 4 ears of corn
* 1 pound of scallops (or shrimp)
* 1 cucumber, diced
* 2 Tbl spicy mustard
* ¼ cup chopped dill
* 1 Tbl butter
* salt/ pepper to taste

1) Using a sharp knife, carefully slice the kernels off the ears of corn. If using large scallops, cut into quarters.
2) Over medium heat in a large skillet, melt the butter. When pan is hot, add the corn and scallops. Cook about 8 minutes, stirring occasionally, until both change darker shades of their respective original coloring.
3) While the corn and scallops are cooking, dice the cucumber and chop the dill.
4) In a large bowl, place the buttermilk, broth, cucumber, mustard and dill.
5) Once corn and scallops are done, add to buttermilk mixture. Add salt/ pepper to taste. Stir and refrigerate until cooled.

Saturday, July 08, 2006

Kurlansky's Choice Cuts

Experiencing Internet problems.

In the meantime, please check out my review: Well Fed's Food Bound.


View Stats
Rankingblogs.com: Defining your blogs worth..